captainmorgan
Well-Known Member
I blame Supra and his DIY thread for making me do this,I couldn't help myself.
Much of the info that I'll post is thanks to Supra and other contributors in his thread.
I ordered parts for 4 of these and have most of the parts now,so it's time to start the thread.
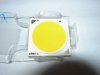
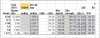
Cree CXA3070 Z4 3000k
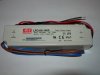
Mean Well LPC-60-1400
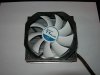
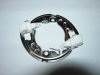
Arctic Alpine 11 Plus
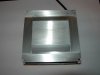
Ideal Solderless COB Holder
Ebay 12v Fan Power Supply
Much of the info that I'll post is thanks to Supra and other contributors in his thread.
I ordered parts for 4 of these and have most of the parts now,so it's time to start the thread.
Cree CXA3070 Z4 3000k
Mean Well LPC-60-1400
Arctic Alpine 11 Plus
Ideal Solderless COB Holder
Ebay 12v Fan Power Supply
Attachments
-
 943.3 KB Views: 973
 -
 1.1 MB Views: 1,010
 -
 1.1 MB Views: 987
 -
 1.1 MB Views: 1,072
 -
 1.1 MB Views: 1,033
 -
 48.4 KB Views: 1,009