Pelt's First Grow Box and Indoor Grow Journal

pelt1

Well-Known Member
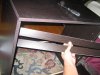
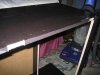
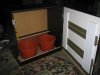
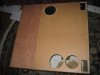
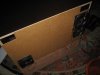
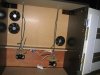
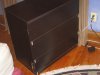
Howdy all. I am going to give a go at my first Grow Box and Indoor grow in the upcoming weeks. The plan is a stealth box, constructed with a dresser. The grow will be using CFLs and the plant will be Northern Lights from Nirvana.

Now while I wasn't trying to produce the least expensive setup possible, this setup should be very affordable for most people when all said and done. I am no expert, so I'll be learning as I go along, but the process seems relatively straight forward.

The first part of this journal will be of the Grow Box build, and the second half will be the growing. I have what I think I need to complete this build. So let's start with the build list which may change over time. I will update with a cost breakdown later.


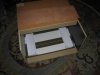
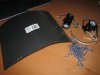
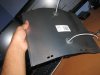
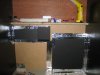
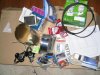
  • Ikea Dresser -(27 x 28 x 15)
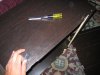
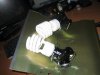
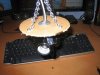
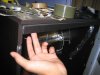
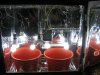
  • x2 3-Socket Light fixture
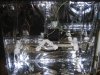
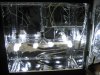
  • 25 x 52" Roll of Reflective 2mil Mylar (not shown)
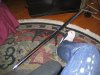
  • 4" Aluminum Duct
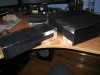
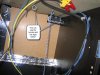
  • Acu-Rite digital humidity/temp monitor
  • 15Amp Light Switch
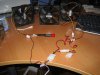
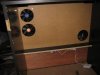
  • Cooler Master 120mm PC fans ( Pack of 4)
  • Wall socket plug
  • Silver Foil Tape
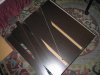
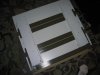
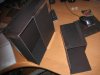
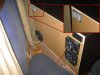
  • x4 Drilled Sheetmetal plates
  • 6 Feet of small chain (11lb capacity)
  • Assortment of Wire Nuts
  • 6 Outlet Power Strip
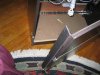
  • 2" Narrow Utility Hinges(2 in the pack)
  • 15W 1200 MA AC/DC converter
  • 5/8" Brass hooks
  • #8 Screw Eyes
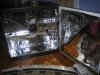
  • x6 23watt 6500K CFLs
  • x4 23watt 2700K CFLs
  • 6 feet of 14-2 outdoor lamp wire
  • #6 5/8" zink Construction Screws
  • Black Foam Board - Not Shown
 

Attachments

pelt1

Well-Known Member
So I've just been working on getting the dresser together. Now, you know how a dresser is structured, but that wouldn't work for me as I need front door access. So all of the shelves were not going to be used. Instead I constructed a bit of a door on the front so I would have good access to work on the plants and the box build.

Since a lot of the pieces for the drawers weren't used, I used a few leftover pieces to brace the door.

I added hinges. I could have just placed them on the outside, and inset the door, but I think that looks tacky. So I spent some time notching the frame for the hinge so it set inside and the door would be flush. As you can see I tried to chisel the mdf.... but I kinda messed up as mdf apparently needs to be done with TINY chunks at a time. I had to notch the other side, I used my roto-zip type tool this time. So now I have a door that is hinged from it's right side, which I find awkward :wall:

Here you can see the original pieces from the frame that I was not going to use the way it was intended:
IMG_0185.jpg

Here is what all the pieces for my front door would look like:
IMG_0187.jpg

Here I mocked up the fit by taping the pieces together using '100milehour' tape.
IMG_0188.jpg

Here are some shots of the notches made for the hinges. You can see the bottom section where I screwed up.
IMG_0192.jpg
IMG_0191.jpg

Here are some leftover pieces from the drawer that I attached vertically.
IMG_0193.jpg

The dresser has two big gaps on the back and bottom, obviously too much area to cover up with tape.
IMG_0194.jpg

So added two pieces to cover up that big area:
IMG_0195.jpg

Here's is what she looks like so far. I still have to come up with a latching/locking mechanism to hold the door shut. Debating using magnets or not?
IMG_0196.jpg
 

pelt1

Well-Known Member
Here is my idea for the Hood/light fixture. I had this thought when I was in the store, but didn't act on it. I will go buy one more of these pipes and stitch them together to make my hood longer.

But here is the idea.
IMG_0197.jpg

IMG_0199.jpg

IMG_0198.jpg
 

pelt1

Well-Known Member
Got my fans all installed and wired up. I chose to mount the fans on the outside of the box. I figured this will give the air a little more room to make the bend around the light trap. I also like how much cleaner it is on the outside as far as wiring goes.

I am using two Exhaust and one intake. Having more exhaust should give me a bit of negative pressure inside the case and keep things cool. I will see once it is set up and I can run it for a few hours.

IMG_0201.jpg

IMG_0200.jpg

IMG_0203.jpg

IMG_0202.jpg
 

pelt1

Well-Known Member
I wanted to get my lamps on something I could raise and lower as the grow progressed. I am working on that now, as my original idea is a bust so far.
 

pelt1

Well-Known Member
Ok, I managed to find something that I am semi-happy with. At least these sit level.

I may add a reflector at some point, or change the anchor.

I will be getting some more chain so that I can use the other set of hooks I have and screw them in the back wall. This will allow for easy height adjustment (this will make sense with pictures later.

But here is the general idea of what it will look like.
IMG_0001.jpg

IMG_0002.jpg
 

pelt1

Well-Known Member
I've got my light traps done. They are taking up more space than I anticipated. The larger one sticks out enough that I will only have 10 inches of grow space from front to back. I hope this is sufficient.

Due to the size of my light traps, I am worried about interference with my lights, so I will have to rethink my light strategy. Instead of using the 2 chandeliers with the 3 lights in one unit, I will move to 3 chandeliers with 2 lights in each with one of those 'Y' adapters.

IMG_0004.jpg

IMG_0005.jpg
 

pelt1

Well-Known Member
I test fitted the boxes and they are getting some really good airflow!

Due to this I decided to cut the boxes down a bit so that they take up less of my space. I did this on the intake box first, and it still seems to get really good airflow. Ii am showing a pic of both boxes which were originally the same depth, so you can see the difference.

This will make the boxes flush with that little ledge in my grow box.

IMG_0001.jpg
 

pelt1

Well-Known Member
Ok, cleaned up the bottom a bit and mounted my powerstrip in a way that I like. Here is an upside down view of the setup so far.

The only thing left is the mylar and lights. I should finish the lights today. The mylar or my seeds haven't arrived yet.

IMG_0001.jpg
 

pelt1

Well-Known Member
Ok, almost there. I got all my wiring done and have my lighting system installed. As of now the ONLY things left to do is install the Mylar when it arrives, install the latch I have in hand, and light proof the system and I should be good to go.

I will eventually put a timer on this system by the time I start the flowering phase, but I still wanted to have a light switch on here so when I do want the lights off, I can just flip a switch mounted on the outside of the box.


In this picture below, you can see the light switch installed. Also in this picture take note of the anchor system I have in place to raise and lower the lights as the plants progress. It is somewhat ghetto but I think it will get the job done.
IMG_0001.JPG


In this next pic, you can see the general layout of the box as it sits right now.
IMG_0005.JPG


This picture is a good view of how the anchor will work to drag the lights up and down.
IMG_0007.JPG


This picture shows the lighting switch on the back with a close up.
IMG_0003.JPG


Here is a good shot of everything as it sits now with the lights on. I have circled the little box I made for my switch, I think it is pretty slick!
IMG_0006.JPG

Since I am just about done with things, if you guys have any comments or things I should do to improve my box, let me know!!
 

pelt1

Well-Known Member
I've had my box running since my last post. So far everything seems to be running very good.

The temperatures and humidity seem to be ok for now.

IMG_0001.jpg
 

pelt1

Well-Known Member
Still waiting on my mylar to finish the box. BUt I've been doing some light proofing. Right now I probably am stopping about 99% of the light from escaping.

The fans aren't letting visible streams of light leave the fans, but they are faintly illuminated. I created some baffles for my air boxes, but I didn't like the way they hampered the aiflow, so I will roll w/o them. Here is a picture of them before I took them out.
IMG_0001.jpg


After removing the baffles, there was just one dot of noticeable light the lasered out the fan. Here is that solution for that, only took a small piece of baffle glued on the front of the duct.
IMG_0006.jpg


I'm showing also a set of door sills I have created on the top and opening side of the door. They do an excellent job of keeping out the light. I will do another for the bottom and the other side and I should be good to go.
IMG_0008.jpg IMG_0007.jpg
 

pelt1

Well-Known Member
So.... I think I'm done with my box!

The next phase of this journal will be the actual growing of my plants.

I don't see me doing much else beyond what has been done. I may wrap my pots in mylar as well before I pot my seeds.

If there is any interest I will compile the completed parts list along with a price breakdown. I'm sure I wound up spending more than I wanted anyway... but it should still be reasonable.

The interior is all mylar'd up, and boy is it bright in there. It's so bright I can't look directly in the box with the lights on.

I am very happy with the way it turned out.

Here are some pics:
IMG_0001.jpg IMG_0002.jpg IMG_0003.jpg IMG_0004.jpg IMG_0005.jpg
 

pelt1

Well-Known Member
So now it's time for the grow phase.

I have everything I need and my seeds are germinating now.

A lot of people don't recommend it, but I will see how it turns out for this grow. I am gonna go with Miracle Grow Organic Potting Soil, it has a 2-1-1 ratio. So I am thinking it will supply plenty of Nitrogen for the vegging stage. Some time during Flowering, I'm gonna try some half strength Miracle Grow Rose Bud nutes with a ratio of 18-24-16. So I'll be getting some nutes in there for flowering that should help.

I am running a 80/20 mix of soil to perlite.

I will be doing LST for at least one of the plants but probably both if it turns out to not be too much of a hassle. At that point, I may add a few more lights depending on how flat I can get the grow to happen.

IMG_0002.JPG
 

pelt1

Well-Known Member
Got everything planted and ready to go. I hate the few days before sprout b/c I think about all the things I may have done wrong.

I'm certain I will add another 4 23watt CFLs once I get enough growth to start LST.

My light cycle atm is 24 hours on. I will be vegging for about 16 days similiar to the SeymoreBuds book.

Also, is it a bad idea to run a 24 hour cycle for vegging, or is a 18/6 better? I initially was gonna do the 18/6, but in the book it seems like he was using a 24 hour cycle during vegging, unless I mis understood and he only used 24 hour cycle during germination?

Now I have my lights really tight together just because I'm trying to get light directly over where my seeds are. Here's a pic of how things currently are.

IMG_0003.JPG
 

pelt1

Well-Known Member
Got my PH meter and my tap is 7.4 after letting it sit out for some time. Did some watering of my planted seeds, and with just around 24 hours after planting my seeds, still no signs of life yet.

Just for grins I checked a bottle of "Nestle Pure Life" bottled water and it was right @ 7.0.
 

pelt1

Well-Known Member
Woot!! Look at what I found in one of my pots.

This is about 50 hours after planting my seeds into the soil. I don't see any signs of the other one yet, but hopefully it will follow suit shortly.

IMG_0001.jpg
 
Top