daveybc
Well-Known Member
If you want to splice into the ground wire on the AC side of the driver, that can be done. For me I wouldn't do that. I prefer a direct termination that is solid for the AC side. Like
https://www.amazon.com/Leviton-515PR-Straight-Blade-Rubber/dp/B000FKBZ7M
https://www.ebay.com/itm/Waterproof...w-Terminal-Cable-field-assembly-/252609964438
Also reference HLG website.
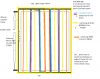
https://horticulturelightinggroup.com/pages/qb-optics-and-connectors
I assume you would be screwing the driver/s to something so pick up a grounding lug/s and connect it to the actual driver. Use the screw that holds to driver to wall, run a ground wire from there to the heat sinks with another ground lug ( scratch ( a little ) the anodized heat sink surface with sand paper to ensure good ground to lug ). Loop the wire to the next heatsink. If your heat sinks are connected to a common frame. The frame can be grounded instead. I would also scratch the anodized heat sinks a little near the bolt that would connect to a frame to ensure a good ground. Good luck with your project.
PS keep your drivers spaced apart for airflow. If your drivers are hot to handle rig a small fan for airflow. Use solid wire to connect to Molex on board. Stranded or solid can run back to the driver.
https://www.amazon.com/Leviton-515PR-Straight-Blade-Rubber/dp/B000FKBZ7M
https://www.ebay.com/itm/Waterproof...w-Terminal-Cable-field-assembly-/252609964438
Also reference HLG website.
https://horticulturelightinggroup.com/pages/qb-optics-and-connectors
I assume you would be screwing the driver/s to something so pick up a grounding lug/s and connect it to the actual driver. Use the screw that holds to driver to wall, run a ground wire from there to the heat sinks with another ground lug ( scratch ( a little ) the anodized heat sink surface with sand paper to ensure good ground to lug ). Loop the wire to the next heatsink. If your heat sinks are connected to a common frame. The frame can be grounded instead. I would also scratch the anodized heat sinks a little near the bolt that would connect to a frame to ensure a good ground. Good luck with your project.
PS keep your drivers spaced apart for airflow. If your drivers are hot to handle rig a small fan for airflow. Use solid wire to connect to Molex on board. Stranded or solid can run back to the driver.
How best do I ground
I have plenty of proper wire high heat etc
On frame going to where?
Copper piping on hot water rads they are 2 inch.
20 AMP GFI is available as dedicated.
I feel the rest I am ok with
I do have other lights
but drivers are all on-board
I don't want 40 lbs of drivers kicking out heat in tent.
Can you explain
And also why are your light strips never in stock lol?
I have the right person is that correct?
Thanks for stopping in to warm me.
It is what decent people do.