Well hello everyone
I'm sorry I've neglected you lately

A recipe to reward you for your patience...a jerky tutorial
-Canna Infused Beef Jerk-
I have a few health and digestive issues... many days, especially if I've been
particularly ill, or if I'm too weak at the moment to whip anything up in the kitchen,
jerky is all I can stomach and manage to put into my system! So, especially when
dealing with nausea, I'm a little particular (ie. a perfectionist
) when it comes to
how good it tastes.... the below is my personal recipe.
It tastes GREAT, with or without canna!
There are several ways you can make it; if you'd like some canna-free, and some
infused, simply wait to add your canna oil and tincture until the coating phase, and
only coat certain pieces. (Make sure you remember which ones!) If you'd like it all
infused, you may include your oil and tincture in the marinade, in this case just be
certain you use enough meat and that you baste frequently enough, that you're not
left with any potent 'juice' after your final basting/coating. I like to do both a potent
marinade, and potent basting.
If you enjoy jerky, once you've made your own, you will NEVER want to waste your money at the store by buying it pre-made, ever again!
Between you and me, my favorite part of any jerky is the rare bit of fat. So I tend to
leave a fair amount in my jerky, and you can feel free to either trim off or leave as
much as you like.
------------------
Makes enough for 1 lb, or 6 oz (+/-) dry-weight
'Smokey Original' Beef Jerky
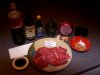
You will need:
- 1 teaspoon, strong hash oil
- ½ teaspoon, strong hash tincture *optional (no more than ½ -1 tsp; if only using one source of potency, go with oil)
- 1 lb, of you favorite cut of beef (I use large roasting cuts, sirloin tips etc., but any cut will turn into great jerky)
- 1 Tbsp crushed/grated fresh ginger
- 1/4 cup soy sauce
- 1/3 cup worcestershire sauce
- 1 tsp red wine vinegar
- 2 tsp crushed onion
- 2 cloves, crushed garlic
- 1 tsp oregano
- ½ tsp ground grains of paradise (or black, or cyan pepper; your choice)
- 3 Tbsp brown sugar
- 2 Tbsp white sugar
- 1 tsp liquid smoke
- 1 tsp honey
- ½ tsp salt
- pinch powdered rosemary
* An Oven, or Toaster Oven
* Meat Tenderizing Mallet
* Saran Wrap
* Oven Bags, for storage
* Food Grade Desiccant Sachet
----
I sometimes prefer to
quick-wash my meats before any type of cooking, I fill a large
mixing bowl with cold water and a little salt, then dunk each section in and give it a
squeeze under the water, then pat it dry. I do
not do this for sanitation purposes (it
would do little good if your meat was very contaminated, or 'that' far gone) but it's a
good way to prep a meat for marinating, and depending how talented the butcher
was, and how good your local grocers storage methods are, quick washing can be a
lifesaver when you have a pack of meat which smells a little too 'red'. Towel dry
when finished, or skip entirely and move on to the next step.
Wrap your sections cleanly in plastic wrap, leaving no folds, 'tucks' or creases between the meat and wrap.
Partially freeze.. this makes it very easy to cut, later on.
[/IMG]
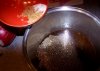
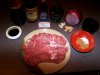
While your meat freezes, crush and mix together all other ingredients, -except your
glycerin tincture, hash/canna oil, and honey-.
Reserve 2 - 3 Tbsp of the resulting liquid from your marinade, in a container that you
can refrigerate. This will be mixed with your honey, oil and glycerin, later on. (You
have options.. you can marinade it all together and use the marinade to baste, or you
can reserve all your canna oil and tincture, for only the basting phase. I feel it is more
sanitary, not basting with the remains of the marinade, but I have basted with the
marinade many times, without trouble.)
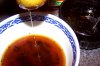
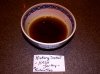
Tip- Later on, before adding your glycerin and oil to the basting sauce/marinade,
heat the reserved basting marinade and honey until it is just warm to the touch, and
allow your canna oil to melt in it while whisking, adding the glycerin tincture last.. if
you used coconut oil, it will remain solid unless gently heated this way.
Once your sections of meat are relatively stiff and partially frozen, you can remove
the sections from your freezer individually, unwrap them, and begin slicing them
down to size, while removing excess fat... you will want them long and wide enough
that you can arrange them easily, and about ¼ - 1/3 inch thick.
Once sliced, sandwich several pieces of the cut meat between layers of saran wrap,
take your mallet, and begin pounding the sections until they are relatively flat.
Add your slender slices of meat to the larger portion of the marinade, not the
reserved few spoons. Once all pieces have been added, cover the container they are
in, and set in the refrigerator for two days.
You could technically begin drying in as little as 8 or so hours, but I MUCH prefer
the flavor and texture produced by a good long marinade. If you only want to
marinade for a few hours, I suggest only refrigerating for half the time desired, and
then allow it to finish at room temp.
Before placing in the fridge...
40 or so hours later....
Once you've allowed your meat time to take on the flavor of the marinade, drain and
either set aside the excess liquid (particularly if you used a canna oil/tincture in the
marinade itself), or discard it. You are going to want to towel-dry the meat, using a
clean lint-free towel, or sections of paper towel.
---------
[/IMG]
Pre-heat your oven on its lowest setting, usually 170 f.
---------
Keep in mind, that this is well above the recommended safe temperature for cooking
red meat, and still 5 degrees higher the required temperature for chicken. Your meat
will exit the oven safe and sanitary at the end of this process, which can not always
be said of meat or jerky dried in food dehydrators, some of which are incapable of
reaching temperatures above 150 F.
----------
Once you have toweled off excess moisture, arrange your pieces so they are not
touching each other on your oven racks. They can be close; you just don't want
them touching.
Only keep your oven entirely shut
for the first 30 minutes.
After that, leave it propped just barely
open, on either the last 'setting' just before
being closed, or (if you have cats/animals, and that's a little too-open) by folding
your potholder and wedging it in the door, using it to create an inch-or-smaller gap.
----------
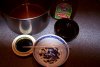
Prepare your potent basting sauce, as described earlier in the tutorial. You may use
the marinade the meat soaked in if you like, but if you're concerned, or if your fridge
isn't exactly 'up to code' (clean!) you may wish to consider using only the few
spoons you reserved and set aside, earlier on.
----------
One and a half, to two hours later
----------
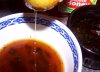
In two hours or less, you will want to begin basting. Your meat should not quite
look leathery yet, but it should clearly be a bit dry. Using a pastry brush, or even a
small section of paper towel, 'baste' each piece of meat. You should have enough
sauce to do this two to three times over the next hour and a half. If using the
remaining marinade, you will be able to baste to your hearts content, give or take
Be sure you allow an additional
hour of dry-time, after your final basting.
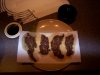
First dry, pre-baste
Third basting...
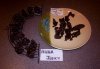
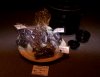
Finally dry...
In a total of four to five hours, from the point you began drying (it can vary
depending on the temperature and humidity of the room, and the time of year), you
should have finished jerky.
Turn off your oven, and allow it to 'rest' inside a few moments.
Bag it with a -
food grade silica desiccant sachet-, and, leaving the bag open, set
the bagged jerky in the oven for an additional 15 or so minutes at 200 f (sterilizing
the bag, re-sterilizing the meat inside on the chance it came into contact with anything
between drying and bagging, as well as the silica desiccant sachet which can
withstand temps of 250 f during 'rejuvenation').
Finally, seal it up while the bag is still nice and warm, and store it in your cupboard
for up to two months, or in your freezer for several years! You may use ziplock bags
if you plan to consume the jerky within the next few weeks. Home made jerky is
said to have a shelf-life of two to three months, but I'd still suggest eating it within a
month and a half just to be on the safe side.
Additional recipes for jerky...
Makes enough for ¾ - 1lb
-Teriyaki Jerky-
- Canna or Hash Oil
- Glycerin tincture
- 2/3 cup soy sauce
- 1/8 cup mirin, or cooking sake
- 2 tsp rice vinegar
- 4 Tbsp brown sugar
- 5 spice powder
- 3 coves crushed garlic
- 2 Tbsp crushed/grated ginger
- 1 Tbsp crushed onion
- ½ tsp grains of paradise or black pepper
- optional, few drops liquid smoke.. go easy, or it won't taste like teriyaki anymore!
Prepare ingredients, dividing marinade if desired for basting, and use as directed in the above tutorial.
--------
Makes enough for ¾ - 1lb
-BBQ Sauce Jerky-
- Canna or Hash Oil
- Glycerin tincture
- 3/4 cup brown sugar
- ¼ cup scotch or whiskey
- 1/8 cup worcestershire sauce
- 1/3 cup ketchup
- 1 Tbsp honey
- 1 Tbsp crushed onion
- 2 cloves crushed garlic
- ½ tsp cayenne pepper
- ½ tsp mustard powder
- ¼ tsp ground black pepper
- optional, few drops liquid smoke.... go easy, or it won't taste like BBQ sauce anymore!
Prepare ingredients, dividing marinade if desired for basting, and use as directed in the above tutorial.
Enjoy