TheTinkerer
Active Member
So, in these large 20+ gallon sips made of totes, do you ever clean the reservoir?
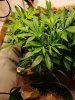
I mixed up some super soil, it’s been cooking for two weeks. I’d like to try no till, sub irrigated, but I’m not sure if I should use large fabric pots sitting on trays of perlite, or build a tote sip. I worry about something getting funky in the res and it being impossible to clean. Any comments?
I mixed up some super soil, it’s been cooking for two weeks. I’d like to try no till, sub irrigated, but I’m not sure if I should use large fabric pots sitting on trays of perlite, or build a tote sip. I worry about something getting funky in the res and it being impossible to clean. Any comments?


 , Instructions at bottom for the people like me.