Venomhawk
Member
Please be a bit patient with me as there are a LOT of pics for this journal.
Quick run down of lights, soil, etc that I am working with.
Lights: 150W HPS, 50W HPS, 26W(x2) CFL, 17W 2ft flouro
Soil: Miracle Gro Moisture Control potting soil
Nutes: Right now only Miracle Gro all purpose being fed at 1/2 strength at the most
In some pics you will see two smaller containers, those have my freebies from 'Tude that I got (White Indica and Northern Lights x Skunk). Those two got germinated about a month after the LSD plant. I will add some more pics later today to show where I have started LSTing the plant as well. And some of the pics towards the end show where I went ahead and FIMMed her as well. And now onto the pics of my first month of starting from seed.....
---Apparently I got some of the pictures out of order, but you all can see pretty decently what I have going on
Attachments
-
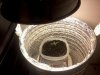 Photo0204.jpg59.5 KB · Views: 10
 -
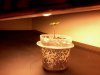 Photo0190.jpg42.8 KB · Views: 12
 -
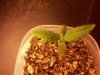 Photo0195.jpg52.7 KB · Views: 9
 -
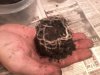 Photo0198.jpg51.1 KB · Views: 9
 -
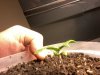 Photo0199.jpg50.3 KB · Views: 9
 -
 Photo0241.jpg66.5 KB · Views: 11
 -
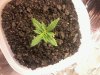 Photo0210.jpg72.6 KB · Views: 10
 -
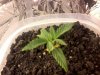 Photo0211.jpg67.3 KB · Views: 9
 -
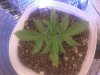 Photo0222.jpg59.1 KB · Views: 9
 -
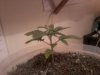 Photo0223.jpg35.8 KB · Views: 9
 -
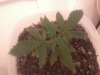 Photo0224.jpg39 KB · Views: 10
 -
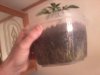 Photo0225.jpg30.1 KB · Views: 9
 -
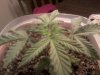 Photo0226.jpg47.5 KB · Views: 10
 -
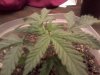 Photo0227.jpg42.9 KB · Views: 11
 -
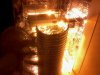 Photo0229.jpg65.9 KB · Views: 10
 -
 Photo0230.jpg64.3 KB · Views: 9
 -
 Photo0231.jpg41.5 KB · Views: 10
 -
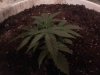 Photo0234.jpg40.4 KB · Views: 9
 -
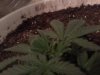 Photo0235.jpg37.9 KB · Views: 9
 -
 Photo0236.jpg77.3 KB · Views: 11
 -
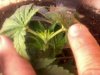 Photo0238.jpg43.2 KB · Views: 11
 -
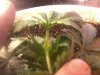 Photo0239.jpg43.1 KB · Views: 10
 -
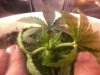 Photo0240.jpg42.8 KB · Views: 10


