Has anyone tried air layering for clones

Drop That Sound

Well-Known Member
IMG_2018.JPGIMG_2022.JPGIMG_2024.JPGIMG_2033.JPGIMG_2034.JPGIMG_2035.JPG
IMG_2062.JPGIMG_2071.JPGIMG_2036.JPG

For sure, I will do a couple rooters too.


The root plugs work f'ing awesome btw, and the first thing I ever tried using. ;)

Not messy at all!

Even just a single plug sliced like a hot dog bun is enough to root a big branch (easier to water the small ones with gravity drip feed anyway). I like wrapping 3-5 of the rooters around a big branch though if you are watering\injecting manually by hand, as it stays moist for way longer.

I been using rockwool cubes the last few years, but I do have some dried out plugs laying around still. I feel like they attract gnats into my netpots though, like bait..
 

Drop That Sound

Well-Known Member
Not long, compared to ALing trees and other plants. To many variables to give anyone an exact time. I've seen roots in a week (on smaller non -atypical clones taken from down below), and also had some larger layers take longer than 3 weeks. It works like a charm, even when every other cloning method fails to root for some reasons.. Its fool proof though! No such thing a a hard to clone plant/tree anymore. Kind of depends on the size, as well as where you take it from, and many other factors. If you know you could root out some cuttings in a week in your aero cloner right now, than expect it to take less than 2 weeks I would say.


EDIT: It's kind of a balancing act really. You want enough roots that the clone can self sustain, after you break the life support connection to the host plant. Smaller ones can be treated more like any other cutting, but larger air layers you have to be more careful with.
 
Last edited:

Drop That Sound

Well-Known Member
Figured I should mention that if you were to stop watering the layers, the branches will just dry up and start to heal over, and quit trying to root out. It will scab over with callous tissue and re-bridge the connection to the cambium layer you cut away. Pretty cool. I could see stalling mother plants to make them root out more than veg, using air layers that you won't cut away, etc. . Ancient bonsai style! ;)
 

Drop That Sound

Well-Known Member
I didn’t forget about the experiment btw ;-)

Had to move my only mother plant to the drying room, and snapped a few big branches on accident smacking her around. Right where I wanted to put some of the DWC pods lol. Its been healing up though, and shes hanging from the ceiling again.. by a string lol.


I got everything round up, and gonna use 1 gallon ziplock bags around the netpots I modified.

I’ll probably make a short little how to thread on the dwc layers. Also wrapping various different mediums for side by side comparisons, so keep an eye out!

DB69019C-267A-4764-A65E-5E307870A34A.jpeg
 
Last edited:

TCH

Well-Known Member
I have a 3 footer about ready to come off the plant after about 20 days. Rooted using a .5 liter water bottle and some Promix.
I can add some picks when I harvest if peeps be interested.
I would definitely like to see the setup!!
 

TCH

Well-Known Member
I'm gonna let the roots bulk up for a few more days before the chop.
I also tried what Boatguy suggested and used damp sphagnum moss packed into some water bottles.
These branches are very side leaning on the bottom and Promix would just fall out.
View attachment 5301520View attachment 5301521
I'd love to see more of the bottle. How'd you put it on? Cut it lengthwise down the whole side? Split it in half?
 

7CardBud

Well-Known Member
I'd love to see more of the bottle. How'd you put it on? Cut it lengthwise down the whole side? Split it in half?
Yup, cut the bottom off and then split down one side. I pried it apart, slipped over the branch and taped around the top. Then dropped Promix in from the top. I didn't do the full girdle. I removed the small branches and scraped off the top fiberous skin.
Does the full girdle cut increase rooting speed? Rooting speed wasn't a huge concern, since the branch was still growing well.

I definitely like Boatguy's method better since you can easy layer a branch in any orientation.
 
Last edited:

Drop That Sound

Well-Known Member
You can heat the bottle head area up with a torch or heat gun to make it easier to pry apart, and it will re-harden pretty quickly. Form it back into shape around the branch as it cools. Won't hurt the plant any, just don't get it molten hot. ;)
 

Drop That Sound

Well-Known Member
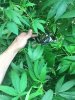
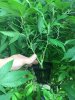
Finally getting around 2 it. All the big branches I wanted to test the DWC pods are side ways, so I’m probably gonna pick a few upper vertical ones that are smaller for the test. That, or im contemplating leaning the whole plant over on the side so they stick up better, lol maybe..
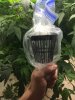
I guess I could go sideways with the cup, and clamp both cut ends of the ziplock bags, and poke a hole up top afterwords.. we’ll see.

If I use this method in the future it will likely be to clone a whole untrained plant in half btw, and not on big overgrown bushes that are a pain to deal with.

Also realised the hydroton pebbles will probably float up and around, so I might make mesh caps for the 3” net cups to keep them in.

Anyway, just gonna do maybe 2 dwc pods for now, instead of a whole bunch. I gotta silicone the bags on first with zip ties and wait to dry, then I’ll fill em up tomorrow sometime after girdling the branch, and start bubbling away.

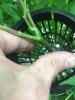
Gonna layer a few more monsters with rockwool. My rooters shriveled up so small but ill try to rehydrate some too.

Wonder if I should attach a fogger to one of the bags? :eek:

I don’t need a lot of clones right now so ill probably just hand water the wrapped ones instead of gravity feeding them, and dealing with even more tubes everywhere..
 

Attachments

Drop That Sound

Well-Known Member
:bigjoint:

Hope its cool to dump some more pics here, in the new air layering thread?

Just wanted to show how I got the pods set up. Pain in the ass really, lol.

I picked one good sized branch to clone, so wide I had to literally wad it up and stuff it through the zip lock. Helps to put your hand through the cut bag first, then pull through.. but the big one I couldn’t do that.

I used zip ties, not toxic aquarium sealant (black was all i had unfortunately), and a few hose clamps. Wrapped a little bit of waterproof tape before the clamps to help from ripping the bag. Cranked em down tight as I could

Hoping it holds when I fill em later tonight!

ACCDF4A1-9766-49B8-8320-41FCA5AD0A9D.jpeg
65D0C54A-90A2-4C08-B2FF-B6A7D91B9AFE.jpeg
4F3E66C9-5774-437B-838B-015D1BA3D6B8.jpeg
29BABF58-A8C8-473B-9734-BD0B3289B716.jpeg
1734C2E8-5A5B-473D-AB87-9DBA51787BEF.jpeg
97610139-A10D-4F58-B33C-32B58EEE3201.jpeg
C472AE2B-B6A9-4CAE-ACC7-A1E5D3111FDB.jpeg
 

Drop That Sound

Well-Known Member
Couple more shots, sealing up the lower parts

Oh, and showing off my grandma garden kneeler, that flips over into a seat too. Forgot I had one for years lol. Its so nice for air layering without kneepads.. AL procedures are tough in tight spots, and always kills my back!

113BFAD3-0CB4-4FD5-A7AD-3F7C2FC7BF41.jpeg
7657E1C1-010C-46B7-9E1A-CB4840922942.jpeg
8DB6C249-688A-49F5-85A2-3A11063B163C.jpeg
3B033FB4-C75C-4AD8-80EF-878AE131C4AC.jpeg
B4A869B8-1BF8-4644-9D91-B7A0E9607CCC.jpeg
65DEC70C-E21F-465F-B0C3-5A7785497EB9.jpeg
D9AFFE0C-6E77-4763-82B7-A1632A085B86.jpeg
 
Top