You are using an out of date browser. It may not display this or other websites correctly.
You should upgrade or use an alternative browser.
You should upgrade or use an alternative browser.
Cold$moke
Well-Known Member
The only thing i didnt like with my mini mock up is that the batting while it dies get wet
Its a little on the hydrophobic side.
I have been busy so i have been neglecting them but i did peek in and the roots are starting to grow through the batting so part one is a success.
But my mini mock up is just a nursery tray so i have reservations about how well water can get into the batting if the water just travels through the troughs without wetting the batting .
Time will tell")
Its a little on the hydrophobic side.
I have been busy so i have been neglecting them but i did peek in and the roots are starting to grow through the batting so part one is a success.
But my mini mock up is just a nursery tray so i have reservations about how well water can get into the batting if the water just travels through the troughs without wetting the batting .
Time will tell
...This heat sink I added has room for 4 of them if needed. This is just some scrap aluminum channel left over from other projects - including my Solstrip light fixture. I will attach the cooler modules to the heat sink on the outside of the tote, then attach another piece of the channel to them and add a computer fan for cooling. I have several power supplies from my RC hobby that can run them, so it wont cost much to do this.
Props!! You can also get some finned heatsinks for the outside instead of channel...may increase the cooling capacity. When you run a test of the effectiveness of your peltier setup, please post the results...I am itching to know how well they perform, as are others I'm sure...
JSB99
Well-Known Member
Try using cotton for the wick. I've cut up old shirts and used strips.I am having doubts and reservations about the Membrane Meniscus technique.
I decided to run some more tests based on how I plan to setup the Membrane tote. I have been planning to follow the original patent drawings and details pretty closely.
That would be a layer of perlite in the bottom of the tote, with a water inlet on one end and a drain on the other end. The nute solution is supposed to flow slooooly through the perlite. The water level needs to be just at or barely below the top of the perlite. The, the "membrane" sits on top of the perlite. Its purpose is to allow water to wick up to the root zone but prevent the roots from getting into the perlite. The roots are NOT supposed to be sitting in water. Only a thin film of water - the meniscus - is supposed to be touching the roots.
That all sounded good to me, and when I ran my first test of the rip-stop nylon I have using just water, it seemed to work fine. That test was just filling a jar to the top with water and setting the nylon on the top and then placing a cardboard tube on the nylon and seeing the water wick up the tube. That worked ok, but the water was actually touching the nylon in that test.
I put some perlite in a jar and added water almost to the very top of the perlite. Then placed the nylon on that and stick another cardboard tube in there with a small weight to hold it against the nylon and perlite. Wicking does occur, but it is really sloooooooooooooow. Im having a hard time imagining this will be enough water to let a plant grow properly.
So I ran a second test using the silk screen. It lets water flow through it very freely where the nylon does not. The wicking action is much better, but its still pretty darn slow.
It looks like my nylon just doesnt wick fast enough to work, so maybe I have the wrong kind of rip-stop or its too dense or something. The silk screen however, is a lot more porous than what he describes as the perfect material - I think.
Im going to have to go re-read his notes and details to see if I missed something. If it wasnt for the rave reviews I read and pics from several different growers, I would doubt this could possibly work. Actually, Im doubting anyway....
Left is the rip-stop and right is the silk screen after about 15 minutes.
View attachment 4101891
Yea perlite dont wick too well
I did a test on some perlite a couple of weeks ago and I thought it did pretty good. I put about 1/2" of water in a mason jar, then added about 3" or 4" of perlite. Then I placed another cardboard tube just resting on top and it started getting wet in just a few minutes. That meant the water had wicked up at least 3" in just a few minutes.
I think its the fabric Im using that is the issue.
I remember reading somewhere in the docs on the Membrane technique about how he recommended testing the fabric. Now I need to go find that and re-read it.
The only thing i didnt like with my mini mock up is that the batting while it dies get wet
Its a little on the hydrophobic side.
I have been busy so i have been neglecting them but i did peek in and the roots are starting to grow through the batting so part one is a success.
But my mini mock up is just a nursery tray so i have reservations about how well water can get into the batting if the water just travels through the troughs without wetting the batting .
Time will tell
You might try washing it with soap. It may have some sort of coating to make it water proof or mildew proof. After I washed my nylon, it wicked better - still stupid slow but better. I also washed the silk screen, but didnt notice much difference there. I plan to wash my batting as well.
Cold$moke
Well-Known Member
The issue is that you had the carboard directly in the perlite so it wicked well. The cardboard probably did more of the wicking cause its such a thirsty materialI did a test on some perlite a couple of weeks ago and I thought it did pretty good. I put about 1/2" of water in a mason jar, then added about 3" or 4" of perlite. Then I placed another cardboard tube just resting on top and it started getting wet in just a few minutes. That meant the water had wicked up at least 3" in just a few minutes.
I think its the fabric Im using that is the issue.
I remember reading somewhere in the docs on the Membrane technique about how he recommended testing the fabric. Now I need to go find that and re-read it.
But i think being such an irregular surface the material wont get enough surface contact to wick well on the perlite
Cold$moke
Well-Known Member
Excellent idea i will give it a hand washYou might try washing it with soap. It may have some sort of coating to make it water proof or mildew proof. After I washed my nylon, it wicked better - still stupid slow but better. I also washed the silk screen, but didnt notice much difference there. I plan to wash my batting as well.
You guys may be onto something.
I dont think cotton as a wick by itself will work - it will let roots grow through it and the membrane needs to keep the roots OUT of the nute channel and out of the water.
But - using something like that on top of the perlite might help a lot. In his revised, later designs, he is using marine carpet instead of perlite for the nute to flow through. He says is wicks better and also makes more even contact with the membrane - which would allow for more wicking I think. He is also recomending that the water just touch the membrane, which is a big change.
Im going to need to re-read and re-test before building this tote.
Mabey use somthing that wicks easier under the dacron layer.
Rockwool or coco slabs? Then lay the layer over it ?
I just had a crazy CRAZY CRAZY Idea
I just might change my design! Need to go do some drawing now
Ok, you have been holding out on us! We need pics and details - especially on the new idea!
Cold$moke
Well-Known Member
Ha ha let me draw some stuff first to see if it works out mentally first sometimes my crazy ideas are just crazy ha ha.
Im busy as hell with batroom remodel but ill try to get a pic up of the mock up later .
Nothong to see just a nursery tray set inside another tray on an angle for water to run off the tray has a slot cut in the botom on the drain end
Then i used the batting to line the bottom and threw some clones in (the ugly expendable ones)
Then i coverd it with panda film using double sided stick tape so i can peel it back to check the roots.
So far so good but im not pushing it cause im already maxing out my little veg room .
Just
Cold$moke
Well-Known Member
My CRAZY idea will only work if i find a material that will wick water but NOT let roots through.Ok, you have been holding out on us! We need pics and details - especially on the new idea!
Ill try to get time to draw up what im thinking later
But if it works... i just solved not needing an airpump or a waterpump (optional for top ups)
Also it would not require any real disposables
But it could all be retarded ha ha
Budley Doright
Well-Known Member
Polypropylene wicks away moisture I believe. My long undies do anyways lol.
My CRAZY idea will only work if i find a material that will wick water but NOT let roots through.
Ill try to get time to draw up what im thinking later
But if it works... i just solved not needing an airpump or a waterpump (optional for top ups)
Also it would not require any real disposables
But it could all be retarded ha ha
Thats exactly what the Membrane guy says to use.
The silk screen fabric I tested wicks very well - much better than the rip-stop nylon - and Budley Doright says it stops roots, so maybe give that a try. You can get a yard on Amazon for $9 or so. Probably cheaper elsewhere.
Also, shower curtain fabric (not the plastic ones) should work well too. Its one of the fabrics he suggests.
Budley Doright
Well-Known Member
Could send you my tent, it wicks too, touch it as your soaked  .
.
Tent material should work well.
I may have discovered the problem on my end. Apparently, these fabrics come pre-treated with some sort of water proofing or coating of some sort. Parker (the Membrane guy) recommends cleaning them with a TSP based de-greaser rather than regular soap. Gonna have to make a trip to Home Deopt.
I may have discovered the problem on my end. Apparently, these fabrics come pre-treated with some sort of water proofing or coating of some sort. Parker (the Membrane guy) recommends cleaning them with a TSP based de-greaser rather than regular soap. Gonna have to make a trip to Home Deopt.
Falcon23
Member
Very good experiments.. I have one small one going in my room which uses the batting found in a cheap blanket from wm. Mostly poly til I believe, before I forget, rayon will wick like their is no tomorrow. Don’t know about roots getting through though. Anyway back to my experiment.
I have a plant in a plastic clear container which is almost nothing but poly fil, I will double check the material later today.
I was doing it in expectations of using it in an ebb and flow with 2 liter bottles and pvc piping. I will examine it later and see if there is any root penetration and how the roots have grown or not.. it hasn’t been the most scientific test but the info may help someone.
I am currently in week 3 if flower in a plastic barrel using only 3-4 yard water sprinklers and while my first time doing hydro, I believe I am liking the results. I have a soil grow going on Next to it for a comparison and so far so good.
Here are few pics in the name of science..
I have another thread in aero ponics which goes into a bit more detail, but I can appreciate your experiments and am not trying to hijack your thread.
Here’s 2 more pics of plants currently.
I will be doing a few more experiments this next time. And will definitely keep
You in mind exploring different media.
Attachments


Chris Edward
Well-Known Member
I have a tube of 3M 5200. That stuff is rated for below water line use on boats and lasts forever. In fact, I just used some to install a heat sink on the side of the rez.
I added a heat sink on the side of the rez for the future addition of some peltier coolers if the rez temps get too hi.
I think peltier coolers are very 'cool' gizmos and Im actually half way hoping I need to buy some to keep the rez temps down. They are cheap and easy to work with. The cheap ones dont have perfect reviews, but it will still be interesting to try them out to see how effective they can be at cooling. One of the best features is that by simply reversing the current flow you can heat the rez or cool it. I have an STC1000 temp switch that can do the switching automatically. I will be using it to monitor rez temps and - if needed - control the peltier coolers.
www.amazon.com
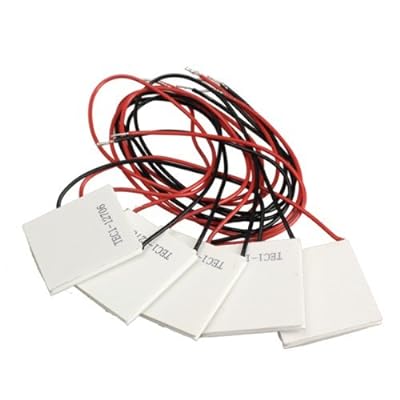
Amazon.com: Laqiya 5PCS TEC1-12706 12V 60W Heatsink Thermoelectric Cooler Cooling Peltier Plate Module: Computers & Accessories
100% Brand new and high quality Get ice cold in minutes or heat to boiling by simply reversing the polarity, used for numerous applications from CPU coolers to alternate power sources, or even for you ...
This heat sink I added has room for 4 of them if needed. This is just some scrap aluminum channel left over from other projects - including my Solstrip light fixture. I will attach the cooler modules to the heat sink on the outside of the tote, then attach another piece of the channel to them and add a computer fan for cooling. I have several power supplies from my RC hobby that can run them, so it wont cost much to do this. These can be had for even less on ebay.
All I did was cut out a strip 1.75" wide by 7" tall, then glued the heat sink in with 3M 5200 fast cure marine sealant. That stuff will last forever and not leak.
View attachment 4100960
View attachment 4100963
The garden spigot is to drain the rez and the 1/2" CVPC pipe is to feed the airlift pump chamber. I'll go over that later when I get to that part.
I have toyed around with the idea of using Peltier junctions on a cooling block in-line with my modular Dutch bucket systems. But I am not sure what to use as the cooling block material... Plastic isn't the best thermal conductor and metal will corrode and could mess with the plants, so until I can find a suitable material I have pretty much shelved the idea.
Similar threads
- Replies
- 38
- Views
- 3K