apoulin
Well-Known Member
Hello everyone,
Just a little background about myself, I have been a member here for a while now and have been an avid reader. I have grown in soil and DWC, both under CFLs. I had ok results, but didn't get to really put the time in that it required. I am now ready to start my first serious grow and plan to make a grow journal on here.
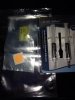
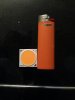
I just ordered a:
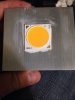
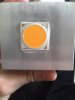
Cree cxa3070 3000k from Digikey - $40
Meanwell LPC-60-1400 from Jameco - $18
Arctic Silver Alumina Thermal Adhesive from Amazon - $6
Total - $72
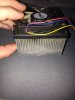
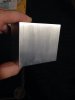
This should all be in by this next week. I have a cpu heatsink with fan that I plan on mounting the LED to with the thermal adhesive.
I also have some seeds
2 Girl Scout Cookie
1 Black Domina
2 Kandy Kush
1 Golden Haze
1 Blue Widow
Let me know what you guys think, I am excited for this next week!!
Just a little background about myself, I have been a member here for a while now and have been an avid reader. I have grown in soil and DWC, both under CFLs. I had ok results, but didn't get to really put the time in that it required. I am now ready to start my first serious grow and plan to make a grow journal on here.
I just ordered a:
Cree cxa3070 3000k from Digikey - $40
Meanwell LPC-60-1400 from Jameco - $18
Arctic Silver Alumina Thermal Adhesive from Amazon - $6
Total - $72
This should all be in by this next week. I have a cpu heatsink with fan that I plan on mounting the LED to with the thermal adhesive.
I also have some seeds
2 Girl Scout Cookie
1 Black Domina
2 Kandy Kush
1 Golden Haze
1 Blue Widow
Let me know what you guys think, I am excited for this next week!!
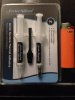
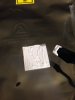

 when I was reading the shipping tracking info, the correct dates are 1/27/15-1/30/15 haha oops

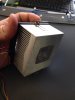
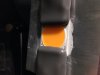
 making progress guys, making progress

