Massive Cabinet Build. Comments/Ideas?

pazuzu420

Well-Known Member
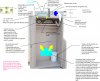
Well I've taken the plunge and found what I believe will be a suitable grow space for my conditions. Because of external circumstances the cabinet will be stealth for smell but it sure will be noticible whereever it is placed. Anyways on to the fun stuff....

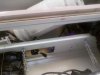
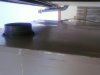
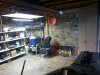
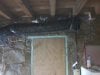
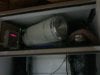
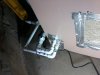
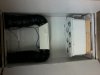
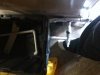
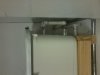
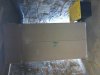
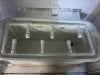
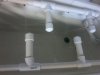
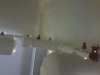
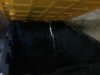
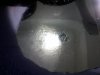
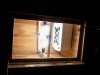
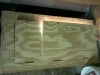
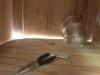
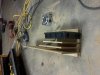
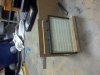
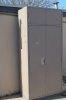
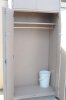
Picked up the cabinet at the local scrap metal yard. After much contemplation on where to find a cheap used cabinet this was by far the BEST solution. There were so many to choose from including fire proof boxes that were used for paint and chemical storage 75$. I decided on this one because of it's sheer massive size. External dimensions are HxWxD 95 1/2in x 42 1/8 x 24 1/8. I don't know about you but I put the tape up and it says my celings are 95 1/2 in exactly a slight over sight. Luckly it looks as if I can cut the bottom toe kick off so I can beef it up with some lumber so I am sure it will hold the weight. These came off the local military base and were used in the dorm rooms for the enlisted men to store thier personal belongings. Excellent find for 30$!!!!

Well I ordered the light today
400W dialawatt lumatek mh/hps
supersun II air cooled hood
Vortex 6inch 450 CFM
(took the plunge, hope it doesn't bite me in the as!)
Organic Air Charcoal Fiber Filter - 4", 6", 8", 10" and 12"
as I could get no info on if it works or not
..either way got the 6in

More to come as materials start to arrive as we have no hydro store here.
Comments welcome throughout the building and then through my first grow. Wish me luck
front_closed.jpgopen_front.jpgclose_top.jpgopen_front_w_ideas.jpg

NM medical ---Wake n Bake
 

pazuzu420

Well-Known Member
Well made some more progress today...
Cut the bottom toe kick off and installed a piece of plywood under the steel to strengthen it and have something solid to put casters into.
After putting the casters on I ended up with a total of 94 1/2 inches which is an inch shy of the ceiling in most homes. Hope it fits! As it is still out side while I finish painting ect.
Speaking of paint I was able to put the last coats of white on the inside and hopefully I don't get any hotspots and if so I'll hit them with alittle bit of sand paper as there is alittle sheen to the epoxy. Or I used this hope it doesn' bite me in the ass later Amazon.com: Rust-Oleum 7881830 Appliance Enamel 12-Ounce Spray, White: Home Improvement
Ofcourse I got it at the local wally world. I guess I could of ordered mylar off the internet as I didn't want to get the saftey blankets due to all the folds and I figured I would have to replace it quite frequently in the long term picture. This is hard epoxy finish that is water and rust resistant so I should be able to wipe clean with bleach water between grows.
I've been thinking more about passive intakes and sizing. Is there a formula for this, perhaps according to the cubic or square foot of the area? I saw someone used floor/ceiling vents that were adjustable and I thought I would do the same with a light proof box containing it. I would do two on the sides but would rather keep everything in the back, so I think I'll do two vents down low in boxes.
I wanted to get somehting that I could put a filter into but now I think I'll just make the box so I can slip a filter in and cut them to fit.

Well that's the latest progress with more to come as I"m still waiting on the taxes to come through....should be very very soon though!!
 

pazuzu420

Well-Known Member
02131717.jpg02131717a.jpgWell things are comming together and I've learned a thing or two along the way here is some updated pics of the progress I've been making.
02131716a.jpg
02131716b.jpg
I"ve mounted a sentinel MDT-1 Timer in the upper right hand quarter with the fan speed variable day and night controller.
I"m painting my hyrdoponic totes with a automotive primer/paint for plastics it is comming out really well pics to come soon.
I have to break it down and finish up sealing up the box to move it into its final resting place in a couple of weeks. I can't wait to move and fill it with ladies!
 

jimmygreenfingers

Well-Known Member
Looking good mate, ive built two cabs like this myself there up and running and just need finnishing off. Ill keep an eye on this see how your doing, good luck fella.
 

pazuzu420

Well-Known Member
Well it has finally happened! I've settled into my new location, which has been quite the adventure. I must admit when I started this project I had planned for it to be in a interior room of an airconditioned house in the summer, but have now rented a new property which includes a basement which is where is now resides.
The thing is so massive there was no way to get it down the stairs let alone stand it up in the space (you'll see by the pics) so I ended up tearing the entire thing apar to it's respective indivdual metal paneles, which I discovered would of made everything much easier to cut but alas, you live you learn.t
I don't know if the low pressure aeroponic system is going to work but I"ll give it a test tonight and make a few more minor adjustments unless it just flat doesn't work :)
Photo0022.jpgPhoto0021.jpgPhoto0015.jpg
I know I know where are the pics!
Photo0012.jpgLooking up at the connection for the exhaust (there is a 90 in there somewhere ;) )
Photo0013.jpg Photo0018.jpgIn and out connections for the hyrdosystem with a few vaulves to pump drain the system out.
Photo0014.jpg Comming around to the rez..
Photo0017.jpgInterior connections
Photo0020.jpg
 

pazuzu420

Well-Known Member
Waiting on my updated card to arrive before I get started and I'm fixing to start building a small veg cabinet to sit next to it with a small DIY CFL light. I want to connect it into the backside of the main cabinet with a 90 and a rig I make to seal it to the intake filter. I have a small cloner I've made to put in it and would like it to hold one mother plant. Will I need another fan to pull into the main box, the fan I'm using is huge and hardly runs so I thought it should be able to handle pulling though both spaces as well as some fresh air from the backside. I was concerned with dust dirt, mites, ect so I put in the highest priced filter I could find at the local hardware I hope it will be o.k.
I have concidered putting plastic along the back side wall....

Anyways I'm being long winded but there is soooo much more to talk about...

Thoughts Ideas?
 

zem

Well-Known Member
don't try to cover the whole area with a 400, just shrink the canopy so that it's getting 5000lumen/ft minimum, check your light output to know. it was a nice cab, too bad you tore it to pieces, it seems you got a nice setup. try and make smoother curves in the ducting or increase the size of it, anyway, i think that 450cfm is way more than required, so it won't matter much, it will be a humming cab lol good luck :)
 

pazuzu420

Well-Known Member
I went with a bigger fan because it was going to sit in a room with a much higher ambient temp. I wish I had known that this was where it was going to finally end up and I would of designed it to be a closed system. I was so worried about the 400w putting off so much heat it would cook everything in there but with the low ambient temp, 65 degrees, the fan hardly ever comes on. Plus using the cap day and night controller, when it does come on, it runs at a very low speed. I was also pleasantly suprised that with the insulated ducting the noise from the fan even, when on high, is barely audible from the top of the stairs. Although I might have to vent out of the room above the door, through an existing hole, which will increase the noise a bit.
I was thinking if I let it pull in the room it might help bring the temps up so the fan will run alittle more often to help keep smell down? I was worried though that this might raise the humidty beyond 65 percent. The ambient humidity is 44% currently.
I should note that the room is entirely under the house and shares no outside wall with the house, this helps keep the temp constant ofcourse it will rise in the summer when outside temps reach 100. I can't see it raising more than 5 to 8 degrees, ofcourse I havent' been in here long enough.
Waiting on my stupid card to come back and my clones are on back order from the dispensery, atleast they are on a donation basis. :)
To tired tonight to do water test it will have to wait till tomarrow. All this work has been extremely taxing on my already broken back :(
Most would prob say just use the entire room like it appears someone else has done before as I got to looking around, but I have to stay within my plant limit :()

Thoughts, critisim, and all that jazz...appreciated
 

pazuzu420

Well-Known Member
Well I fixed the leak and descovered I should of thought alittle more ahead on how I was going to take the pump on and off, but I got it off and back on without too much of a problem. After running a few minutes a couple of times I noticed a few things.
1.) The pump is really loud! I found out this is due to the back pressure on the pump as if I pull one of the fittings off and let it pour out the 3/4 end it doesn't sound toooo bad.
2.) With the intake and the outtake being the same size it keeps a few gallons in the root tank as it pumps and comes Nowhere near running down the water level.

So I was going to put in a few more spray heads in hopes of taking some of the back pressure of the pump. Does this mean that the spray heads I"m currently using are working at thier maxium effieciency?
I was wondering if I could dam across the rez making the water rise and pour over before being drawn back up into the system and if that would work would it be sufficient enough turn over to not have to oxgenate the rez?
I have like 1 large and 1 smaller powerhead for aquariums I though I would use in the rez running 24/7 turning the solution over.
The larger one has an attachment that lets you put oxygen right into the stream. Anyone know these? If not I'll post a pic later of in in my aquarium pumping away and drawing oxygen it will fill the tank with bubbles I know from past experience.

Comments thoughts HELP!
 

pazuzu420

Well-Known Member
As it turns out doubling the number of head still is putting to much back pressure on the pump. For a easy solution I put some I.D 1/2 O.D. 5/8 plastic tubing that I was going to use to pump out the system and put it back into the tub. So now it is circulating and aerating the water while getting rid of the back pressure. The pump just really isn't designed for that those kinda pressures even though they are very low. I think I'll be able to find a sutiable medium of leaving the valve partially open and still getting good spread on the ez-clone spray heads.

I was also thinking of putting in a riser in the flower chamber to hold alittle water if the power goes out.

So the big question what kinda watering schedule?
Any thoughts ideas? I've seen 24./7 schedules in nft and deep water flood in pvc tubes and fence posts but I thought this would over water the plants and lead to root rot?
I have a sentinel timer so I can go down to the second if need be but I was trying like 15 on and 10 off to see if it emptied the rez but it maintains a constant level in the rez

Please agian I could use some help...
 

zem

Well-Known Member
dude i'm too blazed to read all the posts, just a thing i read in 1st post, you said "fan barely goes on" that's not right, you need to vent the plants not only for temps but for fresh co2, that's essential, especially in lights on in flowering. you need to intake "FRESH" air into the tent not just circulate the same air around... hope this helps....
 

jimmygreenfingers

Well-Known Member
So the big question what kinda watering schedule?
Any thoughts ideas? I've seen 24./7 schedules in nft and deep water flood in pvc tubes and fence posts but I thought this would over water the plants and lead to root rot?

Please agian I could use some help...
As long as you have good root development then it shouldnt be a problem. Lots of folk when running NFT put there plants in to early and the plant suffers from wilt as the root structure is good enough to handle a constant flow, also good D/O levels in the water will prevent root rot but the main prevention from it is the res temp. Not sure what kind of hydro system you have built but sprayers in pipes/posts is pointless IMO as it ends up being run as NFT anyway. I run a pipe setup in my DIY cab which is almost the same as yours. My pipes are run as NFT with a constant flow, very simple and very effective.
4.jpg
 

pazuzu420

Well-Known Member
Thanks jimmygreenfingers, I appreciate you taking the time to stop in and read over my rantings. When developing the system I had concidered a wide variety of choices and I wish I really had went with pvc tubes so perhaps in the future.
I'll try and take some more pics today of the system as it is 'kinda' unique as I've taken ideas from all over and kinda smashed them together ..we'll see if it bites me in the ass later.
I also will take some of the new veg/storage cabinet I've been working on the last couple of days as it is starting to take shape also.
This has been truely as fun and exciting learning experience and can't wait to get my hands 'wet' so to speak

Waiting for the stupid DOH to send me me my updated cards so I can get started!
 

pazuzu420

Well-Known Member
Photo0027.jpgPhoto0029.jpgPhoto0030.jpgPhoto0034.jpgPhoto0031.jpg
Well, first pic is of my new veg cabinet I made with storage for all my stuff on top. I plan on spliting the door in two and have already added the outtake and need to work on the intake tonight.
THe other pics are of the low pressure aeroponics unit I came up with after studing various designs. They point downward so that they will drain better as well as they don't interfere with the root mass.

Comments? First time grower and design with improvements in the future. Like being able to push towards a more 'true' High pressure aeroponic setup.
 

pazuzu420

Well-Known Member
Photo0036.jpgView attachment 1493876Photo0025.jpg
THese are pics of it sorta in action. I'll have to get the digital SLR to take some better pics of spray. I was running a 550 GPH pump with I think 6 or 8 foot of head. I had orginally had 6 heads but the back pressure on the pump was so hard I thought it was going to rattle apart. I doubled the heads and it gave som much need relief to the 'subpar' pump *note: subpar at best* I also ran a line from the valve I use to pump the rez out during changes to recirculate back into the rez while the pump is running and by adjusting the amount of flow through the valve I can increase or decrease the amount of pressure at the head. Leaving it open slightly returns water and oxygenates it plus stirs the entire rez. Would I still need an airstone? Also would a 15 on 45 off cycle work? I can get more percise with the sentinel MDT....
 

pazuzu420

Well-Known Member
Thanks stelthy for the interest as I have looked over quite a few threads with your comments on them. I have been reading for quite some time now and just recently became able to persue my endevours but have learned tremendous amounts from your threads and others like them.

Kinda wish I went with a 600w dimmable now that I see I can handle the heat, everyone had me sooo afraid of heat issues but taken care of properly I don't see heat to be a problem in my future :)

Got get some pics of the veg cabinet as it is comming along I'll try and get the camera down there sometime tomarrow...stairs and me don't get along *laughs*
 

pazuzu420

Well-Known Member
Thought I would post alittle update as I"m almost ready to paint and caulk the veg cabinet. I've been working on the lighttrap for the veg cabinet, it contains, a $20 hepa filter and is made out of 1/4 MDF and 3/4 spacers. Basicly everything I had laying around minus the filter.
Photo0052.jpgPhoto0046.jpgPhoto0053.jpgPhoto0049.jpgPhoto0050.jpg You can see basicly how the lighttrap is taking shape if anyone needs some advice on how to build one I'll be happy to answer. The finished trap will have a solid 3/4 spacer around the front side so that I have plenty of material to mount the lighttrap to the veg box.
 
Top