shocker1185
Active Member
Ever wanted a vaporizer but didnt have hundreds of dollars to spend?
Well, i spent many hours up last night devising a plan that WORKS!! cheap and effective.
Materials needed:
Ceramic pot ("rainy day fund" change jar") w/ cork for top at least 4" diameter
Glass vase with a v shape, smaller at the bottom and larger at the top.
25w Soldering iron
power drill
diagonal cutters
wire strippers
razor blade
screw or nail that will fit in the top of the soldering iron.
electrical tape
metal bowl piece (either from those small "crack-pipe" metal pieces or look around in the plumbing department. *stay away from copper
bic pen
hose that will fit perfectly on the inside of the bic (at least 3-4 feet per hose you want to install. (you can add as many as you like!
Basically, the way it works is: you have a base made out of ceramic, glass, or any other strong material pot with a cork at least 4 inches in diameter. cut out a piece of the center of the cork large enuf to fit soldering iron handle into. cut the cord to the soldering iron 6 inches away from handle, separate and strip.
Drill 1 small hole on the side near the bottom of the bottom piece, large enough to feed the power cord into, and reconnect cord together. solder if you have another iron.
Make a second hole in the cork just big enough to fit a pen casing in it, and have about an inch of it sticking through the bottom. this is so that the hose does not touch the soldering iron by accident and give unwanted vapor! One pen casing per hose desired.
Now, drill as many holes as hoses desired on the same vertical level as the hole for the power cord, but preferably on the other side of the pot. feed the hose through the hole and the pen casing, so that an inch or two is beyond the top of the casing.
Place cork in tightly, and remove the tip from the soldering iron. place bowl piece on the top, and put the screw or nail through the center of it into the soldering iron and tighten down. (some soldering irons have threaded tips...you can buy screws that will fit the threads perfectly at your local hardware store, as well as the hose and bowl piece)
The glass vase should be tall enough to cover the height of the soldering iron, and either sit on the table or be able to conform to the roundness of the pot and stay there. electrical tape will provide a more stable surface for glass to sit on if it is connected to the pot itself.
Plug it in, let it sit for about a half an hour to burn off fumes from the bowl piece. put in ur favorite flavor and put the glass back on. Let it sit for about 2 minutes and let 'er rip...you will not be dissapointed.
Prices will be put up soon. my trip to the hardware store cost me less than $3, for the hose screw and bowlpiece....
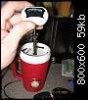
Pics will be up soon as well.
V2 soon also, with temperature control
Well, i spent many hours up last night devising a plan that WORKS!! cheap and effective.
Materials needed:
Ceramic pot ("rainy day fund" change jar") w/ cork for top at least 4" diameter
Glass vase with a v shape, smaller at the bottom and larger at the top.
25w Soldering iron
power drill
diagonal cutters
wire strippers
razor blade
screw or nail that will fit in the top of the soldering iron.
electrical tape
metal bowl piece (either from those small "crack-pipe" metal pieces or look around in the plumbing department. *stay away from copper
bic pen
hose that will fit perfectly on the inside of the bic (at least 3-4 feet per hose you want to install. (you can add as many as you like!
Basically, the way it works is: you have a base made out of ceramic, glass, or any other strong material pot with a cork at least 4 inches in diameter. cut out a piece of the center of the cork large enuf to fit soldering iron handle into. cut the cord to the soldering iron 6 inches away from handle, separate and strip.
Drill 1 small hole on the side near the bottom of the bottom piece, large enough to feed the power cord into, and reconnect cord together. solder if you have another iron.
Make a second hole in the cork just big enough to fit a pen casing in it, and have about an inch of it sticking through the bottom. this is so that the hose does not touch the soldering iron by accident and give unwanted vapor! One pen casing per hose desired.
Now, drill as many holes as hoses desired on the same vertical level as the hole for the power cord, but preferably on the other side of the pot. feed the hose through the hole and the pen casing, so that an inch or two is beyond the top of the casing.
Place cork in tightly, and remove the tip from the soldering iron. place bowl piece on the top, and put the screw or nail through the center of it into the soldering iron and tighten down. (some soldering irons have threaded tips...you can buy screws that will fit the threads perfectly at your local hardware store, as well as the hose and bowl piece)
The glass vase should be tall enough to cover the height of the soldering iron, and either sit on the table or be able to conform to the roundness of the pot and stay there. electrical tape will provide a more stable surface for glass to sit on if it is connected to the pot itself.
Plug it in, let it sit for about a half an hour to burn off fumes from the bowl piece. put in ur favorite flavor and put the glass back on. Let it sit for about 2 minutes and let 'er rip...you will not be dissapointed.
Prices will be put up soon. my trip to the hardware store cost me less than $3, for the hose screw and bowlpiece....
Pics will be up soon as well.
V2 soon also, with temperature control