Harvest a Pound Every Three Weeks!

questiondj42

Well-Known Member
I'm still amazed how the first day when you put your rooted clones in the stibkbud veg and 18-19 days later (mine just under 4 T-5's) they explode. Of course for me to avoid root rot I was putting in frozen water bottles in the morning and at night every day.
Do your tubs drip? Mine drip non-stop. I've tried using weather stripping along the edge, but that doesn't seem to help.
 

sky rocket

Well-Known Member
Do your tubs drip? Mine drip non-stop. I've tried using weather stripping along the edge, but that doesn't seem to help.
Yes my drips sometimes. I'm thinking of getting some clear plastic sheets (don't know the correct name for it)and glue it on the inside of the bins. That way the water beads off and back into the resovoir.
 

letdown shifty

Well-Known Member
Today's photos. I'd guess the gals have a week minimum to 2 weeks tops left, Trichomes are all still clear. They're drinking about 5 gallons a day, filling up with 0ppm water + Hydroguard + Bud xl + some finishing nutes. Looking forward to the harvest, but not all the trimming. Sidenote, this is my last grow cycle at current place. Trying to time everything so it's ready for our new house.
-Shifty
mir_20160204_155730.jpg mir_20160201_144651.jpg mir_20160201_144735.jpg mir_20160204_160043.jpg
 

questiondj42

Well-Known Member
Yes my drips sometimes. I'm thinking of getting some clear plastic sheets (don't know the correct name for it)and glue it on the inside of the bins. That way the water beads off and back into the resovoir.
This more than sometimes. it's pretty excessive. I guess I'm going ot have to dick with weather stripping ideas.
 

joey green

Well-Known Member
@WeedFreak78 i picked up the botanicare CNS17 line already so i guess ill see what happens, so far the girls are looking frosty, but i havent started the veg feeding, cuttings will probably be ready for a meal by sunday.
my sprayers are also like what you described, i just wasnt sure if having them as a mist would improve yeild and i was missing out.... i only have 12 spray heads in the unit, i think its because of the 4' hose's the water needs to get pushed through that i had to get a 633, i was debating to go higher to try for a mist...
 

StinkBud

Well-Known Member
Do your tubs drip? Mine drip non-stop. I've tried using weather stripping along the edge, but that doesn't seem to help.
What you want to get is rope calk. It comes in a roll for about $4 at Ace Hardware. It's four small beads lined up in a clay strip. Roll the clay out around the edges and press down firmly to seal the gaps. When you put the lid on make sure you press everywhere around the edges. I've tried everything and nothing works better.

The clay usually dries out or algae starts growing on it after about a year or so. I try to replace the seal before I need to.
 

StinkBud

Well-Known Member
What you want to get is rope calk. It comes in a roll for about $4 at Ace Hardware. It's four small beads lined up in a clay strip. Roll the clay out around the edges and press down firmly to seal the gaps. When you put the lid on make sure you press everywhere around the edges. I've tried everything and nothing works better.

The clay usually dries out or algae starts growing on it after about a year or so. I try to replace the seal before I need to.
Also, another method is to take a big trash bag and line the inside of the res. Bring the edges of the bag back up and tape it to the lid. That way anything that does leak goes right back into the res. It also makes clean up easier. Of course some bags leak so another method is to cut out the bottom of the bag and just use it as a skirt, you know like what you wear on Saturday night...
 

questiondj42

Well-Known Member
What you want to get is rope calk. It comes in a roll for about $4 at Ace Hardware. It's four small beads lined up in a clay strip. Roll the clay out around the edges and press down firmly to seal the gaps. When you put the lid on make sure you press everywhere around the edges. I've tried everything and nothing works better.

The clay usually dries out or algae starts growing on it after about a year or so. I try to replace the seal before I need to.
Awesome! Thanks man. I'll be picking some up as a backup when this silicone strip fails. Because it will.
 

CB7guy

Well-Known Member
ANy body help me turn a hydrogen pro ,,water cooled co2 gen into just a co2 gen,, it is activated via water flow so i was hoping it was simple enough to just wire the water flow switch together but its not// so i took off the water cooling part and didnt get it to light,(figured) so i added a small pump to simulate water flow but still isnt working,,

yes the gen worked b4 i put my hands in it
i should of got a regular gen, and the cost about as much so figured instead of making a DIY gen i would convert the one i have because it has all the part i need ...im a diyer so hand with the hands
 

2ANONYMOUS

Well-Known Member
I believe when you add carbon dioxide to water it will undergo hydrolysis to form carbonic acid CO2 + H20 <=>H2CO3
So in reality H2CO3 _is_ the solvated form of CO2, so there is no other CO2 there, really. If you were to, say, lower the vapor pressure of CO2 over the water, changing the equilibrium, then the CO2 dissolved in the water would leave, forming bubbles. In other words, what happens when you open a soda bottle.
 

CB7guy

Well-Known Member
I believe when you add carbon dioxide to water it will undergo hydrolysis to form carbonic acid CO2 + H20 <=>H2CO3
So in reality H2CO3 _is_ the solvated form of CO2, so there is no other CO2 there, really. If you were to, say, lower the vapor pressure of CO2 over the water, changing the equilibrium, then the CO2 dissolved in the water would leave, forming bubbles. In other words, what happens when you open a soda bottle.
i went right you went left
 

GreenTools

Well-Known Member
Awesome! Thanks man. I'll be picking some up as a backup when this silicone strip fails. Because it will.
Rope caulk is bad. 1/4" butyl rubber weatherstripping comes with adhesive backing doesn't dry out and works great. Push down on the lid a bit to compress it and install a 1/2" screw on each corner of the lid into the flange of the tub through the side. Did this over a year ago, still no leaks and only an extra 30 seconds to remove the lid to get into the rez.
 

questiondj42

Well-Known Member
Rope caulk is bad. 1/4" butyl rubber weatherstripping comes with adhesive backing doesn't dry out and works great. Push down on the lid a bit to compress it and install a 1/2" screw on each corner of the lid into the flange of the tub through the side. Did this over a year ago, still no leaks and only an extra 30 seconds to remove the lid to get into the rez.
What's bad about rope caulk? I was actually looking for buytl at Lowes when I found the silicone stuff. It's definitely working, but not as effectively as I'd hoped. Can you post a photo of how you have it taped out?
 

GreenTools

Well-Known Member
Even the EPDM stuff in the pic works great. The problem with rope caulk is that it is porous.....I like to sterilize the cloner between runs prior to introduction of new clones and beneficial bacteria. Rope caulk does dry out, and doesn't provide to cushion seal created with the screws/weatherstrip set up.
 

StinkBud

Well-Known Member
What's bad about rope caulk? I was actually looking for buytl at Lowes when I found the silicone stuff. It's definitely working, but not as effectively as I'd hoped. Can you post a photo of how you have it taped out?
What's bad about rope calk is it dries out and breaks down so you eventually have to replace it. Any type of weather sealer will work, it's just that some work better than others.

I've switched to using a cooler for my cloner a couple of years ago. It's completely water tight (no seal needed) and helps keep water temps in check. The downside is large coolers are expensive. I figure my cloner will last a lifetime so it's worth it in the long run.
 
Last edited:

questiondj42

Well-Known Member
What's bad about rope calk is it dries out and breaks down so you eventually have to replace it. Any type of weather sealer will work, it's just that some work better than others.

I've switched to using a cooler for my cloner a couple of years ago. It's completely water tight (no seal needed) and helps keep water temps in check. The downside is large coolers are expensive. I figure my cloner will last a lifetime so it's worth it in the long run.
It looks very tidy though. I really dig it.
 

AKGrowAreo

Well-Known Member
is anyone using a chiller with this system? and do you need one?
I have been moving and harvesting so I have not posted in for a minute, but I thought I would chime in on this one because my chiller system works fucking great! And its super cheap!

I run a sealed tent with CO2 at 83 to 85 degrees so I have no choice but to run chillers. Now that I have been running my chiller system for a while, I will never go back...

I have access to a fresh cold water faucet in my grow area and a drain. If you have these in your area try this out. It works absolutely great.

When going to CO2, High res temps were my #1 concern so I researched, then researched, then researched some more.

The idea of a traditional chiller was too expensive and pretty inefficient, and pumping my nute solution to a remote chiller seems fucking retarded (how to keep the lines from getting dirty, potential for flooding, extra reservoirs, fuck that business). Peltier Thermoelectric chillers simply would not do good enough, they are expensive to buy, annoying to make, and quick to fail. So what were my other options? I was stumped!

I went back to the drawing board and designed my own reservoir chilling system. Full disclosure, I am positive that other growers have developed the same chilling system as I did, but I could not find shit about it on the web so I designed this one all on my own. I am not claiming to have invented style of chiller, but I am fucking stoked on it and would love to hear from anyone who has done anything similar. My first designs were very similar to other DIY chillers out there and there was nothing special about it really. My first plan was to put put a coil of hose in a fridge and pump my nute solution through it using a timer. It would have worked, but also would have used unnecessary electricity and added extra headaches.

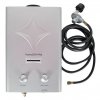
Frustrated, I then remembered that I had used a little thingy called a wort chiller when brewing beer in the past. Basically this is a immersion chiller that consists of a coil of metal tubing (usually copper, but you want a stainless steel one to prevent any leaching from the copper caused by the nute solution). What a great way to go! This meant I wouldn't have to keep any extra pumps in my res and I never have to move the nute solution out of the res to chill it! Duh, tons of people are using these so I don't know how I missed it!

I set out to put a really big res filled with potable RV/marine antifreeze into a freezer, then put a pump in the res connected to a hose that pumps the antifreeze through the wort chillers that sit in my reservoirs. The pump would be turned on and off by the another one of these $38 Inkbird thermostats with sensor and outlets built in.

Right when I was about to buy a fridge I had little light bulb go off in my head! Why the fuck should I wast time, power, and money on a fridge when my tap water is 43 degrees once it runs for a minute or two? I was stoked! I had finally figured it out!!! I am lucky enough to have a drain in the floor of my grow area and I plumbed cold water faucet to the area as well. Without both of these, you will not be able to run this chiller, sorry.

I turned my attention from fridges to sprinkler valve electronic relays. They are cheap and they last forever! Here is how it ended up working out. Don't buy cheap hose parts though because THEY WILL LEAK! I was able to build my chiller for my 2 flower room reservoirs for about $210 and its really easy to build. Shit is extra expensive where I live, so you can probably do better. I will do a detailed thread with pics and instructions on how to build this chiller as soon as I have some down time, but here are the basics.

These items work for my set up. You may need slightly different lengths of tubing, hose and more or less of some items. Measure and plan before you buy!

Supplies For 2 Reservoirs:

1 cold water hose faucet (sink will work but you'll need a garden hose adapter)
1 drain
2 - Super Efficient 3/8" x 25' Stainless Steel Wort Chiller = $40 each (brew shop or Amazon)
1 - Inkbird Itc-308 Digital Temperature Controller Outlet Thermostat, 2-stage = $38 (Amazon
1 - Orbit 57100 3/4-Inch Female Pipe Threaded Auto Inline Sprinkler Valve = $12 (Amazon)
1 - Orbit Sprinkler System Power Source Transformer 57040 = $13 (Amazon)
1 - box of miscellaneous wire connectors = $5
2 - male 3/4 threaded to male garden hose adapters = $5 each (Lowe’s)
2 - 2 Way Solid Y Valve Garden Hose Connector Splitter Adapter = $13 each (Lowe’s)
1 - PTFE Pipe Thread Seal Tape = $2 (Lowe’s)
1 - 50’ length of garden hose = $13 (Lowe’s)
6 male and 6 female (this should be enough to have extras) hose repair pieces = $5 each (Lowe’s)
1 - 20’ length of 3/8” vinyl tubing = $10 (Lowe’s)
1 - 3/8” vinyl tubing T = $3 (Lowe’s)

Instructions For One Reservoir: (If only chilling one res you will only need 1 wort chiller and you wont need the vinyl tubing T.)
  1. Connect 2 Way Y Valve Garden Hose Adapter to water faucet.
  2. Connect one side to the new garden hose and the other side to your old garden hose (if you have one).
  3. Run the hose close to your flower room and cut it to an appropriate length (pvc pipe cutters work great for this).
  4. Connect female hose repair piece to the end of the hose where you just cut it.
  5. Connect the 2 male 3/4 threaded to male garden hose adapters to the Orbit 57100 3/4-Inch Female Pipe Threaded Auto Inline Sprinkler Valve using PTFE Pipe Thread Seal Tape and be sure to tighten well using crescent wrench.
  6. Connect the hose to the Orbit 57100 and tighten well. Be sure to find the arrow to ensure the water goes in the correct hole and out her other.
  7. Connect Orbit Sprinkler System Power Source Transformer 57040 to Orbit 57100 using wire crimpers and connectors.
  8. Connect another female hose repair piece to the other cut off end of the hose.
  9. Connect the hose to the out end of the Orbit 57100 and tighten well.
  10. Clean the wort chiller using dish soap to remove any machining oils and rinse well.
  11. Insert wort chiller into reservoir.
  12. Connect wort chiller to the garden hose.
  13. Connect vinyl tubing to other end of the wort chiller.
  14. Run vinyl tubing to drain.
  15. Connect Power Source Transformer to the cooling outlet on the Inkbird Itc-308 Digital Temperature Controller Outlet Thermostat.
  16. Put temp sensor in the reservoir.
  17. Plug thermostat into outlet and set desired temp, dead band, alarms, etc. Calibrate the unit if necessary.
Instructions For Two Reservoirs:
  1. Follow instructions 1 through 9 from above then the following
  2. Run the garden hose to a central location between the two res and cut.
  3. Connect male hose repair piece to the newly cut end.
  4. Clean the wort chillers using dish soap to remove any machining oils and rinse well.
  5. Insert wort chillers into reservoirs.
  6. Connect vinyl tubing to the supplied garden hose adapter.
  7. Run tubing to the wort chiller and cut to appropriate length.
  8. Repeat steps 6 and 7 to the other wort chiller.
  9. Connect vinyl tubing to both wort chillers using supplied clamps.
  10. Connect separate vinyl tubing pieces to the other end of each wort chiller.
  11. Run the end of the tubing to a point where you can connect them to the vinyl tubing T.
  12. Connect another piece of tubing to the other end of the T and run the tubing to the drain.
I set my res temp to 67 degrees with a 1 degree dead band so that the second the res it gets above 68 degrees the sprinkler relay is activated and cold water starts flowing through my wort chillers and thus chilling my nute solution. As soon as the temp goes below 67 degrees the water ceases to flow. I keep my sensor in my warmer of the two reservoirs and they stay within 1 degree of each other. I could adjust the flow to each res using the valves on the y adapter to get the temps exactly the same if I wanted, but I just keep the valves wide open cause I am not worried about the 1 degree difference. Make sure to secure the vinyl tubing into the drain in some way. If you don't the line has a tendency to pop out of the drain and start spraying water everywhere.

Inkbird Thermostat

Orbit 57100 3/4-Inch Female Pipe Threaded Auto Inline Sprinkler Valve (sprinkler relay)

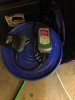
I have it housed in a bucket just so its out of the way and doesn't get kicked accidentally.

I don't have any pics of the wort chillers, but they are pretty straight forward. Let me know what you think about this and would love to hear about other's experience with similar set ups.
 
Top