The Dude 4552
Well-Known Member
Well i'm sure excited. After many hours, drafts and edits, I am finally going to start building my:
Stealth Perpetual Harvest Multi-Chamber Grow Cab
If you are not familiar with this I have been thinking of a way to clone, veg, and flower on a perpetual cycle so that 6 plants are harvested every month, but I wanted something clean, organized and localized into one particular space.
I started looking into storage boxes, cupboards and pantry's but neither offered a partition that could separate plants on 24/0 and 18/6 with those on 12/12 nor have enough space to store the plants along with lights, timers, fans, etc.
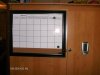
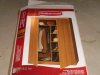
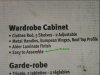
Then I found the Rubbermaid wardrobe from Canadian tire.


The wardrobe took me a long and drawn out four hours. Instead of building it to their specifications, I modified the shelves and drilled everything together for solid reinforcement. There were a couple of minor aesthetic foibles on my part: for example,

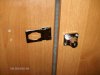
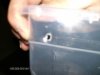
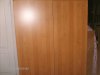
As you can see the doors do not align. However they still cover the entire grow space so I'll keep it for wabi-sabi.
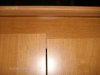
This one isn't my fault")

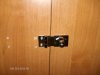
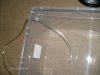
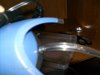
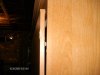
Apart from the chipping on the door (thank you Canadian Tire!) as you can see the doors are not flush to the wardrobe. I will need to rectify this with some weatherstripping later on.
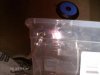
Also they gave me a cardboard backing for the wardrobe which is no good. I will have to buy some plywood and reinforce it.
Now on to the inside:

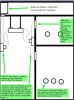
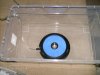
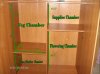
When I was planning out the dimensions in my blueprints, I estimated based on the actual wardrobe dimensions, 72x48x12. Now that it is built I have measured and displayed the actual dimensions of each chamber. Turns out to be more than I estimated, which is good. However this required me to turn my original design upside down to accommodate it. Instead of the clone/mother chamber going top shelf, they now go bottom shelf. And instead of the flowering room exhaust venting up to the filter in the filter chamber, it now needs to vent through the supply chamber (most likely via PVC)

I purchased some flat white wood spray paint to paint the entire inside of the wardrobe flat white. I figure flat white is simple and economical. Plus I plan on having adequate lighting for all chambers.
======================================================
I will update this thread regularly as I purchase materials and will be sure to take plenty of pictures for you.
I encourage suggestions. I have blueprints, but I am always looking for some good advice on how to improve this cabinet. I hope to use this cab for years to come so I really want to get it right.
Till next time.
Stealth Perpetual Harvest Multi-Chamber Grow Cab
If you are not familiar with this I have been thinking of a way to clone, veg, and flower on a perpetual cycle so that 6 plants are harvested every month, but I wanted something clean, organized and localized into one particular space.
I started looking into storage boxes, cupboards and pantry's but neither offered a partition that could separate plants on 24/0 and 18/6 with those on 12/12 nor have enough space to store the plants along with lights, timers, fans, etc.
Then I found the Rubbermaid wardrobe from Canadian tire.
The wardrobe took me a long and drawn out four hours. Instead of building it to their specifications, I modified the shelves and drilled everything together for solid reinforcement. There were a couple of minor aesthetic foibles on my part: for example,
As you can see the doors do not align. However they still cover the entire grow space so I'll keep it for wabi-sabi.
This one isn't my fault
Apart from the chipping on the door (thank you Canadian Tire!) as you can see the doors are not flush to the wardrobe. I will need to rectify this with some weatherstripping later on.
Also they gave me a cardboard backing for the wardrobe which is no good. I will have to buy some plywood and reinforce it.
Now on to the inside:
When I was planning out the dimensions in my blueprints, I estimated based on the actual wardrobe dimensions, 72x48x12. Now that it is built I have measured and displayed the actual dimensions of each chamber. Turns out to be more than I estimated, which is good. However this required me to turn my original design upside down to accommodate it. Instead of the clone/mother chamber going top shelf, they now go bottom shelf. And instead of the flowering room exhaust venting up to the filter in the filter chamber, it now needs to vent through the supply chamber (most likely via PVC)
I purchased some flat white wood spray paint to paint the entire inside of the wardrobe flat white. I figure flat white is simple and economical. Plus I plan on having adequate lighting for all chambers.
======================================================
I will update this thread regularly as I purchase materials and will be sure to take plenty of pictures for you.
I encourage suggestions. I have blueprints, but I am always looking for some good advice on how to improve this cabinet. I hope to use this cab for years to come so I really want to get it right.
Till next time.
Attachments
-
 250.8 KB Views: 1,112
 -
 47.9 KB Views: 1,093
 -
 32.3 KB Views: 25
 -
 51.6 KB Views: 1,111
 -
 36.7 KB Views: 1,057
 -
 229.7 KB Views: 1,053
 -
 47.7 KB Views: 1,058