mafuki
Active Member
(THIS INFO IS FOR MEDICAL EDUCATION GROWING HYPOTHETICAL ISSUES.)

Herb is for the use of man
It comes from the earth. Cannabis plants have a wide variety of uses, ranging from it's psychoactive and medicinal properties to fiber hemp used to make fabric, fuel and building material.
All and all it is a very versatile plant.
Cannabis has been grown for a very long time. The oldest stash of seeds and bud ever found was 2,700 years old and was discovered on two mummies in china. The research team could not get the seeds to germinate and the THC in the bud was long gone but this proves that we have a long history of cultivating cannabis.
The very fact that we have receptors in our brains which sole purpose is to bind cannabinoids, proves a strong point for the recreational, spiritual and medicinal use of cannabis.
This guide contains information on how to grow, flower and harvest your crops, what equipment you will need and how to setup your grow room.
Indica / Sativa / Ruderalis
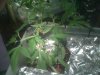
Cannabis Sativa is a diecious equatorial plant that originates from tropical regions of the world. The length of day and night is about 12/12 in these regions and that is what sativa dominant plants are used to. It is perfectly acceptable to grow tropical sativas under a light regime of 13/11 during vegetative growth and to flower them under 11/13. Sometimes sativas wont even flower under 12/12 as it is so close to home that they just keep on growing. Sativas take longer to flower than indicas, usually twice as long and sometimes even three times as long. Sativas are generally more tall and lanky than their indica counterparts. They have thin serrated leafs like in the picture above. The buds are also different in appearance to the indica buds. Sativa buds sometimes resemble a fox-tail and are not as tightly packed as indica buds. Getting tight sativa buds really is an art form that requires some practise.
Cannabis Indica on the other hand is a subspecies of Cannabis Sativa that has adapted to the colder climates and shorter days further up north from the equator. Most indica plants will remain in a vegetative state until the the light regime is changed to 12/12, with some variation between strains. Some early indica strains will flower under 18/6. Indicas have thicker and broader serrated leafs than sativas and the buds are usually more compact, sometimes even rock hard. They stay shorter and grow wider than sativas, often branching out heavily with frequent internodes.
Cannabis Ruderalis is also a subspecies of Cannabis Sativa which originates from sativa plants that escaped from outdoor plantations in northern Russia. Because the day can be very long in these areas, reaching up to 24/0 in the summertime, the plants developed the unusual ability to flower under any light conditions.
Some commercial strains like Lowryder, Mighty Mite and Stuporsonic carry ruderalis genes which means that they can be grown outdoors in arctic regions of the world.
It is more difficult to grow sativas because of the way they behave but once you learn how to grow them properly, growing indicas becomes a breeze. Indicas have a more predictable growth pattern, they can be kept quite low and do not stretch as much as sativas. The closer you get to a pure sativa, the more trouble you are looking at. Some pure sativas just seem to grow forever and there is no real distinction between the vegetative and flowering stages. Not in the same way as indicas are concerned any ways. Often a good 50/50 mix will have the best of both worlds.
Equipment and Hardware

It is generally known that plants prefer light from the blue spectrum during vegetative growth and light from the yellow/red spectrum during flowering. Sources of blue light are compact flouros and metal halide gas discharge bulbs. High pressure sodium is currently the best solution for the flowering spectrum although there are also more advanced solutions. The gas discharge bulbs must be connected to a ballast in order to operate.

Naturally you will also need to put your light on a timer as pulling the plug every day during flowering is not a very practical solution. Make sure that the timer can handle more watts than your ballast puts out.

The gas discharge bulbs will always outperform the compact flouros, although they also do a pretty good job at close range. The benefit here is that cfls emit almost no heat so there is no need for noisy fans etc, which means that your setup is basically running silent. I have tried both and can honestly say that nothing beats MH and HPS in terms of plant vigor and health as well as bud development and crop size.
What is generally not known is that there are photosynthetic pigments relating to each spectrum of light, chlorophyll a (red) and chlorophyll b (blue) respectively. The plant is capable of producing more or less of each pigment in it's fan leafs, depending on what sort of light is available. That said, plants still grow stronger under the corresponding light for each stage of development but also benefit from receiving both during its whole lifespan as both pigments are active to some degree outside their optimal spectrum. A good compromise are light bulbs that emit a little blue light as well as the red light, like the Osram Plantastar for example, which I personally use during flowering with great results.
Always try to get the lamp as close to the plants as you can without burning them. The distance is good if you can keep your hand in place above the canopy for a longer period of time without discomfort. It is good to remember however that both HPS and MH bulbs put out a fair deal of light radiation so watch your plants. Most of the time it's not so much the heat as the infrared radiation that causes harm to the plant.
It is advisable to change the gas discharge bulb (MH and HPS) every other harvest or at least after four harvests, depending on the make of the bulb. You can find the specifications for your bulb on the manufacturer's website but generally HPS and MH lamps should be good for 10,000 hours of constant use.

Nothing is more important than stealth so make sure that you have some kind of odor control, either a carbon scrubber or an ionizer. The benefit of using a carbon scrubber is that you can hook the fan (and scrubber) to a cooltube or aircooled hood, therefore killing two birds with one stone by allowing the fan to both neutralize odor and cool the hot HPS or MH bulb. You can have the fan sucking or blowing air through the filter, both methods work but the filters are not designed to have air blown out through them so my recommendation is that you use them as they were intended. A high-performance fan, like say an industrial duct fan will also ensure that the grow room gets proper air exchange. This means that a lot of free CO2 will stream to the grow room and keep your plants healthy.

Personally I prefer the aircooled hood as cooltubes tend to create hotspots which basically means that the rounded glass of the cooltube works as a magnifying glass, burning the plants directly underneath it. Hoods also do a better job at dispersing the reflected light over a greater area as cooltubes usually come with a small reflector. If the light is dispersed over a greater area the ambient temperature also drops in the grow room and the plants receive more light.
Here is an example of how you can hook up your equipment. In this case I had to fit a lot of hardware into a closet and have since updated the setup but at least you get an idea of what I am talking about.
In terms of reflective efficiency, solid white surfaces do the best job reflecting upwards of 90% of the light emitted by your bulb. Second comes mylar with something close to those percentages. Avoid using mirrors in the grow room as they in fact absorb more light than they reflect.
A great addition to your setup is a humidifier or mister. This will ensure that you have a high relative humidity in your grow room. Since plants can also be foliar fed by spraying the leafs, they will be very happy with the constant supply of humidity and remain nicely green and healthy. One could even add nutrients to the mister if one wanted but I rather keep the machine clean and foliar feed manually.
The most important thing to remember is that you have to make your grow room entirely light proof, if you can see your own hand at close range it is not dark enough. It really has to be pitch black in the grow room during the dark hours or the plants will not flower properly or even become hermafrodites.
General Growing Information
It is always a good idea to mix fertilizers into the soil no matter what form of fertilization one intends to use. This will keep the plants healthy and they will also have something to fall back on in case they need to. Since plants need Nitrogen (N) during the vegetative stage and Phosphorus (P) during flowering, a mix of guano and bone meal with some blood meal will ensure that the plant has what it needs. The plant also needs a variety of other micro nutrients and trace metals in order to grow to it's full potential so the best advice that I can give is that you try to provide the best environment possible for your plants. Fan leafs (the big ones) are used both as solar panels and for storing energy. This is where most of the photosynthetic process takes place and where the bulk of the energy is stored.
There are mixed opinions whether or not to trim fan leafs but in general you should leave them be even if you are tempted to remove them. I sometimes remove the smaller leafs on the branches but leave the big ones alone for most of the time. The plant will decide whether or not the leaf is needed and relocates the energy stored in it if needed. The argument for removing them has been that they might prevent light from reaching buds sites in flowering but the counter argument would be that light does pass through the leafs although we cannot observe this with the naked eye. You decide, a third option would be to split the fan leafs in half allowing more light to pass through.
Remember that it is possible to feed your plants too much and cause nutrient burn. By doing so you may also create micronutrient lockouts which will resemble under or over-fertilization. By feeding the plant more at this stage you actually make things even worse. If you notice these symptoms, flush the plant with plenty of water and look up a nutrient disorder guide. I will not go into this here because there are a lot of good posts by educated experts on this forum regarding nutrient problems.
Nothing beats organic fertilizers when it comes to how they affect the scent and taste of buds in my opinion. Chemical fertilizers are very strong and more difficult for the plant to break down. Great results can be achieved with both but the organic way resembles more the conditions in nature. Organic fertlizers include compost, organic material like seaweed, ash, bone meal, blood meal, guano etc.. etc.. It is also easier to cause nutrient burn with synthetic fertilizers. If you use chemical fertilizers make sure that you flush your plants for at least two weeks prior to harvest.
By flushing I mean that you stop feeding the plants nutrients and only supply ph adjusted water. It is generally a good idea to flush your plants regardless of what means of fertilization you chose, although it is not necessary when growing organically. The plants will draw energy from it's leafs and direct it into the flowers. At this stage the underlying colors of the carotenoids and micronutrients will become apparent. The plant might display an array of beautiful colors ranging from deep purple to orange and red.
Keep in mind that you can also foliar feed your plants by spraying the top but especially the underside of the leafs with a weak nutrient solution. Plants love this.
Always make sure that the pot you use have holes in the bottom to allow the excess water to drain off. If you have solid pots water will gather at the bottom and eventually go sour, causing problems with ph and possibly root rot. Plants do not like wet feet. Also remember that you need to add something to the soil to keep it from packing together and essentially turning into mud. Something like say vulcaponic will do.
A large pot is always better than a small one. More space equals more root mass which in turn equals bigger plants. In the end its all about roots. You can always repot your plants once they gain size but generally it's better to start them in the pot that they will use throughout their entire lifecycle. Sometimes it is more practical to start them in smaller pots, say if you start more plants from seeds than you will have room for. Then you need to sex your plants and as soon as you find the females, repot them into a pot of decent size. It all depends on how much room you have but generally a 10L or 2.6 gallon pot will do. I use slightly smaller pots so that I will have room for more plants. Pot size also determines the final size of the plant so if you want them to stay a bit smaller, use smaller pots.
Cannabis plant can handle a wide range of environmental fluctuations but a temperature of 25-27 degrees celcius or 77 to 81 degrees farenheit is generally considered the optimal. Your plants can handle lower and higher temperatures but once you get to the extremes your plants will suffer from stress related symptoms, so try your best to keep it inside the good range. When the temperature gets really cold, photosynthesis stops and the plant goes into hibernation. If the temperature drop to freezing the plant gets frostbite and severe tissue damage as water is essentially its blood. Too high temperatures will also harm your plants, a good rule of thumb is that the ambient temperature should be pleasant, like a warm day at the beach say.
A ph or 6-7 is optimum which can easily be regulated with ph up or down. You can get a successful grow by mixing nutrients into the soil and then just let the plants extract what they need throughout the grow, but if you intend to feed the plants liquid nutrients in order to improve on taste and scent you will need a couple of things. In order to adjust the ph of your nutrient mix you will need some PH+ and PH- solutions and a pipette. You will also need some means of measuring the ph. There are a few alternatives, one being litmus paper, another a drop tester, or if you want to go high-tech get an electronic meter. They are however quite expensive and you won't really need to be that precise unless you growing hydroponically. If that is the case you will also need an EC meter that measures the electroconductivity or salt concentration of your nutrient solution. Soil is more forgiving due to the slow uptake of nutrients so you get away with more flux.
There are several more things that affect the health of the plant, like the hardness and calsium content of your tap water etc. etc. Just make sure that you provide the best environment that you can for your plants.
It is also good to have a fan blowing over the plants as this will make them grow thicker stems. It is however not necessary to use a fan if you provide other means of support like a scrog net or the like. Personally I do not use a fan because I like to keep my setup as silent as possible, which means that I have noise-insulated exhaust etc.
kiss-ass
By SCROGGING I am referring to the grow style where you have your plants growing through a net. The goal is to fill the entire surface area of the net with budding flowers in order to maximize the crop. There is another grow style too, called SOG or sea of green. Here you plant a whole bunch of plants in smaller pots which means that you harvest the main cola of say 30-50 plants instead of of growing a few larger plants. Sometimes this might be the way to maximize yo ur crop but that all depends on your grow room setup.
The rate of photosynthesis is directly related to the availability of CO2 so talk to your plants!
Some grower who want to give their plants the best possible environment will rig up bottled CO2 with a slow-release valve and use air conditioning to keep the temperature in the grow room at optimal levels. Anything is possible.
Seed Germination
There are several ways of germinating seeds, where the most common is to place the seeds between a few sheets of wet paper towel. This is probably the best method but seeds will also germinate when planted directly into soil.

After placing the seeds between the paper towels, put them in a box and keep the paper towels wet at all times. Applying some heat underneath the box (like placing it on the heating element/radiator) will effectively turn the box into an incubator and the seeds will germinate faster. Once the taproot has cracked the seed and emerged, it ready to be planted into soil.
Sometimes you will run into tough or old seeds that fail to germinate. There are a few ways of getting them to germinate.

Old seeds or seeds with a very thick outer shell can sometimes fail to germinate because the seed coat is so hard or thick that the moisture never gets inside the seed in order to trigger germination, or even if the seed germinates, the taproot lacks the strength to emerge.
Method 1:
Take a really sharp knife, a scalpel or maybe a carpet knife will do. Something really sharp anyway, the smaller the blade the better as this is precision work. Hold the seed between your fingers and chip the outer shell /seed coat at the bottom (sharp end) or in the middle. This will expose the "seed embryo" to the moisture of the paper towel. If you chip the seed coat at the top, the taproot might try to work it's way to the other side inside the shell and usually the seed dies before it succeeds. The trick here is not to hurt the innards of the seed in any way. If you chip too deep you end up slicing the embryonic seed and then it's goodbye for that one.

If you look at the picture above you can see how the seed coat is chipped. This method is so effective that seeds usually germinate within a few hours after a piece of the coat has been removed.

Using this method I have managed to get high germination rates upward of 75% with really old and tough seeds.
It's a gamble but if done carefully it will work almost every time.
Method 2:
This is the safer option with less change of ruining the seed. It might take a little bit longer for the seed to germinate than with method 1 but still pretty fast compared to regular germination.
Use fine grain sand paper and carefully thin out the seed coat until it looks like there is only a very fine layer of the outer shell left. That's it.
Both methods increase germination rates considerably.
Vegetative Growth
In my experience it is of great benefit to the plants if they are kept in a vegetative state for at least 6-8 weeks or basically until they show fully developed preflowers. Keeping the relative humidity high in the grow room during this stage will ensure that your plants are happy campers, I keep the RH above 80% by using a humidifier. I rarely see yellowing of the leafs unless or other problems unless I give the plants too much nutrients by mistake, which rarely happens. By keeping the RH high the leafs become nice and thick and you will also se more roots forming on the main stem even in places where it is not covered by soil. These are called "adventitious roots", more on that later.
One good way of telling how your plants are doing is looking at their leafs. When plants are well fed and happy the leafs have a deeply green colour and they point upwards, towards the light. When your plants are hungry the leafs will lose their colour and look bleak. If the leafs are drooping they probably need some water. Mild nutrient burn is not uncommon as all plants behave differently, but if that occurs, just feed that plant less nutrients. Sooner or later you will find the optimal amount of nutrient to feed your plants.
Here are some plants in vegetative state, happily gaining size under the blue light.
If you are growing plants from seed you'll have no idea whether they are male or female unless you are growing feminized hybrids. Preflowers are small flowers that appear at each node of the plant once it reaches sexual maturity. There are a ton of information relating to this topic but basically female plants produce a small elongated pod with white hairs sticking out of it. Males produce balls that stack together like clusters of grapes. To the trained eye these are very easy to tell apart. If you wait long enough the white hairs will be recognizable by the naked eye but if you wish to determine sex earlier, use a magnifying loupe with at least 10x magnification. Undifferentiated vegetative growth at the nodes can sometimes be mistaken for flowers but if you wait long enough you will be able to tell the difference.

These pictures might be of help when you are trying to determine the sex of your plants.
You might get around to cloning you females and clones can be started under 12/12 from the start since they are already mature so the transition into flowering is rather painless. Generally though, it's a good idea to wait until the clones gain some size before flowering them. It is good to keep in mind that although your plants will mainly concentrate on growing flowers, they will also direct some energy to vegetative growth during flowering as well, especially tropical sativas.
Training and Pruning
Chose a number of main branches that you think will be the strongest ones and remove all other at an early stage. Investment planning for the plant will ensure that you get a big harvest of high quality mature bud from a few branches instead of a mediocre juvenile harvest from a bunch of smaller ones. The number of branches to keep is naturally dependent on strain and individual plants. Popcorn buds on the lower branches will never reach maturity and therefore a complete waste of energy resources (energy sink).
Topping, pruning and Low Stress Training (LST) is a very good combination when growing indoors, especially when using a SCROG net. Most of the time this will ensure a larger crop than if the plant was left to grow in the Christmas Tree shape. This is naturally dependant on both strain and the individual plant in question. Some plants do not like to be topped and will resist any attempts. Some plants seem to stop growing for up to two weeks when topped, this indicates that it will rather grow one main cola instead of several smaller ones.

Low stress training means that you tie the top/tops of the plant at ground level. Because the auxin transport system (plant growth hormone) is located in the main shoot, the plant will assume that the lower shoots are now the main shoots and send them upwards. These can in turn be tied down to repeat the process. If the tops are tied in a circular fashion the plant will grow into a dense bush.
Every time a branch is topped that branch will produce twice as many tops. Topping once will result in two tops, topping twice will result in four tops etc. It will always take a while for the plant to adjust to it's new condition so don't worry.
This method is especially beneficial if limited space is of concern. Here is a Ingemar's Punch plant that went through extensive training. This example is a bit extreme but it proves a point.
Successful FIM (Fuck I Missed) topping is the best method. This means topping the plant in manner that leaves some of the tissue intact on the topmost node. This will make the plant grow 4 main colas instead of two. The success of this method seems to be the luck of the draw but the same result can be achieved by topping the plant several times over.
If you need more information on topping, training and pruning, have a look at my extended guide on that topic.

My Take on Different Light Schedules
I have grown cannabis under many different light schedules in many different combinations and here is my take on it. Im leaving out combinations that did not differ much from the ones listed here. I have not considered problems with space in grow rooms here. Basically if you are running a small cab or pc case grow, grow lowryders for best result.
24/0 --> 12/12: After many grows I have noticed that running the lights 24/7 in the vegetative stage is of little use compared to 20/4 or 18/6. I also think that constant light without a rest period is not beneficial for the seedlings, puts your equipment under unnecessary stress and runs up your electric bill for no more than a 5-10% increase in weight, at the most. It can be said that this is unnatural but then again, periods of close to 24h sunlight during summer days is not unheard of in arctic regions. On the other hand, how would you cope with around the clock work and no sleep? The dark reactions are important for the plant to build up and move around essential biological components, ultimately it affects things like resistance to stress and sufficient root structure for further development. Furthermore, the 12/12 stretch becomes unnecessarily long due to the big difference in daylight hours. Hey! Where did the sun go?
20/4 --> 12/12: This is a kinder option for the plants, your equipment and your electric bill. This gives the plants some time to rest and your equipment time to cool down once and a while. I run the lights over my mother plants with this light schedule, the light is on a timer and turn off for an hour four times a day. Four consecutive hours of darkness are sufficient for the dark reactions but still, the 8 hour jump after the switch to 12/12 is a bit of a stretch.

18/6 --> 12/12: This is a valid option to the light schedule above. Not that big a difference in final stretch as the stretch caused by increased dark hours in the vegetative stage evens out with the lesser stretch in early flowering stage after the 12/12 switch. The plant might be a bit stronger under this light schedule compared to the one above as it has some time to rest. 18/6 is no where near the equatorial daylight length that sativas are used to but is suitable for both indicas and sativas during the vegetative stage.
20/4 --> 18/6 or 16/8 --> 12/12: This is a good option, at least when growing from seeds. This light schedule gives the plants a chance to prepare for flowering in good time with minimal stress. I run the lights 20/4 for about two weeks, then switch to 18/6 or alternatively 16/8 for another two weeks and finally 12/12 for the duration of the flowering stage (I usually drop the daylight hours to 11/13 in late flowering, this benefits especially sativas but works well for indicas too, don't go much lower though).
20/4 --> 18/6 --> 16/8 --> 14/10 -->12/12: The best option. Same as above but a little more work. Depending on the length of desired vegetative growth, decrease daylight by 2 hours every 7-9 days. If you are going to take the time to grow weed, why not take the time to reprogram your timer?
12/12 from start: This is good when flowering clones but can also be used on mostly or pure sativas. I always clone the strongest females and keep them in a constant vegetative stage in a separate grow room. Once my harvest is done, I take a clone of the mother plant and move it into thekiss-ass flowering room. Usually the mother plants have several months of vegetative growth as well as rigorous training under their belts, so these heavy duty bonsai plants are well established, strong and produce monster crops. Their stems are usually as thick as my thumb when they go into flowering.
Thats my take on it. I think that its pretty close to the truth, considering natural environments and chemical processes that take place in the plant under different stages of their life cycle. Some people also swear by unorthodox light schedules outside the natural ones but I cannot expand on this subject because I have not tried it myself.
Flowering
What we talking about when refering to bud are unfertilized female flowers, or sensimilla. As long as the female plant remains unfertilized, she will continue to flower and thereby also produce Tetrahydrocannabinol or THC, the main psychoactive substance found in the Cannabis plant.
Once the plant enters the flowering stage, it will produce this substance in abundance. The quality and quanity of the finished product varies according to strain and growing conditions.

The most important thing to remember during this stage is that absolutely no light may reach the plants during the dark hours as this will interfere with flowering and might even stress the plant into sex reversal. A light sitting on the opposite side of the room is enough to confuse the plants so make sure that you have complete darkness in the growroom. I am talking pitch black here.
The flowering time stated for a certain strain by the seed provider is a general guideline and will seldom correlate with the exact flowering time in your own garden. Usually these flowering times reflect the time it takes for plants to mature under optimal conditions like in large greenhouses where the environment is precisely controlled. Trust your feelings, harvest the plant when it looks ready and forget about counting weeks. Most plants will take from 2-4 weeks longer than stated to mature properly according to my experience. The flowering time can range anywhere from 6 weeks for fast indicas to 20+ weeks for pure tropical sativas.
Once the plants have started flowering, never spray the flowers with water and always try to keep the relative humidity as low as possible during flowering to minimize the chance of mold. Do not foliar feed the plants once they go into flowering.

Patience always pays off in the end. The decision to harvest too early will always result in a smaller harvest. Cannabis plants usually go through two to three bloom explosions during flowering, when the bud mass essentially doubles each time. The first bloom explosion can be expected after 4 weeks of flowering, the second at 8 weeks and so on depending on the strain and the individual plant. Trust your feelings. Harvest the plant when it is ready.
Sometimes you have to wait a long time, I grew some monster Super Silver Haze that took 17+ weeks to finish as it was a Neville's Haze dominant pheno. I could have harvested two crops of indicas in that time...so was it worth it?

Hell Yeah! (Click the link for a detailed grow report on the Super Silver Haze)
There are three types of trichomes but the one we want in abundance is the capitate-stalked glandular trichome that looks like a mushroom. The peak of thc production is when 50% of the capitate-stalked glandular trichomes have turned from clear to cloudy, with a few amber ones here and there. Clear trichomes have not yet matured but cloudy ones are at their peak. Amber ones contain mostly CBN and have already passed the peak.
Read more about trichomes here
The biosynthetization of Delta-9-Tetrahydrocannabinol inside the trichome goes as following:
Cannabinoid production starts with formation of CBG (cannabigerol). From here it is independently processed into either:
1. CBC (cannabichromene), non psycho active "energy-storage" compound which is readily converted back to CBG if needed.
2. CBD (cannabidiol), the body stone effect, which is the precursor of THC. It also affects how the THC hits us, effectively improving on the high. (So high THC low CBD isn't necessarily a good thing). CBD also have some medicinal properties, making a high CDB value good for medicinal strains. CBD is then enzymatically cyclized to THC.
CBD --> THC (delta-9-tetrahydrocannabinol), the cerebral high that sometimes border on the psychedellic. A very high THC content can also increase your pulse and cause paranoia.
Note the trichomes in this picture. They look like crystal mushrooms but are actually spherical containers for the THC oil.Keep in mind that every time you touch a bud you are breaking these fragile structures and THC evaporates into the air, which is why I try not to touch the buds unnecessarily during flowering. On the other hand, there is enough to go around so don't worry about it too much.
THC --> CBN, in late flowering and with trichome age, THC starts degrading into CBN (cannabinol). This also means that the THC on buds sitting in a jar will also eventually degrade into CBN and other lesser cannabinoids. It might taste great and be smooth smoke but probably less potent than when it was harvested. This is why we store the buds in air-tight jars and in darkness, we hope to reduce the the rate of THC degradation.
Cannabis sativa strains usually have a higher THC content than their indica counterparts. Pure sativas can carry a stratospheric, and sometimes creative, cerebral high so strong that you'll be blown into next dimension. Indicas on the other hand can pack a strong narcotic stone so numbing that you lose the ability to speak, let alone think. That's why they are good pain killers. Indicas also contain higher values of the therapeutic CBD cannabinol, especially landrace indicas. Cannabis Ruderalis contains almost no THC and is mainly used for making autoflowering hybrids.
THC is quite a complex compound that binds to several cannabinoid receptors in the brain in various ways depending on the presence of other cannabinoids. The rate and quality of the synthesized THC is also dependent on the availability of nutrients, environmental factors like humidity etc.. I like to keep a very dry environment during flowering because I believe that promotes THC synthesis.
THC has many uses for the plant, including fighting off pests (pesticide), prevention of desiccation by the means of binding solar energy so that it will not harm or cause mutations in the plant, and to some degree keep the buds dry due to the fact that THC oils are hydrophobic. Cannabis plants can actually kill insects because they get stuck in the sticky resin. Once stuck they die and start to slowly dissolve.
Now, the reason why many scientist have proclaimed that uv-b radiation is important is because it fully activates the CBG --> THC synthesis. Not only that, but it can also activate a secondary metabolic pathway, which means that the road to THC synthesis becomes a "dual-lane" one. I'm guessing that the CBC pathway skips the CBD step and the compound is converted directly into THC. Twice the production that is. No matter how you twist it, I bet that cannabis grown on the top of the Himalayas is always more potent than indoor bud.
I'm sure that many will agree that bud grown under the sun will most of the time blow indoor bud out of the water in terms of potency. The incredible power of the sun cannot be matched by man-made instruments. Sticky and Heavy.. Taste and smell however can be more refined in indoor bud as we can control what we feed them. Outdoor bud usually has a feral taste to it. Not that it's unpleasant, not at all, the wind and the rain all leave their mark on the buds and you can really taste the difference.
The whole process of THC synthesis is naturally heavily dependent on the sum of all the factors, but providing optimal soil goes a long way, so I think it's always wise to give the plant a good start.
kiss-ass
Another way to go is to harvest when 50% of the visible hairs on the bud have turned brown but this is a very rough indicator.
You will always have bud that is in different stages of maturity as the plant keeps flowering and forms new buds all the time. New flowers actually grow on top of old ones, so you get a layer of bud. Just make sure that the bulk of the crop is ready before harvesting. Or just harvest the top half of the plant and leave the bottom half flowering for another month or so. Those popcorn buds will eventually pack on weight, but personally I do not think that it's worth the wait.
One thing that is of major concern when it comes to the flowering stage is the stretch that plants go through when the light regime is changed to 12/12. If the difference between the vegetative and flowering light regime is great, the plants will also stretch more. It is more natural for the plant to be gradually introduced to the flowering light regime by shorting the day length in the manner explained above.
Another thing that reduces the stretch is keeping the blue light present during the first two or so weeks of 12/12. Personally I leave the metal halide bulb in for this period of time before switching to the high pressure sodium bulb. The same applies to compact flouros of corresponding spectrum.
It can be debated whether or not plants increase resin production under stress. Personally I try not to stress them too much as there is a difference between stress and torture. I have found that keeping a dry environment with high light intensity seems to promote resin production.
I believe that providing the optimal environment for the plants will ensure that they express their true potential without the need to stress the plant beyond a certain point.
Drying, Curing and Storing
No big secret here, just dry the buds first slowly by air and then allow them to cure in mason jars or something similar. The taste and smell of the bud will improve with time like fine wine, just make sure that the containers are air-tight and stored in a dark place as both light and air will speed up theTHC degradation process. Over time the THC will degrade to CBD no matter what so you might get a smooth smoke but the bud will not be as potent as the day you harvested the plant.
When you have harvested the buds you will probably want to manicure them by removing excess leaf matter as this will give the buds more "bag appeal". It won't change the finished product but makes the buds more pleasing to the eye. Usually when you do this you end up with sticky resin on your fingers and the scissors you are using. Collect this black tar and roll it up in a ball, this is called charas or finger-hash. A very small amount of this stuff is enough to send you into orbit as it is almost pure THC.
Cannabis be turned into hashish by collecting the trichomes (kief) with a kiefing screen or sieve and pressed together into a solid form. The holes in the screen have to be small enough to only let the trichomes pass through. The kief can also be smoked as it is but it is easier to handle and store when pressed into one solid brick or ball. There are several methods of collecting kief and turning it into hash, so look up a thread if you need more information on the subject.
One thing that many overlook is that if you store your buds in a plastic bag, a lot of the trichomes will fall off over time and accumulate in the bottom of the bag. If you place the bag in the freezer for a day, you can easily scrape off the kief with a knife and then smoke it. If you store your buds in a jar, once it is empty add some water to it and shake for a few minutes, finally sieve the solution through a coffee filter and you will also end up with some kief.
Cannabis can be used in cooking to make everything from "cannabutter" to "space cakes" or whatever one chooses. There are detailed posts here on the forum on how to cook with cannabis. The easiest method however is to heat some bud in water on low heat with some real butter. After some time when you feel that most of the THC has bounded with the fat, sieve the liquid into another container in order to remove the plant material. Then allow it to solidify in the fridge or freezer. Once solid, the "cannabutter" cake can be removed and used in cooking.
Keep in mind though that enough heat will make the cannabinoids evaporate:
THC has a boiling point of 200°C (392°F). However before the THC boils, other parts of the oil evaporate and boil.
Here are some important temperatures:
At 21°C (70°F) - the most volatile terpenoids start to evaporate, lending a pungent odor to the air.
At 31°C (87°Fkiss-ass) - the less volatile terpenoids start to evaporate, lending the air even more pungent odors.
At 39°C (102°F ) - virtually all of the terpenoids undergo evaporation fairly rapidly.
At 50°C (122°F) - THC-Acid decarboxylates as the water molecule held in the carbonate form evaporates. This activates the THC.
At 66°C (150°F) - Cannabidiol (CBD) melts and starts to evaporate.
At 185°C (365°F) - Cannibinol (CBN) boils.
At 200°C (392°F) - THC boils. Clear vapor from a vaporizer.
There are other methods for extracting THC from plant material but turning it into butter is the easiest way.
The Overlooked Secrets of a Bountiful Harvest
One of the easiest ways of improving on plant health and maximizing plant potential is in my opinion the use of the symbiotic root fungi or mycorrhiza in the soil. This fungus has had a mutualistic relationship with plants for over 400 million years, 92% of plant families and 80% of all known plant species form this relationship in the wild.
The fungus connects to the plant roots effectively increasing the root surface area and therefore nutrient uptake considerably. It also functions a skilled mediator between plant and soil, buffering out nutrient problems and improving on plant resistance. You can buy spores of this stuff in more advanced grow or garden shops or order it online.
Here we have an example of a plant that has formed a symbiosis with the root fungus. You can see how the thin white microfilaments of the fungus radiates from all the roots. Mycorrhizal mycelia are much smaller in diameter than the smallest root and can explore a greater volume of soil, providing a larger surface area for absorption, thus improving the nutrient absorption capabilities of the plant roots.
Studies have shown that mycorrhizal root systems increase the absorptive area of roots 10 to 1000 times thereby greatly improving the ability of the plants to utilize the soil resources. In the great outdoors this relationship is always present in the plants that can form it in the first place. Usually the strain of mycorrhiza is restricted to a certain plant but the good news is that since cannabis is a weed it can form this relationship with a wide range of mycorrhiza species. More proof of how this amazing plant is superior to many other.
Read more on symbiotic mycorrhizal fungi here
There are also other organisms that one can add to the soil in order to improve on crop, one of them being the streptomyces actinobacteria which can also be found in compost. It kills mold, improves on plant health and is responsible for the production of natural antibiotics in many plants.
These two work especially well together as they reinforce each other.
A final note on this subject is the use of companion plants like chamomille. Chamomille is said to be a sort of plant doctor that assists other plants in many ways effectively making them grow stronger. But more importantly, this plant is often grown alongside herbs like basil in herbal gardens because it improves on the production of essential oils (THC in cannabis) in other plants, making them taste and smell stronger.
I am currently experimenting with this and will report whatever I find. Im hoping that this companion plant will greatly improve on the quality of my buds, if it works on basil I don't see any reason why it wouldn't work on cannabis too.
Cloning
Cloning a plant means that you take a cutting from a larger plant and persuade that cutting to form roots. This is possible because any part of the plant is capable of producing roots.
The most common method is to cut one of the smaller branches from the lower part of the plant and put in some sort of rooting medium. There are several methods for cloning plants, which include water cloning, straight to soil or using rock wool cubes. Personally I use a cloning bubbler which is essentially a small hydroponic setup with a container, an aquarium air pump, a hose and an air-stone. I then suspend the cuttings in the water medium while the pump provides oxygen for the newly cut clones as that is the most important component for the formation of new roots.
This method is so successful that I pull clone after healthy clone out of this contraption. I cannot think of a better way to do it, most clones root within a week or two. This is good because until the plant roots it will have to survive on the energy stored in its leafs.
Click the link if you want to know how to build the Propagation Bubbler
It is a good idea to dip the cuttings in a rooting hormone like clonex before planting them in soil or rock wool cubes. Adding general plant hormones like the auxin found in seaweed extract will also speed up the process.
The reason why cannabis plants can be cloned is that it is capable of forming so called adventitious roots on any tissue. This is also why we see new roots growing on the stem in humid environments. If you intend to repot you plants at some stage, always plant them a bit deeper than before because new roots will form on the sections of the stem that are covered by soil.
It is also possible to clone plants in flowering but I have found that it is very rarely that it succeeds, so always make sure that you have clones of each plant you intend to flower if you aim to keep mother plants. Once the plant has switched to flowering mode , it is very reluctant to revert to the vegetative stage. Take your clones as soon as you can and take lots of them as you never know how the cuttings will behave, some root faster and others take a long time.
Clones and mother plants do not need very strong light as the purpose is merely to keep them alive and not have them grow to monstrous proportions. A low wattage cfl will do the job. Trimming both the green matter and roots might become necessary at one point or another.
Most cannabis mother plants can be kept alive for a very long time. Once the mother plant loses vigour you take a new clone and start over. This is why there are so many commercial crosses out there of the legendary G-13 mother. Here I would like to point out that no G-13 father was ever obtained so there cannot be any pure G-13 seeds out there unless the plant was selfed through hermafroditism. Most of the time we are looking at G-13 crosses.
Finally a very important note. Be very careful if you accept clones from friends. Although the gesture is noble, sometimes they can carry pests and often you will have to completely disinfect your grow room to get rid of them. And by disinfection Im talking laboratory procedures here like boiling the loose equipment like pots and what not, heating soil in the oven etc. etc.
Plant hormones
There are three main types of plant growth hormones; auxin, cytokinin and gibberellic acid. These regulate the way that plants grow by affecting the rate of cell division, cell elongation etc. Kelp or seaweed extract is an outstanding source of plant hormones. Seaweed and algae have no roots and are either free-floating or merely anchored to the sea floor. Sea creatures constantly nibble on them which means that they need to rapidly grow more mass all the time so they never cease to produce these hormones. Cannabis plants can easily extract these plant hormones from water making them stronger and improve on everything from root development in clones to vegetative and flower growth in mature individuals.
Basically its like putting your plants on steroids.
Please note however that plant hormones can also interfere with sexual development to some degree. Using too much of it might trigger hermafroditsim more easily in plants that are genetically prone to the condition. Heavy use of gibberellic acid has shown to trigger hermafroditism so use the stuff wisely.
Hermafroditism and Feminized Seeds
The term "hermaphrodite" derives from Hermaphroditus, the son of Hermes and Aphrodite in Greek mythology, who was fused with a nymph, Salmacis, resulting in one individual possessing physical traits of both sexes.
The question whether it is a good idea to grow cannabis from feminized seeds can be disputed.
On one hand you have seeds that will produce female plants to a certainty of 99%. On the other hand you have the genetic makeup to consider. Feminized seeds are produced by allowing or chemically inducing hermafroditism in a female plant, which is then used to fertilize either itself or other female plants. Thusly the genetic makeup of the offspring consists of 100% female genes. The plants grown from these seeds will either be female or hermaphrodites.
The reason why these seeds exist in the first place is that they remove the need to sex plants before flowering which saves growers a lot of time and trouble. If one has the sole intention of growing and flowering plants for a sensimillia crop, the feminized seeds represent a valid choice. These plants may or may not turn hermaphrodite. If they are somewhat resistant to this condition in despite of the hermaphroditic parent or parents, the grown feminized plants can also be cloned and kept as mother plants in order to produce several crops of the particular strain. The more stable the individual plant is, the more suitable it is for cloning.
However, and this is the point of this debate; if one has any plan of ever using the plant to produce seeds the genetic makeup is invalid for this purpose. This is because the feminized plants carry genes for the hermaphroditic trait that is dominant in cannabis plants. The hermaphroditic parent or parents were chosen because they carried the gene for this dual-sex condition. Therefore some, if not all of the offspring from this plant will have a tendency to become hermaphroditic under stress or even spontaneously under favorable conditions. When it comes to breeding, this is naturally a very undesirable trait. Since hermafroditism is a dominant trait it is likely that from the second generation (F2) onwards, more and more plants will display this trait.
Hermafroditism also occurs spontaneously in cannabis plants in nature as an emergency response to the absence of either sex in a colony, also observed in frogs.
Although hermafroditism is a naturally occurring phenomenon that favors cannabis in the wild, normal diecious individuals can also display this trait in unfavorable environmental conditions. Some examples are too high or low temperatures, light leaks, over-watering or over-fertilization. The absence of males might also be enough for the females to change sex, this is however not a proven fact just an educated guess. Normal plants will most likely turn if they are genetically prone to this condition. Once turned, these females will form modified or incomplete pollen sacks that look like bananas which are hard to notice and usually end up pollinating the entire sensimillia crop.
It is more common that female plants produce staminate parts than vice versa, although both have been reported by growers. Male plants that are flowered for an unnaturally long period of time indoors have been known to produce female flowers and the distinctively familiar and sticky capitate-stalked glandular trichome.
Feminized seeds can produce really nice female plants that remain stable throughout flowering but there is always the risk of them turning hermaphroditic. Under optimal conditions one might not even notice the heritage as the plant behaves like a normal female. However, since the parents carried the gene, with enough stress any feminized plant will eventually turn and pollinate your sinsemillia crop.
Pests
There are several different pests that attack cannabis. They range from the most harmful spider mites (The Borg) to the relatively harmless fungus gnats. Some of these pests are really nasty and can wipe out your entire grow. The fungus gnats are so common and harmless that Irarely bother to wipe them out but if you encounter something more threatening the only way to go is to disinfect your grow room. The most secure way is to scratch the grow and replace the soil as well as every pot you used. If you chose to disinfect you need to use neem oil or pyrethrine in order to get rid of the pest or some sort of homemade pesticide.
This recipie works great on most pests:
Soak a pack of strong cigarettes in water of night. Then boil some water with strong chili peppers in it (Im talking high on the scoville scale here). Once it cools down, add the nicotine water to it, then some cooking oil and soap. The thought behind this is that the nicotine will poison the bugs and the capsicum from the peppers will burn them. Insects breathe through holes in their bodies called tracheae, so the soap and the oil will clog these holes and the insect will also choke to death on top of everything else. I used chili strong enough to burn my hands and the gnats were killed instantly dropping down in mid-air. It also worked on aphids.
I have personally never had the misfortune to experience a spider mite infestation on any of my grows but some friends were not as lucky and they said that the damned things just keep reappearing over and over again so be careful when accepting clones and especially when bringing outdoor plants inside.
Breeding
From every seed the promise of new life.
No plant is the same, they all have different genetic makeup. The only exception is clones. Since they are in all ways the same plant as the mother, their genetic makeup is identical. That is why you need to clone plants that prove superior or if they have qualities and traits that you like. This way you can preserve and grow the same crop over and over. Cannabis is not the easiest plant to clone but not the most difficult either. The chance of successfully cloning a plant depends on the strains, the methods and so on.
Genotype is the genetic makeup of an individual and phenotype is the physical expression of those genes.
When it comes to breeding we get genetic recombination of the genes, 50% from the father and 50% from the mother. Since the genetic makeup of plants is so complex there really is no way to predict which of the original traits will be preserved in the offspring and how new ones will form. The only thing that can be said is that the offspring will show similar traits to the parental strain but this is heavily dependent on whether or not a particular trait is dominant or recessive.
Some traits are dormant or inactive and will only be activated if the alleles of that particular trait correspond in the genes of both parents. This means that the offspring will display some/none/all of the traits of the parents but new ones will also form depending on the genetic recombination.
The F1 or first generation of plants will be quite uniform in appearance but once you reach the F2-generation, you will get individuals with a wide range of traits inherited from the parents. In order to get uniform plants that resemble the parent, you need to isolate traits by backcrossing the offspring to one of the parental plants. This is effectivelykiss-ass inbreeding which is naturally unfavorable as genetic anomalies may occur because the same genes perform the recombination and the gene pool is restricted. This method, referred to as cubing, is sometimes used to preserve a particular trait and will result in uniform or true breeding IBL seed lines. Crossing the plant to a new one will however produce very healthy offspring because the gene pool is expanding and the genetic recombination gives rise to hybrid vigour.
Ill take the example of the Lowryder strain to prove my point here. The aim is to preserve the recessive autoflowering trait:
a = recessive autoflowering trait
A = dominant normal flowering
aa x aa = 100% aa F1 = 100% of the offspring carry the autoflowering trait in this (lowryder x lowryder) cross.
aa x AA = 100% Aa F1 = The recessive gene is masked by the dominant gene but the offspring carry it as well.
kiss-ass
aa x Aa F1 = 50% aa + 50% Aa F2 = 50% of the offspring carry the autoflowering trait in this (lowryder x normal X) cross where the normal plant carries the recessive gene.
If we then take one of the autoflowering F2-individuals and cross it to a true lowryder we get the same result as in the first example, 100% autoflowering offspring.
So, if you want to make a new autoflowering lowryder hybrid, you have to backcross it twice to true breeding lowryders in order to preserve the autoflowering trait in the new hybrid. Remember though that this F3-offspring only carries 12,5% of the genes from the non-autoflowering parent. In order to increase this percentage you have to start the process all over again.
Some traits might be controlled by several genes which means that the odds are even smaller that this particular trait will be expressed, especially if it is recessive.
The same goes for every trait of the plant, everything from potency to colour so my recommendation is to only use the strongest plants you can find for breeding purposes.
If you are planning on making your own hybrids, it's not a bad idea to read up a bit on Mendelian Genetics
The actual act of fertilization is no big mystery. I will not go into it in great detail here but one male carries enough pollen to pollinate a whole bunch of females. Once mature, the pollen sacks spring open, dispersing the pollen. It looks like fine yellow powder. The pollen can be collected and stored in the freezer for up to six months, after which it is no longer viable. Seeds on the other hand can be stored for decades as long as they remain in a cold environment. Seeds as old as 30 years have reportedly germinated.
The best way is to allow one male to pollinate all the females chosen for the breeding project. If you have several males of different strains, you will have no idea which male pollinated which female. You can have several males of the same strain pollinating females, but usually the strongest male is chosen for the job.
In order for the pollen to be spread around you can have a fan blowing over the plants or just shake the male plant now and then, as this is enough for the pollen to reach the females if they are in close proximity. Once the females have been pollinated, it takes about 6 weeks for the seeds to be ready. You will know when they are ready because they will fall to the ground. Once you see that a few seeds are ready you can harvest the whole plant. Its a lot easier to separate the seeds from the bud if you allow them to completely dry up first.
One way of telling if the seeds are ready is to look at the colour and texture of the seeds. If they have a nice dark brown colour with stripes on them, they are ready. Not all seeds are striped however but most are. Seeds can range in size from very small to quite large. Seed size is both genetically determined but also by the degree of pollination. A slightly pollinated female will generally produce a smaller amount of large seeds while a heavy pollinated one produce lots of smaller seeds. The rule of quality vs. quantity applies here.
Herb is for the use of man
It comes from the earth. Cannabis plants have a wide variety of uses, ranging from it's psychoactive and medicinal properties to fiber hemp used to make fabric, fuel and building material.
All and all it is a very versatile plant.
Cannabis has been grown for a very long time. The oldest stash of seeds and bud ever found was 2,700 years old and was discovered on two mummies in china. The research team could not get the seeds to germinate and the THC in the bud was long gone but this proves that we have a long history of cultivating cannabis.
The very fact that we have receptors in our brains which sole purpose is to bind cannabinoids, proves a strong point for the recreational, spiritual and medicinal use of cannabis.
This guide contains information on how to grow, flower and harvest your crops, what equipment you will need and how to setup your grow room.
Indica / Sativa / Ruderalis
Cannabis Sativa is a diecious equatorial plant that originates from tropical regions of the world. The length of day and night is about 12/12 in these regions and that is what sativa dominant plants are used to. It is perfectly acceptable to grow tropical sativas under a light regime of 13/11 during vegetative growth and to flower them under 11/13. Sometimes sativas wont even flower under 12/12 as it is so close to home that they just keep on growing. Sativas take longer to flower than indicas, usually twice as long
Cannabis Indica on the other hand is a subspecies of Cannabis Sativa that has adapted to the colder climates and shorter days further up north from the equator. Most indica plants will remain in a vegetative state until the the light regime is changed to 12/12, with some variation between strains. Some early indica strains will flower under 18/6. Indicas have thicker and broader serrated leafs than sativas and the buds are usually more compact, sometimes even rock hard. They stay shorter and grow wider than sativas, often branching out heavily with frequent internodes.
Cannabis Ruderalis is also a subspecies of Cannabis Sativa which originates from sativa plants that escaped from outdoor plantations in northern Russia. Because the day can be very long in these areas, reaching up to 24/0 in the summertime, the plants developed the unusual ability to flower under any light conditions.
Some commercial strains like Lowryder, Mighty Mite and Stuporsonic carry ruderalis genes which means that they can be grown outdoors in arctic regions of the world.
It is more difficult to grow sativas because of the way they behave but once you learn how to grow them properly, growing indicas becomes a breeze. Indicas have a more predictable growth pattern, they can be kept quite low and do not stretch as much as sativas. The closer you get to a pure sativa, the more trouble you are looking at. Some pure sativas just seem to grow forever and there is no real distinction between the vegetative and flowering stages. Not in the same way as indicas are concerned any ways. Often a good 50/50 mix will have the best of both worlds.
Equipment and Hardware
It is generally known that plants prefer light from the blue spectrum during vegetative growth and light from the yellow/red spectrum during flowering. Sources of blue light are compact flouros and metal halide gas discharge bulbs. High pressure sodium is currently the best solution for the flowering spectrum although there are also more advanced solutions. The gas discharge bulbs must be connected to a ballast in order to operate.
Naturally you will also need to put your light on a timer as pulling the plug every day during flowering is not a very practical solution. Make sure that the timer can handle more watts than your ballast puts out.
The gas discharge bulbs will always outperform the compact flouros, although they also do a pretty good job at close range. The benefit here is that cfls emit almost no heat so there is no need for noisy fans etc, which means that your setup is basically running silent. I have tried both and can honestly say that nothing beats MH and HPS in terms of plant vigor and health as well as bud development and crop size.
What is generally not known is that there are photosynthetic pigments relating to each spectrum of light, chlorophyll a (red) and chlorophyll b (blue) respectively. The plant is capable of producing more or less of each pigment in it's fan leafs, depending on what sort of light is available. That said, plants still grow stronger under the corresponding light for each stage of development but also benefit from receiving both during its whole lifespan as both pigments are active to some degree outside their optimal spectrum. A good compromise are light bulbs that emit a little blue light as well as the red light, like the Osram Plantastar for example, which I personally use during flowering with great results.
Always try to get the lamp as close to the plants as you can without burning them. The distance is good if you can keep your hand in place above the canopy for a longer period of time without discomfort. It is good to remember however that both HPS and MH bulbs put out a fair deal of light radiation so watch your plants. Most of the time it's not so much the heat as the infrared radiation that causes harm to the plant.
It is advisable to change the gas discharge bulb (MH and HPS) every other harvest or at least after four harvests, depending on the make of the bulb. You can find the specifications for your bulb on the manufacturer's website but generally HPS and MH lamps should be good for 10,000 hours of constant use.
Nothing is more important than stealth so make sure that you have some kind of odor control, either a carbon scrubber or an ionizer. The benefit of using a carbon scrubber is that you can hook the fan (and scrubber) to a cooltube or aircooled hood, therefore killing two birds with one stone by allowing the fan to both neutralize odor and cool the hot HPS or MH bulb. You can have the fan sucking or blowing air through the filter, both methods work but the filters are not designed to have air blown out through them so my recommendation is that you use them as they were intended. A high-performance fan, like say an industrial duct fan will also ensure that the grow room gets proper air exchange. This means that a lot of free CO2 will stream to the grow room and keep your plants healthy.
Personally I prefer the aircooled hood as cooltubes tend to create hotspots which basically means that the rounded glass of the cooltube works as a magnifying glass, burning the plants directly underneath it. Hoods also do a better job at dispersing the reflected light over a greater area as cooltubes usually come with a small reflector. If the light is dispersed over a greater area the ambient temperature also drops in the grow room and the plants receive more light.
Here is an example of how you can hook up your equipment. In this case I had to fit a lot of hardware into a closet and have since updated the setup but at least you get an idea of what I am talking about.
In terms of reflective efficiency, solid white surfaces do the best job reflecting upwards of 90% of the light emitted by your bulb. Second comes mylar with something close to those percentages. Avoid using mirrors in the grow room as they in fact absorb more light than they reflect.
A great addition to your setup is a humidifier or mister. This will ensure that you have a high relative humidity in your grow room. Since plants can also be foliar fed by spraying the leafs, they will be very happy with the constant supply of humidity and remain nicely green and healthy. One could even add nutrients to the mister if one wanted but I rather keep the machine clean and foliar feed manually.
The most important thing to remember is that you have to make your grow room entirely light proof, if you can see your own hand at close range it is not dark enough. It really has to be pitch black in the grow room during the dark hours or the plants will not flower properly or even become hermafrodites.
General Growing Information
It is always a good idea to mix fertilizers into the soil no matter what form of fertilization one intends to use. This will keep the plants healthy and they will also have something to fall back on in case they need to. Since plants need Nitrogen (N) during the vegetative stage and Phosphorus (P) during flowering, a mix of guano and bone meal with some blood meal will ensure that the plant has what it needs. The plant also needs a variety of other micro nutrients and trace metals in order to grow to it's full potential so the best advice that I can give is that you try to provide the best environment possible for your plants. Fan leafs (the big ones) are used both as solar panels and for storing energy. This is where most of the photosynthetic process takes place and where the bulk of the energy is stored.
There are mixed opinions whether or not to trim fan leafs but in general you should leave them be even if you are tempted to remove them. I sometimes remove the smaller leafs on the branches but leave the big ones alone for most of the time. The plant will decide whether or not the leaf is needed and relocates the energy stored in it if needed. The argument for removing them has been that they might prevent light from reaching buds sites in flowering but the counter argument would be that light does pass through the leafs although we cannot observe this with the naked eye. You decide, a third option would be to split the fan leafs in half allowing more light to pass through.
Remember that it is possible to feed your plants too much and cause nutrient burn. By doing so you may also create micronutrient lockouts which will resemble under or over-fertilization. By feeding the plant more at this stage you actually make things even worse. If you notice these symptoms, flush the plant with plenty of water and look up a nutrient disorder guide. I will not go into this here because there are a lot of good posts by educated experts on this forum regarding nutrient problems.
Nothing beats organic fertilizers when it comes to how they affect the scent and taste of buds in my opinion. Chemical fertilizers are very strong and more difficult for the plant to break down. Great results can be achieved with both but the organic way resembles more the conditions in nature. Organic fertlizers include compost, organic material like seaweed, ash, bone meal, blood meal, guano etc.. etc.. It is also easier to cause nutrient burn with synthetic fertilizers. If you use chemical fertilizers make sure that you flush your plants for at least two weeks prior to harvest.
By flushing I mean that you stop feeding the plants nutrients and only supply ph adjusted water. It is generally a good idea to flush your plants regardless of what means of fertilization you chose, although it is not necessary when growing organically. The plants will draw energy from it's leafs and direct it into the flowers. At this stage the underlying colors of the carotenoids and micronutrients will become apparent. The plant might display an array of beautiful colors ranging from deep purple to orange and red.
Keep in mind that you can also foliar feed your plants by spraying the top but especially the underside of the leafs with a weak nutrient solution. Plants love this.
Always make sure that the pot you use have holes in the bottom to allow the excess water to drain off. If you have solid pots water will gather at the bottom and eventually go sour, causing problems with ph and possibly root rot. Plants do not like wet feet. Also remember that you need to add something to the soil to keep it from packing together and essentially turning into mud. Something like say vulcaponic will do.
A large pot is always better than a small one. More space equals more root mass which in turn equals bigger plants. In the end its all about roots. You can always repot your plants once they gain size but generally it's better to start them in the pot that they will use throughout their entire lifecycle. Sometimes it is more practical to start them in smaller pots, say if you start more plants from seeds than you will have room for. Then you need to sex your plants and as soon as you find the females, repot them into a pot of decent size. It all depends on how much room you have but generally a 10L or 2.6 gallon pot will do. I use slightly smaller pots so that I will have room for more plants. Pot size also determines the final size of the plant so if you want them to stay a bit smaller, use smaller pots.
Cannabis plant can handle a wide range of environmental fluctuations but a temperature of 25-27 degrees celcius or 77 to 81 degrees farenheit is generally considered the optimal. Your plants can handle lower and higher temperatures but once you get to the extremes your plants will suffer from stress related symptoms, so try your best to keep it inside the good range. When the temperature gets really cold, photosynthesis stops and the plant goes into hibernation. If the temperature drop to freezing the plant gets frostbite and severe tissue damage as water is essentially its blood. Too high temperatures will also harm your plants, a good rule of thumb is that the ambient temperature should be pleasant, like a warm day at the beach say.
A ph or 6-7 is optimum which can easily be regulated with ph up or down. You can get a successful grow by mixing nutrients into the soil and then just let the plants extract what they need throughout the grow, but if you intend to feed the plants liquid nutrients in order to improve on taste and scent you will need a couple of things. In order to adjust the ph of your nutrient mix you will need some PH+ and PH- solutions and a pipette. You will also need some means of measuring the ph. There are a few alternatives, one being litmus paper, another a drop tester, or if you want to go high-tech get an electronic meter. They are however quite expensive and you won't really need to be that precise unless you growing hydroponically. If that is the case you will also need an EC meter that measures the electroconductivity or salt concentration of your nutrient solution. Soil is more forgiving due to the slow uptake of nutrients so you get away with more flux.
There are several more things that affect the health of the plant, like the hardness and calsium content of your tap water etc. etc. Just make sure that you provide the best environment that you can for your plants.
It is also good to have a fan blowing over the plants as this will make them grow thicker stems. It is however not necessary to use a fan if you provide other means of support like a scrog net or the like. Personally I do not use a fan because I like to keep my setup as silent as possible, which means that I have noise-insulated exhaust etc.
kiss-ass
By SCROGGING I am referring to the grow style where you have your plants growing through a net. The goal is to fill the entire surface area of the net with budding flowers in order to maximize the crop. There is another grow style too, called SOG or sea of green. Here you plant a whole bunch of plants in smaller pots which means that you harvest the main cola of say 30-50 plants instead of of growing a few larger plants. Sometimes this might be the way to maximize yo
ur crop but that all depends on your grow room setup.The rate of photosynthesis is directly related to the availability of CO2 so talk to your plants!
Some grower who want to give their plants the best possible environment will rig up bottled CO2 with a slow-release valve and use air conditioning to keep the temperature in the grow room at optimal levels. Anything is possible.
Seed Germination
There are several ways of germinating seeds, where the most common is to place the seeds between a few sheets of wet paper towel. This is probably the best method but seeds will also germinate when planted directly into soil.
After placing the seeds between the paper towels, put them in a box and keep the paper towels wet at all times. Applying some heat underneath the box (like placing it on the heating element/radiator) will effectively turn the box into an incubator and the seeds will germinate faster. Once the taproot has cracked the seed and emerged, it ready to be planted into soil.
Sometimes you will run into tough or old seeds that fail to germinate. There are a few ways of getting them to germinate.
Old seeds or seeds with a very thick outer shell can sometimes fail to germinate because the seed coat is so hard or thick that the moisture never gets inside the seed in order to trigger germination, or even if the seed germinates, the taproot lacks the strength to emerge.
Method 1:
Take a really sharp knife, a scalpel or maybe a carpet knife will do. Something really sharp anyway, the smaller the blade the better as this is precision work. Hold the seed between your fingers and chip the outer shell /seed coat at the bottom (sharp end) or in the middle. This will expose the "seed embryo" to the moisture of the paper towel. If you chip the seed coat at the top, the taproot might try to work it's way to the other side inside the shell and usually the seed dies before it succeeds. The trick here is not to hurt the innards of the seed in any way. If you chip too deep you end up slicing the embryonic seed and then it's goodbye for that one.
If you look at the picture above you can see how the seed coat is chipped. This method is so effective that seeds usually germinate within a few hours after a piece of the coat has been removed.
Using this method I have managed to get high germination rates upward of 75% with really old and tough seeds.
It's a gamble but if done carefully it will work almost every time.
Method 2:
This is the safer option with less change of ruining the seed. It might take a little bit longer for the seed to germinate than with method 1 but still pretty fast compared to regular germination.
Use fine grain sand paper and carefully thin out the seed coat until it looks like there is only a very fine layer of the outer shell left. That's it.
Both methods increase germination rates considerably.
Vegetative Growth
In my experience it is of great benefit to the plants if they are kept in a vegetative state for at least 6-8 weeks or basically until they show fully developed preflowers. Keeping the relative humidity high in the grow room during this stage will ensure that your plants are happy campers, I keep the RH above 80% by using a humidifier. I rarely see
yellowing of the leafs unless or other problems unless I give the plants too much nutrients by mistake, which rarely happens. By keeping the RH high the leafs become nice and thick and you will also se more roots forming on the main stem even in places where it is not covered by soil. These are called "adventitious roots", more on that later.One good way of telling how your plants are doing is looking at their leafs. When plants are well fed and happy the leafs have a deeply green colour and they point upwards, towards the light. When your plants are hungry the leafs will lose their colour and look bleak. If the leafs are drooping they probably need some water. Mild nutrient burn is not uncommon as all plants behave differently, but if that occurs, just feed that plant less nutrients. Sooner or later you will find the optimal amount of nutrient to feed your plants.
Here are some plants in vegetative state, happily gaining size under the blue light.
If you are growing plants from seed you'll have no idea whether they are male or female unless you are growing feminized hybrids. Preflowers are small flowers that appear at each node of the plant once it reaches sexual maturity. There are a ton of information relating to this topic but basically female plants produce a small elongated pod with white hairs sticking out of it. Males produce balls that stack together like clusters of grapes. To the trained eye these are very easy to tell apart. If you wait long enough the white hairs will be recognizable by the naked eye but if you wish to determine sex earlier, use a magnifying loupe with at least 10x magnification. Undifferentiated vegetative growth at the nodes can sometimes be mistaken for flowers but if you wait long enough you will be able to tell the difference.
These pictures might be of help when you are trying to determine the sex of your plants.
You might get around to cloning you females and clones can be started under 12/12 from the start since they are already mature so the transition into flowering is rather painless. Generally though, it's a good idea to wait until the clones gain some size before flowering them. It is good to keep in mind that although your plants will mainly concentrate on growing flowers, they will also direct some energy to vegetative growth during flowering as well, especially tropical sativas.
Training and Pruning
Chose a number of main branches that you think will be the strongest ones and remove all other at an early stage. Investment planning for the plant will ensure that you get a big harvest of high quality mature bud from a few branches instead of a mediocre juvenile harvest from a bunch of smaller ones. The number of branches to keep is naturally dependent on strain and individual plants. Popcorn buds on the lower branches will never reach maturity and therefore a complete waste of energy resources (energy sink).
Topping, pruning and Low Stress Training (LST) is a very good combination when growing indoors, especially when using a SCROG net. Most of the time this will ensure a larger crop than if the plant was left to grow in the Christmas Tree shape. This is naturally dependant on both strain and the individual plant in question. Some plants do not like to be topped and will resist any attempts. Some plants seem to stop growing for up to two weeks when topped, this indicates that it will rather grow one main cola instead of several smaller ones.
Low stress training means that you tie the top/tops of the plant at ground level. Because the auxin transport system (plant growth hormone) is located in the main shoot, the plant will assume that the lower shoots are now the main shoots and send them upwards. These can in turn be tied down to repeat the process. If the tops are tied in a circular fashion the plant will grow into a dense bush.
Every time a branch is topped that branch will produce twice as many tops. Topping once will result in two tops, topping twice will result in four tops etc. It will always take a while for the plant to adjust to it's new condition so don't worry.
This method is especially beneficial if limited space is of concern. Here is a Ingemar's Punch plant that went through extensive training. This example is a bit extreme but it proves a point.
Successful FIM (Fuck I Missed) topping is the best method. This means topping the plant in manner that leaves some of the tissue intact on the topmost node. This will make the plant grow 4 main colas instead of two. The success of this method seems to be the luck of the draw but the same result can be achieved by topping the plant several times over.
If you need more information on topping, training and pruning, have a look at my extended guide on that topic.
My Take on Different Light Schedules
I have grown cannabis under many different light schedules in many different combinations and here is my take on it. Im leaving out combinations that did not differ much from the ones listed here. I have not considered problems with space in grow rooms here. Basically if you are running a small cab or pc case grow, grow lowryders for best result.
24/0 --> 12/12: After many grows I have noticed that running the lights 24/7 in the vegetative stage is of little use compared to 20/4 or 18/6. I also think that constant light without a rest period is not beneficial for the seedlings, puts your equipment under unnecessary stress and runs up your electric bill for no more than a 5-10% increase in weight, at the most. It can be said that this is unnatural but then again, periods of close to 24h sunlight during summer days is not unheard of in arctic regions. On the other hand, how would you cope with around the clock work and no sleep? The dark reactions are important for the plant to build up and move around essential biological components, ultimately it affects things like resistance to stress and sufficient root structure for further development. Furthermore, the 12/12 stretch becomes unnecessarily long due to the big difference in daylight hours. Hey! Where did the sun go?
20/4 --> 12/12: This is a kinder option for the plants, your equipment and your electric bill. This gives the plants some time to rest and your equipment time to cool down once and a while. I run the lights over my mother plants with this light schedule, the light is on a timer and turn off for an hour four times a day. Four consecutive hours of darkness are sufficient for the dark reactions but still, the 8 hour jump after the switch to 12/12 is a bit of a stretch.
18/6 --> 12/12: This is a valid option to the light schedule above. Not that big a difference in final stretch as the stretch caused by increased dark hours in the vegetative stage evens out with the lesser stretch in early flowering stage after the 12/12 switch. The plant might be a bit stronger under this light schedule compared to the one above as it has some time to rest. 18/6 is no where near the equatorial daylight length that sativas are used to but is suitable for both indicas and sativas during the vegetative stage.
20/4 --> 18/6 or 16/8 --> 12/12: This is a good option, at least when growing from seeds. This light schedule gives the plants a chance to prepare for flowering in good time with minimal stress. I run the lights 20/4 for about two weeks, then switch to 18/6 or alternatively 16/8 for another two weeks and finally 12/12 for the duration of the flowering stage (I usually drop the daylight hours to 11/13 in late flowering, this benefits especially sativas but works well for indicas too, don't go much lower though).
20/4 --> 18/6 --> 16/8 --> 14/10 -->12/12: The best option. Same as above but a little more work. Depending on the length of desired vegetative growth, decrease daylight by 2 hours every 7-9 days. If you are going to take the time to grow weed, why not take the time to reprogram your timer?
12/12 from start: This is good when flowering clones but can also be used on mostly or pure sativas. I always clone the strongest females and keep them in a constant vegetative stage in a separate grow room. Once my harvest is done, I take a clone of the mother plant and move it into thekiss-ass flowering room. Usually the mother plants have
several months of vegetative growth as well as rigorous training under their belts, so these heavy duty bonsai plants are well established, strong and produce monster crops. Their stems are usually as thick as my thumb when they go into flowering. Thats my take on it. I think that its pretty close to the truth, considering natural environments and chemical processes that take place in the plant under different stages of their life cycle. Some people also swear by unorthodox light schedules outside the natural ones but I cannot expand on this subject because I have not tried it myself.
Flowering
What we talking about when refering to bud are unfertilized female flowers, or sensimilla. As long as the female plant remains unfertilized, she will continue to flower and thereby also produce Tetrahydrocannabinol or THC, the main psychoactive substance found in the Cannabis plant.
Once the plant enters the flowering stage, it will produce this substance in abundance. The quality and quanity of the finished product varies according to strain and growing conditions.
The most important thing to remember during this stage is that absolutely no light may reach the plants during the dark hours as this will interfere with flowering and might even stress the plant into sex reversal. A light sitting on the opposite side of the room is enough to confuse the plants so make sure that you have complete darkness in the growroom. I am talking pitch black here.
The flowering time stated for a certain strain by the seed provider is a general guideline and will seldom correlate with the exact flowering time in your own garden. Usually these flowering times reflect the time it takes for plants to mature under optimal conditions like in large greenhouses where the environment is precisely controlled. Trust your feelings, harvest the plant when it looks ready and forget about counting weeks. Most plants will take from 2-4 weeks longer than stated to mature properly according to my experience. The flowering time can range anywhere from 6 weeks for fast indicas to 20+ weeks for pure tropical sativas.
Once the plants have started flowering, never spray the flowers with water and always try to keep the relative humidity as low as possible during flowering to minimize the chance of mold. Do not foliar feed the plants once they go into flowering.
Patience always pays off in the end. The decision to harvest too early will always result in a smaller harvest. Cannabis plants usually go through two to three bloom explosions during
flowering, when the bud mass essentially doubles each time. The first bloom explosion can be expected after 4 weeks of flowering, the second at 8 weeks and so on depending on the strain and the individual plant. Trust your feelings. Harvest the plant when it is ready. Sometimes you have to wait a long time, I grew some monster Super Silver Haze that took 17+ weeks to finish as it was a Neville's Haze dominant pheno. I could have harvested two crops of indicas in that time...so was it worth it?
Hell Yeah! (Click the link for a detailed grow report on the Super Silver Haze)
There are three types of trichomes but the one we want in abundance is the capitate-stalked glandular trichome that looks like a mushroom. The peak of thc production is when 50% of the capitate-stalked glandular trichomes have turned from clear to cloudy, with a few amber ones here and there. Clear trichomes have not yet matured but cloudy ones are at their peak. Amber ones contain mostly CBN and have already passed the peak.
Read more about trichomes here
The biosynthetization of Delta-9-Tetrahydrocannabinol inside the trichome goes as following:
Cannabinoid production starts with formation of CBG (cannabigerol). From here it is independently processed into either:
1. CBC (cannabichromene), non psycho active "energy-storage" compound which is readily converted back to CBG if needed.
2. CBD (cannabidiol), the body stone effect, which is the precursor of THC. It also affects how the THC hits us, effectively improving on the high. (So high THC low CBD isn't necessarily a good thing). CBD also have some medicinal properties, making a high CDB value good for medicinal strains. CBD is then enzymatically cyclized to THC.
CBD --> THC (delta-9-tetrahydrocannabinol), the cerebral high that sometimes border on the psychedellic. A very high THC content can also increase your pulse and cause paranoia.
Note the trichomes in this picture. They look like crystal mushrooms but are actually spherical containers for the THC oil.
Keep in mind that every time you touch a bud you are breaking these fragile structures and THC evaporates into the air, which is why I try not to touch the buds unnecessarily during flowering. On the other hand, there is enough to go around so don't worry about it too much.THC --> CBN, in late flowering and with trichome age, THC starts degrading into CBN (cannabinol). This also means that the THC on buds sitting in a jar will also eventually degrade into CBN and other lesser cannabinoids. It might taste great and be smooth smoke but probably less potent than when it was harvested. This is why we store the buds in air-tight jars and in darkness, we hope to reduce the the rate of THC degradation.
Cannabis sativa strains usually have a higher THC content than their indica counterparts. Pure sativas can carry a stratospheric, and sometimes creative, cerebral high so strong that you'll be blown into next dimension. Indicas on the other hand can pack a strong narcotic stone so numbing that you lose the ability to speak, let alone think. That's why they are good pain killers. Indicas also
contain higher values of the therapeutic CBD cannabinol, especially landrace indicas. Cannabis Ruderalis contains almost no THC and is mainly used for making autoflowering hybrids. THC is quite a complex compound that binds to several cannabinoid receptors in the brain in various ways depending on the presence of other cannabinoids. The rate and quality
of the synthesized THC is also dependent on the availability of nutrients, environmental factors like humidity etc.. I like to keep a very dry environment during flowering because I believe that promotes THC synthesis.THC has many uses for the plant, including fighting off pests (pesticide), prevention of desiccation by the means of binding solar energy so that it will not harm or cause mutations in the plant, and to some degree keep the buds dry due to the fact that THC oils are hydrophobic. Cannabis plants can actually kill insects because they get stuck in the sticky resin. Once stuck they die and start to slowly dissolve.
Now, the reason why many scientist have proclaimed that uv-b radiation is important is because it fully activates the CBG --> THC synthesis. Not only that, but it can also activate a secondary metabolic pathway, which means that the road to THC synthesis becomes a "dual-lane" one. I'm guessing that the CBC pathway skips the CBD step and the compound is converted directly into THC. Twice the production that is. No matter how you twist it, I bet that cannabis grown on the top of the Himalayas is always more potent than indoor bud.
I'm sure that many will agree that bud grown under the sun will most of the time blow indoor bud out of the water in terms of potency. The incredible power of the sun cannot be matched by man-made instruments. Sticky and Heavy.. Taste and smell however can be more refined in indoor bud as we can control what we feed them. Outdoor bud usually has a feral taste to it. Not that it's unpleasant, not at all, the wind and the rain all leave their mark on the buds and you can really taste the difference.
The whole process of THC synthesis is naturally heavily dependent on the sum of all the factors, but providing optimal soil goes a long way, so I think it's always wise to give the plant a good start.
kiss-ass
Another way to go is to harvest when 50% of the visible hairs on the bud have turned brown but this is a very rough indicator.
You will always have bud that is in different stages of maturity as the plant keeps flowering and forms new buds all the time. New flowers actually grow on top of old ones, so you get a layer of bud. Just make sure that the bulk of the crop is ready before harvesting. Or just harvest the top half of the plant and leave the bottom half flowering for another month or so. Those popcorn buds will eventually pack on weight, but personally I do not think that it's worth the wait.
One thing that is of major concern when it comes to the flowering stage is the stretch that plants go through when the light regime is changed to 12/12. If the difference between the vegetative and flowering light regime is great, the plants will also stretch more. It is more natural for the plant to be gradually introduced to the flowering light regime by shorting the day length in the manner explained above.
Another thing that reduces the stretch is keeping the blue light present during the first two or so weeks of 12/12. Personally I leave the metal halide bulb in for this period of time before switching to the high pressure sodium bulb.
The same applies to compact flouros of corresponding spectrum.It can be debated whether or not plants increase resin production under stress. Personally I try not to stress them too much as there is a difference between stress and torture. I have found that keeping a dry environment with high light intensity seems to promote resin production.
I believe that providing the optimal environment for the plants will ensure that they express their true potential without the need to stress the plant beyond a certain point.
Drying, Curing and Storing
No big secret here, just dry the buds first slowly by air and then allow them to cure in mason jars or something similar. The taste and smell of the bud will improve with time like fine wine, just make sure that the containers are air-tight and stored in a dark place as both light and air will speed up the
When you have harvested the buds you will probably want to manicure them by removing excess leaf matter as this will give the buds more "bag appeal". It won't change the finished product but makes the buds more pleasing to the eye. Usually when you do this you end up with sticky resin on your fingers and the scissors you are using. Collect this black tar and roll it up in a ball, this is called charas or finger-hash. A very small amount of this stuff is enough to send you into orbit as it is almost pure THC.
Cannabis be turned into hashish by collecting the trichomes (kief) with a kiefing screen or sieve and pressed together into a solid form. The holes in the screen have to be small enough to only let the trichomes pass through. The
kief can also be smoked as it is but it is easier to handle and store when pressed into one solid brick or ball. There are several methods of collecting kief and turning it into hash, so look up a thread if you need more information on the subject. One thing that many overlook is that if you store your buds in a plastic bag, a lot of the trichomes will fall off over time and accumulate in the bottom of the bag. If you place the bag in the freezer for a day, you can easily scrape off the kief with a knife and then smoke it. If you store your buds in a jar, once it is empty add some water to it and shake for a few minutes, finally sieve the solution through a coffee filter and you will also end up with some kief.
Cannabis can be used in cooking to make everything from "cannabutter" to "space cakes" or whatever one chooses. There are detailed posts here on the forum on how to cook with cannabis. The easiest method however is to heat some bud in water on low heat with some real butter. After some time when you feel that most of the THC has bounded with
the fat, sieve the liquid into another container in order to remove the plant material. Then allow it to solidify in the fridge or freezer. Once solid, the "cannabutter" cake can be removed and used in cooking. Keep in mind though that enough heat will make the cannabinoids evaporate:
THC has a boiling point of 200°C (392°F). However before the THC boils, other parts of the oil evaporate and boil.
Here are some important temperatures:
At 21°C (70°F) - the most volatile terpenoids start to evaporate, lending a pungent odor to the air.
At 31°C (87°Fkiss-ass) - the less volatile terpenoids start to evaporate, lending the air even more pungent odors.
At 39°C (102°F ) - virtually all of the terpenoids undergo evaporation fairly rapidly.
At 50°C (122°F) - THC-Acid decarboxylates as the water molecule held in the carbonate form evaporates. This activates the THC.
At 66°C (150°F) - Cannabidiol (CBD) melts and starts to evaporate.
At 185°C (365°F) - Cannibinol (CBN) boils.
At 200°C (392°F) - THC boils. Clear vapor from a vaporizer.
There are other methods for extracting THC from plant material but turning it into butter is the easiest way.
The Overlooked Secrets of a Bountiful Harvest
One of the easiest ways of improving on plant health and maximizing plant potential is in my opinion the use of the symbiotic root fungi or mycorrhiza in the soil. This fungus has had a mutualistic relationship with plants for over 400 million years, 92% of plant families and 80% of all known plant species form this relationship in the wild.
The fungus connects to the plant roots effectively increasing the root surface area and therefore nutrient uptake considerably. It also functions a skilled mediator between plant and soil, buffering out nutrient problems and improving on plant resistance. You can buy spores of this stuff in more advanced grow or garden shops or order it online.
Here we have an example of a plant that has formed a symbiosis with the root fungus. You can see how the thin white microfilaments of the fungus radiates from all the roots. Mycorrhizal mycelia are much smaller in diameter than the smallest root and can explore a greater volume of soil, providing a larger surface area for absorption, thus improving the nutrient absorption capabilities of the plant roots.
Studies have shown that mycorrhizal root systems increase the absorptive area of roots 10 to 1000 times thereby greatly improving the ability of the plants to utilize the soil resources. In the great outdoors this relationship is always present in the plants that can form it in the first place. Usually the strain of mycorrhiza is restricted to a certain plant but the good news is that since cannabis is a weed it can form this relationship with a wide range of mycorrhiza species. More proof of how this amazing plant is superior to many other.
Read more on symbiotic mycorrhizal fungi here
There are also other organisms that one can add to the soil in order to improve on crop, one of them being the streptomyces actinobacteria which can also be found in compost. It kills mold, improves on plant health and is responsible for the production of natural antibiotics in many plants.
These two work especially well together as they reinforce each other.
A final note on this subject is the use of companion plants like chamomille. Chamomille is said to be a sort of plant doctor that assists other plants in many ways effectively making them grow stronger. But more importantly, this plant is often grown alongside herbs like basil in herbal gardens because it improves on the production of essential oils (THC in cannabis) in other plants, making them taste and smell stronger.
I am currently experimenting with this and will report whatever I find. Im hoping that this companion plant will greatly improve on the quality of my buds, if it works on basil I don't see any reason why it wouldn't work on cannabis too.
Cloning
Cloning a plant means that you take a cutting from a larger plant and persuade that cutting to form roots. This is possible because any part of the plant is capable of producing roots.
The most common method is to cut one of the smaller branches from the lower part of the plant and put in some sort of rooting medium. There are several methods for cloning plants, which include water cloning, straight to soil or using rock wool cubes. Personally I use a cloning bubbler which is essentially a small hydroponic setup with a container, an aquarium air pump, a hose and an air-stone. I then suspend the cuttings in the water medium while the pump provides oxygen for the newly cut clones as that is the most important component for the formation of new roots.
This method is so successful that I pull clone after healthy clone out of this contraption. I cannot think of a better way to do it, most clones root within a week or two. This is good because until the plant roots it will have to survive on the energy stored in its leafs.
Click the link if you want to know how to build the Propagation Bubbler
It is a good idea to dip the cuttings in a rooting hormone like clonex before planting them in soil or rock wool cubes. Adding general plant hormones like the auxin found in seaweed extract will also speed up the process.
The reason why cannabis plants can be cloned is that it is capable of forming so called adventitious roots on any tissue. This is also why we see new roots growing on the stem in humid environments. If you intend to repot you plants at some stage, always plant them a bit deeper than before because new roots will form on the sections of the stem that are covered by soil.
It is also possible to clone plants in flowering but I have found that it is very rarely that it succeeds, so always make sure that you have clones of each plant you intend to flower if you aim to keep mother plants. Once the plant has switched to flowering mode , it is very reluctant to revert to the vegetative stage. Take your clones as soon as you can and take lots of them as you never know how the cuttings will behave, some root faster and others take a long time.
Clones and mother plants do not need very strong light as the purpose is merely to keep them alive and not have them grow to monstrous proportions. A low wattage cfl will do the job. Trimming both the green matter and roots might become necessary at one point or another.
Most cannabis mother plants can be kept alive for a very long time. Once the mother plant loses vigour you take a new clone and start over. This is why there are so many commercial crosses out there of the legendary G-13 mother. Here I would like to point out that no G-13 father was ever obtained so there cannot be any pure G-13 seeds out there unless the plant was selfed through hermafroditism. Most of the time we are looking at G-13 crosses.
Finally a very important note. Be very careful if you accept clones from friends. Although the gesture is noble, sometimes they can carry pests and often you will have to completely disinfect your grow room to get rid of them. And by disinfection Im talking laboratory procedures here like boiling the loose equipment like pots and what not, heating soil in the oven etc. etc.
Plant hormones
There are three main types of plant growth hormones; auxin, cytokinin and gibberellic acid. These regulate the way that plants grow by affecting the rate of cell division, cell elongation etc. Kelp or seaweed extract is an outstanding source of plant hormones. Seaweed and algae have no roots and are either free-floating or merely anchored to the sea floor. Sea creatures constantly nibble on them which means that they need to rapidly grow more mass all the time so they never cease to produce these hormones. Cannabis plants can easily extract these plant hormones from water making them stronger and improve on everything from root development in clones to vegetative and flower growth in mature individuals.
Basically its like putting your plants on steroids.
Please note however that plant hormones can also interfere with sexual development to some degree. Using too much of it might trigger hermafroditsim more easily in plants that are genetically prone to the condition. Heavy use of gibberellic acid has shown to trigger hermafroditism so use the stuff wisely.
Hermafroditism and Feminized Seeds
The term "hermaphrodite" derives from Hermaphroditus, the son of Hermes and Aphrodite in Greek mythology, who was fused with a nymph, Salmacis, resulting in one individual possessing physical traits of both sexes.
The question whether it is a good idea to grow cannabis from feminized seeds can be disputed.
On one hand you have seeds that will produce female plants to a certainty of 99%. On the other hand you have the genetic makeup to consider. Feminized seeds are produced by allowing or chemically inducing hermafroditism in a female plant, which is then used to fertilize either itself or other female plants. Thusly the genetic makeup of the offspring consists of 100% female genes. The plants grown from these seeds will either be female or hermaphrodites.
The reason why these seeds exist in the first place is that they remove the need to sex plants before flowering which saves growers a lot of time and trouble. If one has the sole intention of growing and flowering plants for a sensimillia crop, the feminized seeds represent a valid choice. These plants may or may not turn hermaphrodite. If they are somewhat resistant to this condition in despite of the hermaphroditic parent or parents, the grown feminized plants can also be cloned and kept as mother plants in order to produce several crops of the particular strain. The more stable the individual plant is, the more suitable it is for cloning.
However, and this is the point of this debate; if one has any plan of ever using the plant to produce seeds the genetic makeup is invalid for this purpose. This is because the feminized plants carry genes for the hermaphroditic trait that is dominant in cannabis plants. The hermaphroditic parent or parents were chosen because they carried the gene for this dual-sex condition. Therefore some, if not all of the offspring from this plant will have a tendency to become hermaphroditic under stress or even spontaneously under favorable conditions. When it comes to breeding, this is naturally a very undesirable trait. Since hermafroditism is a dominant trait it is likely that from the second generation (F2) onwards, more and more plants will display this trait.
Hermafroditism also occurs spontaneously in cannabis plants in nature as an emergency response to the absence of either sex in a colony, also observed in frogs.
Although hermafroditism is a naturally occurring phenomenon that favors cannabis in the wild, normal diecious individuals can also display this trait in unfavorable environmental conditions. Some examples are too high or low temperatures, light leaks, over-watering or over-fertilization. The absence of males might also be enough for the females to change sex, this is however not a proven fact just an educated guess. Normal plants will most likely turn if they are genetically prone to this condition. Once turned, these females will form modified or incomplete pollen sacks that look like bananas which are hard to notice and usually end up pollinating the entire sensimillia crop.
It is more common that female plants produce staminate parts than vice versa, although both have been reported by growers. Male plants that are flowered for an unnaturally long period of time indoors have been known to produce female flowers and the distinctively familiar and sticky capitate-stalked glandular trichome.
Feminized seeds can produce really nice female plants that remain stable throughout flowering but there is always the risk of them turning hermaphroditic. Under optimal conditions one might not even notice the heritage as the plant behaves like a normal female. However, since the parents carried the gene, with enough stress any feminized plant will eventually turn and pollinate your sinsemillia crop.
Pests
There are several different pests that attack cannabis. They range from the most harmful spider mites (The Borg) to the relatively harmless fungus gnats. Some of these pests are really nasty and can wipe out your entire grow. The fungus gnats are so common and harmless that I
rarely bother to wipe them out but if you encounter something more threatening the only way to go is to disinfect your grow room. The most secure way is to scratch the grow and replace the soil as well as every pot you used. If you chose to disinfect you need to use neem oil or pyrethrine in order to get rid of the pest or some sort of homemade pesticide.This recipie works great on most pests:
Soak a pack of strong cigarettes in water of night. Then boil some water with strong chili peppers in it (Im talking high on the scoville scale here). Once it cools down, add the nicotine water to it, then some cooking oil and soap. The thought behind this is that the nicotine will poison the bugs and the capsicum from the peppers will burn them. Insects breathe through holes in their bodies called tracheae, so the soap and the oil will clog these holes and the insect will also choke to death on top of everything else. I used chili strong enough to burn my hands and the gnats were killed instantly dropping down in mid-air. It also worked on aphids.
I have personally never had the misfortune to experience a spider mite infestation on any of my grows but some friends were not as lucky and they said that the damned things just keep reappearing over and over again so be careful when accepting clones and especially when bringing outdoor plants inside.
Breeding
From every seed the promise of new life.
No plant is the same, they all have different genetic makeup. The only exception is clones. Since they are in all ways the same
plant as the mother, their genetic makeup is identical. That is why you need to clone plants that prove superior or if they have qualities and traits that you like. This way you can preserve and grow the same crop over and over. Cannabis is not the easiest plant to clone but not the most difficult either. The chance of successfully cloning a plant depends on the strains, the methods and so on.Genotype is the genetic makeup of an individual and phenotype is the physical expression of those genes.
When it comes to breeding we get genetic recombination of the genes, 50% from the father and 50% from the mother. Since the genetic makeup of plants is so complex there really is no way to predict which of the original traits will be preserved in the offspring and how new ones will form. The only thing that can be said is that the offspring will show similar traits to the parental strain but this is heavily dependent on whether or not a particular trait is dominant or recessive.
Some traits are dormant or inactive and will only be activated if the alleles of that particular trait correspond in the genes of both parents. This means that the offspring will display some/none/all of the traits of the parents but new ones will also form depending on the genetic recombination.
The F1 or first generation of plants will be quite uniform in appearance but once you reach the F2-generation, you will get individuals with a wide range of traits inherited from the parents. In order to get uniform plants that resemble the parent, you need to isolate traits by backcrossing the offspring to one of the parental plants. This is effectivelykiss-ass inbreeding which is naturally unfavorable as genetic anomalies may occur because the same genes perform the recombination and the gene pool is restricted. This method, referred to as cubing, is sometimes used to preserve a particular trait and will result in uniform or true breeding IBL seed lines. Crossing the plant to a new one will however produce very healthy offspring because the gene pool is expanding and the genetic recombination gives rise to hybrid vigour.
Ill take the example of the Lowryder strain to prove my point here. The aim is to preserve the recessive autoflowering trait:
a = recessive autoflowering trait
A = dominant normal flowering
aa x aa = 100% aa F1 = 100% of the offspring carry the autoflowering trait in this (lowryder x lowryder) cross.
aa x AA = 100% Aa F1 = The recessive gene is masked by the dominant gene but the offspring carry it as well.
kiss-ass
aa x Aa F1 = 50% aa + 50% Aa F2 = 50% of the offspring carry the autoflowering trait in this (lowryder x normal X) cross where the normal plant carries the recessive gene.
If we then take one of the autoflowering F2-individuals and cross it to a true lowryder we get the same result as in the first example, 100% autoflowering offspring.
So, if you want to make a new autoflowering lowryder hybrid, you have to backcross it twice to true breeding lowryders in order to preserve the autoflowering trait in the new hybrid. Remember though that this F3-offspring only carries 12,5% of the genes from the non-autoflowering parent. In order to increase this percentage you have to start the process all over again.
Some traits might be controlled by several genes which means that the odds are even smaller that this particular trait will be expressed, especially if it is recessive.
The same goes for every trait of the plant, everything from potency to colour so my recommendation is to only use the strongest plants you can find for breeding purposes.
If you are planning on making your own hybrids, it's not a bad idea to read up a bit on Mendelian Genetics
The actual act of fertilization is no big mystery. I will not go into it in great detail here but one male carries enough pollen to pollinate a whole bunch of females. Once mature, the pollen sacks spring open, dispersing the pollen. It looks like fine yellow powder. The pollen can be collected and stored in the freezer for up to six months, after which it is no longer viable. Seeds on the other hand can be stored for decades as long as they remain in a cold environment. Seeds as old as 30 years have reportedly germinated.
The best way is to allow one male to pollinate all the females chosen for the breeding project. If you have several males of different strains, you will have no idea which male pollinated which female. You can have several males of the same strain pollinating females, but usually the strongest male is chosen for the job.
In order for the pollen to be spread around you can have a fan blowing over the plants or just shake the male plant now and then, as this is enough for the pollen to reach the females if they are in close proximity. Once the females have been pollinated, it takes about 6 weeks for the seeds to be ready. You will know when they are ready because they will fall to the ground. Once you see that a few seeds are ready you can harvest the whole plant. Its a lot easier to separate the seeds from the bud if you allow them to completely dry up first.
One way of telling if the seeds are ready is to look at the colour and texture of the seeds. If they have a nice dark brown colour with stripes on them, they are ready. Not all seeds are striped however but most are. Seeds can range in size from very small to quite large. Seed size is both genetically determined but also by the degree of pollination. A slightly pollinated female will generally produce a smaller amount of large seeds while a heavy pollinated one produce lots of smaller seeds. The rule of quality vs. quantity applies here.