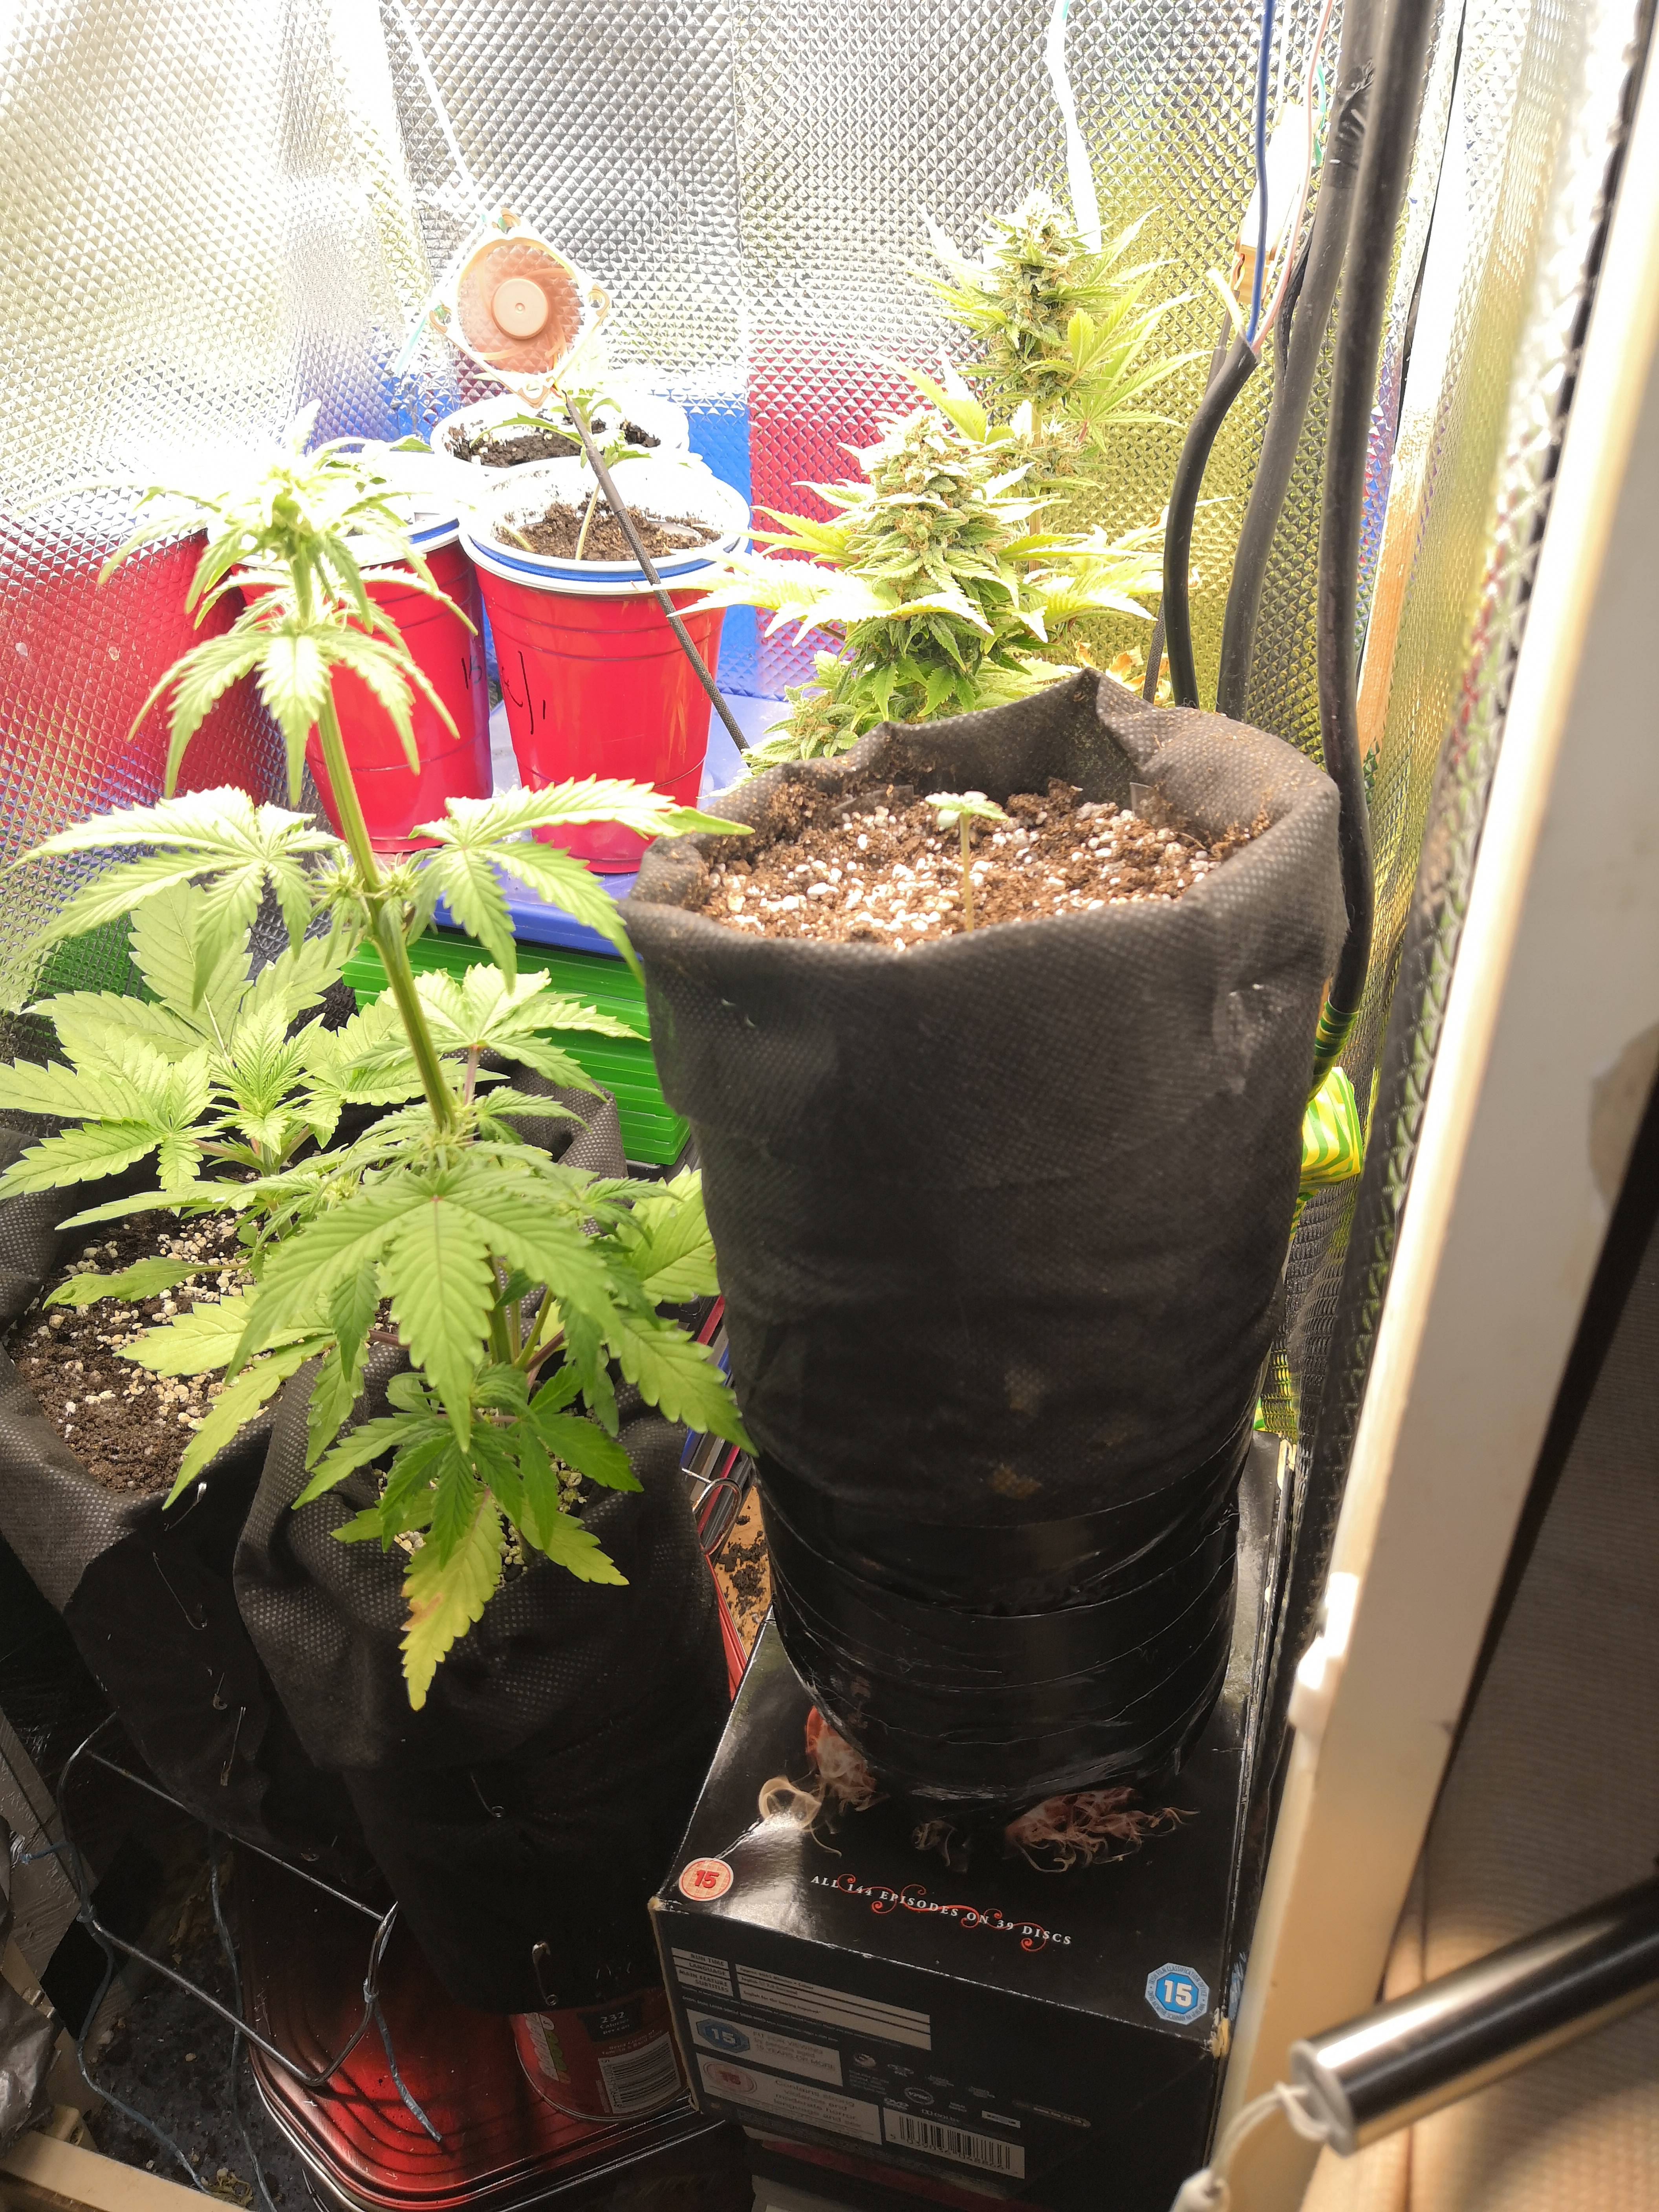
SIP thread -- (Sub-Irrigated Planter)

meangreengrowinmachine

Well-Known Member
hey man, I'm starting a comparison in a few weeks of my version on the sips, using probiotics, only difference will be, one gets mammoth p, other wont, if u or anyone is interested I'll share links when it starts!

fyi. If anyone has some good info on the mammoth p they can share with me plz do! I don't know much! also with that said, if you haven't read a tad about my method I've been working on, then that's very important to atleast know the basics of what I'm doing for any of this to make sense! links on my page, also in the thread a page or so back!

also I could use some advise or pointers to help run this comparison if anyone doesn't mind helping me out with this! I'd greatly appreciate it, I don't even mind showing my thanks I have some extra bodhi f2 gear I can send you way to say thanks for the help!
nice that sounds like it should be interesting man! I know nothing about mammoth P to help you with unfortunately. I did look a bit on your thread but have not checked it all out but will do that before I try to emulate it for sure.
 

Greenthumbs256

Well-Known Member
it's a good read, all important stuff is on the first two pages after that, it's a lot of ppl talking and having a good time, with updates and discussing all this, still some good info, but only the first 2 pages are a must to read to understand! but most can't stop after that second page lol!
 

Lrn2Yield

Well-Known Member
personally I went with the Inntainer design since it has been around for a very long time and proven results outside of these applications also. Super easy to build and there are step by step instructions earlier in this thread (I can re post if you want the PDF and don't want to dig). One thing you want to be careful of is the wick size so it does not over or under saturate. let me know if you want a re post of the inntainer design. I has step by step instructions for 18 gal and 14 gal tote versions. Obviously this is not the ONLY way to go but again seems tried and true.
Hey there @meangreengrowinmachine ,

Yes, I would very much appreciate that PDF if you know where to find it off hand. I know at some point over the past few weeks I have read info on the Inntainer, and it looked like a pretty easy build. If it's easy, and effective count me in!

After reading, and having a chat with a fellow member here, I think I'm going to do two 18g sips with a scrog. I only have a 4x4 with a 6.5' height restriction so I can't get too out of hand or I'll have an out of control jungle going haha. I'm sure the PDF will have wick sizes etc, but what is the generally consensus on wick size for 18g ? What you guys all using to hold the wicking medium? Netpots, perforated drain tube? PVC?

Still undecided on the medium .. I've read 50/50 coco/perlite, sand, perlite only, or even your soil medium packed in there will work. I'm sure once it all falls into place, I'll be glad I took all the right steps to at least start in the right direction.

Thanks for your response bud.
 

meangreengrowinmachine

Well-Known Member
Hey there @meangreengrowinmachine ,

Yes, I would very much appreciate that PDF if you know where to find it off hand. I know at some point over the past few weeks I have read info on the Inntainer, and it looked like a pretty easy build. If it's easy, and effective count me in!

After reading, and having a chat with a fellow member here, I think I'm going to do two 18g sips with a scrog. I only have a 4x4 with a 6.5' height restriction so I can't get too out of hand or I'll have an out of control jungle going haha. I'm sure the PDF will have wick sizes etc, but what is the generally consensus on wick size for 18g ? What you guys all using to hold the wicking medium? Netpots, perforated drain tube? PVC?

Still undecided on the medium .. I've read 50/50 coco/perlite, sand, perlite only, or even your soil medium packed in there will work. I'm sure once it all falls into place, I'll be glad I took all the right steps to at least start in the right direction.

Thanks for your response bud.
this gives you ALL you want man! it literally outlines and answers ALL of that with pics and these work GREAT here is a pic of mine built before.... and the amazingness at the end (-: enjoy!!
 

Attachments

Greenthumbs256

Well-Known Member
what kind of ideas does everyone have for keeping their soil from falling into the rez?

when i first started I used a a black mesh, almost like what's on window screens. it worked great, problem is it stopped the roots from growing into the rez, as well as the soil!

so I'm looking for ideas, that will help to not let the soil slip into the rez along the sides, but will still allow the roots to grown into the soil!

important things to me, would be obviously none or as little as possible amount of soil getting into the rez; roots able to grow into the rez; and lasty nothing permanent! at the end of each cycle I like to be able to break down my sips piece by piece and clean it out, to restart! so as I could glue or tape or somehow seal the sides where the floor (or the top of rez) would be sealed to the walls, I can't break that apart each time!

pics below are my very first design with the window mesh stuff and the roots after harvest, that I no longer use! (I'm sure you can see why) and also my newest 30g sip. I just built to hold 2 ladies! if you look at the sides you can see what I'm talking about!CM181124-210119001.jpg CM181124-210136002.jpg CM190219-220453001.jpg
 

Greenthumbs256

Well-Known Member
also I feel I need to Point out, that I use a cheese cloth in the net pots, bc the holes are way to big, and if i didnt it would pour out my soil and fill my rez with soil in no time! it's and easy fix, the roots can still grow through the floor!CM181109-143128002.jpg
 
Last edited:

raggyb

Well-Known Member
what kind of ideas does everyone have for keeping their soil from falling into the rez?

when i first started I used a a black mesh, almost like what's on window screens. it worked great, problem is it stopped the roots from growing into the rez, as well as the soil!

so I'm looking for ideas, that will help to not let the soil slip into the rez along the sides, but will still allow the roots to grown into the soil!

important things to me, would be obviously none or as little as possible amount of soil getting into the rez; roots able to grow into the rez; and lasty nothing permanent! at the end of each cycle I like to be able to break down my sips piece by piece and clean it out, to restart! so as I could glue or tape or somehow seal the sides where the floor (or the top of rez) would be sealed to the walls, I can't break that apart each time!

pics below are my very first design with the window mesh stuff and the roots after harvest, that I no longer use! (I'm sure you can see why) and also my newest 30g sip. I just built to hold 2 ladies! if you look at the sides you can see what I'm talking about!View attachment 4285907 View attachment 4285908 View attachment 4285909
I don't know if my wick is going to work because I'm doing this for the first time but your question makes me think about what I'm trying. I'm making a tall SIP and my wick is not tall enough to get to the bottom so I thought of hanging cloth strips from the bottom of it which I hope would transfer the water to the soil when the level gets low. Which makes me think for your question that you could loosely weave some cloth strips around the sides of the pots too that would hold the soil in better.
 

Greenthumbs256

Well-Known Member
I don't know if my wick is going to work because I'm doing this for the first time but your question makes me think about what I'm trying. I'm making a tall SIP and my wick is not tall enough to get to the bottom so I thought of hanging cloth strips from the bottom of it which I hope would transfer the water to the soil when the level gets low. Which makes me think for your question that you could loosely weave some cloth strips around the sides of the pots too that would hold the soil in better.
that actually could work! for my problem, can't say how well it would work for you tho!
 

Serverchris

Well-Known Member
what kind of ideas does everyone have for keeping their soil from falling into the rez?

when i first started I used a a black mesh, almost like what's on window screens. it worked great, problem is it stopped the roots from growing into the rez, as well as the soil!

so I'm looking for ideas, that will help to not let the soil slip into the rez along the sides, but will still allow the roots to grown into the soil!

important things to me, would be obviously none or as little as possible amount of soil getting into the rez; roots able to grow into the rez; and lasty nothing permanent! at the end of each cycle I like to be able to break down my sips piece by piece and clean it out, to restart! so as I could glue or tape or somehow seal the sides where the floor (or the top of rez) would be sealed to the walls, I can't break that apart each time!

pics below are my very first design with the window mesh stuff and the roots after harvest, that I no longer use! (I'm sure you can see why) and also my newest 30g sip. I just built to hold 2 ladies! if you look at the sides you can see what I'm talking about!View attachment 4285907 View attachment 4285908 View attachment 4285909
Why dont you use smartpot material, roots grow through those easily but no dirt will get through.
 

meangreengrowinmachine

Well-Known Member
honestly I use net pots and pack with wick with pete moss (as is recommended in the PDF I posted earlier) and have never had any issues.. I guess the one thing that did happen was I didnt use few of the SIPs for a while and had no water in the rez... the rez the whole thing eventually just turned into a small scale worm farm with the worms congregating at the bottom of the soil bin portion. The rez became a worm casting catcher! they were kind of a pain to disassemble and clean but got all those good castings mixed right back in!
 

Getgrowingson

Well-Known Member
I have been interested in doing these for a while with my organic soil but want automation wherever possible with full time as well as on call work and three young children to deal with before I am “allowed” to tend the grow. What I am interested in is have any of the SIP gurus here used tubing almost like a current culture setup to attach all the sips in a room to a “control bucket” basically a float valve set to the desired water level for the sips so I don’t need to monitor water levels for each individual SIP? I have wanted to do this for a while but my dripper and mesh pots were keeping it low maintenance but fungus gnats and over watering are almost unavoidable as I always run different strains in the same room (variety spice of life type thing) . Anyway if anyone has done this and can comment or point out any pitfalls in my idea that would be awesome. I want the hydro growth with the flavour and taste that the water only soil provides! Thanks all
 

meangreengrowinmachine

Well-Known Member
I have been interested in doing these for a while with my organic soil but want automation wherever possible with full time as well as on call work and three young children to deal with before I am “allowed” to tend the grow. What I am interested in is have any of the SIP gurus here used tubing almost like a current culture setup to attach all the sips in a room to a “control bucket” basically a float valve set to the desired water level for the sips so I don’t need to monitor water levels for each individual SIP? I have wanted to do this for a while but my dripper and mesh pots were keeping it low maintenance but fungus gnats and over watering are almost unavoidable as I always run different strains in the same room (variety spice of life type thing) . Anyway if anyone has done this and can comment or point out any pitfalls in my idea that would be awesome. I want the hydro growth with the flavour and taste that the water only soil provides! Thanks all
I mean,... I left for a week on vacation at the END of flower and topped them off and then were all gorgeous when I got back.... the point of SIPs imo is LACK of the need for all that automation! No pumps to break and ruin your crop or water lines to leak or anything... SET IT AND FORGET IT!!! lol or KISS (-:
 

Lrn2Yield

Well-Known Member
Picked up all the goodies to build my sip today. Next weekend project, and hopefully in the next month and a half it'll have warmed up enough to get going on another grow. Been -25/-30c here for weeks, depressing.

Was back and forth on sizes for a couple of days, but decided on a 28 gal tote. Should hold enough medium for one or two plants under a 4x4 I think? Not sure how well it's going to work, but going to line the wick with fabric from a smart pot to keep as much soil out as possible and allow roots through. Should be a fun build, one which wouldn't have happened had I not come across this thread, so thanks for all the good info here .. Great read, and learned lots.
 

Jesselikes2grow

Well-Known Member
what kind of ideas does everyone have for keeping their soil from falling into the rez?

when i first started I used a a black mesh, almost like what's on window screens. it worked great, problem is it stopped the roots from growing into the rez, as well as the soil!

so I'm looking for ideas, that will help to not let the soil slip into the rez along the sides, but will still allow the roots to grown into the soil!

important things to me, would be obviously none or as little as possible amount of soil getting into the rez; roots able to grow into the rez; and lasty nothing permanent! at the end of each cycle I like to be able to break down my sips piece by piece and clean it out, to restart! so as I could glue or tape or somehow seal the sides where the floor (or the top of rez) would be sealed to the walls, I can't break that apart each time!

pics below are my very first design with the window mesh stuff and the roots after harvest, that I no longer use! (I'm sure you can see why) and also my newest 30g sip. I just built to hold 2 ladies! if you look at the sides you can see what I'm talking about!View attachment 4285907 View attachment 4285908 View attachment 4285909
I'll be using garden burlap, cheap stuff. Couple layers of it holds soil fine and it's open enough for roots to go through. Its what we used to wrap plants root balls for sale and transplant when i was a kid. Not mmj then, baby trees, tomatoes, beans, etc and youd just plant the burlap and all. It also does a great job of acting as a mulch for my outdoor garden, hence i already have some to use. Not sure how the em1 will affect it though. Ill update on that more when ive got some more info.
 

Smiffy2k9

Well-Known Member
Hi lads,

Im trying out sub irrigated planters for the first time, and also sohum living soil for the first time. Due to my space being small i went with a 3 liter bottle style sip. Ive made 1 change to the design and that is using a fabric pot for the top portion instead of inverted bottle because i love using fabric pots. Also for wicking material im using polyester stuffing (couldnt source polypropylene rope local to me and didnt feel i had enough room for a soil wick)

Now this being my first time using living soil and sips i dont know if its going ok or not. The fabric feels dry to the touch and the soil is dry the depth of my finger. Should it be this way or is my wicking material either not working or i havent placed enough inside the pot?

The sip is the pot on the right in the foreground, the other 4 are fabricpots
 

raggyb

Well-Known Member
I'm building my first one too Smiffy and have the same question. Hopefully we get to the bottom of this. I haven't planted in it yet. I got the wick partially submerged and the soil feels dry several inches down but there is some added humidity at the soil line and that's it. I didn't top water.
 

Smiffy2k9

Well-Known Member
I ended up top watering with a sprayer due to slow growth of the seedling. I set up another sip but didnt add soil to test the wicking of my polyester stuffing, after a hour sitting in the res the stuffing is only wet at the bottom of the pot where it goes into the res, there is an inch of dry stuffing above it (following the youtube video i copied). So maybe i need less stuffing in the pot.

Hopefully i get it sorted quick as the 3 party cups are ready to transplantt
 

Serverchris

Well-Known Member
Hi lads,

Im trying out sub irrigated planters for the first time, and also sohum living soil for the first time. Due to my space being small i went with a 3 liter bottle style sip. Ive made 1 change to the design and that is using a fabric pot for the top portion instead of inverted bottle because i love using fabric pots. Also for wicking material im using polyester stuffing (couldnt source polypropylene rope local to me and didnt feel i had enough room for a soil wick)

Now this being my first time using living soil and sips i dont know if its going ok or not. The fabric feels dry to the touch and the soil is dry the depth of my finger. Should it be this way or is my wicking material either not working or i havent placed enough inside the pot?

The sip is the pot on the right in the foreground, the other 4 are fabricpots
Since you used a smartpot I have an easy fix for you. Get a container that the smartpot will fit in that is about 5 or 6 inches deep. Fill that container with perlite to about 4 or 5 inches tall. Water the container leaving about 1 inch of the perlite up top dry not sitting in the water. Put your smartpot on the bed of perlite and your done. Water the perlite from now on unless you want to give a tea or something, if so water at the top of the smartpot. Been doing it this way for awhile now but I use 10 gallon smart pots and bus tubs for a container.
 

Smiffy2k9

Well-Known Member
Since you used a smartpot I have an easy fix for you. Get a container that the smartpot will fit in that is about 5 or 6 inches deep. Fill that container with perlite to about 4 or 5 inches tall. Water the container leaving about 1 inch of the perlite up top dry not sitting in the water. Put your smartpot on the bed of perlite and your done. Water the perlite from now on unless you want to give a tea or something, if so water at the top of the smartpot. Been doing it this way for awhile now but I use 10 gallon smart pots and bus tubs for a container.
Easier said than done, i I followed and then modified a 2 liter bottle sip, you cut the bottom of the bottle, that becomes your res and then you invert the other part of the bottle and thats the pot, so i have the neck/lid portion of the bottle on the bottom and then fabric sides with no fabric base, height in my grow space is also limited bit ill see what i can do for the next lot of pots.
 
Last edited:

Serverchris

Well-Known Member
Easier said than done, i I followed and then modified a 2 liter bottle sip, you cut the bottom of the bottle, that becomes your res and then you invert the other part of the bottle and thats the pot, so i have the neck/lid portion of the bottle on the bottom and then fabric sides with no fabric base, height in my grow space is also limited bit ill see what i can do for the next lot of pots.
Oh I see, you have no bottom on your smartpot. If you had another smartpot laying around you could transplant into that one first. Be aware if you move up sizes it will probably need some time to let the roots expand in the new pot before you move to the sip.
 
Top