Roseman's DIY Bubbleponics Tutorial

Roseman

Elite Rolling Society
It is starting to look like a GROW.
The seeds NEVER sprout all at the same time, or show themselves at the same time. I am faced with depriving some of them of food, to wait until they are all ready for food. After examining each seed, only one has not popped although 4 have not shown themselves. Same theory applies to LIGHT. I had to supply the ones that broke the surface with LIGHT and hope the other ones would show up soon. I have come to believe when it pops, it wants LIGHT.
I do not want a full dose of Food or LIGHT to start with.


One 200 watt 6500K bulb seen here, I need a 2700K bulb with it.
(K = Kelvin)


Two 85 watt spiral CFLs, one 2700K, one 6500K. A great balance.


I tossed the 200 watt bulb that only half of it worked. It is always a good idea to save the receipt and carton the bulbs come in. I'm just a stoner and not that smart, I guess. And I've always been the kind that hates to take anything back or return anything.
Here is a 105 watt Spiral and a 105 Watt Tube Type bulb, one 2700K, one 6500K.

I always have a problem with the big 105 watt bulbs working in the Clamp Reflectors, so I got an extension socket and then it works great.
One of these is needed to put a 105 bulb into a Clamp Reflector for a good connection:


Roseman

Elite Rolling Society
It is just not going 100% perfect in Roseman's garden. All is well, but not perfect.

Of the 15 original seed that I started, only 11 have popped and visible. I examined them closely and I think 2 or 3 more may sprout but I started 5 more seeds soaking, and I replaced two of the duds with seeds I started germinating in the wet-papertowel plate.
All but 5 of the seed were a year old and that might have something to do with them not sprouting yet.

I swapped some grow cups from one tank with sprouted seeds with grow cups that the seed had not sprouted, to the other tank. That way, I have a full tank with 6 sprouted seeds and I can start feeding them a snack.

I am using pre-packaged, pre-measurend nutrients from Stealth Hydroponics, made especially for growing with CFLS.
One small packet feeds 6 plants in 6 gallons of water. Since my sprouts are babies and are not really ready to eat a Big Mac Full Meal Deal, I am feeding them 1/4 packet of GROW Nutes and 1/6 Packet of Micro Nutes. I disolved those seperately in a quart jar of luke warm water, stirred them briskly, and added them to my tank.

Let me review that my plants grow in two basic cycles. One cycle is called VEG, (or Vegging, or Vegetating) also called the GROW cycle.
The 2nd cycle is called FLOWER, or FLOWERING, or the BLOOM cycle.
The VEG cycle is the plant's early life of growing green leaves and becoming an adult, a mature plant capable of making babies, or making buds and seeds.
The BLOOM cycle is the formation of flowers, that turn into buds or seed clusters.
Nutrients for the VEG cycle are heavy in Nitrogen and have much less Phosphorus .
Nutrients for the BLOOM cycle are heavy in Phosphorus with much less Nitrogen.
 

Roseman

Elite Rolling Society
I wanted to show you the baby roots I already have from each sprouted plant.
I counted 7 days from the seeds being introduced into the grow cups and tank until today. SEVEN DAYS! Try that in a plain DWC or Aeropnic System. (Not that it is wise to start from a seed in those systems)


Attachments

Roseman

Elite Rolling Society
Let me review the Seed Germination Process in more detail here.

This is the WET PaperTowel method. It is recommended that you start germinating the seed on the paper towel, but it is easier to start them in the system if you have the right water temperature, not too warm, not too cool, and proper pH.
What you need is a dinner plate, four paper towels and a bowl.

The plate you use will have to have a flat center area and the bowl will have to fit in the center area of the plate, upside down.
Take your plate and bowl and run boiling hot water all over them to kill any germs, you should do this to the paper towels also making sure they don't fall apart. Then squeeze the paper towel until it does not drip water unless you squeeze it a little.
Take the 1 or 2 sheets of paper towel and carefully fold them into quarters until they fit into the bottom of the plate. Turn the bowl upside down and place it over the plate, the paper towel should not stick out around the outside of the bowl.
When the paper towels reach room temperature, remove the bowl and place the seeds on top of the damp towel then cover them with the other wet paper towel, and cover them with the bowl again. The plate and bowl should be dark enough to block sunlight or kept in a dark area or covered to block sunlight and stored in an area that is clean and warm.

Check daily and add small quantities of water when needed to keep moist.

When you see a root a half inch long, it is ready to place in the center of your rockwool cube with some very clean tweezers.

Seeds average 6 to 8 days to germinate, sometimes it takes only 3 or 4 days, soemtimes as long as 12 days.
 

Roseman

Elite Rolling Society
On the tank that had the one 200 watt 6500k bulb, I went back and added two 85 watt, 2700k bulbs, to give me the Dual Spectrum that is ideally needed.


I love the Reflector Clamps for my CFLS and I am not fond of the larger reflectors that hold 2 or 3 bulbs and are suspended from two chains.
The 3 bulb reflectors have their purpose, and in some instances they are perfect or ideal. You can duplicate the sun's rays of 10,000 lumens with 3 105 watt bulbs in a good reflector. But I like the ease of being able to hang, move and rearange my lights, and Clamp Reflectors work best for me for that reason. Another reason is I rotate the lights around often.

I will rearrange my wires and cords later, but as you see here, I have not done it yet.
 

Attachments

Roseman

Elite Rolling Society
CFLs vs HID Lights

If you want to start an arguement fast, then visit an Internet Grow Forum or Chat Room and mention CFLs vs HID Lights.
Let me just tell you a fact. HID Lights (High Intensity Discharge Lights) are much more efficient than CFLs (Compact Flourscent Lights) and they grow FASTER and penetrate a large plant much better than CFLs do. HID lights grow tighter denser buds too. That is a fact no one should argue. HIDs win easily.
Wait a minute. What costs more to purchase? What requires a fancier Reflector and costs more to hang? What cost more to use and adds more to the electric bill? What cost more to handle the HEAT?

HEAT? I can touch a 200 watt CFL for ten seconds and not burn my hand. I can hold a burning 42, 65, or 85 watt bulb in my hand for five seconds and not get burnt. I can touch a HID bulb for half a second and have a serious blister and burn. Touching a HID bulb is like touching the burner on an electric stove. If you use HID bulbs, not only will you have to cool the bulb, you will have to cool the grow area too. Growing with HID lights requires VENTING the HEAT, and that cost extra money.

If you are a large scale grower, or commercial grower, HID lights are best for you.
If you are a small grower, a closet or tent grower, then CFLs are your best, easiest, cheapest way to grow.

As I mentioned, I like the cheaper CFLs because of their mobility and ease of use. When I did my first grow three years ago, a 65 watt CFL was the largest made and sold. Today I see up to 300 watt CFLS, but I do not advise using the larger watt CFL bulbs.
 

Roseman

Elite Rolling Society
Let me tell you about CFLs.

From Ed Rosenthal:

In the new Skunk Magazine there was a question in the "Ask Ed" section that just made my night last night when reading it...


The question was:

I intend to grow a single cannabis plant in a space 1' x 2'. What light would you recommend? I was think of using four 30-watt compact fluorescent lamps. Will this be enough? Cost isn't an issue but I am deterred from getting a high pressure sodium [light] because of the amount of heat the bulb produces.

Answer:

As you mentioned, you have several lighting systems to choose from, including compact fluorescents and high pressure sodium (HPS) lamps. Among HPS lamps you have a choice between a single 100-watt lamp which uses a total of about 120-watts and emits about 8,800 lumens(73 lumens per watt) or a 150-watt lamp, which uses about 180 watts and emits almost double that-15,800 lumens (87 lumens per watt).

A 42-watt compact fluorescent (CFL) emits about 2700 lumens(64 lumens per watt). Four 42 watt CFLs use 168 watts and emit 10,800 lumens. Other size CFLs have a similar efficiency.

However, that is only part of the story. Plants use mostly red and blue light. Yellow and green light is of little use to them, so light that is emitted in these spectrums is wasted energy. Most of the light emitted by HPS lamps is in the yellow spectrum. Only a small amount of the emitted light is is in the orange or red spectrums, which plants use efficiently. Warm white fluorescents (2700 Kelvin) emit a greater portion in the red and orange sectors.
Although fluorescents produce only about 75% of the light per watt that the HPS does, the amount of light usable by the plant is equal or probably higher with the fluorescents. You may wish to experiment to see if adding a single cool white CFL to replace one warm white results in shorter, stouter stems and more vigorous growth. The reasoning is that warm whites don't emit much blue light, which the plants use for photosynthesis and to regulate their growth. The cool white bulb supplies the blue light.

My call for your unit would be to use several (three to five) CFLs with a total input of between 120-160 watts. Although the 150 watt HPS is a bit more efficient that the CFLs in total output, watt for watt the fluorescents provide as much useful light as the HPS lamp. Heat is another consideration. The HPS runs much hotter and emits more heat than the fluoescents.

Make sure to use reflective material around the garden so that any light escaping the garden is reflected back to the plants. Any light that doesn't get to the plant leaves is wasted.


Look at a lumen/watt ration of various CFL's. The higher the wattage of CFLs, the lower the lumen/watt ratio. This chart was submitted by Jerry Garcia, of RIU and edited for typos.

For example...

the 200w listed at 9250 lumens for a lumens/watt ratio of 9250/200=46.25

the 150w is listed at 7500 lumens for a l/w ratio of 7500/150=50

the 125w is listed at 6500 lumens for a l/w ratio of 6500/125=52

the 42w are listed for 2700 lumens, l/w ratio of 2700/42=64.28

I have some 26w that give off 1700 lumens for a l/w ratio of 1700/26=65.38

GE lists some 13w that give off 825 lumens for a l/w ratio of 825/13=63.46

So, according to these numbers the most efficient bulbs for growing are the 26w that emit 1700 lumens. If you used 8 26w bulbs (208 watts total) you'd be getting 13,600 lumens...4,350 more lumens than a single 200 watt cfl.

I suppose you need to purchase more sockets and cords and things to support 8 bulbs, but in the long run more lower watt CFLs seem like the way to go.
 

Roseman

Elite Rolling Society
Lets look at some CFLs, these are the Spiral Type bulbs:
42 watt average $ 9 to $10.00 each

65 watts, = $19.99 average price ($16.95 now at Lowes and Home Depot)

85 Watt, average $29.00 each, can be found for $24.95 on Internet

This is a Tube Type bulb, not a spiral bulb. 105 watt bulbs average $34.95 to $38.99 each. 105s come in Tube type and Spiral. Note Tube Types do not work well in Clamp Refectors and an Extension Socket will be needed.


CFLs come in 15, 26, 42, 65, 68, 85 and 105 watts and recently last year, even larger 200, 250 and 300 wattages.
The 26s and smaller are not as efficient to me.
26s to 85s do not put out any noticable heat unless you use dozens of them. The 105s do put out some heat, but not as much as HID lights.
I can touch and hold a burning 65 or 85 watt bulb.
The 42's are about $9 to $10 each.
65 watts are abut $17 to $20 each, 85s are $30 each, 105s are $39 to $42 each, average is $40+ each for 105s.
A CFL needs a reflector, like a hood. I like the $12 Heavy Duty Clamp reflectors at Lowes, or Home Depot. Walmart sells a cheaper $8 reflector but it is smaller and flimsey and does not last. The plastic breaks easily.


DUAL SPECTRUM
With CFLs, you need the DUAL SPECTRUM, red and blue spectrums. That does not refer to the color of the bulb that you see. It refers to the kind of rays, like UVA or UVB, or the color temp of the bulb, called kelvins.
CFLS come in 2700 kevins, 3000, 4100, 5100, and 6500.

Low Kelvin bulbs, like the 2700k is for BLOOM OR FLOWERING, 6500k is for the VEG Spectrum. The others are "MID" spectrums or in between.
IF you use the MID-range bulbs (4100) then also use the 6500 and 2700s for a balanced spectrum.
In outdoors, the sun produces different rays in the spring (VEG Rays called Blue) and late summer rays for the Bloom spectrum, the RED spectrum. The sun also produces green, and orange rays, but plants do not use them.


CFLs are new on the scene, in 2006 the biggest made was 65 watts. When we talk about CFL watts, we are talking about the actually electricity used, NOT the equivalent . For example, a 15 watt CFL bulb puts out 60 watts equvalent .

Spiral and Tube type CLFS emit LIGHT FROM THE SIDES, NOT THE ENDS OR TIPS. Spirals do project light in a circle more than the tube type.

YOU CAN GET SPIRAL CFLS (15, 26, 42, 65, 85) AND TUBE TYPE CFLS (105, 250, 300).

How much light is needed for growing?
Depends on the size of plant you are trying to grow. I'll try to answer this "in general" instead of being specific to one size plant. Light seen and perceived with the human eye is measured in Lumens. There is an ideal amount of lumens for growing and a minimum amount of required lumens. The very minimum amount of light required for smaller sized plants grown is around 3000 lumens per square foot. Let me put emphasis on "minimum amount" of light. However, that's not 100% exactly accurate, since although you may have a 10,000 lumen light, the amount of light that reaches the plant varies with the distance between the light and plants, and the reflectivity of the grow area. The ideal amount is somewhere around 7000-10,000 lumens per square foot for average sized plants. As long as the plants do not show burn, as much light can be used as you want to use. (Note, the sun produces about 10,000 lumens per square foot, on a sunny mid summer day). Contracy to "talk" you CAN have too much light.

Determining lumens for your grow area:
First determine the square footage of your area (example in a 4 foot by 4 foot area, there is 16 square feet, 2 by 2 feet is 4 Sq ft. ) If you have a 1000 Watt High Pressure Sodium Light Bulb, that produces approximately 107,000 lumens. Divide this by 16 (your square footage) 107,000 divided by 16 = 6687 lumens per square foot. So just divide the total amount of Lumens, by the total amount of square feet, and that's your lumens per square foot.


Note on HIDs contributed by PurpDaddy, of RIU:
When given the choice of only one light, most marijuana growers will choose an HPS, High Pressure Sodium grow light over MH, Metal Halide, because HPS lights are more efficient (larger harvest).
You can't use a standard high pressure sodium bulb in a metal halide fixture, but you can use a metal halide bulb in a high pressure sodium fixture of the same wattage.
There are special hps bulbs that can be used in a mh fixture and vice-versa. But these conversion bulbs cost about double the price of a standard bulb.
With HID Lights:
A 250 watt fixture will supply enough light to cover a 2.5 foot by 2.5 foot grow area. (6 plants or less)
A 400 watt fixture will supply enough light to cover a 4 foot by 4 foot grow area. (12 plants or less)
A 600 watt fixture will supply enough light to cover a 5 foot by 5 foot grow area. (18 plants or less)
A 1000 watt fixture will supply enough light to cover a 6.5 foot by 6.5 foot grow area. (30 plants or less)

How far away from my plants do the lights go?
The lights in your grow room should be as close as possible to the plants without burning them. There is no such thing as too much light, unless there is overly sufficient heat to dry out and burn the leaves. A good rule with HIDs is to put your hand under the light, if its too hot for your hand, chances are that the plants will be too hot too, so move the light up until your hand feels more comfortable. For seedlings or sprouts, I keep them a little further away from the light, because they are very susceptible to burning and drying out, at these young stages. Placed too far away, and you will get undesired STRETCHING. (defined later)

I can safely place my 42, 65 and 85 watt bulbs one and a half inches near the plant.
I put the 105 and 200 watt bulbs three inches near.

How do I decide which lights to use?
Efficiency is very important when choosing a type of light. The wattage is not the most important thing, different types of light produce different amounts of lumens per watt. For example, a 300 watt incandescent will produce about 5100 lumens. (not that you can grow with incandescent bulbs) While a 300 watt Metal Halide (just an example, they do not come in 300 watts), will produce 27,000 lumens. Obviously far more efficient for growing, while still using the same amount of electricity.
Can you afford to VENT the HEAT out of the grow area and cool the area? (HID)
Are you on a budget? (CFL)

Approximate estimated light production:
Incandescents: 17 lumens/watt
Mercury vapor: 45-50 lumens/watt
Fluorescents: 60-70 lumens/watt
Metal halide: 90 lumens/watt
High pressure sodium: 107 lumens/watt


Incandescent lights: Incandescent bulbs are the most popular type of lights in the world. They may come advertised as incandescent, tungsten, quartz, halogen, or simply standard. The important thing about incandescent bulbs when it come to growing is simply this: they suck. Using incandescent bulbs to grow plants is like trying to flag down the Space Challenger with a burnt out match! You can do it, but it won't work. There are some incandescents which are sold as "grow lights." They usually have a blue coating and usually come in 60W and 120W sizes. While they may seem like a good choice to new growers, they are next to useless; they produce some light at a usable spectrum, but only have about a 5% efficiency and generate more heat than usable light. Most of us have these in our homes right now. Don't use them for growing, instead opt for a Compact Fluorescent, CFL, as a cheaper but more efficient alternative.

Fluorescent lights: Fluorescents are far more useful than incandescents. They are efficient enough, and much less expensive than HID (High Intensity Discharge) lights. Compact fluorescent tubes, (commonly called CFLs) are popular with growers because of their good output to size ratio. Compared to standard 4 foot tubes, CFLs are smaller, more easily moved, and more can fit into a given small area. CFLs are good for small grows on a tight budget, and for novice growers, since they do not require any special sort of wiring or understanding of the necessary bulbs for a given fixture, and the small wattage ones (23, 42 and 65) are very widely available. Fluorescent lights come in many different Kelvin (spectrum or color) ratings; often the spectrums are labeled on packaging as being 'cool white' or 'warm white.' Cool white is more blue, and is good for the vegetative stages of growth. The bulbs are ultra white. Warm white light is more reddish in spectrum, and is best for the flowering stage. The bulbs are almost cream colored.

Color rating - Measured in Kelvin (K). The higher the number, the more bluish the light. 4000K-7000K is mostly on the blue side of the spectrum for Vegging or GROWING, while 3000K and under goes from a white spectrum, to a redder spectrum and is best for BLOOMING or FLOWERING.
There is NOT one CFL bulb for both spectrums, two different kelvin bulbs are needed.
This pic shows both COOL WHITE and WARM WHITE, or high and low kelvin bulbs:


One of many mistakes I have made over the years, is I wish I had labeled or dated my bulbs. I highly urge everyone to date-label your bulbs.


Lets look at some Clamp Reflectors:


The above are the CHEAP ones, and not durable.

Below are the very good ones:


IF you see PLASTIC on the Clamp Reflector, they are cheap and flimsey and you should avoid them.

If you plan on using a 105 watt CFL bulb in a Clamp Refector, you will need one of these:


I have come to believe that 2 42 watt bulbs, in one Clamp Reflector is the most efficient, cost effective way to provide light to your Grow.
You also need one of these

and two of these


Available in black or cream colored at Walmart, Lowes, Home Depot and any Hardware store, about $1.69 to $1.99.
They are used to put two 42 watt CFLS in one Reflector.

I also like these:


1 to 4 Sockets Adapter A4E27

This adapter will allow 4 bulbs to be installed in one socket. Each socket on the adapter can support up to 250W, so it support up to 1000W in total.

I have seen these lined up and used in a Surge Protector:

Or try two of these :

in one of these:


One in each side. There is a socket on the bottom of this that u can not see.

One of those equals 3 sockets all 90 degrees apart.


Roseman

Elite Rolling Society
The Importance Of Mixed Lighting (Dual Spectrum)

It is common knowledge that plants absorb warm and cool spectrum of light throughout its life. But I find that the importance of mixed lighting is understressed throughout the growing community.
During the flowering phase of a plants life, Warm light is better utilized to increase the size of a plant's buds. As CFL growers we tend to pile up on 2700k bulbs to increase our yield. In most cases, growers assume that warm light not only grants us larger buds, but insures that those buds are of connoisseur quality as well. This is not to say that one can not achieve a very successful crop off of pure warm spectrum 2700k lighting. We see it all the time as members of the Grow Forum Internet community. But as CFL growers, almost all of us demand a higher efficiency for our dollar.
So what does this mean? Clearly I'm trying to emphasize the necessity of cool lighting during the flowering phase of a plants life. But why? Well thats simple. As many of you may have heard or read before, Cool lighting (6500k) introduces a UVB spectrum that benefits the potency of the buds our plants are producing.
" The writer's own experience allow for a more specific conclusion: If the UVB photon is missing from the light stream(a), or the intensity as expressed in µW/cm2 falls below a certain level(b), the phytochemical process will not be completely energized with only UVA photons which are more penetrating but less energetic, and the harvested resin spheres will have mostly precursor compounds and not fully realized THC(c).

Now it would be completely unreasonable to ask a grower using a 1000watt HPS to switch out for MH lighting even though it produces quality of the weed. Sticking with blue spectrum lighting in a plants flowering phase would greatly decrease the size of the buds and the yield of the plant. People using high wattage systems tend to grow for cash crop. No single person really needs a pound of buds.
" “Metal halide produce the best potent buds with less lumens for the money but better smoke. After years of testing with some friends who did want to keep THEIR recipe (more hps) I found their buds to be harsh, full of CBD, make me eat and sleep. The blue spectrum will give you a final product that have everything included:taste without curing, potency and yield.
For lower wattage growers who grow for self use, and are not on a low budget, it would be beneficial to replace their HPS with an MH for the last week or two of budding. This is because the last weeks of a plants life before harvesting is dedicated to the ripening of the buds, and not the growth of the bud itself. It would not greatly impact the yield of the plant, but have a great effect on the quality. Interesting, but this only applies to a few amount of growers that fit this category.
As CFL growers, we would be fools to ignore such information. It is astonishing that so many fantastic growers to not utilize cool lighting even to a small supplemental degree. We owe it to our selves to scrounge up a few bucks in change and take a drive to Home Depot. Buy a pack of 6500k bulbs (26watts tend to be popular, 42s are better) and set them somewhere not far off from your buds. Don't let your hard work return with unsatisfaction. Added quality with increased quantity(more light). Mixed lighting should be standard knowledge, not found in the advanced cultivation section.

Side Note: Reptile lighting found at pet stores is not ideal for UVB lighting. Yes they do emit a high % of UVB than regular CFLs but they output less light and emit over 12x more UVA light than UVB light which can harm your plant.


Contributed and submitted by Chase1126, and edited for links and spelling.
 

Roseman

Elite Rolling Society
All of the 42, 65, 85 and 105 watt bulbs I have discussed here have regular sized sockets and the bulbs fit into any normal socket.
200 watt CFLs have a much larger socket, called a mogul socket.

8' Power Cord with Mogul Socket


If you want a 200 watt CFL, you will need one of those or a Mogul Socket.

There are Adaptors:
Mogul To Standard Bulb Adapter
 

Roseman

Elite Rolling Society
I failed to mention two things in all of this info on Lights.
I can not find the words to accurately describe those Parabolic Reflectors, except to say they are AWESOME! The MYLAR does not reflect as much light, and I've never seen any reflector that compares.
They are huge and yet lighter in weight than any reflector I have ever seen.
Here you see one with a Mogul Socket and cord:


And secondly, I just want to suggest tht you investigate and research the new highly efficient T-5 Flourscent Tubes in 2 and 4 foot lenghts.
 

Roseman

Elite Rolling Society
Lets discuss Temperatures and Humidity


The temperature is the hardest factor to take control of to me. When confined to a small space, HID ballasts and any lights can push temperatures sky-high in no time flat. That is why I use CFLS, to avoid venting heat. This is especially true during hot summer months when outside temperature reaches its highest. Nighttime (LIGHTS OFF period) temperature can be just as difficult to regulate during cold winter month. Most gardeners are aware that temperature in the grow room plays a major role and can greatly affect the growth of plants and the quality of the finished crop. Most gardeners do not know how controlling the temperature of their garden in very specific ways they can achieve a superior crop. Drift to far from these ideal temperatures and watch your plants and crop suffer.

Before getting started it is highly recommended that every indoor garden has a max/min thermometer.
(Digital $6.95 at Walmart)


This product allows the gardener to see exactly the fluctuations in temperature within their garden. Without this useful tool there is no accurate way of knowing the different temperatures between daytime (lights on) and nighttime (lights off). The difference between the two temperatures is very important to plant growth. Anymore than a 10F-15F difference between daytime and nighttime temperatures and you risk shocking and stressing the plants. You want a 10 degree difference between LIGHTS ON and LIGHTS OFF temps. In general the optimal daytime temperature for plant growth is between 70F -75F. Drift too far above this range or too far below and growth can be severely affected. Daytime temperatures exceeding 90F or under 62F and plant growth will be slowed and stunted. Plants do thrive in Afganastan's 110 degrees, but they quit growing at that temp. If the temperature drifts higher than 95F the plant’s enzyme production will drop off and the plant will begin shutting down. At temperatures above 92 - 94, high photosynthesis shuts down due to the stomata in the leaves closing down to conserve water. At normal temperatures the stomata will be open, taking in CO2 and sweating water to keep the plant cool and allowing for transpiration.


Ideal temperature varies depending on whether or not CO2 is being introduced to the environment. A more suitable daytime temperature when the air is being enriched with CO2 is 80F-85F. This temperature range promotes the exchange of gases between the plants and the environment. Also, it can speed up the process of photosynthesis. Plant in an environment at 86F can perform carbon extraction from CO2 twice as fast as at 68F. It is still recommended that the nighttime temperature drop no more than 15F from that of the daytime temperature.

There is another relationship between temperature and the absorbsion of gases by plants that many hobbyist growers are aware of. That is the relationship between the temperature of the water in your reservoir and the amount of oxygen the water can hold. The best range that your reservoir can be between is 60F-75F. Ideally the reservoir temperature should be at 65F because this level contains the most oxygen. Also this temperature will help control transpiration (the act of drawing up nutrients by evaporating water through out the leaves), and humidity levels. Buying a simple aquarium floating thermometer will allow you to know where you fit in this range.


$2 to $4 at Walmart, Target,
PetSmartm Aquarium Departments


Another great reason for regulating the temperature in your grow room is that biological processes can be speed up exponentially by every degree. This is true for your plants as well as the potential pests that may invade your grow room.
Pests such as spider mites can reproduce up to 10 times faster with every degree the temperature rises.
These pests can destroy a garden in no time flat, you really do not want to make it any easier for them. Spider Mite Eggs and webs can screw up the buds so bad, they can not be smoked. With a daytime temperature at a steady 72F and nighttime temperature of 65F it is much easier to control and destroy spider mite, thrip, and many other pest populations.
The same principal can be applied to the prevention and control of fungi, molds, mildews, and bacteria, which can spread more rapidly when temperatures in the grow room or reservoir exceed 90F. Also, the warmer the air, the more water it can retain which means humidity levels can easily go beyond the recommended 40-50% for Vegging. (you want high humidity for VEG, and low humidity for Flowering.) This high humidity coupled with lower nighttime temperatures can cause condensation to form on leaves. This will invite molds, mildews, fungi, and bacteria to take over you grow space. With high temperatures the likely-hood of losing control of the problem, such as powdery mildew, is very high. Once control is lost your plants may be the next to go.

Temperature is also very important when it comes to starting seeds and getting cuttings to root. Placing seedling trays on a heating mat will reduce germination time dramatically. Speeding up germination time usually leads to stronger and healthier plants. Also, less time spent between crop cycles makes a garden efficient. More harvests provided in less time can equal big bucks in the pockets of professional growers.
The ideal temperature for sprouting or cloning is 80F. Any higher and you risk burning the roots. Also, many seeds simply will not germinate at temperatures over 90F. The seeds will become dormant and never sprout.
The same principal used for seeds is used on cuttings to coax roots out quicker. The sooner cuttings can establish roots the better. If roots can be forced quickly they will grow strong and stay strong. A bottom temperature of 80F-85F, roughly 10F warmer than the air, will speed up rooting time and help to jump start those roots once they do begin. Let the temperature get too high or too low and roots growth will be hindered or they will never grow at all. Using the proper technique and the proper temperature for bottom heat not only can rooting time be speed up from 2 weeks to as little as 3 days, but the survival rate of your cuttings will drastically improve.

On the topic of roots, there is an ideal temperature for the root zone after the plants’ roots have been established. Roots are working 24 hours a day and constant attention is required concerning temperature in and around the root zone. The ideal temp for this root zone is generally 65 to 75 degrees F. At this temperature the ion exchange between the roots and the environment around them is at its absolute best. This means that the plant’s root system can take up more macro nutrients, more micro nutrients, and more oxygen at this temperature than at any other level. This makes a plant more efficient and a plant working efficiently will provide a superior yield.

Amazingly, some growers grow successfully with no themometer for the air or water. But for maximum efficiency, you got to take control of temps.

HUMIDITY? that is more simple to me. Get the Humidity VERY high for VEGGING, and very low for FLOWERING.

Have you ever seen how an outdoor plant loves a rain shower? In Vegging, I mist them daily. I mist with plain distilled water and i mist with a foilage spray too. I do raise the lights up, to be careful with my bulbs getting wet and breaking. And when it rains outside, it also gets cloudy and the sun's rays are blocked. Plants in outdoors, in nature do get an ocasional rain shower or thunderstorm. Do you let it rain on yours? I do, but artificially by MISTING.
AND, I bought a cheap humidifier.

Cheap Cool Mist Humidifiers from Walmart:

$26.00


Ultrasonic Humidifier With Light


$28.97


Graco, Cool Mist Humidifier, 1.5 Gallon $29.96


During Flowering, we need a low humidity, especially to avoid Bud mold and bud rot.

Cheap De-Humidifier for closets and tents
$40 at amazon.com

__________________


Another way to raise the humidity is simply place saucers of water all around the grow area. I hand soaking wet towels from coat hangers in my closet to raise humidity. You can also take a large roll of newpaper, and stick the roll in a large quart jar of water, and the wet newspaper acts like a wick, spreading humidity as your fan blows across it.
 

Roseman

Elite Rolling Society
It is much easier to heat a cool room in winter, than it is to cool a warm room in the summer.

Here are some tips and tricks for controlling reservoir temps.

First, insulating your res really helps stabilize the temps. Wrap mylar or insulation around it.
I used to put blue ice bags in the res if the temps started to rise, but I can no longer recommend putting ice in the root zone. During my last grow I did this, and the plant closest to where I put the ice definitely didn't like it; it ended up stunted and there was a bald spot in the root zone where the ice went. And as the root mass grows there's generally not enough room to stick ice bottles in the res anyways.

If you want to use ice to cool the res you might want to try the following ideas:

I rigged some quart and half-gallon jugs using drip line and a drip-line shut-off valve. What I do is freeze them overnight and then stick the line in a hole on top of the res in the morning This serves a few purposes: 1) provides a slow flow of cold water to the res throughout the day, so the roots aren't shocked by a rapid change in temperature; 2) keeps the res topped off; and 3) serves as a ghetto A/C for the grow area. The main disadvantage is condensation; I have to keep a rag under the jug to soak up water.

I built a semi-recirculating DWC for my latest grow - a separate res allows you to easily do maintenance without disturbing the plant reservoirs; 2) I'm planning on doing a ScrOG - once the plants are in the screen lifting the lids becomes problematic; 4) more water means that things like temperature, ph, and nutrient concentration are more stable; and 3) if I need to cool the reservoirs I can put ice in the shared res without worrying about the roots. The main disadvantages are complexity, size of system, and more nute usage.

Some other ideas:

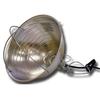
1. Put your air pump in a cool area. It seems like most people put their pump on top of the reservoir under the lights. If it is hot where you put the pump, then you're going to be pumping hot air into the res. I try to put mine outside the grow area if possible, or as close to the inlet as possible.

2. Direct some airflow from the inlet over the res using a fan.

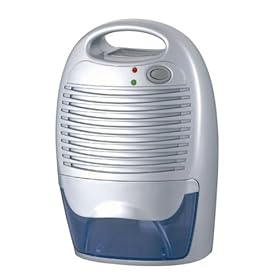
3. If you use a humidifier like what Roseman recommends try directing the air from the outlet over the res using a fan. Acts kind of like a swamp cooler; I've found it lowers the temp over my res by about 5 degrees.

4. Running a water pump continuously in the res will cause the temps to rise. I think I have a good idea how the stealth hydro system works, for instance, and I can certainly see the advantages of it during the early stages of growth. However, once the roots are in the water I'm not sure if running the pump continuously is necessary after the roots are deep in the water. I put the pump on a timer and run it kind of like an ebb and flow once the roots are in the water - like for 10 minutes 5 times a day.

Of course, like Roseman says, the best way is to keep your room temp down if you can. 75* is out of the question for me, it costs too much to keep my A/C running all day at 70 degrees, especially since no one's home anyways. I keep my A/C at 80, and my grow room at 85.

Contribured by Dystopia, from RIU, and edited for content.
 

Roseman

Elite Rolling Society
OSCILATING FANS


An oscilating fan is a necessity to me, in growing.
First it cools the area. Consider in nature, outdoors, plants get breezes and strong winds blown on them, for a reason.
Second, you know how to strenghten a muscle, or make it larger, or stronger or grow faster? You exercise it, you MOVE it.
To strenghten a plants stem, stalk or branch, or make it larger, or stronger or grow faster, you MOVE it too, with an oscilating FAN blowing on it.

Fans help with Temps, Humidity Control, Moisture Control, etc.

Air movement is very necessary for the health of your plants, but too strong of a fan can cause wind burn. Direct your fan toward the tops of the plants and toward the lights. Never position the fan blowing strongly downward on the leaves or you can get wind burn.
 

Roseman

Elite Rolling Society
Join up with us.


SpongeBob Squarepants grows hydroponically!
He grows with tiny bubbles, just like you and me!


We ARE Family,
We are The BubbleHeads!

If you want to learn from the greats,
PurpDaddy, Mostly Crazy, Bongtok4u,, db297, JonnyBtreed, Southern Grower, HomeGrown Hairy, ACGrower, MajPat, tSunami13, BlueyBong, Paranoid420, LongHornFan, SmokeNchoke, hubebaba, peterman990, xpac7007, chnk915, and hundreds of other skilled bubbleponic growers, then learn from THE BUBLEHEADS.

If you can teach DWC and Bubbleponics, am willing to help the new members here, and want to be part of a family, then join us.


Show your logo, show your pride, and show your intelligence and ability to do what most people can not do and that is grow Hydroponically with Feeder Tubes and a Water Pump!

We're not Dirt Bags!
We are The BubbleHeads!!!!!

THE BUBLEHEAD GANG!

We are NOT DirtBags!!! We can grow in water!

Right click the BubbleHead Logo, save it to your computer, then upload it to your signature.

By adding this bubblehead Logo to your signature, and claiming membership to the BubbleHeads, you agree to be very helpful to Newbies with DWC and Bubbleponics with patience and caring and make all other BubbleHeads proud to be a member of the gang. If you do not know the answer, go get someone else from the BubbleHead Gang to help.
Send this invitation to anyone you like and be sure that they know DWC and Bubbleponics and are willing to help newbies.

May the Bubble Force be with us all.
God Bless our Chief BubbleHead, Mostly Crazy!


The BubbleHeads are dedicated to helping others learn to grow in water, simple, fast and easy.


Helpful links:

BubbleHead Logo Post # 10672

CFL Tutorial -

What is Bubbleponics Post # 9835

8 Step Recovery Post # 9838

Start Nutes - Drain and Replinish # 10395

10 Days, 12 days, 15 days, 20 days Post # 9

Temps, Humidity Post # 8491

HARVESTING CURING Post # 6623

Roseman and purpdaddys guide for my Bubbleponics setup from Stealth Hydroponic

Roseman's DIY Bubbleponics-DWC Tutorial
BUBBLEHEADS know how to grow!
 

Roseman

Elite Rolling Society
I took the largest beach towel I could find, actually two of them, and soaked them in the sink, and hung them in my closet, over a bucket, on a clothes hanger, to raise my humidity. I also use a humidifier ocasionally. I will use more wet towels adn more saucers of water laying around when the plants get a little larger.


2009 Grow 003.jpg (3 of 3)09-05-2009 01:26 AM
 

Attachments

Roseman

Elite Rolling Society
Notes:
One of my feeder tubes got disconnected for about 12 hours before I noticed it and the two inch tall baby plant just dried up to a crisp and died.

So far, I have been limited to using 1/4 dose of nutes, causing me a slower start. I have sprouts big enough for a full dose of nutes, but in the same tank is one or two babies NOT ready for full nutes.

I had 5 duds that did not sprout, so I replaced them with seeds I had germinating in the wet papertowels.

I want to go back to GERMINATION IN PAPERTOWEL and add
Do NOT have the papertowel soaking wet with a puddle of water in the plate. Just have the paper towel very wet, but do not have the seeds resting in a puddle of water.
 

Roseman

Elite Rolling Society
I moved a larger sprout to the 5 gallon bucket to have 3 babies the same size so I could give them a full dose of nutrients. As I previously mentioned, I am using pre-measured nutrient packets.

A few days ago, I put 1/4 packet of GROW nutes and 1/4 package of MICRO nutes in both tanks and in the 5 gallon bucket. It was a small feeding, but the plants were not ready to eat a full meal and none of them were the same size in each tank.

Today, I drained and replinished the two tanks and bucket.

I found one air stone not working as powerfully as it should, because the air line was crimped and folded at the end. I need to check my tanks inside daily.

I also found one tank had some hydroton dust in it, making the water slightly brown. It is from adding more hydroton later and not rinsing it good enough.

You should always drain and replinish after the first ten to 14 days, and then every week, once a week.

To drain my tank, I use a 1/2 or 3/4 inch clear plastic hose made for aquariums, and an extra 5 gallon bucket. I lift the lid about 4 inches, with both arms in the tank, I disconnect the irrigation hub from the water pump. I use my fist as a coupllng, and put my fist on top of the water pump and stick the hose in my fist.
The pump pumps the tank empty within one minute into my bucket. I empty my tanks leaving only an inch or two in
the bottom of the reservoirs.

Here I am holding the hose in my bucket and the other end is stuck into the top of the pump, emptying my tank.


Here I am draining the bucket.


If you buy the Drain Plug for the tank, remember to use some plumbers tape, or teflon tape, or some plumbers putty or glue, or it will leak. To use the Drain Plugs you also have to have the tank elevated and not at floor level.

I have friends that use a wet vac to drain it and I know several growers that bought a DRILL PUMP at Lowes or Home Depot to drain it. A Drill Pump attaches to a hand drill, and is fast, only costs about $12 to $15.
I also have friends that use a syphon hose or an aquarium vacumn hose to empty their tanks.


You should always have a two inch air pocket inbetween the bottom of the grow cups and the top of the water line.

When you do the 2nd Drain and Replinish, about the 21st day, you will see a growth spurt the next day, of two inches in height. Every week, when you do the Drain and Replinish, you will see a growth spurt. It is because of the AIR BATH the roots get while being out of the water. This AIR BATH can last up to ten minutes safely with absolutely no harm to the roots or plants. They love it.
 

Attachments

Top