Multiple smaller growing containers shouldn't attract pests any more growing in a single large container. Pests become a problem when they're introduced, and when the population of predators is too small or non-existent to take care of it if they do show up. Prevent infestations of terrible things like spider mites by practicing proper cleanliness, that includes your own body, hair, and clothes as well as your tent, and the room your tent is situated in. If get clones from outside your own grow, always quarantine them for at least a week far from the room containing your tent, and scope it daily searching the undersides of leaves and where new growth is coming from nodes. All these precautions should be undertaken regardless if you're growing pure hydro or no-till organic.
Also avoid visiting and handling your plants 10X a day. You introduce a very small but accumulative risk every time you unzipper it. Keep pets out of the room your tent is in. The number of different people who interact with your plants increases the risk.
The risk of infestations of things like gnat flies will be the highest during your first cycle, and that risk continually lowers as the cycles go by and you develop a balanced relationship between predators and prey. In my last few cycles I haven't seen even a single gnat flying around. Unfortunately a lot of folks try this out and quit after the first and most difficult cycle to get through. I suggest not using the most expensive and prized seeds for your first cycle, and hang some yellow stickies for monitoring things.
Ensure your initial soil mix alone will get you through your first cycle - do not depend on cycling of organic material for it. For those small pots I had before, it was hen manure and EWC that helped get me though the first cycle in my mix, and top applications before flower mostly to get me through the second cycle. You could also apply applications of Gaia Green or some other reasonably faster source of organic-based nutrients instead of you can't buy organic hen manure where you are. That means still add organic material to feed the bacteria and start the cycling process in cycle one, because this will be feeding cycle two and even part of cycle three at some point. That part has to be continous, and always apply more mulch material if it gets thin at any point in your grow.
Don't complicate it or overthink it. To me, it's the easiest way to grow anything on earth. Nature does it continually without any help from us.
Hey man, I am moving into action. I make posts but among the replies, you have been most helpful and gracious to spend time to answer and your ideas are what makes sense to me the most.
Today I am starting to take action. I will acquire peat moss, vermicompost and compost.
Now, it seems that peat moss has black and yellow varieties with different grades and nutrient density etc. Any need to differentiate and select one over the other, and if so do you have any advice?
In the same way, when buying compost what should I look for? I will ask what was composted into it, how hot is it etc. What am I looking for and what am I avoiding?
It would seem the companies which produce vermicompost and sell worms in my country mostly work with Eisenia fetida which they call red californian worm here. Is vermicompost from that ideal? Are those worms ideal and enough if I buy and put them in my pots?
I am thinking the base as
%20 vermicompost
%20 compost
%30 peat
%15 pumice
%15 rice hulls
with some amendments to be bought after I acquire these.
(I remember you saying you included %5 alfalfa pellets, should I add?)
(You also said you added the alfalfa compost and vermicompost to your Pro-mix Organic Herb & Vegetable to make your medium. Can't I just mix the vermicompost, compost, peat and aeration and use that? Is it necessary to mix those ingredients with a soil mix?)
You also said "Ensure your initial soil mix alone will get you through your first cycle - do not depend on cycling of organic material for it. For those small pots I had before, it was hen manure and EWC that helped get me though the first cycle in my mix, and top applications before flower mostly to get me through the second cycle. You could also apply applications of Gaia Green or some other reasonably faster source of organic-based nutrients instead of you can't buy organic hen manure where you are. That means still add organic material to feed the bacteria and start the cycling process in cycle one, because this will be feeding cycle two and even part of cycle three at some point. That part has to be continous, and always apply more mulch material if it gets thin at any point in your grow."
For the last time, like if I had not asked this before, could you simply tell me either "ye these percentages are ideal" or "idk man I'd put less of xxx and more of yyy, and add zzz". I would like to prepare this soil in a way that I can transplant the seeds I have put in paper towels yesterday into it once they are in early vegetation, so in a few weeks.
So if I do quality mulching, I dont need to do cover crops? Personally I don't do cover crops. Instead I add 10% biochar to my soils. It simulates something like a Terra Preta soil, the massive surface area of the carbon matrix allows beneficial bactera to thrive. Then I foliar feed with an...
www.rollitup.org
in this post, you say you don't really cook your medium so is it safe to say the mix I make will be ready to transplant into in 20 days as long as I follow your way and guidelines of growing?
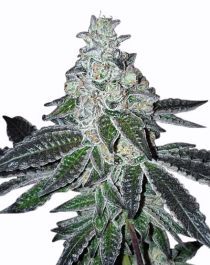
Gelato seeds are a cross of GSC and Sunset Sherbet, together they combine to create one of the best high yielding, potent desert-like tasting strains.

www.marijuana-seeds.nl
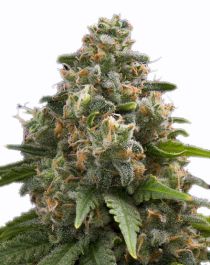
Green Crack marijuana - some of the finest weed in the world
www.marijuana-seeds.nl
These are the seeds. 2 of each will go into the 4 pots.
I read a post of yours here
Looks real good always enjoy reading your updates. Just a suggestion but would raising the light help to maybe make them stretch a bit to fill the vertical space. I like this idea I will have to try it on my next grow
www.rollitup.org
where you say wider pots are more important than height. I will be buying ingredients soon and will have to buy the pots soon too. So, what would be the ideal dimensions for these 4 pots? Should I try to find fabric or plastic bins like you did?
Like you said, aeration is needed until your soil settles properly and the system works. Therefore, it seems rational to me to keep the pumice as low as possible since rice hulls seem more decomposable in soil. Yet, you said too many rice hulls might cause bacteria to use up nitrogen to nreak the carbon down. Right now I am still learning but need to make a soil now so if you could like I said just tell me : "I advise you to do these base ingreadients at these percentages."
I am still researching stuff but rn I need to decide and all I ask is for you to just tell me "I'd do it this way instead" and once you add your final recommendations give me the "ok this looks ideal, most probably this is ok" green light so I can execute.
Much appreciated