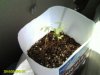
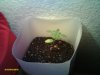
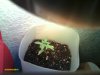
Okay this is her now at 5ive weeks.
Any ideas on how to get her to grow faster but not too big? LOL I gotta stay incognito!
I'm not sure if you have heard of it, but there is this organism, group of organisms, together marketed as fungi perfecti. They server as a fertilizer, root stabilizer, and overall plant health sentinel for the underground.
Just go to this website:
http://www.fungi.com/mycogrow/index.html
One ounce
HMSO1O $5.95 is what you want, the myco-grow soluble.
It's cheap and easy to make the solution up. 1/2 teaspoon of the Myco-Grow organisms into a 1 quart container of water, close lid, and mix until well mixed. Once well mixed set aside.
Get your potting soil mixture, and use spoonfuls of the Myco-Grow solution to moisten and stir around the soil/potting mixture you plan to use for your transplant. Do not use so much that the soil turns into a soggy mess. Use about 1 tea spoonful per 1/2 cup of soil necessary to fill the pot you'll be using. You'll need to ever so gently take your plant out of that container, and put aside for a second; it will be going in a pot 2-3 times the volume it's in now, and make sure the new pot has drainage in the bottom.
Assuming that the roots of your plant have nearly reached the bottom of your container, fill your new pot leaving a dug out in the pot within this moistened soil mixture you've just made in the pot as deep and as wide as it was in it's prior container. Set the pot aside, and there should be little more soil mixture left over for filling in the transplant in a little while.
I'm a newbie, and this is my advice, take it for what it is. This is what I would be doing/did. It would be best if you can wear gloves while doing this, like latex lab type gloves. Once you have your plant out of the container, you'll need to gently take soil from the outside until you start to see the roots, but keep the roots wet once they begin to be exposed.
Work semi-quickly and keep some water near in a spray bottle on super fine mist. Once you see the roots in one area, you are done pulling dirt from that part, more to another section to the left or right. But, very gently, crumbling, and pinching the dirt away you do not want to hurt the roots, just expose them. As you expose more and more root-ball eventually all the way around, and on the bottom, you'll have exposed the entire root-ball. Remember, keep the roots wet!!!!
You'll need something about a slim as a coffee stir stick. Gently, poke 5-10 holes evenly spaced out at the top face of your plant's soil, if you feel resistance stop, otherwise, go in about 1.5-2 inches. This will be so that the Myco-grow can get a chance to reach the inside roots as well as the outside roots. Now for the dip.
The Myco-grow should be in a container that is somewhat taller than the root-ball. Dip the root-ball into the Myco-grow solution all the way to the top face and let it cover the surface face and go down into those holes you just made. Give it about 5 seconds, and then pull it out, and place it in the dug-out in the pot you have set aside. If the root-ball is too big, then just pour the myco-grow all around and on top of the root-ball.
Using the soil mixture that you have also set aside, begin to fill in the dug-out until the soil, and the plant are one, level, and steady. You should barely be able to tell where the transplant began and the soil from the pot was filled in. Now, for the final step, the transplant drink.
Your pot is about to have to drain water so know that. Give your pot a good watering all the way around. Getting all of the soil around the pot. Let the pot completely drain. You are done.
From here, you will not need to fertilize anymore, or you shouldn't have to, just water. Figuring out the right watering schedule for a new container can be frustrating, but once you do, that's it, smooth sailing. To water, you do the same thing every time, full water of the top soil, and then let the excess water drain out the bottom fully, do not just let it sit in the drainage water.
Don't water too much-I think stem and leaves will start to turn yellowish instead of nice green, and don't water too little-stems and leaves will droops and begin to fall over. It is easier to bring a plant back from underwatering than it is from overwatering, so err on the side of waiting to water. But, as soon as you even think you see a leaf or steam loosing it's rigidity, then water!
Good Luck!
")