My NEW grow room

AKgrower29

Well-Known Member
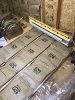
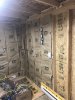
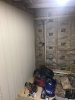
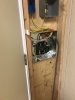
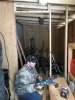
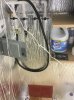
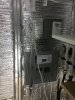
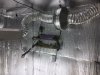
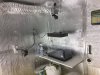
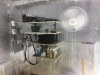
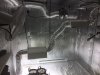
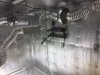
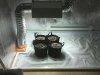
Ok so I posted a while back about my ventilation issues I was having while building a grow room. I scrapped that whole building and decided to build it directly behind my house. I am able to pull intake air from the crawl space of my house. Since it gets quite cold in alaska in the winter. My crawl space stays at least 50 degrees in the winter so I won't have condensation issues with my lights.

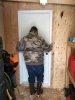
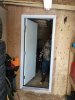
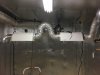
I'll post pictures of the progress.
 

AKgrower29

Well-Known Member
Here is the start of it framed, siding up, and insulation going in. Every wall is insulated. Including the floor and ceiling. I also caulked every joint with siding sealant. After it was insulated I completely sealed it with a 6mil clear vapor barrier.


IMG_1048.JPG IMG_1049.JPG IMG_1050.JPG
 

AKgrower29

Well-Known Member
Electrical is ran to a 100a main panel inside the room where everything is wired into.
I have separate circuits for both heaters and then outlets everywhere I thought I would need them. The ballasts and fan for the lights are wired to the three outlets right next to each other that are all on a digital timer next to the panel. The timer is not able to handle to load from the lights and fan so it actually trips the contractor in the gray box that is on its own dedicated 20a circuit.

IMG_1051.JPG
 

AKgrower29

Well-Known Member
Here is ventilation setup. In the back you can see the carbon filter and exhaust fan setup. The exhaust fan is hooked up to the speed controller on the back wall to control the exhaust speed. Those are both 600w lights the left light isn't hooked up to the intake yet but it is now both the passive intake and the intake for the lights run into the crawl space of the house and are filtered by phresh intake filters.
IMG_1098.JPG
 

420 Boy

Member
If you can, try to move that filter closer to the wall where you exhaust your air out of the room. Shorter flex duct. Try to have it as straight as possible.Bending the flex pipe makes you loose efficiency

Same for the flex pipe connecting the lights, try to put it shorter and straight.

These are details, you room looks good. Good luck
 
Last edited:

AKgrower29

Well-Known Member
The reason the filter is in that corner because where the flex duct leaves the room is directly above my passive air intake so I put the filter in the opposite corner to stop it from just pulling air from directly below and as for the lights I may be able to shorten the connecting duct a little but I wanted to be able to lower the lights independently from each other as I plan on grow different height strains at the same time.
 

420 Boy

Member
The reason the filter is in that corner because where the flex duct leaves the room is directly above my passive air intake so I put the filter in the opposite corner to stop it from just pulling air from directly below and as for the lights I may be able to shorten the connecting duct a little but I wanted to be able to lower the lights independently from each other as I plan on grow different height strains at the same time.
okay.. i see.. everything makes sense now :)
 

AKgrower29

Well-Known Member
The room is about 99% complete now I ran the plumbing into it for water right in the room and only have to plumb in the drain and it's complete. I will get a bunch more pictures today when I go out there to transplant.
 

AKgrower29

Well-Known Member
Here are the photos of the room completed. Any ideas or changes you guys see that I can do to make it better let me know. This is my first room and my first grow so I'm learning as I go.
 

Attachments

sugarshackbuds

New Member
Here are the photos of the room completed. Any ideas or changes you guys see that I can do to make it better let me know. This is my first room and my first grow so I'm learning as I go.
This maybe late in the game but I would have suggested white reflected surfaces.Mylar and other shiny materials are still good reflective sheeting, but if you want the best light reflection white is the way to go.IMO
But great setup!
 

AKgrower29

Well-Known Member
Yeah I debated both, and decided to use the reflectix instead due to the added little insulation value. In the winter it can get pretty cold in alaska and I wanted any little help I could get. It also claims a 97% reflectivity rating but we'll see. If I'm not happy with it I'll put panda film on the walls.
 

sugarshackbuds

New Member
Alaska:shock:!?! Wow!! Yea definitely need to look for something that insulates well. We don't get real cold winters here on Vancouver Island.
 

AKgrower29

Well-Known Member
Yeah, hahahaha.

I live in the Matanuska Valley and usually it's not super cold but for a few times during the winter but I work way up north where it gets really really cold all winter so I tend to think what's really cold to most is not real cold to me.
 

sonson176

Well-Known Member
Good move on the contactor, most consumer grade timers have tiny little junk relays. Good for holding real contactors and small house appliances but that's about it.

Not sure if you bonded the neutral to the grounds in that subpanel, but if you did, remove the bond and isolate the grounds on the subpanel, separate from the neutral bar. Otherwise you end up with a parallel path back to the main panel, with neutral currents flowing through the ground(and everything that's grounded, such as metal enclosures, ballasts, etc).
 

AKgrower29

Well-Known Member
The neutral is isolated from the grounding bar already. Yeah I couldn't find a digital timer that would do much more than 5-8 amps and I was needing it to switch about 14a. The contractor is cheap like 5.00 and the timer was 10.00 so all in all if I had used larger wire I could have a 40amp digital timer. But I only wired it for 20 amps.
 
Top