High Pressure Aeroponics

ZxcStaz

Active Member
Finally got to the testing of the first chamber today. On a whole it works pretty well. Some of the sprayer heads need to be tweaked, and a few have flow issues. I have replacement nozzles, so I just need to switch them around for full coverage.
20180310_191458_resized.jpg 20180310_191455_resized.jpg
The low pressure system really puts out some water. I'm powering it with an IWAKI magnetic pump MD-70RLZ, it can put out 11.4 gpm, so it moves the water for sure. I really like this pump, it is very quiet and as a bonus it's lab grade.
20180310_191526_resized.jpg 20180310_191524_resized.jpg
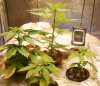
The return pump is very loud and it takes very long time to transfer the water back into the reservoir. I ordered another IWAKI to replace that pump ( Two, actually - I found them for $50, how sweet! ). Using two of the same flow rate pumps will simplify the timing, as they should be pretty close to time and volume moved, plus it will be much quieter. Here is a pic of the return into the rez.
20180310_191556_resized.jpg

There is still a lot of work to be done before I can move the plants in. There is another chamber to create, insulation and exhaust fans, I need to put in a catwalk over the chambers, and ooh, I got a sweet deal on a CO2 controller, so add CO2 supplementation to the list. (I have CO2 tanks from fraternity days- chiller plates and Bush beer hangovers.)
- well, it's back to work for me. I'll post more soon. - zxc.
 

ZxcStaz

Active Member
Snow day! Got some work done today. Pretty much finished the high pressure system. I have two nozzles left to install, but I can't find them. I had 10, but I can only find eight. The dryer must have ate them. I tried to order some more, but the only place I found that sells 3/8" push fit to 1/8" NPTF stems has them back ordered for four weeks. The coverage is a little sparse in one area, but I don't think it will be a show stopper while the plants are small. Here is a couple of shots of the tent now.
20180312_184556_resized.jpg 20180312_184608_resized.jpg
I plumbed in the pump, PEX 1" water feed line, and the waste line. I routed the line so that the pump can power the LPS, drain the rez, and I had an idea to add a recirculating line so that I can put the res into a recirculating loop. I'm going to add a tee and ball valve so that it can flow into the return line. I think this is going to be perfect for mixing nutes. Normally I put a GPH pump in the bottom of the rez and just circulate while adding the salts. With this new configuration, I'll just turn a few valves, empty, refill, and circulate when I need to make the new nutrient solution.
20180313_221220_resized.jpg 20180313_221234_resized.jpg
I also modified a few of the LED's that I have. They had glass encasing the bulbs, so I removed it for better heat dissipation. I will have to be careful if I spray, but I think the benefits outweigh the risks. These are the movable lights. I have a few more to install, but I can't do that until the plant transfer.
20180313_221244_resized.jpg
So, It's a work in progress. I'm hoping with a few more work days it will be up and operational.
 

Atomizer

Well-Known Member
Servicing the central nozzles wont be easy. According to Murphy`s Law, the most inaccessible nozzles will always be the ones that develop an issue ;)
 

ZxcStaz

Active Member
Totally true Atomizer! I had an epiphany (while admiring the progress yesterday) which might make the nozzles easier to work on. I'm going to configure the catwalk(s) down the middle of both chambers instead of down the middle of the tent. I should be able to reach all points from that vantage without using the Mission Impossible harness, and maybe that will mess Murphy up a little bit, if St. Patrick's day doesn't. :)
 

ZxcStaz

Active Member
Anyone remember the time that ZXC spent an hour troubleshooting HPS flow issues while he was installing parallel pressure pumps? - Well, if I was there, I would have told him to make sure the pressure regulator, which has a flow direction, is orientated correctly, that is, if he wanted any water to come out.
 

ZxcStaz

Active Member
Electrics, and Plumbings, and Nutrients ... Oh My!

I have more superglue than fingers at this point. What started out as a little plumbing cut-in turned into a system remodel. It was a 'send the ladies out for parts' day, as I cut more and more into the antiquated pipes. By the time I was finished, the main house line was upgraded to 1" PEX and all of the feeders are 3/4" - we'll have no pressure drops now; no more shrieks when I forget that the shower is on.
20180317_220050_resized.jpg

I created a GFIC matrix of double gang outlets for the pumps. This is spliced off of one of the 20 amp circuits. An electrician friend told me that the new GFI's are awesome, and they can control the load of pumps, so there should be no issues with the power spike associated with the pump activation. I have yet to test it, but I'm sure he is right.
20180317_220109_resized.jpg

Finally, I plumbed the circulation pump. It is an elaborate conglomeration of valves and pathways. I can switch the flow from spray, to drain, to recirculate. I'm pretty stoked. I don't have to move water anymore. There was a funny moment when I first turned on the water, the residual air gap created a loud report as I turned the valve, and I thought I arced the electric. No worries though, just water hammer, and I'm still kicking.
20180317_220121_resized.jpg

I still have a ton to do, but I put a big dent in the workload today.

- ZXC
 

ZxcStaz

Active Member
Well, they say that necessity is the mother of invention, I'd say it's a harbinger of pain and yet accomplishment. I figured out something awesome today; 1/8" NPTM nozzles can thread into 3/8" tubing, if persuaded. Now, when I say persuaded, I really mean, ream the crap out of one end of the tubing after soaking it in boiling water and stretching the top with a pair of Coleman pliers. It takes some serious force, I mean I rammed that sucker in like Big Jim Slade in Kentucky Fried Movie. Screw that bad boy in and it's ready to go. The benefit is that I don't have to buy a bunch of silly adapters, nor wait for stocks to be resupplied. I can use a standard 3/8" tee to house the nozzles, or make up any crazy configuration I want. (Italian accent) I mean, I can put a few nozzles down low, mist the nether regions, maybe a few to hit the sides, tree, maybe four to cascade the moisture on my face - all the while doing it cool; Big Jim Slade style... :)
 

ZxcStaz

Active Member
I can't use gravity to drain water from the RZC. I need to pump it, and it has to either go to the drain or to the rez. I was going to use a timer to activate the return pump, but if the volume or timing is off, the pump will run dry. I thought of a volume switch, but four inches of water in the flood table is over the volume of the reservoir. After searching for options, I emailed a technical engineering company. They can make a float switch and relay with a housing that can handle the load of a pump, but the price tag is $500.
Most of the switches on the market for the level of water that I am working with will not handle a large ampere draw pump; they need a relay to control the electric. These are expensive, and would need to be customized for this system. I found a sump pump switch that will handle the load. The Little Giant water pressure switch turns on a pump at a certain water level, then shuts off when the water is still above the pump intake, so that it will not run dry. I found one of these units for $35.
I installed the unit. The switch would not turn on until the reservoir was filled to a five inch level. This will not do.
To make a long story short, I ripped the unit apart and re-built the switch. I used a longer fulcrum to make it more sensitive and changed the activation from air pressure to water level. It is on now at 2.5 inches and off at one inch. It took about two hours to manufacture, but I think it will do the job.
I used a graduated cylinder to house a styrofoam float the connects to a transfer rod to actuate the switch. The switch pressure was too high; a wiring clip and wire extension increased the travel length to reduce activation pressure. The On/off height is controlled by an adjustable plastic arm. The unit was mounted into the tank and housed in a plastic hood to keep it dry. It looks like a crazy science project, but it might work.
- If anyone can understand what I am trying to accomplish and has a better, less expensive, infallible solution- I'm all ears. In the meantime, I think this engineering marvel might just save the world when there is a zombie apocalypse. I've had four hours of sleep in the last two days, so please excuse any errors.

- zxc.


20180320_174209_resized.jpg 20180320_174219_resized.jpg 20180320_174249_resized.jpg
 

dstroy

Well-Known Member
I can't use gravity to drain water from the RZC. I need to pump it, and it has to either go to the drain or to the rez. I was going to use a timer to activate the return pump, but if the volume or timing is off, the pump will run dry. I thought of a volume switch, but four inches of water in the flood table is over the volume of the reservoir. After searching for options, I emailed a technical engineering company. They can make a float switch and relay with a housing that can handle the load of a pump, but the price tag is $500.
Most of the switches on the market for the level of water that I am working with will not handle a large ampere draw pump; they need a relay to control the electric. These are expensive, and would need to be customized for this system. I found a sump pump switch that will handle the load. The Little Giant water pressure switch turns on a pump at a certain water level, then shuts off when the water is still above the pump intake, so that it will not run dry. I found one of these units for $35.
I installed the unit. The switch would not turn on until the reservoir was filled to a five inch level. This will not do.
To make a long story short, I ripped the unit apart and re-built the switch. I used a longer fulcrum to make it more sensitive and changed the activation from air pressure to water level. It is on now at 2.5 inches and off at one inch. It took about two hours to manufacture, but I think it will do the job.
I used a graduated cylinder to house a styrofoam float the connects to a transfer rod to actuate the switch. The switch pressure was too high; a wiring clip and wire extension increased the travel length to reduce activation pressure. The On/off height is controlled by an adjustable plastic arm. The unit was mounted into the tank and housed in a plastic hood to keep it dry. It looks like a crazy science project, but it might work.
- If anyone can understand what I am trying to accomplish and has a better, less expensive, infallible solution- I'm all ears. In the meantime, I think this engineering marvel might just save the world when there is a zombie apocalypse. I've had four hours of sleep in the last two days, so please excuse any errors.

- zxc.


View attachment 4109245 View attachment 4109246 View attachment 4109247
https://www.apgsensors.com/reports/float-switch-installation-wiring-and-control-diagrams

Use two float switches, one at the max desired water level and the other at the min, then the pump does not run dry and the water level never goes over acceptable max.

Wire it like it’s shown in that link. Use a relay to switch power to the pump. Then you can use any pump you want as long as it stays primed.
 

ZxcStaz

Active Member
Worked all day on the top of the RZC. I was going to cover it with fiberglass 4x8 paneling, but I found what I was really looking for. The paneling goes for about $35 a sheet, but while poking around in Home Depot I saw the 4'x8'x1/2" PVC panels for $78. The integrity offered by the PVC made it the perfect solution for my catwalk problem. I made supports for the bottom, and cut in the sheets to cover the RZC's. I'll put a layer of rigid insulation over the PVC and have a water proof, airtight, insulated chamber that I can walk on, It took some effort, but I have to say, it is progressing nicely. I have to include the most valuable asset in this undertaking; my brother, who offered his truck and hard work. Thanks bro! Your the best. I'll upload some more pic's after I piece in the remaining small cuts and it looks more finished.
20180324_185334_resized.jpg 20180324_185346_resized.jpg
 

kytaez

Member
You are busy!:shock:
I just really hope it's all going to work as you planned! (It's usually doesn't for me). Your brother helping is just awesome in so many ways!
I'm curious how your system will perform and which part of it will be redundant at the end.
Judging by the progress of things you'll be running plant's before me anyway :roll:
 

ZxcStaz

Active Member
You are busy!:shock:
I just really hope it's all going to work as you planned! (It's usually doesn't for me). Your brother helping is just awesome in so many ways!
I'm curious how your system will perform and which part of it will be redundant at the end.
Judging by the progress of things you'll be running plant's before me anyway :roll:
Hey Kytaez! How is your progress going? Do you have a link to your grow or system, I'd love to take a peek ... or post some here, that would be cool! Also, it's good to hear from you, how are things going?!
There are redundancies, but I think they're necessary to make the system go from clone to flower. The drip system will probably only help until the roots have emerged from the pots, but I'll have stopcocks installed if I need to disengage a few.
The fail safe high water pumps might not activate, and the high humidity fans/humidistat controller may remain dormant, but with strange weather, it remains to be seen. I'm not sure if the pH controller will do much in flower, but it should help during veg. I'm also a bit bummed that I can't install a light mover; I don't have any room left.
I'm not sure if I forgot anything, but if you foresee any issues, let me know. I have been trying to address every eventuality, but Nostradamus I am not. I'm close to getting the system online, and none too soon; the plants have outgrown the small tents. I'm working on borrowed time. Well, I'll update progress soon, till then, all the best - zxc.
 

ZxcStaz

Active Member
Well, I'm apprehensive about going live. This weekend I'll move the plants in. Pre-show jitters I guess. Have I forgotten anything, and, where is the weak link? I don't know if it's ready, ...I have to do the move - the plants are too big and it's getting warmer out.
I should have installed switches for each light, maybe make zone controls. I need a deframmulator, to regulate the ambidextrous blue steam pipe extenders that compensate with thermal fluctuations, in addition to... an on-demand feminine, anti-androgenic hormonal accumulation regiment - (and disposal system)... but those can only be acquired on the black market. --- :)
I don't know, I have to give it a shot, but if you guys have any last minute tips, I'd be pleased to hear them.
 

ZxcStaz

Active Member
Here is a progress update. The four plants have to be moved; they are bigger than the tents. The clones, on the other hand, are not rooting. I don't know what the issue is this time, but I have tried three different methods and they won't root. They stay green for a few weeks, but just haven't popped roots. I might have to delve into the seeds that I have.

20180330_074555_resized.jpg 20180330_074601_resized.jpg 20180330_074609_resized.jpg

The system is working pretty well. I cut in the net pots, it was jigsaw work on the PVC panels. What a mess. I'm going to start with half of the tent and leave space for future clones/seedlings.

20180330_101237_resized.jpg20180330_101241_resized.jpg

I put in the insulation, lots of cutting in pieces, but between the PVC and rigid insulation there should be a decent thermal barrier. This, coupled with the exhaust fans, should afford at least a ten-degree separation.

20180330_111238_resized.jpg 20180330_120949_resized.jpg

The high pressure system is working perfectly. The parallel pumps fill the accumulator pretty quick. The pump pressure switches are not synchronized, so one stays on longer than the other. I think I can fix this with an additional pressure switch. I have double monitoring of the accumulator, a pressure gauge and a scale. Between the two, I get very descriptive information about the volume in the tank. I like the mass reading better than the pressure because it is more sensitive.

20180330_192655_resized.jpg

There is an issue with the LPS primary feed pump. The pump will move the water for a few seconds and then seem to acquire an air gap. The pump head spins fast, as if dry, and pressure is lost. If I stop the pump and allow it to refill, it pressurizes the nozzles. This is not good because I can't program the timers to prime the pump every cycle. I have to research this issue and try to manipulate the flow to allow consistent actuation of the nozzles. I circumvented this hurdle with the drip system. I will still have to resolve the problem, but it is not a lethal system flaw.

20180330_192635_resized.jpg

With six pumps and tons of flow paths the system looks complicated, but I think I have incorporated enough fail safes to be able to fix errors quickly.

20180330_192701_resized.jpg

In addition to these I put in "Arlo" cameras to monitor the growth chamber, RZC, and the data displays. I like the cameras because I can pull them up on my phone and monitor the environment when I'm off site. I'll post a few shots next post when the plants are in place.

I hope everyone has a good Easter, and I'll post an update soon.

- ZXC
 

kytaez

Member
Dude! Your plants are awesome! I mean huge! I personally would train the fuck out of them, but hey you've got the space!
I'm taking it easy and nowhere near to start the HPA. My mother plant is a week from the stage I can take cuttings. Then I got to put the whole system together. It seems like I have everything for it except the time.
I also have few questions regarding HPA
Just to clear things up a bit...
1. What is exact purpose of the PRV in the system? Is it just to keep the pressure at constant for a reason of controlling the flow?
2. Will a "non return valve" be useful just before the solenoid to prevent a "water hummer" or any other reason. I mean I've got them.... are there any negatives?
Sorry no pictures today. I'll try to post some soon.
Happy Easter ! :bigjoint:
 

ZxcStaz

Active Member
1. What is exact purpose of the PRV in the system? Is it just to keep the pressure at constant for a reason of controlling the flow?
2. Will a "non return valve" be useful just before the solenoid to prevent a "water hummer" or any other reason. I mean I've got them.... are there any negatives?
Sorry no pictures today. I'll try to post some soon.
Happy Easter ! :bigjoint:
Happy Easter Kytaez!
Thank you! That is a great compliment, and it's much appreciated. I would have trained them, but they filled the tent - I had no room for training, I will do some low-stress training on them now that they are in the big tent. :)
The PRV (pressure regulator valve, if I'm not mistaken) allows you to pressurize the accumulator tank to say, 120 PSI, yet dispense the solution at a constant 80 PSI. This does two things; You can hold a larger volume of high pressure water, and have a consistent pressure and volume dispensation. It both regulates the spray and affords an increased reservoir volume, thus a longer time on a system charge.
In regards to the back flow valves, they will stop leakage and back-flow after the solenoid is closed. They maintain pressure in the upstream line and retard flow down-stream (drips). ( If you have the flow orientation correct - see previous post # 165... ( I'm an idiot )) As for the reduction of water-hammer, I think that it will help alleviate it, as there will be less of a pressure fluctuation. I have them installed in my system, and I do not have a water-hammer problem, but again, I did not have one from the start, so this may not be your only issue. I can only surmise.
I will state that I solved my loss of prime situation by using back flow prevention valves. Well pumps sometimes have a "Foot-valve", which is essentially a back flow valve, that maintains the water in the pump keeping it primed. I installed a back flow valve at the intake, and the pump is running perfectly now.
I have to say that I'm loving the new system. I'll post more about it in the next installment. Spoiler alert: It's really fun to watch and it works well.
 

PetFlora

Well-Known Member
If I may..

I forgot whether you are starting with clones or seedlings. Anyway, my newest creation for starting either could help kick off finishing in hpa. I call it lpa with a twist. The twist comes from my hpa days where timed feed intervals are utilized. Most, if not all lpa spray heads produce far too much nutrient per second, so I made a simple pvc manifold and inserted hpa mist heads. Nutrient solution is pumped via a ~ 240 gph pump, but perhaps a bigger gph would further improve on the spray

These roots are of 4 plants that popped through coco starter pellets a month ago tomorrow. There were 6, but the 2 largest plants/rootballs prevent these from getting adequate feedings. Once those were removed these began to flourish. All those fishbones are awaiting hpa mist , that they won't gt here, as I will be transferring to F & D

If you enlarge the root photo you can see one of the hpa heads at the bottom. In this set up I am using 3 heads

Feed cycle is 3 minutes on/40-60 minutes pause

Im thinking Atomizer will gt a kick out of this

enjoy

hth
 

Attachments

ZxcStaz

Active Member
If I may..

I forgot whether you are starting with clones or seedlings.

... I call it lpa with a twist. The twist comes from my hpa days where timed feed intervals are utilized. Most, if not all lpa spray heads produce far too much nutrient per second, so I made a simple pvc manifold and inserted hpa mist heads. Nutrient solution is pumped via a ~ 240 gph pump...

In this set up I am using 3 heads

Feed cycle is 3 minutes on/40-60 minutes pause
Hi PetFlora!
How is it going out there? I had one messed up clone that I revived, and three seedlings. Those are the four plants I have right now, but I'm going to make more clones....eventually? Maybe? (They better root soon ... @Uc%er's!) :)
That's a sweet idea, using a manifold with fine-mist nozzles. Where did you obtain those and how much are they? I like it.
So, your feed cycle... Is the lpa twist just supplying the nutrients and another system keeps them hydrated? It seems like 40-60 min off cycle would be pretty long if they are not getting misted by some other source of water. Another thing that I wonder about is the concentration of the nutrient solution.
In my system the HPA mist is at about 300ppm, but the drippers and LPA is at about 850 ppm. Essentially, they get a dose of full compliment veg. nutrients every 20 minutes. Then, every 3 min they get a HPA mist at 300 ppm, nitrogen stacked with minimal P/K.
 

Atomizer

Well-Known Member
You need a stable mist environment to initiate aero root growth, the LPA delivery will effectively be resetting the clock every 20 minutes ;) Running 300ppm mist 3 minutes after an 850ppm LPA flood serves no useful purpose. The exception is when running drippers to keep limited media moist in a netpot while the plant grows aero roots. In that situation you would use RO with no nutes in it for the drippers and low strength nutes for the mist to encourage roots out of the netpot.
 
Top