Fridge Grow/Clone Box (part deux)

fishdeth

Well-Known Member
OK, we're back to start the new year with a new grow, a new hydro system, and a brand new lighting system.
Had a lot of fun doing the first run and will have a few zips for my effort.
Learned a lot and and hope to have a MUCH better run this time even with 1 less plant.
I sure am hoping the Stanky Dank (SD) turns out to be female, then I'll have 3 diff strains to enjoy.
20140802_130520.jpeg
 
Last edited:

fishdeth

Well-Known Member
Yes, there are gonna be a bunch of changes/improvements.
First, the length of time under the CFL starter lights will be drastically shorter than first run (FR).
Also, I think I will shorten the veg time a bit too.
This run will go much lighter on the nutes, I think I had some lock out issues.
This run will have better PH monitoring.

When time to transplant, they will be going in a recirculating deep water culture tray in 6" net pots. Tons more holes for roots to emerge in the "soup".
There will be PLENTY of oxygen in the soup with the 4 airstones, 6 jets spraying the soup right at the roots and the rainfall tube in the res where the soup will fall through many holes, not only adding a bit more aeration, but the soup will cool easier in there as it returns this way.
I am going to try a new medium that will go in the net pots and hold the root structure.
Awesome looking stuff, check them out and watch a couple of their vids.
It's kinda like a real soft foam rubber that is non wicking (rock wool), so any of this material above the waterline stays dry (no algae, etc on top)
Exerpted:
Special Features:
  • 1.5 cut out in the insert will accept the STG 1.5” grow cube as well as the 2” clipper cloner
  • pH neutral and require no conditioning or continuous adjustment of your bath due to media influence
  • inert and impart nothing to your nutrient solution. This allows the grower to "start from scratch" when developing a feeding schedule
  • Non-wicking design allows the grower to feed more often, leading to a healthier plant and better harvests
  • Open cells designed for more air flow ensuring a healthy dry stem while the roots receive ambient circulation
http://www.suretogrow.com/STG-Storm™-Series/TORNADO

I had little bits and nibs from my trimmings get into my media before and decompose and may have contributed to my poor roots.
Won't happen on this run.
I have these inserts and the little grow cubes on order, but right in the middle of the holiday... still waiting for confirmation.
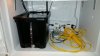
So... I will have to start my freshly popped seeds in my AeroGarden in rock wool again.
But this time I rinsed the crap outta them, remembering the PH swings I had last time.
This run should produce the pretty root masses that I have drooled over on others grows.

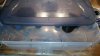
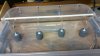
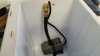
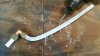
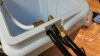
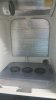
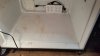
My res will be a Koolatron 12v electric cooler with a few plumbing mods.
I will have the option of cooling the soup down when internal cab temps get a little warm.
It has the capacity to cool as much as 32*F below ambient temps.
I'm still not sure if I want to run the pump submersible this time or externally, gotta get that figured out quick.

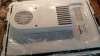
Same exhaust fan, it has worked like a champ and is powerful & quiet, especially on low speed.
Will probably do the ghetto CO2 again and maybe use a little dry ice for a real blast at just the right times.

The crowning glory on all the improvements will be a new grow light system.
I also sent inquires to advancedtechlighting dot com about a special deal going on a Phillips 315w CMD (the latest, greatest version of the Ceramic MH lamps I was looking into) lamp, socket, ballast(220v), and step up trans.
A far superior light spectrum and cooler temps and very long life.

So, as you can see, this run should be a HOOT !

I will start on the detailed build part of this real soon.
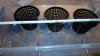
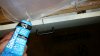
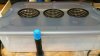
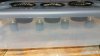
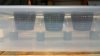
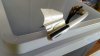
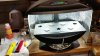
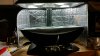
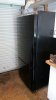
Heres a pic of the new tenants... and their little temporary apartment till the condo is refurbished and ready for move-in. ;-)
20150101_113944_resized.jpg 20150101_153702_resized.jpg 20150101_153643_resized.jpg
 
Last edited:

fishdeth

Well-Known Member
OK,
Some of this retrofitting I posted in the old thread but I'll start all over here for all new stuff to be in one place.
So I went to the store with the big bullseye and got another tray like the original, and the lid.
Got the 1/2" hard tubing feed rail installed in the flood tray that will spray out of the 2 holes right at the roots of each pot.
And installed 4- 2" pieces of SS 3/16" tubing in the double rim of the tray.
Notched the lid, etc.
If I need to remove the tray for a cleaning, just pull off the 4 air lines and the feed and drain lines.
The airstones are heavy and should sit right where they're at.
Air inlets will be at the rear and come up through the hole in the rear area, and the drain will be right up front.
20141223_145628_resized.jpg 20141223_145618_resized.jpg 20141223_135413_resized.jpg 20141223_135403_resized.jpg 20141223_135712_resized.jpg 20141227_142252_resized.jpg
 

fishdeth

Well-Known Member
Got my DWC tray almost done.
Cut the holes in the lid for the net pots.
The location of the drain is still to be determined, I have to install a brace in the fridge under the tray.
There will be a lot more weight/water in there.

20141227_142338_resized.jpg 20141227_142227_resized.jpg 20141227_142148_resized.jpg
 

fishdeth

Well-Known Member
So, next is the new res.
I hated like hell drilling holes in this real nice cooler, but that's what I intended for it.
Went with submersible again.
Drilled a 5/16" hole through where the handle used to attach.
I cut the plug off of the end of the pump cord.
Now I can feed it thru this hole. (I'll install a replacement plug assy)
I drilled 2- 1/2" holes on either side for the in and out tubing.
The same tubing as the feed rail, and I used a piece to create the rainfalll return to the res held in place with some double sided tape and some of that good aluminum duct tape

20150102_104548_resized.jpg20150102_111151_resized.jpg 20150102_115106_resized.jpg 20150102_120214_resized.jpg 20150102_125012_resized.jpg
 

fishdeth

Well-Known Member
I gooped the holes real good with the silicone.
I still gott get a couple small hose clamps for the outside.
I put that drain piece in the brass fitting first and then heated the tubing with a gun and bent that hard curve so it would stay.
 

fishdeth

Well-Known Member
The only other concern I had was the cooling assembly being exposed to the humidity, splashing, and especially, condensation.
I took of the fan cover and popped the fan off the motor shaft.
Removed the heat sink/cooling fins and put a layer of plastic to try to seal it.
Laid a bead of glue in the little groove that the cover rests in and popped a piece of saran wrap over the motor shaft.
Cut out where the heat sink bolts together and when the glue is dry I will trim off the excess around the cover.
No guarantee, but it should help !
20141216_151731.jpg 20150102_130446_resized.jpg 20150102_130754_resized.jpg
 
Last edited:

fishdeth

Well-Known Member
The next BIG job I have to do is remove the entire floor and insulation in the freezer area, down to the metal casing.... I NEED the height for the new res.
UHG !20141216_150725.jpg20141216_150616.jpg 20141216_150550.jpg
 
Last edited:

Tim Fox

Well-Known Member
oh this is going to be such a joy to watch, i love how the new upper res fits so well in the depression you cut, I can just picture the scrog screen on top of that soon, I look forward to seeing how well your able to fill the scrog with 3 this time, i am really thinking of spouting my seed in a couple of weeks, to put me just enough behind you that I can see just how your transplant looks and to get the real idea of how your grow medium and all works in action, It may inspire me to make another last minute change to the over under DRW as well, who knows I am a bit tired of making changes, not sure how much of that you did setting up the fridge for the first go round. I am about to the point where just going thru one cycle and getting a harvest feels more important , then watch how your 2nd run goes and adapt based on what I see here. you have really set me up with great ideas, I want to thank you for that, and to see just how well this size space can work, thanks bro
 

fishdeth

Well-Known Member
Glad you're enjoying it as much as I am.
Cool hobby with a payoff !
Washed and waxed both my car and my truck today so I didn't get to removing the freezer floor today.
Maybe after work tomorrow?
 

fishdeth

Well-Known Member
I got the floor removed in the freezer area.
I have some stainless sheets somewhere that I might can put a piece in there for a nicer floor for spill cleanup
20150105_165429_resized.jpg 20150105_180035_resized.jpg.
 
Last edited:

fishdeth

Well-Known Member
Well I can't figure out what the heck happened, but my 3 seeds have died.
Just ordered 3 more Amnesia Haze and 3 Jack Herer.
Now the waiting game.
Oh well... the condo should be ready for move in by then, with new lights and all !
 

Tim Fox

Well-Known Member
so in the mean time, what seed company do you like to use, I got my latest seeds from ilovegrowingmarijuana came fast and stealthy too, I have been very interested in some Jack Herer myself,
In the meantime why not give us some info on this new light your going to try, how about a link to it so we can learn some about it
thanks, oh and sorry about your 3 dead girls, that sucks
 

fishdeth

Well-Known Member
I know right?
I was so stoked to have New Years babies...
Well the light I have been looking into is the Ceramic Metal Halide lamp.
Supposed to be better than HPS or MH.
The latest and greatest is the Phillips 315 watt CMD lamp.
Supposedly the next best thing to "SUNLIGHT"
Here is where I am inquiring:
http://advancedtechlighting.com/cdmmw.htm
I have sent them 2 emails so far.
1 was during the holidays and the other was yesterday... still waiting.
I will probably call them tomorrow.
Yea, I got my seeds twice now from ILGM.com.
Really hope they come fast, I have a timeline in mind to achieve.
 
Top