3underpar
Member
This is my first grow. I thought I would stay cheap, but as usual, I ended up spending way too much money - ~ $600 (pre-tax). I spent a bit of time researching the box design, and here are some pics.
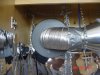
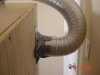
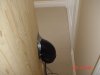
Important to me was smell control, and ability to suck the air out. After doing some research and testing a PC fan, I realized mine couldn't draw air through a carbon scrubber. Also, because of the small closet space, I needed to bend ducting 180 degrees to get out of the closet. This required a quality fan to work against this pressure drop.
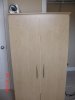
I bought a wood rubbermaid cabinet from the store for 3 reasons: couldn't fit a built cab in my vehicle (found some on craigslist for < $20), I think it was about as expensive as building from scratch, nice stealth appearance (shouldn't arouse suspicion).
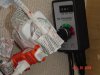
I bought a 4" vortex fan and a Speedster speed controller (for temperature, noise, and electricity usage control). I contacted Atmosphere (Vortex manufacturer) and they endorsed Speedster.
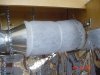
I considered building my own scrubber, but when I researched the cost of materials in my area (activated carbon was $5-10/lb), I found a pre-made filter on Ebay. They get high quality carbon in bulk.
A breakdown of costs:
- Rubbermaid cabinet (Canadian Tire), 17" x 30" x 5' : $80
- Plywood for cabinet backing : $10
- Vortex fan + speed controller: $180
- Carbon scrubber, delivered: $80
- 5 CFLs : $75
- light fixtures and mounting 1x6 wood : $10
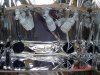
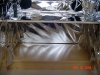
- mylar (25' roll) : $25
- double-sided tape : $5
- heavy duty mechanical timer: $12
- extension cords/3-way plug : $20
- chains/hooks/cords/screws/nails : $20
- weatherstripping : $10
- dryer ducting : $10
I needed some basic tools:
- jigsaw : $20
- spade bit / jigsaw blade : $10
I had the following items around the house:
- duct tape
- screwdrivers
- wire strippers
- PC fan
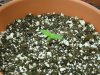
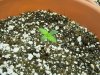
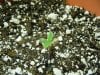
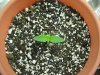
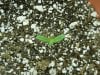
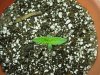
I'm germinating now, so more pics to come
I'm not sure if it'll work, but I left the bottom 1' of cabinet for a separate clone area with its own ventilation (PC fan) and lighting capability. I will put mylar on the shelf later.
BTW - please feel free to comment. I may not be visiting everyday, but when I do, I'd love to hear comments or questions.
Important to me was smell control, and ability to suck the air out. After doing some research and testing a PC fan, I realized mine couldn't draw air through a carbon scrubber. Also, because of the small closet space, I needed to bend ducting 180 degrees to get out of the closet. This required a quality fan to work against this pressure drop.
I bought a wood rubbermaid cabinet from the store for 3 reasons: couldn't fit a built cab in my vehicle (found some on craigslist for < $20), I think it was about as expensive as building from scratch, nice stealth appearance (shouldn't arouse suspicion).
I bought a 4" vortex fan and a Speedster speed controller (for temperature, noise, and electricity usage control). I contacted Atmosphere (Vortex manufacturer) and they endorsed Speedster.
I considered building my own scrubber, but when I researched the cost of materials in my area (activated carbon was $5-10/lb), I found a pre-made filter on Ebay. They get high quality carbon in bulk.
A breakdown of costs:
- Rubbermaid cabinet (Canadian Tire), 17" x 30" x 5' : $80
- Plywood for cabinet backing : $10
- Vortex fan + speed controller: $180
- Carbon scrubber, delivered: $80
- 5 CFLs : $75
- light fixtures and mounting 1x6 wood : $10
- mylar (25' roll) : $25
- double-sided tape : $5
- heavy duty mechanical timer: $12
- extension cords/3-way plug : $20
- chains/hooks/cords/screws/nails : $20
- weatherstripping : $10
- dryer ducting : $10
I needed some basic tools:
- jigsaw : $20
- spade bit / jigsaw blade : $10
I had the following items around the house:
- duct tape
- screwdrivers
- wire strippers
- PC fan
I'm germinating now, so more pics to come
I'm not sure if it'll work, but I left the bottom 1' of cabinet for a separate clone area with its own ventilation (PC fan) and lighting capability. I will put mylar on the shelf later.
BTW - please feel free to comment. I may not be visiting everyday, but when I do, I'd love to hear comments or questions.