Vapor88
Member
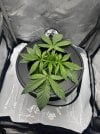
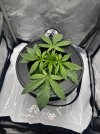
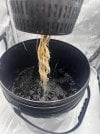
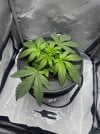
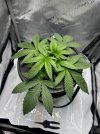
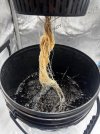
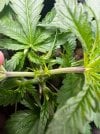
Grow Diary - Already up to day 26 - please see below
Hi all, thanks for viewing my grow diary.
Let me make one thing clear off the bat.
I AM HAPPY FOR PEOPLE TO COMMENT AND ASK QUESTIONS - BUT, please take unneccessary negativity elsewhere (Constructive criticism welcome though)
I had been keeping my journal in private and on another forum that is very quiet, then I remembered about this place and well, here I am.
Couple of things to note:
This is only my second ever grow. My first went ok, but lack of environment control and knowledge ultimately led to bud rot and a poor dry/cure.
This is only my first ever DWC grow and I am learning as I grow.
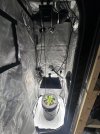
Here is my setup and plant:
AC Infinity Cloudlab 722 Grow Tent (2' x 2' x 7')
AC Infinity Ionboard S22 115w Full Spectrum LED
AC Infinity Cloudline Pro T4 Inline Fan
AC Infinity Cloudforge T3 Humidifier
AC Infinity Cloudray S6 Oscillating Fan (Gen 2)
AC Infinity Thermoforge T3 Heater
Photone App with paid in-app Full Spectrum LED
Light diffuser for iPhone 14 Pro Max for Photone App accuracy
TDS/EC Pen
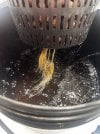
Mars-Hydro DWC Bucket system (Couldn't be bothered with DIY to save a few quid)
Advanced Nutrients Sensi Grow A&B
Advanced Nutrients Sensi Bloom A&B
Advanced Nutrients Big Bud
Advanced Nutrients CalMag Xtra
Plant Success Great White
H²O² 3% on hand if required
99.99% IPA for sterilising where required
Wedding Cake Feminised Photoperiod - Barneys Farm Seeds
I am only growing the one plant this time round whilst I get the hang of my setup, get it all dialled in on the app so next time is even smoother.
I may even do 2 autoflowers next run.
But let's walk first before we run ay.
Now as the title shows, I am already on Day 26, so this first piece of the diary is going to be somewhat rushed and very compact, then it will be updated every 24 to 48 hours alongside my others.
Days 1 in the case of this journal, starts when the seed was placed into the net pot and into the tent under light.
I did not count the days from germination.
Germination:
Germination was done by placing a seed in warm 0ppm RO water ina dark cupboard for 12 hours.
The seed then cracked open and was placed between 2 moist paper towels in a chinese takeaway tub (The clear plastic kind) in a dark cupboard for 4 days.
I then took the seedling and removed the shell easily to expose the cotyledons. The taproot was about 50mm long at this point.
I put the seedling into its pre-soaked rockwool cube and into my net pot.
Seedling Day 1 to 5:
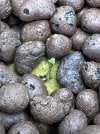
I put 1 layer of hydroton, followed by the rockwool cube and then filled up with hydroton to cover the cube and pot holes to stop light leaking into the res.
I didn't use a humidity dome as I wanted to use my AC Infinity Controller 69 to create automated programmes for all stages of the plants life to keep it as hands-off in future as possible.
For the first week I kept the following conditions:
Light at 400mm, setting 1 which gave 100umol
12.5l 0ppm RO water in reservoir
Tent temp was all over the place as at this point my heater hadn't arrived and I hadn't protected my grow tent from wildly fluctuating ambient temps and humidities.
Temp avergae was around 19°C (Too cold I know, but keep reading)
RH average was 75%, but again, big swings due to the above.
The plant was top fed every day with mild nutrient solution at an EC of 0.3 to 0.4, I wasn't too accurate at this stage as my main issue was the stability of the tent.
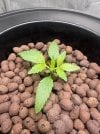
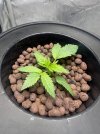
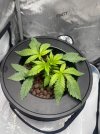
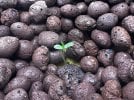
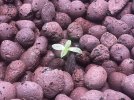
Here are some images of the seedling from Day 1 to Day 5
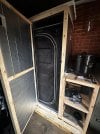
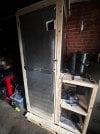
Grow Tent Insulation Housing
I went to my local timber merchants and purchased what I needed, already cut to length for time saving. They cut the timber for free anyway so it saves me getting my table saw out etc.
Purchased 50mm PIR from my local builders merchants and some silver insulation board tape.
I already had the pocket hole jig and screws.
I had planned what I needed on paper beforehand.
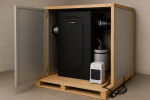
Here is an AI mockup using ChatGPT just to show you the original idea in my head.
ChatGPT made this after I gave it all my ideas, but still didnt understand what I wanted exactly.
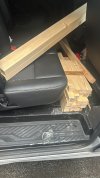
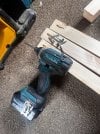
Here are some images of the build progress and finished
Seedling Day 8 to 14 - Dialled In Environment
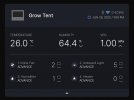
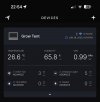
After building the insulation box the stability of the tent was second to none, I can now keep humidity to within a couple of % and temperature to within 0.5°C easily. Even after opening the tent to carry out any checks and top-ups etc, the environment is back to where it needs to be within approx 2 minutes.
Oh, I also took delivery of my Thermoforge T3 heater on the same day I completed the build.
Tent conditions here were now:
Temp average 23°C
RH average 75%
VPD avergae with leaf offset 0.6kPa
Lighting 150umol
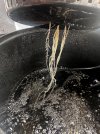
Growth now started to speed up, still the roots hadn't hit the reservoir though so it was still slow, also growth slowed by the previous poor conditions, so a slower first week of veg was to be expected.
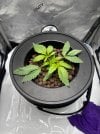
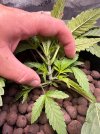
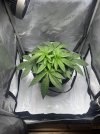
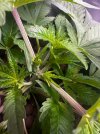
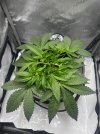
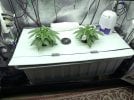
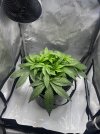
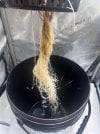
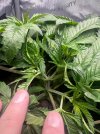
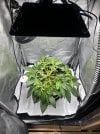
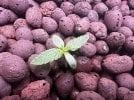
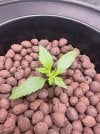
Here are some images from day 8 to 14
Hi all, thanks for viewing my grow diary.
Let me make one thing clear off the bat.
I AM HAPPY FOR PEOPLE TO COMMENT AND ASK QUESTIONS - BUT, please take unneccessary negativity elsewhere (Constructive criticism welcome though)
I had been keeping my journal in private and on another forum that is very quiet, then I remembered about this place and well, here I am.
Couple of things to note:
This is only my second ever grow. My first went ok, but lack of environment control and knowledge ultimately led to bud rot and a poor dry/cure.
This is only my first ever DWC grow and I am learning as I grow.
Here is my setup and plant:
AC Infinity Cloudlab 722 Grow Tent (2' x 2' x 7')
AC Infinity Ionboard S22 115w Full Spectrum LED
AC Infinity Cloudline Pro T4 Inline Fan
AC Infinity Cloudforge T3 Humidifier
AC Infinity Cloudray S6 Oscillating Fan (Gen 2)
AC Infinity Thermoforge T3 Heater
Photone App with paid in-app Full Spectrum LED
Light diffuser for iPhone 14 Pro Max for Photone App accuracy
TDS/EC Pen
Mars-Hydro DWC Bucket system (Couldn't be bothered with DIY to save a few quid)
Advanced Nutrients Sensi Grow A&B
Advanced Nutrients Sensi Bloom A&B
Advanced Nutrients Big Bud
Advanced Nutrients CalMag Xtra
Plant Success Great White
H²O² 3% on hand if required
99.99% IPA for sterilising where required
Wedding Cake Feminised Photoperiod - Barneys Farm Seeds
I am only growing the one plant this time round whilst I get the hang of my setup, get it all dialled in on the app so next time is even smoother.
I may even do 2 autoflowers next run.
But let's walk first before we run ay.
Now as the title shows, I am already on Day 26, so this first piece of the diary is going to be somewhat rushed and very compact, then it will be updated every 24 to 48 hours alongside my others.
Days 1 in the case of this journal, starts when the seed was placed into the net pot and into the tent under light.
I did not count the days from germination.
Germination:
Germination was done by placing a seed in warm 0ppm RO water ina dark cupboard for 12 hours.
The seed then cracked open and was placed between 2 moist paper towels in a chinese takeaway tub (The clear plastic kind) in a dark cupboard for 4 days.
I then took the seedling and removed the shell easily to expose the cotyledons. The taproot was about 50mm long at this point.
I put the seedling into its pre-soaked rockwool cube and into my net pot.
Seedling Day 1 to 5:
I put 1 layer of hydroton, followed by the rockwool cube and then filled up with hydroton to cover the cube and pot holes to stop light leaking into the res.
I didn't use a humidity dome as I wanted to use my AC Infinity Controller 69 to create automated programmes for all stages of the plants life to keep it as hands-off in future as possible.
For the first week I kept the following conditions:
Light at 400mm, setting 1 which gave 100umol
12.5l 0ppm RO water in reservoir
Tent temp was all over the place as at this point my heater hadn't arrived and I hadn't protected my grow tent from wildly fluctuating ambient temps and humidities.
Temp avergae was around 19°C (Too cold I know, but keep reading)
RH average was 75%, but again, big swings due to the above.
The plant was top fed every day with mild nutrient solution at an EC of 0.3 to 0.4, I wasn't too accurate at this stage as my main issue was the stability of the tent.
Here are some images of the seedling from Day 1 to Day 5


Grow Tent Insulation Housing
I went to my local timber merchants and purchased what I needed, already cut to length for time saving. They cut the timber for free anyway so it saves me getting my table saw out etc.
Purchased 50mm PIR from my local builders merchants and some silver insulation board tape.
I already had the pocket hole jig and screws.
I had planned what I needed on paper beforehand.
Here is an AI mockup using ChatGPT just to show you the original idea in my head.
ChatGPT made this after I gave it all my ideas, but still didnt understand what I wanted exactly.

Here are some images of the build progress and finished


Seedling Day 8 to 14 - Dialled In Environment
After building the insulation box the stability of the tent was second to none, I can now keep humidity to within a couple of % and temperature to within 0.5°C easily. Even after opening the tent to carry out any checks and top-ups etc, the environment is back to where it needs to be within approx 2 minutes.
Oh, I also took delivery of my Thermoforge T3 heater on the same day I completed the build.
Tent conditions here were now:
Temp average 23°C
RH average 75%
VPD avergae with leaf offset 0.6kPa
Lighting 150umol
Growth now started to speed up, still the roots hadn't hit the reservoir though so it was still slow, also growth slowed by the previous poor conditions, so a slower first week of veg was to be expected.
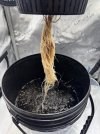
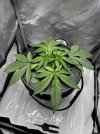
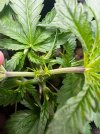
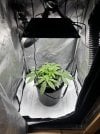
Here are some images from day 8 to 14


