Keif.
Member
I am hoping this can help some people and/or inspire them to improve upon my design.
I always looked for other cab DIY threads and they arent TOO plentiful.
Anyways, on with the show-
What we need-
Lighting-
150w HPS
Digital 150w Ballast
Cool Tube
Ventilation-
SP TD100 Fan (pictured is a 100X, they sent me the wrong one)
Raw Extension Cord for fan - they do not come pre wired
4" Ducting
5-4" Reducers for cool tube
3x hydrofarm 4 inch adapters for the (2x intake holes and 1 for the exhaust hole.)
Cabinet-
Ikea cabinet
Ikea Door set
4" CF - on order
1 4" electrical box
1 extended metal face plate
3/8" clamp for the cord
wire nuts
raw extension cord- I used fourteen gauge (15amp).
Two receptacles (15 amp)
Cabinet Build-
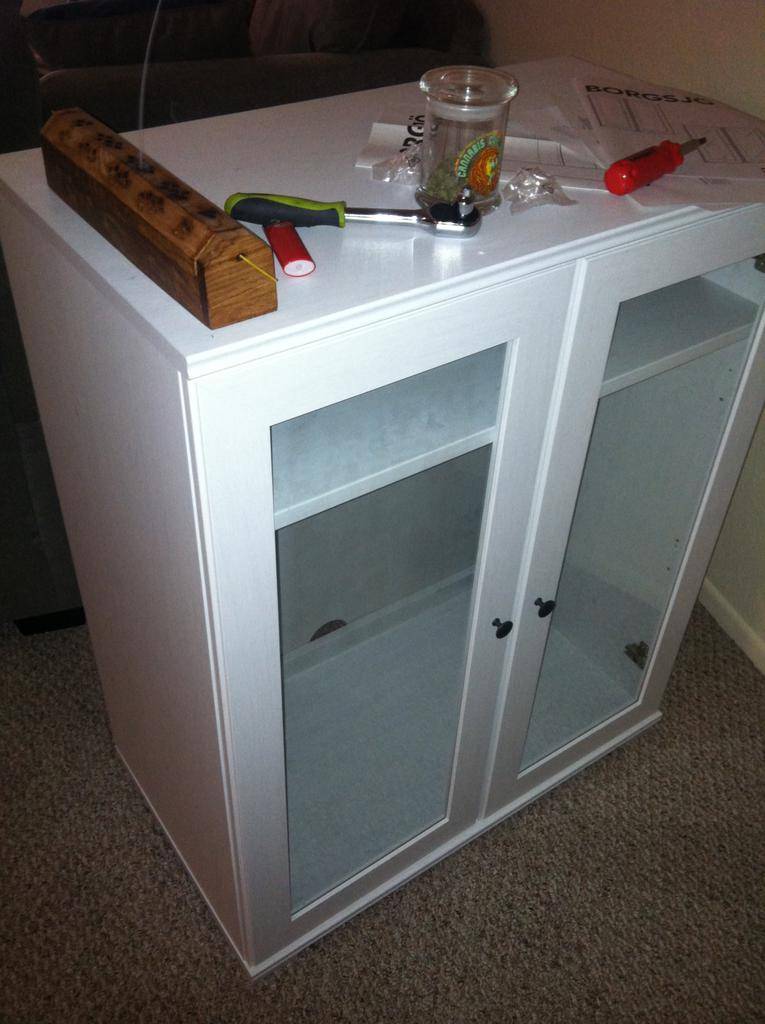
The glass was originally going to be covered by mirrors, but they were about 80 dollars per door... I just ended up getting the wood version doors from ikea for 30 shipped.

The inside is already flat white so I didnt put my mylar up. It would be easier to keep clean like this anyways..
I started by assembling the cab from ikea, just like it should be. I however flipped the rear panel 180 degrees so the hole for cords is on the bottom. I will be patching this over and caulking to seal it shut.
I then caulked all the interior walls of the cab, this ensures no light leaks and it should be pretty air tight.

The upper shelf that the ballast, fan and ducting will be above needs to be modded to accommodate the cord to the cool tube and the ducting from the cool tube -> the fan -> out the back. A hole can be cut in the shelf with a simple jigsaw to allow these items go up and out the flower chamber..
Here it is with the cool tube mocked up. There will be a carbon filter attached to one end and ducting on the opposite going through the top shelf to the fan in the hardware area.

The above image shows how I planned to run it with the hardware area up top, instead however, the people I ordered the TD100 from, sent me the 100x so I needed to ditch the shelf to accommodate for the extra inch or so the 100x takes up over the 100. I ended up just mounting the ballast and fan to the roof..

For the intakes, I used these Hydrofarm 4" reflector ventilation adapters, they can be had for about $5.
You want your intake to be double the size of the exhaust and my exhaust will be 4" so we need two 4" holes for intake.
Always mount your intakes low and exhaust high - heat rises.
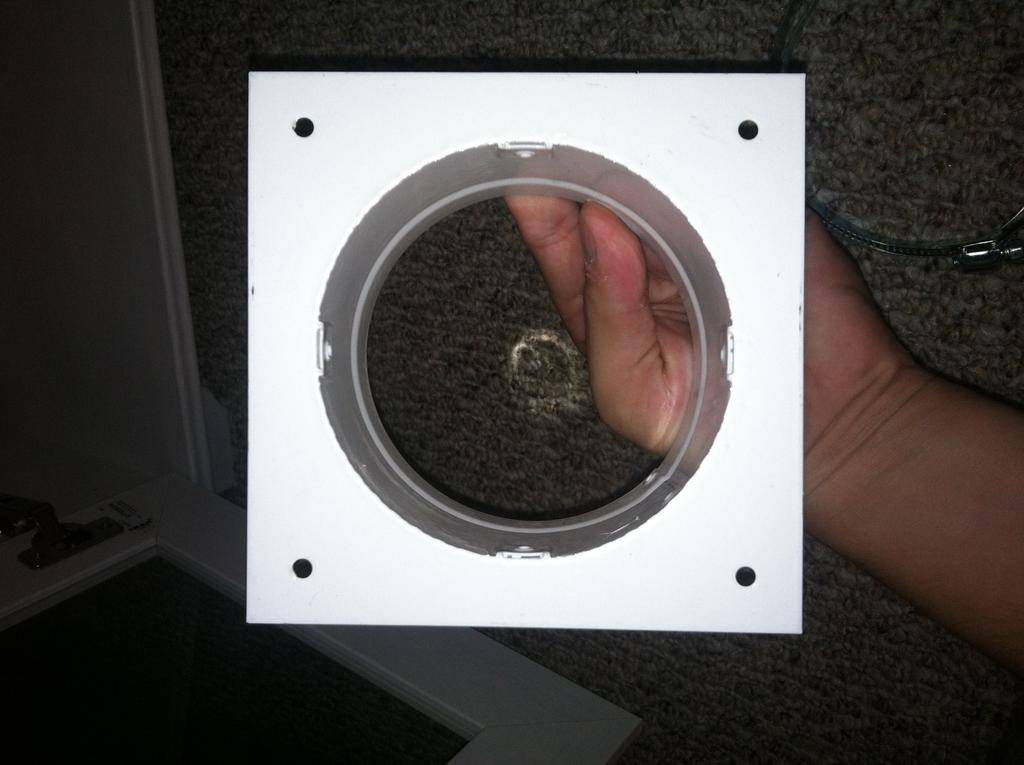
Simply trace the holes on to the back board and cut them with a razor.. I then put caulk in between the vent flange and the board to ensure an air tight seal and bolted them up.
I love how this came out instead of just having holes cut like in the past. It really neatens things up a bit and allows me to easily attach ducting or other elbows to make it light proof.
Here they are mounted up-
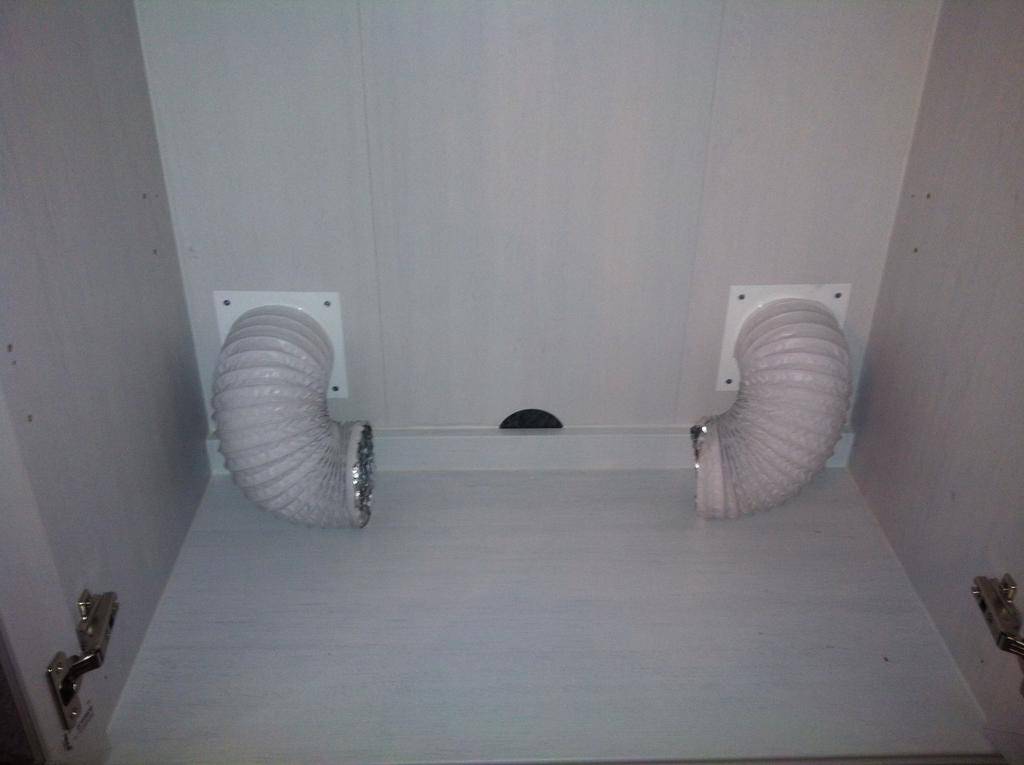
Now do the same for the top left corner for the exhaust.. Intake / exhaust vents are now mounted. Take a break and burn a bowl.
Now we will be working on wiring up a 2 gang box to run your cords to inside the cab.
Here are the parts you need-
1 4" box
1 extended metal face plate
3/8" clamp for the cord
wire nuts
raw extension cord- I used fourteen gauge (15amp).
Two receptacles (15 amp)

Now wire it up, I dont feel comfortable telling you how to wire this as I dont want to be held responsible for any issues you may have. Its very easy though..
I mounted it up top in the box, opposite of the exhaust hole.

* note, I did mine upside down to accommodate for timers, etc..
Next up is getting the light situated. We want to found out where the dead middle is and mount two eye hooks to hang the light hangers from.
Once you know where it will be mounted we need to install the reducers on the cool tube to fit the ducting.
The outlets of the cool tube are 5" and I needed to get them down to 4". Metal duct reducers at home depot were a bit too long for me and it would have barely fit in the cab.. Instead, I grabbed these 4"-3" adapters for PVC. The 3" side fit the 4" tubing around the outside which I will tape with foil tape before I turn the cab on and the 4" side on the adapter fit the 5" side over my cool tube.

Once you have the ducting connected, mount the fan up top (on the shelf if you got the 100 fan or on the roof if you got 100x) and connect the ducting from the cool tube to the fan, and then to the back exhaust outlet..


temps run at +2 over room temp and -4 over room temp with the lights off.
That is it in a nutshell! I hope this can help some people or give others ideas how to modify my cabinet and make it work better!
Thanks for looking, please feel free to ask away if you have any questions.
(yes, I didnt connect my carbon filter yet)
I always looked for other cab DIY threads and they arent TOO plentiful.
Anyways, on with the show-
What we need-
Lighting-
150w HPS
Digital 150w Ballast
Cool Tube
Ventilation-
SP TD100 Fan (pictured is a 100X, they sent me the wrong one)
Raw Extension Cord for fan - they do not come pre wired
4" Ducting
5-4" Reducers for cool tube
3x hydrofarm 4 inch adapters for the (2x intake holes and 1 for the exhaust hole.)
Cabinet-
Ikea cabinet
Ikea Door set
4" CF - on order
1 4" electrical box
1 extended metal face plate
3/8" clamp for the cord
wire nuts
raw extension cord- I used fourteen gauge (15amp).
Two receptacles (15 amp)
Cabinet Build-
The glass was originally going to be covered by mirrors, but they were about 80 dollars per door... I just ended up getting the wood version doors from ikea for 30 shipped.
The inside is already flat white so I didnt put my mylar up. It would be easier to keep clean like this anyways..
I started by assembling the cab from ikea, just like it should be. I however flipped the rear panel 180 degrees so the hole for cords is on the bottom. I will be patching this over and caulking to seal it shut.
I then caulked all the interior walls of the cab, this ensures no light leaks and it should be pretty air tight.
The upper shelf that the ballast, fan and ducting will be above needs to be modded to accommodate the cord to the cool tube and the ducting from the cool tube -> the fan -> out the back. A hole can be cut in the shelf with a simple jigsaw to allow these items go up and out the flower chamber..
Here it is with the cool tube mocked up. There will be a carbon filter attached to one end and ducting on the opposite going through the top shelf to the fan in the hardware area.
The above image shows how I planned to run it with the hardware area up top, instead however, the people I ordered the TD100 from, sent me the 100x so I needed to ditch the shelf to accommodate for the extra inch or so the 100x takes up over the 100. I ended up just mounting the ballast and fan to the roof..
For the intakes, I used these Hydrofarm 4" reflector ventilation adapters, they can be had for about $5.
You want your intake to be double the size of the exhaust and my exhaust will be 4" so we need two 4" holes for intake.
Always mount your intakes low and exhaust high - heat rises.
Simply trace the holes on to the back board and cut them with a razor.. I then put caulk in between the vent flange and the board to ensure an air tight seal and bolted them up.
I love how this came out instead of just having holes cut like in the past. It really neatens things up a bit and allows me to easily attach ducting or other elbows to make it light proof.
Here they are mounted up-
Now do the same for the top left corner for the exhaust.. Intake / exhaust vents are now mounted. Take a break and burn a bowl.
Now we will be working on wiring up a 2 gang box to run your cords to inside the cab.
Here are the parts you need-
1 4" box
1 extended metal face plate
3/8" clamp for the cord
wire nuts
raw extension cord- I used fourteen gauge (15amp).
Two receptacles (15 amp)
Now wire it up, I dont feel comfortable telling you how to wire this as I dont want to be held responsible for any issues you may have. Its very easy though..
I mounted it up top in the box, opposite of the exhaust hole.
* note, I did mine upside down to accommodate for timers, etc..
Next up is getting the light situated. We want to found out where the dead middle is and mount two eye hooks to hang the light hangers from.
Once you know where it will be mounted we need to install the reducers on the cool tube to fit the ducting.
The outlets of the cool tube are 5" and I needed to get them down to 4". Metal duct reducers at home depot were a bit too long for me and it would have barely fit in the cab.. Instead, I grabbed these 4"-3" adapters for PVC. The 3" side fit the 4" tubing around the outside which I will tape with foil tape before I turn the cab on and the 4" side on the adapter fit the 5" side over my cool tube.
Once you have the ducting connected, mount the fan up top (on the shelf if you got the 100 fan or on the roof if you got 100x) and connect the ducting from the cool tube to the fan, and then to the back exhaust outlet..
temps run at +2 over room temp and -4 over room temp with the lights off.
That is it in a nutshell! I hope this can help some people or give others ideas how to modify my cabinet and make it work better!
Thanks for looking, please feel free to ask away if you have any questions.
(yes, I didnt connect my carbon filter yet)
