DiY LEDs - How to Power Them

Randomblame

Well-Known Member
It's mounted outside of the cab in a horizontal position but I've just clipped a fan on the outside to blow over it and it doesn't feel appreciably warmer than ambient temps. When I was running it at 200W, it got very hot but again, the fan blowing across the top of the driver really helps keep it cool.
Up to 70°C case temps are no problem according to the derating curve in the datasheet and do not shorten its lifetime. If he stay below 70°C you can save the fan for another job. It can also help to mount the driver directly on a cold wall or to an aluminum base like a small alu sheet.
 

Tejashidrow

Well-Known Member
You really need a multi-meter hooked up at the output of the driver to the first set of strips or cobs to get an accurate reading as to what the driver is putting out as far as amps or volts. Using a kilowatt meter is only going to give you an idea of overall power consumption which will include some losses from the efficiency rating of the driver.
Ok
^^^^^^^^^^ that’s what I could not see through the fog about last night
I have a multimeter
What should I set it on???
Volts???
Ohms?? ( of course not...)
I was thinking hooking the volt meter to the drivers outputs how do you read currant on a multimeter????
Thanks
 

Zbud94

Well-Known Member
Don’t want to rob the thread but also don’t want to make a new one for such a quick question !

Here’s the details I have a 3x3 tent I want 400 led watts so the hlg-480H .

Now which model hlg-480H do I want for the bridgelux eb series gen 2 560mm ?

I would like to run between 20-25 strips

I want to be able to dim

Thanks everyone I appreciate it.


Again sorry for jacking the thread for a minute lol
 

boilingoil

Well-Known Member
Ok
^^^^^^^^^^ that’s what I could not see through the fog about last night
I have a multimeter
What should I set it on???
Volts???
Ohms?? ( of course not...)
I was thinking hooking the volt meter to the drivers outputs how do you read currant on a multimeter????
Thanks
You'll need an ac/dc multi-meter with the capability to do 20 amps of dc current. I'll refer you to @Randomblame as he more than likely has pics to help guide you through the process and he's a lot easier to understand.
 

Zbud94

Well-Known Member
You'll need an ac/dc multi-meter with the capability to do 20 amps of dc current. I'll refer you to @Randomblame as he more than likely has pics to help guide you through the process and he's a lot easier to understand.
Hey thanks for the help bud ! Just finishing up my banana og and fruity chronic juice using a 600 watt hps in the 3x3 I want to upgrade to the led strips but I’m not the best with ohms volts current and all that. I understand the strips are around 19.5 volts I believe? But again I don’t know.

Might need a shopping list for a 3x3 led strip build around 400 watt ?

Thanks everyone
 

Befri

Well-Known Member
@Randomblame , I made the move and purchased 40 - L09 inFlux(3000k - due tomorrow) strips, and 4 - HLG-320h-48B drivers(received already). The plan is to power 20 strips per light fixture with 10 strips per driver based on your recommendations. I've seen around RIU some really clean wiring with a type of junction box with the following; sonoff, potentiometer, bayite digital meter, quick connect with switch for the power plug(see pic).

How would you recommend wiring up these two drivers? Can I join the two input power from the driver into a water proof connector(see pic)? Then wiring on cord to the junction box, into the sonoff, and then into the inlet plug/switch(see pic).

I've seen where people have connected the two dimmer leads together before the potentiometer so both drivers dim at the same time.

I have already received the "DC" bayite meters, and want to wiring this into the junction box too. Thoughts on how to do this?? I just realized that maybe I should have ordered the "AC" version of the bayite meter. I could return them, and get the "AC" version.

Basically I would like to get your opinion on how I would wire the two drivers on the same light fixture incorporating the sonoff, bayite meter, potentiometer.


led box wiring3.jpg led box wiring2.jpg
WJF.JPG [ATTACH=full]4174816[/ATTACH]
inlet plug.JPG
 

Randomblame

Well-Known Member
Looks really clean, mate! Well done!
Yea, an AC meter makes a bit more sense and is a lot easier to wire. The DC version needs to be connected to the dc outputs of the drivers. With the AC meter the is only a small magnetic coil through which you simply have to guide the AC input wires and good is. AC meters takes the same AC input to work so it can be hooked up to the same L & N wago's.

The Sonoffs can handle up to 10Amps, two HLG-320H need around 6,4A at their max. settings(~700w), I see no problem when you connect both drivers in parallel to its outputs.
Wiring would be like this:
120/220vac >AC switch >Sonoff >both drivers in parallel. The AC meter coil needs to be placed between AC switch and Sonoff.(wiring diagram on its backside)
To dimm both drivers in once you need a 50k poti(55k would be optimal to get the max. current out of these drivers(up to 108%).

Again, it's a nice and well made fixture. Somewhere here there are still pics of my first COB light more or less only held together by cable ties and duct tape..., lol!

One question, do you purchased these driver as Meanwells? I know the ERAO drivers and I like the fact that you can get it in almost any configuration you want(vf and If). But also when the housing looks similar beside the color they are not Meanwells.
If you bought and paid for them as Meanwells the vendor has ripped you off. If you knew it before, no problem!
 
Last edited:

Randomblame

Well-Known Member
Ok
^^^^^^^^^^ that’s what I could not see through the fog about last night
I have a multimeter
What should I set it on???
Volts???
Ohms?? ( of course not...)
I was thinking hooking the volt meter to the drivers outputs how do you read currant on a multimeter????
Thanks

Depends on the meter. And of course you need ohms to check the resistance of the dimmer poti. If it's below 105k you will not get the drivers full power. DC output is checked via voltage and current settings on the meter but make sure you use the right input connectors on the meter. Some meter has 2 inputs, one for low amps and one for higher amps. And for voltage and current measurings use the range in which the driver output values fits in. Be careful CC driver can have a high output voltage, deathly high...
It's probably the best to watch videos on youtube to get an idea how measuring works and if you're still unsure how to do it get someone who knows it. You don't want to make your mom unhappy...
 

Randomblame

Well-Known Member
Hey thanks for the help bud ! Just finishing up my banana og and fruity chronic juice using a 600 watt hps in the 3x3 I want to upgrade to the led strips but I’m not the best with ohms volts current and all that. I understand the strips are around 19.5 volts I believe? But again I don’t know.

Might need a shopping list for a 3x3 led strip build around 400 watt ?

Thanks everyone

http://ledgardener.com/

Lots of wiring examples for strip builds and an easy to use calculator. There are also good explanations with pics and vids on the subject for better understanding of how it works. Also fundamental knowledge about voltage and current, LEDs, Meanwell drivers and so on.
Literally all you need to know ...

@Tejashidrow
You should also visit the site... you will not regret!
 

Befri

Well-Known Member
Looks really clean, mate! Well done!
The pictures of the light are an example of what I'm going to build. I posted those pics of the light so you could see what I wanted to do for my 20 influx strip build with Meanwell drivers HLG-320H-48B. Sorry for the confusion here.

I'm going to return the DC meter, and get the AC version. Thank you!

I did get Meanwells; 5 of the HLG-320H-48B. The light in the picture was an example of what I have seen, and I wanted to duplicate that for this strip build. Sorry about the mix up. I should have been more clear on my post that the light in the pictures was what I wanted to do. :bigjoint:
 
Last edited:

Tejashidrow

Well-Known Member
So
My multi meter is analog and with a dead battery
So, I hooked up the driver, maxed out the ajustmentpot, then backed it off 1/4 turn.
Plugged in and. Bobs yer uncle,
I’ve got light!!!
It’s s way brighter than the 60 watt driver I took off.....( hurt your eyes bright)
The sunboard board and heatsink are at 93F degrees
Cab runs at ambient air temp.
When my Killawatt arrives I’ll hook it up and ajust the driver to 95 watts-ish
While the Killawatt is not optimal I have a small grow. So it will suffice.
Thanks fer yer all’s help
Farm Friendly
Pax
 

Tejashidrow

Well-Known Member
For those interested....,
My Killawatt came in today.
Put it on the sunboard and holy guacamole!!!
I was running at 125 watts!!!
Ooops did a stoner thing and adjusted the pot the wrong direction.
( no wonder it was so brite!!!)
Anyhoo, I turned it down to 99 watts
Gives me 38 watts per square foot
Waaaay better than the 22 watt per square foot I was getting with the 60 watt driver.
Looking forward to the next 2 weeks
Farm friendly ya’ll
 

ANC

Well-Known Member
For my F type strips I just used the calculator... looked at Voltage and current at about the operating temperature I am using them... Which comes to about 45.9V at a ballpark 2.1A / strip
I simply hook a voltmeter over one of the strips and adjust current until the voltage gets there.
 

Mary's Confidant

Well-Known Member
So @Randomblame, I've completed my first builds and I'm trying to make use of my last few pieces lying around. This is going to be a mix n match affair and I don't have to use all the components but I'd like to use what I can.

I have a 2' x 2.5' x 7' tent I'm creating a light for. I have 6 x 2ft Bridgelux EB2s, 4 x 1ft Bridgelux EB2s, 6 x COB CXB3070 3500ks. I was hoping to cobble something together out of all of this.

Any suggestions on a driver and layout? I know this won't be easy but I thought that might be part of the fun :)
 

Mary's Confidant

Well-Known Member
@Randomblame - I hope I haven't overloaded you with the question above. Would it help if I showed pics of the first two builds you helped me complete? If the parts above aren't complimentary, I guess I could order a few more 2 footers and create another strip light.
 

Randomblame

Well-Known Member
So @Randomblame, I've completed my first builds and I'm trying to make use of my last few pieces lying around. This is going to be a mix n match affair and I don't have to use all the components but I'd like to use what I can.

I have a 2' x 2.5' x 7' tent I'm creating a light for. I have 6 x 2ft Bridgelux EB2s, 4 x 1ft Bridgelux EB2s, 6 x COB CXB3070 3500ks. I was hoping to cobble something together out of all of this.

Any suggestions on a driver and layout? I know this won't be easy but I thought that might be part of the fun :)

Sorry for the delay, mate!
There are a few ways to use them. The easiest way would be a series-parallel circuit with CV/CC driver.
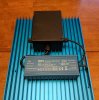
For a 5ft² area you need ~150-175w, so either a HLG-150(165w, 175w total) or a HLG-185(210w, 225w total).

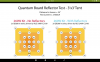
You could connect each of the 6 COB's with one 2ft EB strips in series(36v+19,5v) to get 6 CO/strip pairs. Each pair needs ~55,5v from datasheet. These 6 pairs could be used in parallel on an HLG-185H-54A(3,7Amps). Each pair would run with ~615-650mA. At 620-650mA each COB would need only ~34,5-35v and the EB strips are probably ~19,5-20v depending on Tc., so probably ~54-55v(25-50°C Tj.).
You can also take a HLG-150H-54A(165w) but I would rather have a bit more juice and the HLG-185 is only a few bucks more. With HLG-150 each COB/EB combi would run with only 465-500mA so it would be a bit more efficient(1-1,5% maybe).

The 4pcs 1footers could be used for germination, seedling stage and like a bloom boost. An APC-35-350 would be enough to drive them in series and for the mainlight you could use a slightly smaller (HLG-150H- or even a HLG-120H-54A).
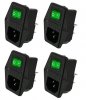
A Sonoff Dual(~9$) could be used to control the fixture via smartphone app. Each driver would have it's own channel and can be switched on and off separately. APC-35 and the four 1ft EB's could be used for germination and early vegging. From week 3or so you could switch to the HLG driver and from BW3 you could use them both to get all the light available. HLG-150H-54A + APC-35-350 would be ~195w or 210w at the wall.

I think that is the easiest way to get everything under one roof. Directly integrating the four 1footers in one circuit would be much more complicated and would only result in them being twice as bright as the diodes on the 2foot strips.

COB's would run at ~22w so passive cooling is enough. You could use a cheap 22x 28" alu-sheet with 2-3mm thickness and glue a few 20x 20x 20mm U-channels on its backside to increase the surface area and improve its cooling capabillity(double sided thermal tape).
Such a "heatsink" works very well(see the 150w light in my signature). Lets say you add 10pcs u-channels on its backside and use the sheet mentioned above that would be +12.000cm² and is enough to remove 110-120 heat watts.
Your 200w light is ~55% efficient so it creates 110PAR/w of light and 90heat watts fully ramped up.
Such a heatsink would stay below 50°C and there is always enough head room when it gets hot in the summer.
How you make the cooling in the end is of course up to you. I can only say that it works well...

:peace: and have fun with the construction..
 
Last edited:

GBAUTO

Well-Known Member
Sorry for the delay, mate!

COB's would run at ~22w so passive cooling is enough. You could use a cheap 22x 28" alu-sheet with 2-3mm thickness and glue a few 20x 20x 20mm U-channels on its backside to increase the surface area and improve its cooling capabillity(double sided thermal tape).

:peace: and have fun with the construction..
Aluminum baking tray-full sheet pan 18x24 About $20
 

Randomblame

Well-Known Member
Aluminum baking tray-full sheet pan 18x24 About $20

Hmm, could be a bit too thin for COB's and probably not enough surface area for 200-220w unless you add c-channels on its backside. The fixture would be a little smaller but the edges would act like a reflector when painted flat white. But I would use slightly bigger c-channels(30x 30x 30mm) to make up for the surface difference and when the COB's are screwed on I would make sure that they sit exactly below one of the u-channels so the mounting place has a little more "meat" and the heat can spread better.
On the other hand, a 22x 28" piece of 2mm alu flashing does not cost much more .. at least as long as you do not have to pay any punitive tariffs on turkish aluminum, lol!
If you take it in 26x 32" you could bent 2" of each edge to 45° to integrate small reflector wings around the mounting surface. Would look like a HID hood..
I already have the 2x 2' base sheets for my new lights laying around and they also have 3" wide wings along the sides. Its not much of a difference maybe 2-3% but they help to reduce wall loss and they slightly increase over all PAR readings and along the sides.

Below is a QB260 kit test with and without reflector wings if you interested..
 

Attachments

Gman94

Member
Hey, so im going to build a setup using qb132s, they run at max mA 2000 and 36v.
https://horticulturelightinggroup.com/pages/qb132-board-guide

I want to run two of them using a hlg-150h-36a with a max current of 4200 mA. Ill wire them in paralell.
https://www.arrow.com/en/products/hlg-150h-36a/mean-well-enterprises

Next i want to run 6 of them also in paralell using a hlg-480h-36a wich has a max current of 13300mA.
https://www.arrow.com/en/products/hlg-480h-36a/mean-well-enterprises
Both these drivers are cv+cc

I really dont know much about drivers and what i know i have learned the last 24 hours reading and seing youtube vids, can anyone confirm that the setup i just mentioned would work like i think it will or if i have mistaken something?
Thanks
 

GBAUTO

Well-Known Member
Welcome, Gman.
Those drivers will provide the full current output regardless of number of boards connected so both of your examples will exceed maximum current rating of the board. You'll need to either increase the number of boards on each driver to bring its current down or go to a constant current driver and use series wiring.
 
Top