subcool
Well-Known Member
I see many grow rooms in my travels and I also see lots of bad practices and nasty looking canopies. I thought I would try and shed some light on the problems I see popping up the most.
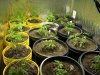
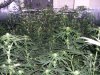
#1. Improper use of lights!
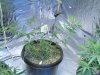
It is common for growers to want to group all there plants under the hoods but this can cause a few problems. Many Sativa varieties will fox tail and form dready buds if the light intensity is to high.
Your wasting space if your not covering 6x6 with a 1000 watt hood!
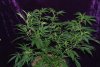
Lets discuss a few ways to construct a indoor grow room. According to your local laws, each state has a different limit of plants that can be grown in a space. I find it best to always have less plants budding than allowed so we will be learning to keep our plants in the vegetive state longer than normal all the while training and shaping the plants for maximum production indoors. In my youth we would run as many as 40 plants under 1000 watts in a 6x6 area. Now we design bud rooms to run between 4-6 plants in the same area with the same wattage lights. The yield is very similar and the main difference is the amount of time the plant is grown under an 18/6 lighting schedule. The plants are topped and shaped to form a wide bush that will finish with multi-headed and at a height of around 5-6 feet. Think of each area covered by a 1000 watt light as a 6x6x6 Cube that you are going to fill with Cannabis. By using 3 separate areas designated as Cloning area, Vegetive area, and Budding area, you can continually harvest medicine every 60 days.
We are going to use some firm measurements in this teaching example but almost any configuration will work that allows the three areas to be constructed. Every light/bulb has a foot print. This means the area that can properly be covered for maximum production.
They are as follows
1000 Watt Hoods 6x6
600 Watt Hoods .5x5
400 Watt Hoods .4x4
250 Watt Hoods .3x3
The design we will be teaching is a 12x6 Budding room with 2000 Watts of HPS lighting. The vegetive area is 6x6 with 1000 Watts of MH lighting, and a starting area 4x4. I also use a small shelf with fluorescents for cloning.
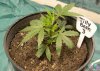
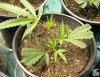
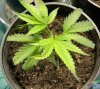
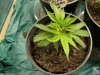
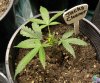
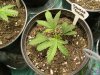
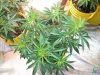
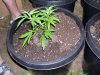
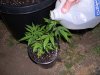
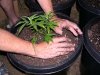
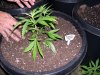
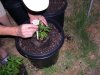
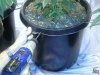
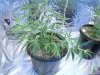
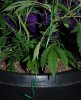
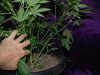
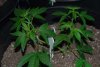
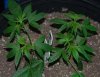
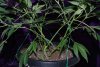
Top Plants early!
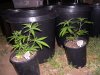
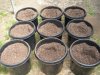
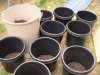
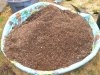
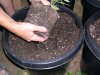
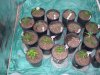
Transplant your plants early!
Do not start plants in small ass cups and then leave them untill there root bound and legged out.
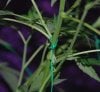
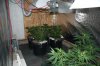
Pictures are of proper applied methods.
#1. Improper use of lights!
It is common for growers to want to group all there plants under the hoods but this can cause a few problems. Many Sativa varieties will fox tail and form dready buds if the light intensity is to high.
Your wasting space if your not covering 6x6 with a 1000 watt hood!
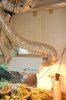
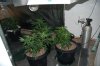
Indoor Theory
Lighting
We are going to use some firm measurements in this teaching example but almost any configuration will work that allows the three areas to be constructed. Every light/bulb has a foot print. This means the area that can properly be covered for maximum production.
They are as follows
1000 Watt Hoods 6x6
600 Watt Hoods .5x5
400 Watt Hoods .4x4
250 Watt Hoods .3x3
The design we will be teaching is a 12x6 Budding room with 2000 Watts of HPS lighting. The vegetive area is 6x6 with 1000 Watts of MH lighting, and a starting area 4x4. I also use a small shelf with fluorescents for cloning.
Top Plants early!
Transplant your plants early!
Do not start plants in small ass cups and then leave them untill there root bound and legged out.
Pictures are of proper applied methods.
Attachments
-
 185.2 KB Views: 1,508
 -
 67.8 KB Views: 1,444
 -
 83.8 KB Views: 1,246
 -
 91.1 KB Views: 1,545
 -
 89 KB Views: 1,402
 -
 71.6 KB Views: 1,376
 -
 81.7 KB Views: 1,358
 -
 78.3 KB Views: 1,923