Building up for bigger grow

Voidling

Well-Known Member
Well my old photo of my cab seems to be gone for some reason. Anyways I'm looking to do another grow in this thing, maybe two runs.

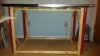
The mother/clone/veg side is 20"x 17" and 30" tall. It's a bit cramped to put the diy aerocloner in there with small potted plants. It is set up for 4 cfl bulbs currently, but only has three working 23w? bulbs,I forget exact wattage. It only has a small pc fan exhaust and a semi light trap passive intake.

The flower side is 28"x17" and 30" tall. It had a chinese led similar looking to gothams chrome series. Two of the pucks or the driver failed after a year and half and gave up as heat was too much of a problem running 200w hps. I think I have a 4 inch fan pushing through a carbon filter and a semi light trap passive intake.

I'll likely continue to use the wicking bed in the flower cab as I was last using:
https://www.rollitup.org/t/voidlings-wicking-bed.623923/


I was looking at building an led couple years back but blew it off. With these cobs though, it seems like the only way to go.

Part 1

I'm looking to refit the flower cab with light so I'm buying 2 CXA3070 3000K Z4, two 1.4A drivers, and two
ARCTIC Alpine 11 Plus CPU Cooler.

I've been reading through a number of these CXA3070 threads and my mind is a puddle. I'm very glad a number of you understand it all and geek out about it, it's not my cup of tea so it's great to have you all condense it down, so thank you all very much for that.

So to start with, I know volts times amps equals watts. Is it the forward voltage of 38.5v that's multiplied with the amperage of the driver? Meaning 38.5*1.4=53.9w per chip?

So 28*17=3.3 sq ft with 100w giving me 30.3w per sq ft?
 

Voidling

Well-Known Member
Part 2 - Making new mother/clone/veg section

I had been using this table as a desk for a while but moved my laptop off to elsewhere and it became a giant stack of crap. So I cleared it off.


I built a frame to slide in between the legs. I should have left a little more clearance. I plan to wrap it in panda film. I'll have to be extremely careful when sliding it back to keep from snagging the film.


The outer dimensions are 38"w x 26"d x 27"tall. It should hold two of the 15 gallon tough totes so plenty of room for cloner and mother and some veg I think. So ~6.9 sq ft of floor space, round on up to 7.

Could a single cree do this or should I go with some of the vero 10? I haven't looked at anything but the cree yet and am already overwhelmed so trying to keep my brain from exploding.
 

Attachments

Voidling

Well-Known Member
The arctic cpu cooler says

"Pre-applied MX-4 non electricity-conductive thermal compound"

Do I still need to add a thermal compound?

Second question is about attaching the cob to the heat sink. What size do I drill and tap and what kind of bolt do I use to secure the cob to the heat sink?

Thanks
 

Banana444

Well-Known Member
I removed the preapplied thermal paste with achohol and then used a good silver thermal paste like artic silver. I used 4-40 tap and drill combo. Hardest part was finding screws the right size and length, I salvaged some from an old ps3. If you have never used a drill and tap on aluminum, remember not to break off the tap in the aluminum heatsink.
 

bicit

Well-Known Member
The arctic cpu cooler says

"Pre-applied MX-4 non electricity-conductive thermal compound"

Do I still need to add a thermal compound?

Second question is about attaching the cob to the heat sink. What size do I drill and tap and what kind of bolt do I use to secure the cob to the heat sink?

Thanks
You'll want an M3x0.5, cold forming tap(non fluted) and a 2.8mm drill bit. Cold forming tap is recommended because they don't form chips.
 

Voidling

Well-Known Member
You'll want an M3x0.5, cold forming tap(non fluted) and a 2.8mm drill bit. Cold forming tap is recommended because they don't form chips.
Thanks. I'm a bit nervous. I broke a bit in wood the other day. Think I'll go borrow a drill press for that part.

Is there any advantage to tapping and drilling versus thermal epoxy other than removing the cob at a later time? The heat sink is only $13 on Amazon and I only plan on adding more rather than replacing in the foreseeable future.
 

bicit

Well-Known Member
Thanks. I'm a bit nervous. I broke a bit in wood the other day. Think I'll go borrow a drill press for that part.

Is there any advantage to tapping and drilling versus thermal epoxy other than removing the cob at a later time? The heat sink is only $13 on Amazon and I only plan on adding more rather than replacing in the foreseeable future.
A drill press is pretty much mandatory in order to do the job properly. The hole must be straight or the tap will break every time. The tap also needs to be started straight or the it will break. It's best to drill the hole, then unplug the drill press, exchange the drill bit with the tap, then manually turn the chuck of the drill press while maintaining a light amount of downward pressure. Once the tap is started then you can remove it from the drill press and continue the tapping process.

Cold form taps and heatsinks are expensive to ruin. Best to do it right if you're doing to do it. Don't bother trying with a hand drill.

Drilling and tapping is more secure and the thermal pastes have a higher thermal conductivity than thermal adhesives. If you don't want to drill/tap check out supraPSL's threads. He uses kapton tape to secure his cobs. Seems to work quite well.

Also, the pre-applied thermal paste on those heatsinks isn't the best, it does work well enough though.
 

Voidling

Well-Known Member
Thanks, I'll take a closer look for kapton tape. I'm only part way through the 100+ pages of that thread.

I'm only doing two so would hate to spend much on a tap
 

bicit

Well-Known Member
Thanks, I'll take a closer look for kapton tape. I'm only part way through the 100+ pages of that thread.

I'm only doing two so would hate to spend much on a tap
They are expensive, but they'll carve thousands of holes if properly used.

If you're only doing two, Kapton tape or tthermal adhesive would probably suffice.

Anyone tapping high dollar heatsinks should look into a tapping station and a drill press.
 

Voidling

Well-Known Member
Have access to old drilling press but not a tapping station.

I'll stick with kapton, need to add it to my Amazon cart
 

SupraSPL

Well-Known Member
Hey Voidling, if you use high performance thermal paste like Prolimatech PK3, thermal conductivity is 12 (W/mk). The MX4 paste that comes on the Arctic heatsinks is rated at 8.5 (W/mk). Steves LEDs sells Momentive TSE3941M easy release thermal adhesive which is 0.84 (W/m*K). So if your mating surface is near perfect, the thermal paste plays less of a role, but if the surfaces are not flat, the heat from the COB will have to travel through a thicker layer with a relatively low thermal conductivity (the aluminum itself is about 200 (W/mk)).

So based on that, the easiest solution would be to use the thermal paste Acrtic supplied and maybe take the time to warm it up and press on the COB corners to squeeze the layer as thin as possible. The hardest method would be to scrape off that paste, flatten the heatsink surface with 120grit and then polish to 1000 grit, then apply Prolimatech PK3. I have never tested to see exactly how each method affects the actual light output with a 1.4A setup, but I would like to test that once I get my next shipment of Arctic CPU coolers. Cree has some data on that in this PDF.

As far as thermal adhesive vs thermal paste+kapton, I highly recommend the paste+kapton method. You will get excellent thermal transfer and the COB sticks tenaciously to the heatsink surface. The kapton keeps it from sliding sideways and you could add thermal adhesive to the sides rather than kapton. If you ever need to remove the COB, you just remove the kapton and slide/twist the COB until air penetrates the paste, then the COB will come free and can be cleaned off with alcohol. This method works well on 20mm stars and larger, but for smaller stars I recommend screwing them in or using thermal adhesive or thermal epoxy. Bicit is the man for drilling tapping info.

There is one thing to be wary of if you mount CXAs without the COB holder. When soldering the wires onto the COB, you have to make sure there is no tension on the wire while it is hot, or it can pull the solder pad away from the COB. The COB will still function, but if that pad breaks off at some point, it would most likely be inoperable.
 

Voidling

Well-Known Member
Good info.

I tend to solder component first and then attach back to circuit or power. I wasn't formally taught so I don't know what's proper.

Banana made it sound like the pre applied comes off with alcohol ok. I may still have arctic silver compound around from the last desktop build. Not sure thermal conductivity of it vs the other stuff though.

Thanks
 

SupraSPL

Well-Known Member
Yes it should come off easily and alcohol can clean up the residue. Arctic Silver 5 is 8.7 W/(m·K) but they all seem to perform similarly.
thermal_chart.jpg
 
Last edited:

Positivity

Well-Known Member
My 2c..

I use a cheap drill tap combo kit. I do mine free hand with a hand drill and hand tap. Doing it that way is pretty easy as you can better feel the resistance and not break bits.

The only bit I broke was on the first one not drilling deep enough and tap bottomed out while I kept tapping

It's really easy even with hand tools

Cutting oil is one of the key items also
 
Last edited:

Voidling

Well-Known Member
Sounds like it's hardly worth the hassle of cleaning off to go worth arctic silver. Though those tenths of a point could mean more than it seems
 

bicit

Well-Known Member
My 2c..

I use a cheap drill tap combo kit. I do mine free hand with a hand drill and hand tap. Doing it that way is pretty easy as you can better feel the resistance and not break bits.

The only bit I broke was on the first one not drilling deep enough and tap bottomed out while I kept tapping

It's really easy even with hand tools

Cutting oil is one of the key items also
That's funny, cause I've never used cutting oil :P

Voidling- The difference would be the thickness of the TIM. The preapplied stuff is pretty thick.
 
Top