Thermoelectric wine cooler drying and curing - DIY

Just had my first setup die, it was an 8? bottle wine fridge with a lil vivosun dehuey sitting on crayons. Have now setup a bigger esky style koolatron with a diff dehue on some scrap wood. Cheers for talking about this stuff and making it so easy to learn/do. Just outta curiosity, do you guys ever make it all the way down to 62% ? I find by the time I hit ~66rh setting on the inkbird it's about jar ready, kinda crunchy outside and jar stable at ~62.
Yeah mine at 65 are still very soft and pliable, smells outstanding when ya touch em ;)
 
Finished the 14 day dry today, set to 60 today and box is at 60.3 RH, I'm at 58 deg the entire time, I'm thinking about possibly acclimatizing....

Tell me if I'm pushing Risk:
thinking of keeping the inkbird at 60 rh, and clicking up the temp daily 1.0 to reach around 68 or 70
 
Finished the 14 day dry today, set to 60 today and box is at 60.3 RH, I'm at 58 deg the entire time, I'm thinking about possibly acclimatizing....

Tell me if I'm pushing Risk:
thinking of keeping the inkbird at 60 rh, and clicking up the temp daily 1.0 to reach around 68 or 70
I don’t think you’d be pushing risk of mold or anything, although some terps start to evaporate at 70f so I wouldn’t go much higher than that.
 
I don’t think you’d be pushing risk of mold or anything, although some terps start to evaporate at 70f so I wouldn’t go much higher than that.
I think I'm gonna do it to stabilize, thanks HD :)

I swear, my best cure I ever got was in an apartment sliding door closet that was in socal by the beach, it was May-June, around 15 days and fluctuating 68-76 deg, might of been the coastal humidity that saved the hangers, but it dried beautifully and cured with a lot of flavor, but I will run it to 68 here. And then grove bag these suckers outside the box
 
I have a feeling Acclimatizing is a good way to prevent directly inserting into a Grove Bag. I've done the process up to the 14th day 60 % humidity before and the buds eventually come out smelling well after around a few weeks to a month or so, but I feel bumping the temp up in the box and keeping humidity stable at 60 is a good way to dry the internal Humidity of the bud thoroughly before bagging up. bumped up 1 deg to 59 % today, and humidity went from RH% 60 in the box to RH% 62.6 when I checked this morning. So that change def brought out the internal I'm guessing.

We shall see, I'll monitor the bumps/RH% to see if there's a Temp SweetSpot that will keep at 60% RH stable and take out then.
 
Welp, I'm at 63 degrees box temp 60 Rh, pretty sweet so far, feels like a fermentation the further I go up, it's carboxing nicely, very nice grey smoke, the thick proer nugs are drying on the outside and very pliable still be feeling nice on the internal dry out, gonna go as high as I can, good luck new guys !
 
Oh, can you explain that to me in more detail? I read that it can work, but not how!? Thank you
You can dry in a compressor based fridge, it’s called the “lotus cure method”, but works differently than using the thermoelectric cooler. Here’s one link, or google lotus cure:

 
Fun to see others doing a diy version. I have my own I did. I used a 28 bottle thermoelectric wine fridge. I own a cannatrol so I’m testing the one I made. It works great. I’m using a ACI 69 pro controller to control mine. Also the cannatrol shelves fit it perfectly. It does it just as well as the cannatrol.
Hey Bud, I am late to the party. What unit did you retrofit with Cannatrol shelves...exactly? My shelves measurements are 13 7/16 x 11 3/8. My unit is Koolatron 48L, 28 Bottle, WC20. Thank you Brother. I am on page 33 of 81, so just reading through the thread.
 
Regarding chemical off gassing of the Koolatron...

Here are the three steps I used, in the order I used them. Step three finally worked.

Leave door open for a couple days, and direct fan into interior.

Wash inside with a mixture of baking soda and white vinegar, using a stiff bristle brush, made of plastic.

Use a heating pad inside unit, with door closed, and raise internal temperature to around 100 degrees Fahrenheit. Heat for 24 hours, and de-energize. Then, run Koolatron at lowest temperature with door closed for 24 hours. De-energize the Koolatron and open door for 12 hours with fan directed at interior. Step and repeat twice or until smell disappears.

Good luck.

I am still looking for quality replacement shelves for the Koolatron. Cob jobs, or ill fitting incorrectly sized solutions only frustrate me, so there's that... lol. It's not you, it's me, seriously.

Thank you Hook Daddy!
 
Hey, not sure it is important but if you wish, I can post my build. It may or may not help others, as this thread was the inspiration for me. I scoured the internet, but this thread was the most informative with regard to how much information it has and all of it comes from so many different people.
 
Hey, not sure it is important but if you wish, I can post my build. It may or may not help others, as this thread was the inspiration for me. I scoured the internet, but this thread was the most informative with regard to how much information it has and all of it comes from so many different people.
Sure, this thread is all about sharing ideas so please post your build, any improvements or different ways of doing things. As long as it’s a thermoelectric drying cooler this would be the place to post it. Very glad the thread helped out, that’s exactly what I was hoping for when I started it.
 
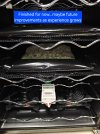
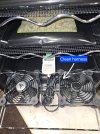
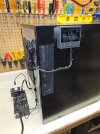
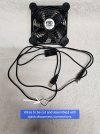
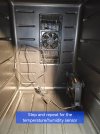
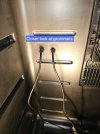
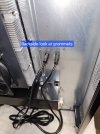
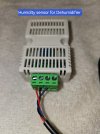
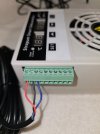
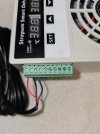
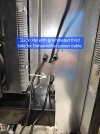
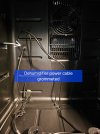
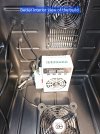
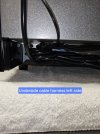
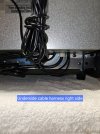
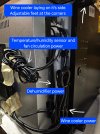
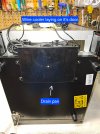
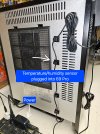
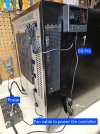
Okay, so I purchased a Koolatron 48L Thermoelectric Wine Cooler. I then drilled some holes for cables and installed a Circulation Fan, Sensor Probe and Dehumidifier using grommets and cable anchors. I use an AC Infinity 69 Pro for the temperature/humidity sensor. The fan circulates air indirectly. Below are the pics of the build and hopefully will be self explanatory. Ask any questions you may have. Thank you for any advice or suggestions.

The unit suffered from a chemical off gasing. It took me a couple weeks and several attempts to rid the unit from this smell. This included airing out with fan blowing inside, washing with white vinegar and baking soda, and finally...adding heat to the interior with a heating mat. After heating was complete and cooled down, I then energized the unit and set the temperature for 46 degrees Fahrenheit. I cooked at about 97 degrees Fahrenheit when using heat. I went back and forth twice between the two temperatures. Finally, the unit has no smell when cooling or not.

MAKE SURE TO VIEW ALL PAGES FOR REMAINING IMAGES AND ADDITIONAL UPDATES ETC. THIS WAS ORIGINALLY POSTED TO ANOTHER AWESOME FORUM CALLED BUD BUILDERS A WEEK OR SO AGO.

PLEASE UNDERSTAND THAT I ONLY READ ABOUT A HANDFUL OF PAGES THAT INCLUDED HDs BUILD. I NEVER FINISHED THE FULL 81 PAGES UNTIL I FINISHED MY BUILD. SO IT WAS VERY SATISFYING TO FINISH READING THE THREAD, ONLY TO DISCOVER ALL THE SAME CHALLENGES YOU ALL FACED AND CONQUERED, I DID TOO...LOL!!!

Here is the TREMOJEM KOOKATRON BUILD...

20250714_100906.jpg
20250714_101233.jpg20250714_103728.jpg20250714_110507.jpg
20250714_111848.jpg20250714_111929.jpg20250714_112424.jpg20250714_114236.jpg20250714_114252.jpg20250714_114310.jpg
 
Last edited:
TREMOJEM KOOLATRON BUILD CONTINUED...20250714_114313.jpg20250714_115540.jpg
20250714_115620.jpg20250714_115634.jpg
20250714_115733.jpg20250714_121856.jpg20250714_122158.jpg20250714_122740.jpg20250714_125647.jpg20250714_125723.jpg
US Dollars, all rounded up...

Koolatron $257 on sale, minus an additional $52 for chemical smell.

Strongman Dehumidifier $68

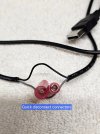
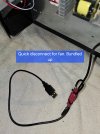
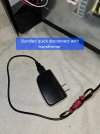
Quick disconnect $10, bag of 100, 3 sizes

HJGarden grommets $8, bag of 10

AC Infinity SP-3 fan $20

Lulu cable anchor $13 bag of 100, size large

$324 total
 
Last edited:
TREMOJEM KOOLATRON BUILD CONTINUED...
20250714_130923.jpg20250714_130935.jpg20250714_131008.jpg20250714_131015.jpg20250714_142507.jpg20250714_142513.jpg20250714_142542.jpg20250714_142908.jpg20250714_145937.jpg20250714_145942.jpg
So, the Dehumidifier is overkill, but I wasn't comfortable with just a module and I thought it was a home run, but I find that without some testing, getting the right temp/humidity balance, is a little time consuming.

The concept is that the Dehumidifier is controlled by the 69 Pro, because it creates heat when cycled and forces the wine cooler to cool, and therefore also dry the space.

The rub is that it creates to much heat because I am not controlling it with the 69 Pro. Instead, I am using the Dehumidifier's onboard sensor and controller SW, if you will.

I will continue to test out settings and report out. I do have the AC Infinity 67 controller, so I can test that set up as well.
 
Last edited:
TREMOJEM KOOLATRON BUILD CONTINUED...
20250714_181802.jpg20250720_114816.jpg20250720_120659.jpg20250720_120724.jpg20250720_120746.jpg20250723_154617.jpg
Hey, so I am kinda in the middle of my dry, so all of this report is going to represent that specific time line and when a new dry starts in a few weeks, it will pull from this data, but a whole new data set will be created, and going forward it is expected that the dataset represents massive flexibility in that the following criteria needs to be considered...

Cultivar
Average bud size and density (larf?)
Amount (wet weight)
Wet trimmed or not
Whole plant hang dry, or individual buds, etc.

So when I say, "these are guidelines" it is a fact.

The goal is a slow and low drying environment. Anything below 70 degrees Fahrenheit while maintaining a dew point of 53, or a VPD of 8. From there you slowly bring the humidity down each day over a two week period.

I am not convinced I can achieve the goals with the current set up. I will try another method whereby I trigger the Dehumidifier with the AC Infinity controller and not the Stropum on board controller.

I will keep updating as I learn more.

DAYS LATER AFTER WATCHING LARGE SWINGS

So, I have given this some thought and my in-experience leads me to think that the swing in data points you see in the images below are from a long Dehumidifier cycle. It is set for...
"On @ 55"
and
"Off @ 50".

I think I am going to change the settings to...
"On @ 51"
and
"Off @ 50".

This should drastically decrease Dehumidifier cycle time, and in doing so, prevent the Dehumidifier from overheating the interior.

The difference I am hoping for is that the wine cooler will be drying the interior instead of fighting the heat generated by the Dehumidifier cycle time, as the Dehumidifier will only run for a very short cycle, and not keep throwing heat into the interior.

Thoughts or suggestions are most appreciated.

MY ANSWER TO A QUESTION

So, Firstly I cannot take credit for any of this. I have viewed 100s of videos/threads all over the internet, that have blazed this trail long before me, so thank you to all of them.

So, the cycle time, and forgive me if I misunderstood your question. The Dehumidifier is just that, a fully programmable stand alone device. No other person I know of used this device, so there is that deviation to the design, that my executive decision determined was appropriate, from my research. Additionally, the modules available online where not up to snuff, and required additional resources that in the end drove up costs and added more unnecessary complexity to the build.

Typically, other users tear down and strip a Dehumidifier to only the module, and control it with a third party programmable controller. I can achieve this by simply connecting my Dehumidifier to an AC Infinity controller and cycle it with the AC Infinity controller.

But, it is just as simple to use the onboard programming functionality of the Dehumidifier and until someone tells me different, I'm not confident there is an advantage to cycling power with the third party controller. Albeit, since I'm already using it to monitor environment, why not use it to control the Dehumidifier, so the thought of it is not lost on me.

Okay, according to the internet...the purpose of the Dehumidifier, is to raise the internal temperature of the wine cooler, resulting in the cycling of power to the wine cooler, based off of the temperature target of the wine cooler. The Dehumidifier cycle time is determined by the controller.

Here is the rub...if controlling the Dehumidifier is managed by a third party controller, then the cycle time of the Dehumidifier is short, very short. This is a result of the third party controller being satisfied when target temp is reached, by the cooling efforts of the wine cooler that has been triggered by the third party controller.

Conversely, using the Dehumidifier's onboard programming controls, allow for a different scenario. This is where I dropped the ball, only to later, have an epiphany regarding the cycle time.

Originally, I had set the cycle time too long. My data set proves that the Dehumidifier was heating the interior so much, that the wine cooler fought to cool the interior and defeated the purpose of a slow and cold drying environment. Instead, I had big swings in the environment and unachievable environmental goals.

My remedy to this, was to drastically reduce the cycle time of the Dehumidifier, by changing the parameters or triggers. In doing so, the goals have been met, with regard to the environment.

I now have the correct environment for my goal of a slow and cold dry. Please know this. I am a rookie. I am learning. I am sharing, even my failures. All, in an effort to further our communities effort to have the very best experience.

So, please continue to deep dive this subject and thank you.

ANOTHER QUESTION I ANSWERED

So sorry, no. One of my concerns about this build was the very issue of fresh air turn over. I do not believe there is much of that happening. My build calls for two fans to be used, I am just waiting for my second fan to arrive. But, having said that, I have no concerns about indirect air "circulation". Instead, I'd like to see some fresh air turn over.

I am giving that some thought, as I am dancing around the idea of building my own enclosure or chamber, from ground up.

Or, maybe retrofit an old fridge..

UPDATE

Latest update...

Please note that this dry was started as a Lotus Dry, in my fridge and after five days went into the Koolatron, so it is not a good representation of this methodology.

Next dry will be first real test.

Dry is completed at a little over 14 days.

12% moisture on average, and into Grove Terploc Bags, and back into Koolatron to cure at 62F and 60 RH.

Here are the mechanical changes to Koolatron.

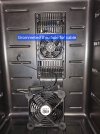
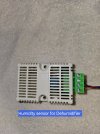
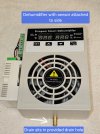
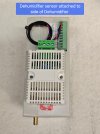
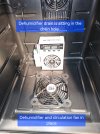
Cut both bottom shelves to allow 75% usage, as I only removed the back rail. Now, both bottom racks fit easily around Dehumidifier, that is located in the rear of Koolatron. One of the two bottom shelves holds the Dehumidifier sensor and the other shelf holds the circulation fans.

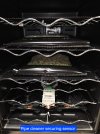
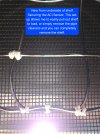
I also secured the ACI Sensor to the bottom of the top shelf. I can pull shelf out to load with buds, without concern for the sensor, or simply remove pipe cleaners and then you can completely remove shelf from Koolatron.

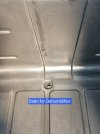
I added four rubber feet to the bottom of the Dehumidifier to slightly elevate it, while the drain nipple still sits inside the Koolatron drain hole. The feet also prevents it from slipping or sliding, not that it's necessary, but a nice added perk. It also allows for some air movement to the area under the Dehumidifier and around collection area and drain hole, which is the reason for that change.

I am not able to remove the shelf with the Dehumidifier sensor, but am able to remove shelf with the circulation fans. The shelf with the sensor is easily freed up in seconds, as it is only a pipe cleaner holding it in place. Not sure it is necessary to move either, but it's nice to know the increased capacity is there should I need it. Just add the food safe perforated grill mats and load up with fresh buds.

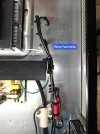
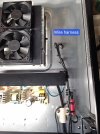
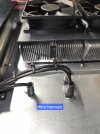
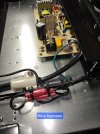
I further cleaned up the wire harness for the circulation fans and it sits on the same shelf as the fans. Since adding the second fan, I have reduced output speed on both to low from high.

SEE NEXT POST
 
Last edited:
TREMOJEM KOOLATRON BUILD CONTINUED...

Okay, so this update is about methodology and not so much hardware or mechanical changes.

My Dehumidifier is a stand alone Dehumidifier with its exterior chassis intact. It has it's own onboard controller, digital display and sensor. It is very good at removing moisture and creating heat.

Originally, I used the onboard controller to control environment and this required me to physically put hands on, because it is not wifi or Bluetooth. That requires opening the Koolatron and destroying the internal environmental targets.

I did this to familiarize myself with the Dehumidifier and the process in general. I can whole heartedly state that this method of control works, but is not convenient.

I have now switched to triggering the Dehumidifier using the ACI 69 Pro. I purchased the ACI AC-ADA3, UIS Control Plug, Socket Adapter. Now everything is monitored and modified right on my phone, from anywhere.

Note: The ACI Plug Adapter is NOT recommended for any device that pulls any real amperage. A small PC fan, a small Dehumidifier, a little device of any kind that does NOT actually pull any real amperage. Otherwise, you're playing with fire, literally.

This method is just as successful in controlling the environment as the onboard controller of the Dehumidifier, just easier and actually improved, as the environment will not suffer from spikes, as a result of opening the door to change setpoints on the Dehumidifier itself. Additionally, you can program in a Buffer, which is very nice.

You can compare data sets from both triggering methodologies. The pictures from the Dehumidifier onboard controller are in this thread for your review. It is my unprofessional opinion that the numbers are a little tighter using the ACI triggering, and that is another small improvement to the process, so a win of sorts...lol.

My targets are...

66 Degrees Fahrenheit
56% Relative Humidity
.9 - 1.0 VPD

I am curing, now that drying is completed. I prefer 56 RH over 54 RH. 54 RH being the recommendation from Cannatrol, when curing. I also noted that the Koolatron is two degrees Fahrenheit higher than my ACI Sensor Probe. I trust the ACI Sensor Probe over the Koolatron, so I will use the ACI numbers in my calculations. After the recommended 4 days of cure, I will change the RH value to 60 RH, for storage. I will make adjustments to cure time if necessary, by adding days if applicable. Incidentally, I believe Cannatrol recommend 68 F and 61 RH for storage.
 
Back
Top