tom__420
Well-Known Member
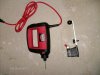
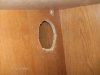
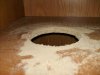
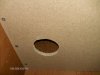
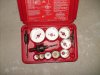
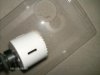
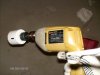
I'll be following this one I promise you that! I'm excited to see how this all turns out. Keep us posted and keep the awesome pic updates coming! +REP to you sirAlright. So I found the right tool for the holes: A handheld cut-out tool. Its kind of like a handheld jigsaw. I will be drilling the holes for tomorrow but for today:

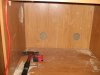
I added a dry erase calender for keeping track of lighting schedules, watering schedules, nutrient concentrations and a myriad of other statistics. Right now it's just a hint as to whats inside...

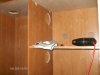
I realized the stupidity of installing a chain lock on the outside of a wardrobe so I removed it and installed one of these key-latch type locks. Works like a charm.


==========================================================================================
I've also started work on my Zen-inspired DWC cloner. Today was the trip to petsmart.
Ingredients:
Two plastic shoe-box containers w/ lids (1 for humidity dome) $5.00
One Whisper 20 Gallon air pump $18.00
One BubbleAir Bubble Tubing 36" $10.00
One 6" Air Stone $5.00
One 25' length of 3/16" vinyl tubing $2.50

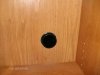
Take one of your shoe box containers and make a small hole using a screwdriver or drill towards the top of the container. Make the hole wide enough to fit the air pump hose through the container like so:


Once the tube is in the container you can connect an air stone to it. An air stone is a circular disc used in aquariums to both make a aesthetically pleasing volcano of bubbles in the water, but also can give oxygen to the roots of a cloning plant by keeping the water aerated. Attach the end of the hose to the air stone.

Now I bought this air stone just in case as I wanted to experiment with a new bubbling technique.i purchased what is known as a bubble wand. It is 36" long and is a tube with miniature holes that bubble. Hooked up to a 20 gallon air pump, I imagine this would do a fantastic job. A airstone disc like this only bubbles in one area whereas this tubing, as you can see, will wrap around the entire container keeping it nice and aerated.

The other end of your tubing is attached to the air pump. Now in my case I have to attach the hose to an anti-siphon filter to regulate the amount of air coming into the bubble wand, and then into the air pump.


Join me tomorrow for more cloner construction and exhaust construction!
Tom