Growing Marijuana 101 - How to Grow Weed Indoors

THCDigest

Member
Hey fellow green gardeners! I wanted to put out all the information I think is necessary for anyone to know when growing weed indoors hydroponically. This is the only way I’ve ever grown marijuana personally, and I’m now working on my 6[SUP]th[/SUP] successful grow.

I’m not here to say that my techniques are the best that ever existed, all I can say is that they are effective and give me enough yield that I never have to buy my own weed, which was really my only goal when I started growing. I just want to provide the answers for a lot of questions that I had starting in hopes that it’ll help someone else who is wondering the same things.

I break the process of growing with a hydro setup into 7 sequential steps:

Step 1 – Hydroponic Systems

Step 2 – Indoor Lighting

Step 3 – Marijuana Seeds

Step 4 – Nutrients & pH Balance

Step 5 – Growing Environment

Step 6 – Root Rot & Maintenance

Step 7 – Harvesting, Drying, and Curing


I wanted to not only give what I think are the absolute essentials to know and grow successfully, but I wanted to give some sort of order to it, so people can go in steps. One of the hardest parts of starting for me is I wasn’t sure where to start; it can be very intimidating. If you go 1 step at a time through this process though, it should be much easier for someone who is newer to digest and implement.

All of this information can be found in my free guide on how to grow weed at THC Digest, and you can also sign up to the THC Digest subscriber list and get access to a free PDF copy of the guide as well.

Marijuana Growing Journal

I also just started doing growing journals complete with videos as well as pics, which will show you exactly what I’m doing and how I’m doing it. I do a new entry every week, so by the end of this grow, you will be able to see my whole process of growing from seed to buds.

Coming Soon (by end of July)

Help Me Improve This Info!

If you believe I’m missing a key piece of information or want clarification on a specific point, you can post below or message me directly. There’s probably some things I’m missing and I’m completely overlooking them, so feel free to point out my errors, so I can fix them for the next person to read.

I’m trying to give a brief overview of what’s involved here, which for some people might be all they’re looking for, but if you want to dive deeper into a specific subject, you can always head to THC Digest to get further explanation, images, etc.

Happy Growing!
 

THCDigest

Member
What is a Hydroponic System?

A hydroponic system is a system that provides nutrients and water to your plants without the use of soil. The basic requirements of a hydroponic system are:


  • A tank to hold the water/nutrient solution
  • A way to distribute this solution to your plants
  • Something to give your plants stability/foundation (since soil won’t be present)
  • An air stone and pump; my system requires one, but not all hydro systems need one

Why I chose a Hydro Setup over soil

I know there’s a lot of controversy of what’s better, hydro or soil. I don’t want to really chime into that debate, but I can say the 2 main reasons I made this choice are:


  • Easier to clean – I didn’t want to deal with soil really, spilled water’s so much easier to clean :D
  • Faster growth – From my research and what I’ve read from various grower testimonials, hydro systems can bring a plant to fully mature as much as 4-6 weeks before a soil grow. I have no basis of comparison, but I will just say a grow for me lasts usually 12-14 weeks (3 months or so)

What Hydro System do I use?

The particular setup I use is called Bubbleponics by Stealth Hydroponics. I chose this system because it is fairly cheap ($100), and it’s very straightforward. I know that when I was first beginning to learn how to grow, I just wanted to dive in and get started.

I didn’t want to custom build a system because frankly, I had no idea what I was doing. I just wanted a system I knew was capable of results and that I could get some good experience on. I have been using this hydro setup for just a little over 2 years now and have only had to replace 1 of the original devices I got with it, 1 air stone.

Needless to say, it has been a real champ for me and I’ve gotten close to 25oz of marijuana out of this system in 5 grows with each grow yield getting bigger than the last. It’s definitely a reliable effective system.

Go to THC Digest for more information on Hydroponic Systems.
 

THCDigest

Member
What’s Important About Light?

Indoor grow lighting is a topic with a ton of information available regarding it, but the 2 main things you fundamentally need to know are:


  • Light = energy and therefore is the biggest factor in producing massive buds
  • Light cycles determine if your plant is in the vegetative or flowering state

What’s Vegetative and Flowering? How Long Are They?


  • Vegetative state – Light on 18-24 hours/day – 2 to 8 weeks or until plant reaches desired size

The vegetative state is when your plants will do most of their growing. During this state, your plant uses a ton of nitrogen, so that it can spread and expand itself as big as possible.


  • Flowering state – Light on 12 hours/day – 8 to 14 weeks depending on strain and desired high

When your plants start the flowering stage, you’ll be able to identify the sex of the plant within a week or so with just the naked eye. Pull out any males as soon as they’re identified if your intention from growing is usable weed. Use trichomes to identify when plant is ready to be pulled.

Types of Lighting

There are 3 main lighting types that I’m aware of, please tell me if there are more that I’m missing.


  • CFL (Compact fluorescent) – Cheapest of the lighting types, but tends to output the lowest intensity meaning smaller end yields.
  • LED (Light Emitting Diode) – Highly efficient lighting system that radiates virtually no heat and lasts a lifetime. Also great for compact spaces. The downside is that LED systems tend to have a high cost for output power.
  • HID (High-Intensity Discharge) – These lighting setups are the most powerful and fairly efficient. Though they give off enormous amounts of light, the cost is a larger power bill and heat signature. Excellent cooling is usually required.

I use a 400W HID dual-lighting system that has served me very well as far as end yields. I’d recommend HID to anyone looking for yields in the ounces.

Closer Distance, More Light = Bigger Yield

Because of the properties of light, it is extremely important to get your growing babies as close to the light as possible without exposing them to too much heat.

Every time you the distance your plants are away from the light source in half, you multiply light intensity and energy your plants are exposed to by 400%! That means cutting your distance from 24” to 12” means you can theoretically get 4x as much yield. (Note: There will be a lot of other factors here, but 4x as much is theoretically possible).

Go to THC Digest for more information on indoor grow lighting.
 

THCDigest

Member
Where To Buy Seeds

There are many seed banks available on the Internet, so you can start your search there. Make sure they deliver to your country before purchasing and I would probably do some research to see what other people think of the seed bank as well.

I don’t want to get into a discussion over which seed banks are the best and which ones aren’t because I think everyone has a different experience to share, and 2 people might have polar opposite views of the same company.

However, I will say that right now and for my last couple grows I have been using Buy Dutch Seeds. Their prices are pretty competitive, and they give lots of information about the strain you’re buying, so you can make informed decisions. Good germination and feminized seeds success as well.

Feminized Seeds vs Regular Seeds

I highly recommend buying feminized seeds as they are almost sure to produce females, which is what you want if yield is your main priority. They will be more expensive than regular seeds, but you have to consider that half of regular seeds will end up being males, so half your money is basically wasted.

Unless the seed bank you’re buying from charges double the price for feminized seeds, buying feminized just makes a lot more sense since you won’t be throwing any of the money you spend away the second you make the purchase.

Seeds Or Clones

One alternative to starting from seeds is using clones. Clones are genetic duplicates of a mother plant which can help you jump start a grow and skip 2-4 weeks or more over growing with seeds.

Clones can be bought from some dispensaries or maintained yourself by having a dedicated mother plant in its own grow area that’s constantly exposed to light. Clones aren’t required (I actually still use seeds every grow), but they can keep strong genetics alive and cut down grow cycle time thus increasing overall yield.

Seed Germination

Germinating is the process of activating the seed by soaking the inner walls of the seed with water thus giving the baby plant access to nutrients and energy until it can be sustained in your growing system.

The process I use to germinate my seeds is very simple and highly effective, which is why I continue to use it, but it is not by any means the only germination method. Here’s what I do:


  • Fill a mug halfway with luke warm water, drop seeds in, cover with tin foil
  • Store mug in dark, warm area of the house with stable temperatures for 24-48 hours
  • You’ll know your seeds are ready when the little white tap root is exposed and ¼” - ½” long

Go to THC Digest for more information on weed seeds.
 

THCDigest

Member
Nutrients Your Plants Need and Why they Matter

Healthy marijuana plants require as much as a couple dozen different elements in at least small amounts, but the main elements they require are nitrogen (N), potassium (K), and phosphorous (P). In fact, these are the dominant elements plants require across the entire globe.

One of the easiest ways to think of nutrients is how they work together with light to make your plant thrive. If you compare a marijuana plant to a standard car, light would be similar to the gasoline and nutrients would be similar the motor oil, antifreeze, etc.

A car can’t go anywhere without energy or gas, and it won’t run efficiently or might even break down if it doesn’t receive the resources it needs. The same goes for marijuana, they won’t grow at all without light energy, and they won’t grow efficiently or might even die without the proper nutrients.

What Nutrients Should Be Used

Most marijuana growing formulas, both hydro and soil, are broken down into 2 separate types: vegetative and flowering. Because the 2 stages require totally different nutrients, it naturally follows that there should be at least 2 separate nutrient types. Some formulas will break it down even further into subsections of each stage such as a different formula for early, mid, and late flowering phase.

One advantage of a hydro system is that nutrients move around in a water-based solution, so the plants have easier access to nutrients (which is a primary reason hydroponic grows can reach maturity so much faster).

These nutrient systems come in two forms: liquid and powder. I prefer liquid formulas because it seems like it’d be easier to clog up my water pump with a powder additive, but if there’s an advantage for powders, please feel free to set me straight.

As far as the specific formula I use, I use General Hydroponics Flora Series and have used it for every successful grow I’ve ever done. It’s super easy to follow because it has a feeding schedule and the plants have always seemed to love it. Using it, I’ve never had plants that experienced nute burn or looked undernourished.

What pH Is and How it Relates to Nutrients

pH is a way of measuring a particular substance’s acidity or alkalinity. The pH scale goes from 0 to 14 with 7 representing pH neutrality. A pH less than 7 indicates that the substance is slightly acidic, which for growing marijuana is exactly what you want.

Ideally in a hydro system, you want the pH to be between 5.5 to 6.5 at all times. At these levels, the nutrients in your hydro tank are readily available for your plants to absorb. If your solution ventures too far outside these levels, your plants will experience what’s known as nutrient lockout and will be unable to receive nourishment at all.

Measuring and Balancing pH

There are a lot of ways to measure the pH of your system, but I use a Milwaukee PH600 to monitor my tank. It’s a simple, cheap device that has never let me down as far as accuracy.

If you notice that your pH is going outside the optimum range, you will need to add pH up or ph down (pH buffers) to your system, whichever is appropriate for your situation. Follow the instructions on your pH buffers to know exactly how much you need to get it to the right level.

Since I’ve used the GH Flora Series of nutrients, I almost never need to recalibrate my pH. Inside the formula, they have elements to control pH and keep it at the desired level, so it’s extremely convenient and easy really.

Go to THC Digest for more information on nutrients and pH balancing.
 

THCDigest

Member
The Importance of a Healthy Growing Environment

Even with a vast amount of light and optimal nutrition, your plants can still run into a lot of problems if the environment it’s in has problems. The two main factors to consider for the environment are:


  • Temperature of the growing area
  • Relative humidity of the room

Ideal temperature and how to adjust

The optimal growing temperature is between 70 to 80 degrees F during the day and 60 to 70 degrees at night. While marijuana is extremely resilient and is able to withstand temperatures well outside that range in small doses, temperatures that are regularly hotter or colder can lead to great inefficiencies in growth and yield or even death.

If you are using an HID system, it is especially important to make sure you have a way to maintain that optimal temperature. HID systems give out a ton of heat, so try to come up with a solution before it gets too hot rather than in the middle of a grow. My first grow actually died and became crispy because it was just way too hot in my grow closet. Don’t make my mistake!

Typically, if I need to heat up the room (like during the winter at night), then I just use a small space heater that has an adjustable thermostat. For cooling, you can setup some kind of air conditioning system or an efficient circulation system that constantly blows the hot air out of your grow room.

Relative humidity, why it’s important and how to control it

Relative humidity, or RH, is the measure of the amount of moisture in the air as compared to the temperature. Ideally, your grow room should maintain around 40 to 60% RH during the vegetative phase and 30 to 50% during flowering.

Monitoring RH is not quite as important as temperature I would say, but in extreme cases can be just as damaging to your grow as runaway temperatures. If humidity is constantly at the high-end, there will be a ton of moisture which may provide a stable environment for the development of molds, which can just wipe out a grow completely. On the other hand, if there’s no moisture at all, your plants growth will be greatly stunted and possibly cause them to dry out to the consistency of brittle hay.

Unless you are in these extreme cases, you probably don’t need to worry too much about RH. If you are in either of these categories though, you should get a humidifier if it’s too dry or a dehumidifier if it’s too wet.

The benefits of air circulation

Having a good circulation system in your grow room helps to not only control the environment but has the additional benefit of strengthening your marijuana stalks. Adding a slight breeze to the direction of your plants helps them become healthier, stronger, and most likely will give you better end yields.

Setting up a circulation system might be as easy as putting an oscillating fan in your grow room. It might also be as involved as setting up a ducting system with inline fans in cases where heat and/or aroma are of great concern.

Go to THC Digest for more information on the ideal weed growing environment.
 

THCDigest

Member
A little work goes a long way

The nice thing about growing weed is that once you have everything set up and ready to go, it doesn’t take much effort at all to get massive results. That being said, you do need to be diligent in monitoring the status of your plants regularly. Detecting a problem early can be the difference between setback and complete loss of your grow.

Root rot and how to prevent it

One disease that’s almost exclusively found in hydroponic setups is root rot. Root rot is usually caused by a lack of oxygen and/or nourishment to your roots resulting in decaying roots. This dying organic makes an ideal food source for parasites known as pythium aka root rot.

Once you get root rot in your system, it can be almost impossible to get rid of. At the very least, it requires cutting off any infected matter and even then, the chances of removing it completely from your grow is almost nil. Your only real shot is to make sure it doesn’t spread further until your grow is completed.

Preventing root rot is far easier than getting rid of it once it’s there, so I highly suggest taking every precaution you can to keep your roots in perfect health. Make sure your marijuana gets plenty of oxygen to its roots or else root rot is sure to follow.

Another thing I do to prevent root rot is use a natural enzyme which feeds on the decaying matter as well, but it doesn’t harm the plant in the process. The particular brand I use is Cannazym. On my 2[SUP]nd[/SUP] grow, I lost everything due to root rot, but since then I have used Cannazym in every grow and haven’t had any root problems since.

Daily maintenance

As stated before, doing just a few minutes of monitoring every day can really increase the overall odds of success because you get much more familiar with your plants and are able to notice any negative changes much easier. At the very least, I do these things every day:


  • Briefly inspect plant for discoloration, pests, molds, or anything that might potentially endanger my grow
  • Make sure the water level of my tank is where it needs to be
  • Check the temperature and humidity (if you’re growing in a fairly stable environment, this shouldn’t change much)
  • Measure the pH to ensure it’s in the optimal range and balance if necessary

Weekly maintenance

Along with daily activities, weekly maintenance procedures help keep your grow system running at full efficiency. Here are the things I do at the beginning of every week to make sure my buds stay healthy:


  • Clean out the tank, pumps, etc. Not only does this get rid of any potential contaminants, I use this as an opportunity to give my plants a day of fresh, clean water without any additives in the water
  • The day after I clean the tank is typically when I will add nutrients. Again, because I use the GH Flora Series, I just follow the weekly schedule, so it’s really quite brainless.

Go to THC Digest for more information on weed growing maintenance.
 

THCDigest

Member
When is the best time to harvest? (Trichome identification)

The total amount of time it takes to get to the point where it’s ready to harvest is going to be partly up to how big you decide to grow your plant and also what strain it is. Fortunately, with all strains of marijuana, they tell you when they’re ready, so you don’t have to guess and hope for the best.

The best way to know when your buds are ready for harvest is by examining the trichomes. Trichomes are small, almost microscopic appendages that are filled with resin and many of the active cannabinoids we’re looking for like THC. From a distance, they give the weed its characteristic frosty appearance.

When you take a closer look though (usually with a magnifying glass or USB microscope), the trichomes will show their true color which will help you identify if the plant is ready to be plucked or not. The colors are as follows:


  • Clear – Trichomes not yet developed, keep growing
  • Cloudy – Trichomes in early development; harvesting at this time will result in a headier high more like a sativa. Because of this, this is often when I harvest my sativa strains.
  • Amber – Trichomes in late development; harvesting at this time results in more of a body high meaning this is the ideal time to harvest an indica grow.

Cutting and trimming your crop

When you’ve decided the time is right to begin harvesting, you’ll have to first cut and trim your branches and buds. The easiest way to do that is to use scissors to cut off each branch at the stalk. Trim around the buds as much as possible and cut off any fan leaves. The more you clean your branches, the faster the buds will dry because leaves won’t be able to hold in the excess moisture.

Drying the branches

After you cut and trim the branches, you’ll have to dry them for a while to extract moisture from the buds. The reason this is so critical is because if you want to store buds for a long time, you want to have as little water as possible inside them. This is because moisture breeds molds and molds ruin the smell and potency of your buds.

To dry, all you need to do is hang the branches up In a well circulated dark room for a few days to a week. Don’t put a fan directly on the buds or you risk drying them out too quickly causing them to become brittle and lose potency. Check the branches daily to see if any molds develop, and if so, remove any infected pieces. You’ll know that the drying process is over when the branches snap rather than bend.

Curing the buds

Though your weed will be perfectly fine to use at this point, it won’t last very long unless you take it through the curing process. Curing will extract even more moisture out of your buds and not only increase the flavor and potency of your buds, but it will allow you to store them for years if you really want to.

To cure your buds, just put them in an airtight jar, preferably glass but plastic works too. Leave them in a dark cool place like a closet, cupboard, or even the refrigerator. Once a day, remove the buds from the jar and place them on a paper towel or paper bag. Dry the inside of the jar then put the buds back in and into the dark cool place again.

Repeat this process every day for at least a week, then every few days for the next couple weeks. After that, this only needs to be repeated once every couple months just to make sure no moisture is in there and molds have no chance of developing.

Let me just say, there aren’t many things more rewarding than smelling that delicious dank aroma permeating from your curing jar. It’s the smell of a job well done and many, many highs to come!

Go to THC Digest for more information on harvesting, drying, and curing weed.
 

Cheifin420

Active Member
This was a good read. Alot I knew, some I didnt. Had some uncertainties about the drying/curing process (which I am rapidly approaching for the 1st time) and I think you answered them. Thanks for the post..Ima check out your grow.
 

Wordz

Well-Known Member
Closer Distance, More Light = Bigger Yield

Because of the properties of light, it is extremely important to get your growing babies as close to the light as possible without exposing them to too much heat.

Every time you the distance your plants are away from the light source in half, you multiply light intensity and energy your plants are exposed to by 400%! That means cutting your distance from 24” to 12” means you can theoretically get 4x as much yield. (Note: There will be a lot of other factors here, but 4x as much is theoretically possible).

Go to THC Digest for more information on indoor grow lighting.
I don't agree you could probably increase the yield for the area under directly under the light but you lose area. 12 inches above the tops probably gives an optimal foot print of 2x2 but 24 inches up you can probably get a 4x4 or slightly more(1000w)
 

THCDigest

Member
I don't agree you could probably increase the yield for the area under directly under the light but you lose area. 12 inches above the tops probably gives an optimal foot print of 2x2 but 24 inches up you can probably get a 4x4 or slightly more(1000w)
It's a good point that increasing distance may also increase the effective area of your light, but it would have to be a significantly larger area that's covered and I can't see the increased effective size outpacing the decreased effectiveness of distance.

Even in your example, the gains would be trivial or nonexistent because going from a 2x2 area to a 4x4 area increases effective area by 400%, but doubling distance decreases light intensity by 75%.

.25 (25% light intensity)* 4 (400% increased area) = 1 (no difference)

All that being said, I also go for 12" from tops to light source. :-P
 

THCDigest

Member
This was a good read. Alot I knew, some I didnt. Had some uncertainties about the drying/curing process (which I am rapidly approaching for the 1st time) and I think you answered them. Thanks for the post..Ima check out your grow.
Glad to help good sir, let me know if you have anything clarified :D
 

THCDigest

Member
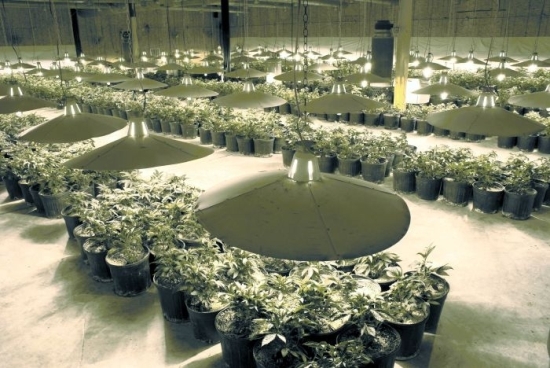
All great grows you're showing and it doesn't look like they use 12", you're right. They do have very powerful lights (I'm sure more powerful than my 400W) which means they give off a ton of heat and which is why they probably aren't as close.

In smaller home grows though, which is what I'm really trying to show how to do, heat tends to be a little more manageable and light systems a little less powerful. In my case, the 12" distance is perfect because it gets my plants very close without exposing them to temperatures above 90 F.

Example -- I think this is about as badass a grow can get as far as efficiency and its about 12" from light source

screen-shot-2012-01-16-at-12-32-48-pm1.png

After seeing your examples, I think I will try to make it clear I believe the ultimate goal is to get your plants as close as possible without exposing them to temperatures they won't like while making sure all plants receive an equal amount of light. This optimal distance will vary based on the circumstances of each grow.
 

THCDigest

Member
Very nice thread very interesting will be following your grow journal +rep
Awesoome, thanks for the compliment! If you have any questions or want to know about a certain topic, just let me know... always looking to make this more valuable
 
Top