Bridgelux EB-series on a 2' x 4' SCROG

rayuki

Well-Known Member
check this out, let me know if it helps anyone or there are errors.
https://docs.google.com/spreadsheets/d/1grRKpCnl7jOGWOQqnynUY0qzbTZiXOUb8IuM5BNmY_A/edit?usp=sharing

Its from Mouser & Digikey Canada so CAD $$ sorry, but for you yanks, just give yourself a 30% discount for no apparent reason. lol. f#ckers

I went with all 1400ma as the driver cost difference is negligible (or nonexistant) and they are dimmable so why not 1400ma and just dim
awesome thanks for this spreedsheet!
 

BuddyColas

Well-Known Member
Heh, just finished the final weigh-in yesterday, and yup, and I think it was you who nailed the "best guess" estimate of the yield: 293 g (10.3 oz). Despite being 4 clones, I ended up harvesting in 3 phases over the course of the past 10 days. The plant that was most unaffected by the LED burn was the last to die and -- no surprise here -- yielded the fattest, densest buds. After test-vaping samples (yes, multiple sample; one has to be sure bongsmilie) the buds from the first 2 harvests kicked my ass with equal intensity, so despite the disappointing size, I've realized the desired effect -- a good night sleep. :sleep: 
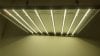
I'm letting the 3rd harvest cure for a few days before sampling it, but I have high hopes. Here's my inspiration:

View attachment 3993396

All told, I'm not disappointed with the the grow or the lights. Obviously, the grow could have gone better, but I believe that's called "experience," and the girls only enjoyed the EB strips for the last 5 weeks of their grow, so next time (a common refrain for new growers, am I right?) I'm shooting for a full lb., which I believe is quite reasonable and doable.
10 ozs is good...and armed with your experience...a pound is a good goal to shoot for.

Good on the multi sample test...you DO want to have a statistically valid test with enough samples!
 

VegasWinner

Well-Known Member
Heh; I'd put together a full description with parts, sources, and 8x10 color glossy photos with circles and arrows... Well, short story is I had a hard drive failure and am going to have to reconstruct the spreadsheet. Gimme a couple of days and I'll get it put back together and posted. ;)
Alice's restaurant. LOL and a paragraph describng the crime.
 

Pistil Kid

Well-Known Member
Thanks mate. Still got one more to go but should be able to knock it up quick now I have done one. Have to say thanks to the people in this and the other thread for blazing the EB trail for us!
Can you tell us some details about the back panel and how you attached the stips did you use thermal tape? What size would the light cover? How thick was the back panel and where did you buy it from? I would love something like this ... cheers
 

klx

Well-Known Member
Can you tell us some details about the back panel and how you attached the stips did you use thermal tape? What size would the light cover? How thick was the back panel and where did you buy it from? I would love something like this ... cheers
Sure man, its just a 600mm x 600mm (2ft x 2ft) sheet of aluminium. I forget the thickness but I think it was 1mm. I just handled the stuff and went for the thickness I thought was sturdy enough. Then I just cut 600mm lengths of aluminium angle to make a frame around the edge and riveted it to the sheet. It was nice and sturdy.

Then just laid out the strips by eye and used a sharpie to mark them. Stuck them down with double sided thermal tape and wired them up. Drilled holes in the aluminium angle to feed the wire through and used wire rope to attach it to the ratchet hangers.

Gaffer tape to tidy up the wires a bit and velcro hook and loop to hold the driver in place. Wire up a power cord and away you go.

The light itself is 2x2 so I reckon it would cover a 2x2 space. It pulls about 200 watts at the wall but I havent measured it yet, it looks about 200W to me though.

I have Vero SE cobs as well so one tip is to strip the wires less than you usually would, it makes it much easier to poke them in the connectors.

Lemme know if any other questions.
 

Pistil Kid

Well-Known Member
Cool thanks for the information, what gauge wire did you use to join the driver and the strips? And are those drivers dimmable? Thanks for your time I appreciate it .. cheers
 

klx

Well-Known Member
I used 18 AWG wire for everything that I had left over from my cob builds. The driver is HLG-185H-C1050A which is dimmable down to 50% via internal pot using small phillips head screwdriver.

If you are going to be dimming a lot you can get the B version of the driver which has leads to connect an external pot. I have external dimming on my cobs and I have found that I never dim them haha but they are in the flower room admittedly.
 

klx

Well-Known Member
Going by your avatar you must be an Aussie? If so where did you buy the strips and components from plus the shipping costs ..... cheers
Yeah man, you Aussie? You can get all the aluminium, wire rope, etc from Bunnings. The thermal tape cheap as hell on ebay and for the strips and drivers get em from Arrow. So cheap and free express international shipping its sick -

https://www.arrow.com/en/products/bxeb-l0560z-40e2000-c-a3/bridgelux
https://www.arrow.com/en/products/hlg-185h-c1050a/mean-well-enterprises
 

Pistil Kid

Well-Known Member

rayuki

Well-Known Member
Oh wait I can wago the power connectors? I went and got a 3 pin plug from bunnings but that seems way easier
 

rayuki

Well-Known Member
All us Aussies building these lol. If it helps anyone i picked up so thermal pads from jcar. Couldn't find thermal tape at bunnings.
 

klx

Well-Known Member
Oh wait I can wago the power connectors? I went and got a 3 pin plug from bunnings but that seems way easier
Yeah man wagos or terminal strips, whatever you got really. Ive got 50m of thermal tape haha, will come in handy at some point no doubt!
 

rayuki

Well-Known Member
Yeah man wagos or terminal strips, whatever you got really. Ive got 50m of thermal tape haha, will come in handy at some point no doubt!
Nice which did you get off ebay? I'd prefer a roll but was running around before shit closed cause I wanted to get this done tonight lol. Still need to get cables to hang it all but wanted to get it going atleast lol
 

klx

Well-Known Member
Nice work, Klx. Looks very familiar. Good job paying attention to the spacing. You're going to find very consistent coverage compared to even spacing.
Yes mate, thanks for doing all the hard work. Makes it easy for me to ride on coat tails.

Just took some IR temp measurements on the back of the aluminium sheet after light been on for 12 hours. 37C was the hottest reading I could find. Driver itself was about 40C. Bloody beautiful.

Killawatt tells me it is pulling exactly 200W at the wall. Plants a loving it. :weed:
 

graying.geek

Well-Known Member
Yes mate, thanks for doing all the hard work. Makes it easy for me to ride on coat tails.
Thanx, but credit also goes to those with experience who were willing to share. Lots of good folks here. I do wish there was more science, and less anecdotal bullshit, but incremental progress is what keeps the ratchet going.

klx: said:
Just took some IR temp measurements on the back of the aluminium sheet after light been on for 12 hours. 37C was the hottest reading I could find. Driver itself was about 40C. Bloody beautiful.
Yup, the efficiency is amazing, and it's only going to get better.
klx: said:
Killawatt tells me it is pulling exactly 200W at the wall. Plants a loving it. :weed:
Yeah, and you're putting out quality photons, too. I'm not to the point of wanting to have sex with my lights yet, but I am in love with them. :)
 
Top