If you have not grown indoors before, go with soil, not hydro if you want to be successful. A simple mix starting with a good potting soil like Fox Farm products or plain old Miricle grow potting soil will almost guarantee you a yield. If you look up "Bushy Old Grower mix," he has come up with a million great economical mixes through the years.
One of my favorites for quick and easy is 2 parts Promix BX to 1 part 50/50 perlite/vermiculate, then whack it with about 1/2 a cup of blood meal and 1/2 a cup of bone meal per cubic foot of finished mix. Moisten it slightly, just enough so it sorta WANTS to stick together when you squeeze a bunch of it together, but doesn't quite do so. You can also add a bit of lime too. It really helps buffer the mix and helps break down the blood and bone into stuff your plants can uptake much faster.
Once that is done, let it sit for two or three weeks to kinda "cook." Do not let it dry out, and do NOT seal it up air-tight or you will get anaerobic bacterial growth, and that's super-bad. It needs to breathe.
If you put your mix in a big clean (brand new) garbage can with no lid on it, that's a good way to do it. You need to turn the mix over every 2-4 days, and add a little water as needed to keep it from drying out completely, and That's where temporarily putting a tight fitting lid on can make it a real quick jib. Just lid it and roll it to turn the mix over thoroughly. Turn it over up-side down too, because you want to mix it top to bottom, and bottom to top.
Using thus sort of mix, your plants will get everything they need from sprout to harvest, and you won't be going nuts chasing res temps, chemistry, ppm and ph, which I can already see as a huge problem in your up-coming summer-time attic grow, unless you are going to do some really hard-core active cooling with a.c. units, which adds to the expense fast.
Root zone temperatures need to be significantly lower that what the plant's above ground structures can tolerate, and soil makes managing that a LOT easier.
All you need is good clean water to top water. When the top 4" or so of soil is dry, and the containers are pretty light, you water the bejesus out of them until you get about 20% runoff, and that's it.
Every new grower wants to jump right into deep water, coco, rockwool or whatever exotic setup with lots of lights and blah blah blah and yield 2 grams per watt of lighting. It's just not reasonable though.
If you start out in soil, you are going to be tickled pink with your results right out of the box as long as you pay attention to all of the other factors like air temp, humidity, get your watering down to a science, (overwatering is easilly the most common mistake. You HAVE to let them dry out pretty good between waterings)
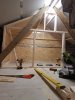
A good dark 12 hours during flowering is critical. No peeking either! It looks like you are doing a fantastic job preping the area. Good on ya! Make sure to get everything super clean before moving plants in, and be sure you have no light leaks.
If you can run full on with 50-75 ACTUALL watts of lighting per square foot on you hottest days without exceeding 75-85°F in your grow area, and avoid dropping below 65°F during lights out during flower, you will in all likelihood be very stoned for a veey long while on the fruits your very first harvest.
Soil will save you HUGE startup equipment costs that, if you are in fact new to indoor growing, you can't even begin to calculate. It also make growing about 75 or 80% LESS COMPLICATED, and therefore 75-80% more likely to be successful, and 75-80% more enjoyable too.
If you decide to do something a little more advanced while in soil, try adding CO2.
")
You will likely have more fun doing that than trying to grow in water early on, and will definately get a very favorable reward with a lot less chance of loosing your entire 1st crop.
You can't hardly have too much air movement short of blowing them right over or snapping too many branches either, so fans are an important consideration that is an often overlooked expense. More air movement equals much stronger branches that will support a lot of bud weight, and fast air also does a lot to spread out heat sigs and make every surface appear to just be part of a well ventilated and energy efficient 75°F attic.
Having temps of 115+ in a summertime attic is not at all unusual, but is also not very energy efficient to keeping living areas comfortable, so There should be NO concern as far as heat sigs in summertime if the whole attic has lots of airflow and is a pretty uniform temp throughout. The real concern is an attic that it 0°F all over except a 110°F spot right above one little part in the dead of winter.
Start flowering when the plant's are 1/3 of the height you need to finish at. Don't get greedy here, or you'll be sorry! lol
Plenty of strong blue light early in your vegitive growth will make for extremely short internal spacing and help get max yield in minimal finished height.
5 gallon buckets are lots of growers go-to for start-up grows, but if you can use shorter totes or tubs of equal or preferably less height, but with equal or better yet, much more capacity (like 15-20 gallons each) you will be astounded at how big just one plant can get, especially if you super-crop it and train the lower branches outward away from the main stem.
Supercropping is pretty simple. After the plant is fairly well established, you pinch the main stem hard just under where the top growth is, and roll it between you thumb and forefinger to damage, but not break it. Once the center has broken down enough, you bend it slowly until you feel it sort of pop in the center. Try hard not to damage the outside of the main stem, but to cause the inside part to break.
This causes a LOT of bud formation in the lower branches that otherwise would not develop, because she would have put most of her energy into only her main top cola. Yields are substantially higher when super cropping and training the lower branches outward so they get plenty of light.
In many areas where there are legalities surrounding the actual number of plants grown, big bushy plants that grow buds all over, all around and top to bottom are very smart. If you are allowed only 7 plants, for example, or, more that 7 causes some significant risk for whatever reason, then it makes since to have 7 plants that are going to offer maximum yield per.
Quite frankly, growing in a soiless substrate is a pita, and a significant investment in time, money, labor, and learning curve. DWC is is also an poi it 80% more likely to fail the first time out, and 90% more likely than a clean, well looked after soil grow to have difficulties ALWAYS. A DWC grow can go from heathy to completely doomed in 72 hours OR LESS. That is a fact.
You can always grow several soil plants and experiment with 1 or 2 DWC bubblers on a small rez until you get a feel for it, and of your DWC goes south, you still have most of your harvest.
Some food for thought, anyhow.
 1.6 MB Views: 29