So here's the latest. Needing a solution to the growing water temp issue I needed some inspiration. I ran across this post which I give credit https://www.rollitup.org/dwc-bubbleponics/313745-best-damn-reservoir-you-can.html
Also here's my quote on what I did:
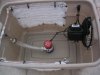
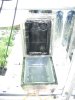
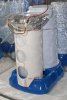
Here are the pics from my first stage. I needed to get something together so no time to tape or take pics. Also it was a "proof of concept".")


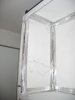
So yesterday went to work on rez number 2. Here are more detailed pics of construction.
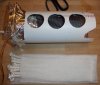
1" rigid foam insulation. This stuff is bug, mold and mildew resistant. It's easy to work with as well.
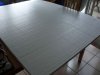
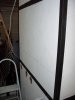
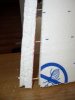
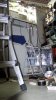
My drywall T-square comes in handy. Sides are 7" high.
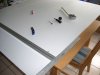
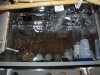
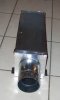
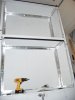
All the pieces. Now for assembly.
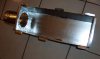
The bottom is two pices "doweled" together with toothpicks. The tape will provide structure (like re-bar and concrete).

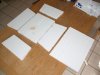
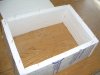
Bottom is together.
Now the sides
Sides together now the bottom.
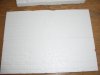
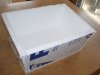
All together. Now for tape.
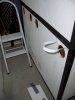
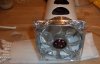
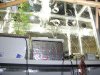
The final product on the right. Notice the work light just in front? I put this inside the box with the light on, cord coming through the slot. Took the whole thing into the bathroom and turned the lights off. It stayed pitch black in the bathroom so no light leaks!!
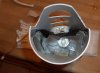
The inside was spray painted black and the rez set in place. Notice I use that pesky 1/2" foam around the edge of the lid. This gives it that final light proofing!
Both coolers easily stay at 66* by throwing in a frozen water bottle every 2 or 3 days when it gets to about 69*.
It works perfect!!
peace
Also here's my quote on what I did:
Hey Boom,
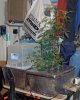
Thought I'd post my Work In Progress. My water temps have been steady at 74-75 so I needed to get moving on a plan because the roots are starting to brown up. Here's the results.
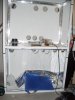
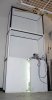
I have exactly 18" of depth in my cabinet and my reservoir is 16". I went to Lowe's and purchased 1" rigid foam insulation. I cut the foam to fit around my reservoir and built a custom lid. What is nice about the lid is that it is now completely flat to let the net pots come closer to the edges spreading them out more. The reservoir on the bottom is what is inside the new cooler on the top so you get some perspective.
The night I built this got too late and I needed to get my ladies put to bed and get to sleep myself. Today, I plan on building another one, taping them both up with Aluminum tape and then spray paint the inside black.
The result? The first night in, I dropped in an 8 oz. frozen water bottle. Then next morning, temps were at 65.9 and the bottle was thawed. I pulled it out and haven't had to add another bottle in 4 days...temps are at 67.8. And that's with no tape yet and lots of leaks.
Structure is provided by toothpicks acting as dowels so the sides and bottom won't slip at the joints. I used skinny pieces for the underside of the lid to form a rim so the lid fits tightly. Again using toothpicks to hold it in place and the Aluminum tape keeping it together.
Comments welcome. I'll try and remember to post the finished deal.
peace
Here are the pics from my first stage. I needed to get something together so no time to tape or take pics. Also it was a "proof of concept".
So yesterday went to work on rez number 2. Here are more detailed pics of construction.
1" rigid foam insulation. This stuff is bug, mold and mildew resistant. It's easy to work with as well.
My drywall T-square comes in handy. Sides are 7" high.
All the pieces. Now for assembly.
The bottom is two pices "doweled" together with toothpicks. The tape will provide structure (like re-bar and concrete).
Bottom is together.
Now the sides
Sides together now the bottom.
All together. Now for tape.
The final product on the right. Notice the work light just in front? I put this inside the box with the light on, cord coming through the slot. Took the whole thing into the bathroom and turned the lights off. It stayed pitch black in the bathroom so no light leaks!!
The inside was spray painted black and the rez set in place. Notice I use that pesky 1/2" foam around the edge of the lid. This gives it that final light proofing!
Both coolers easily stay at 66* by throwing in a frozen water bottle every 2 or 3 days when it gets to about 69*.
It works perfect!!
peace


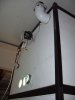
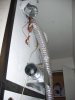
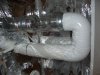
 Since I don't have the doors on the Mum (I like that word) chamber yet I pulled out a comfy chair, turned all the lights in the garage off and stared up at all of the light blazing out of that reflecting space and relishing the work. Then I looked over at my shop vac and remembered I switch the hose from input to output all the time. We go from the 50's in Winter to 90's in the Summer so not near as extreme. But even so, heating the house in winter and then letting the house help out with HVAC in the Summer.