Aleister93
Active Member
Tower of Flower
I want to develop a modular lighting system using CFLs. I.E., expandable, so lights can be added or removed as needed. My Criteria are:
1) should be made as much as possible from commonly available materials
2) should require minimal skill to construct and maintain
3) should be lightweight, so it can be moved easily
4) should be safe (minimal profusion of wiring, etc)
5) should be fairly easy to breakdown for storage or transportation
My first effort was a simple PVC rack, which looked like a towel rack (confiscated by police, no known pictures remain) covered in reflector clamp lamps, braced in place by wires. This model was unsatisfactory for a number of reasons, it was top-heavy, and clamp lamps have a disconcerting habit of falling down, damaging plants (hence the wire braces). also, each lamp had its own cord, resulting in a "strangualting octopus" of cords.
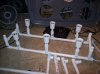
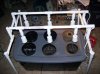
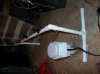
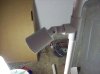
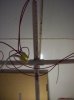
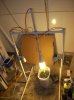
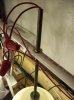
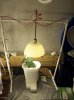
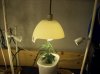
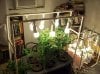
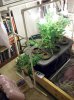
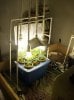
I'm posting some pics of my newest hydro tank (swamp cooler pump and sprayers, will add air pump and stone) and my model 2 lighting system.
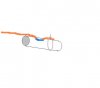
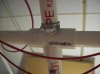
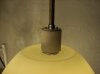
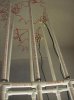
It was difficult to get the wires back into the tubing after splicing them. i tried small wire nuts, and also tried electrical tape, neither is satisfactory. I don't want to have spliced wires out in the open, but if I don't splice, I'm back to having a wire-octopus situation.
I'm thinking about model 3, which will be more flexible in light placement, i.e., allow height of each lamp to be changed... since the plants grow, and don't all grow at the same rate.
I want to develop a modular lighting system using CFLs. I.E., expandable, so lights can be added or removed as needed. My Criteria are:
1) should be made as much as possible from commonly available materials
2) should require minimal skill to construct and maintain
3) should be lightweight, so it can be moved easily
4) should be safe (minimal profusion of wiring, etc)
5) should be fairly easy to breakdown for storage or transportation
My first effort was a simple PVC rack, which looked like a towel rack (confiscated by police, no known pictures remain) covered in reflector clamp lamps, braced in place by wires. This model was unsatisfactory for a number of reasons, it was top-heavy, and clamp lamps have a disconcerting habit of falling down, damaging plants (hence the wire braces). also, each lamp had its own cord, resulting in a "strangualting octopus" of cords.
I'm posting some pics of my newest hydro tank (swamp cooler pump and sprayers, will add air pump and stone) and my model 2 lighting system.
It was difficult to get the wires back into the tubing after splicing them. i tried small wire nuts, and also tried electrical tape, neither is satisfactory. I don't want to have spliced wires out in the open, but if I don't splice, I'm back to having a wire-octopus situation.
I'm thinking about model 3, which will be more flexible in light placement, i.e., allow height of each lamp to be changed... since the plants grow, and don't all grow at the same rate.