Mohican's 2014 Season
- Thread starter Mohican
- Start date


Mohican
Well-Known Member
OK - Novel time!
The washing machine arrived on Monday. It was in a box wrapped in a box. The inner box had a picture and name and was very professional looking. It was a little beat up so I figured they had to open it to get the 220 workbag out of the box (I ordered it without per Frenchys advice). Packed in the outside box was also my new 70 micron all mesh Frenchy style bag ooh lala")
I removed the washing machine from the box, and I noticed that the bottom of the machine looked a little dirty. Figured it was from the box and from sitting in the warehouse. I opened the machine and took out the manual and the filler hose. At this point I noticed a couple dark scratches on the agitator. Not what I expected from a new product (or is it?).


Filled up the machine half way with water and added a dash of Clorox bleach. I turned the timer to 15 minutes and away she went. A couple minutes in it started to smell like new machine getting hot. I threw the new mesh bag in the machine to wash it too.
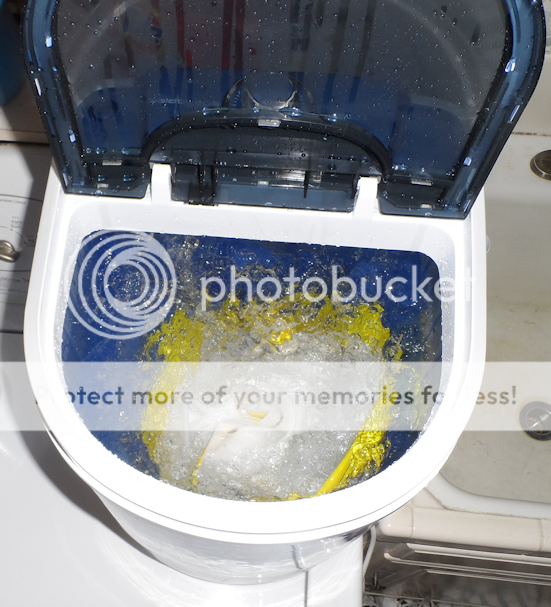
Everything seemed to work fine and it stopped running when the timer reached the end. I drained the machine and dried the mesh bag.
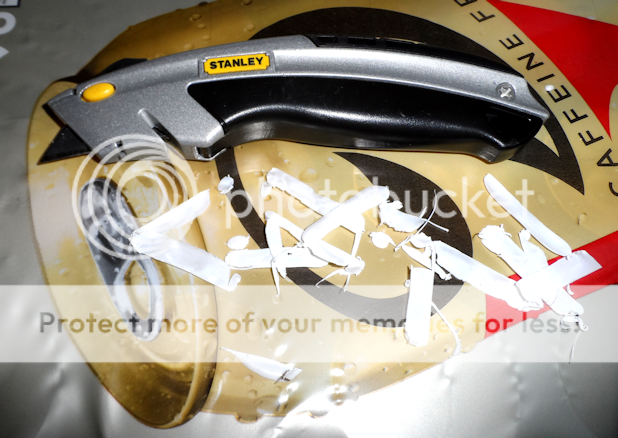
Now I was ready to add a bigger better hose to the drain exit on the machine. I unplugged the power cord from the wall and turned the machine on its side. I examined the base for screws. During this examination I discovered more of the black dust/powder residue and some of the molded plastic air vents were not completely cleared of the molded plastic.


I got my trusty Stanley utility knife and cut away the errant plastic.
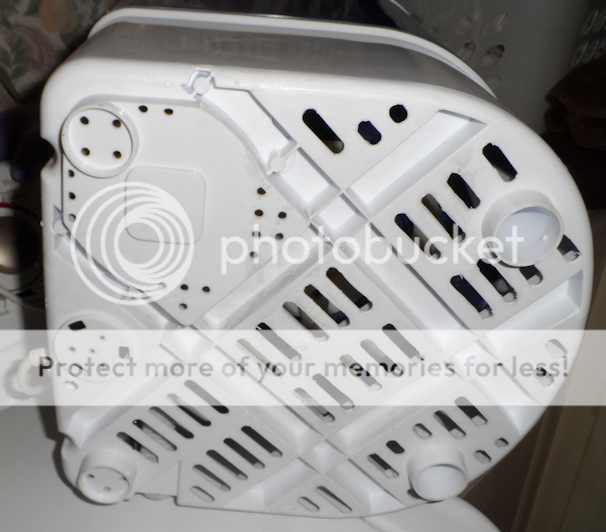
I now noticed that the feet on the base had scratches and embedded dirt. Hmmmm.

Removed the four screws holding the base on and easily removed the tub from the base.


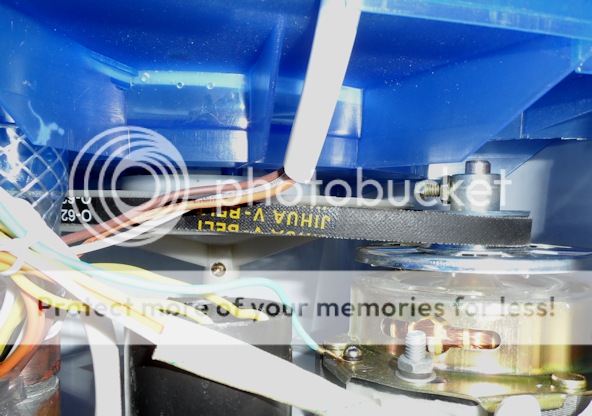
The wires have plenty of slack to make this a fairly easy task. The belt running from the tub agitator pulley to the motor pulley was a surprise but easy enough to handle.


The motor was still very hot. It had been at least 15 minutes since I ran the machine. I took out my laser thermometer to take a reading. It was 106.7 degrees Fahrenheit!

This seems a bit high and is definitely something I will keep an eye on in the future. Must be where the hot smell was coming from!
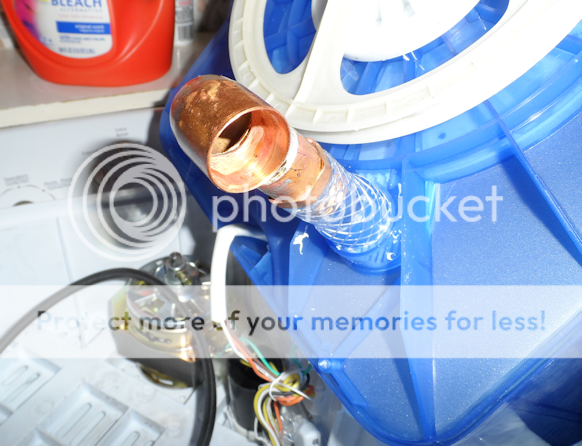
I carefully sliced just through the side of the drain hose and peeled it away from the drain port. There was some glue residue, which was also easily removed. At this point I went to the local hardware store and tried to find the right materials for the modification. They didnt have any barbed plastic elbows! They had tees, and they had elbows that were barbed on one end. They just didnt have what I needed. I came up with a plan when I found out that the ½ inch copper male threads would tightly screw inside the plastic tubing. I love sweating copper pipe so I decided to fabricate the drain hose from copper plumbing pieces. Cool so now I had all of my materials and I could work on the drain pipe mod.
When I got home I stretched the plastic tubing so it could be pushed over the drain port. It was not easy but it finally slipped on and seemed to fit nicely. A threaded drain port would be so much nicer hint hint J
I decided to use some high-end silicone I had purchased for another project to glue the hose to the drain port. Boy was that a mistake! Silicone is slippery. I pushed the hose on and just as quickly it popped itself right back off! But I was smarter than the plastic tubing. I pulled out a special clamp and pushed the hose in place. Now I could just wait overnight and the silicone would dry and the tube would be secure.
The next day I took off the clamp and the hose stayed in place yay! I started working on the next part of the drain hose the copper tubing. I soldered a ½ inch male threaded adapter to a short piece of ¾ inch copper pipe and a ¾ inch copper elbow. When the copper elbow section had cooled enough to handle I washed it and prepared it for assembly with the plastic tubing.
I made several measurements and then cut away some extra plastic tubing until it was the proper length. Next I made a dry fitting test of the copper elbow and the plastic tubing.
It was going great until I reached the end of the threads and the collar of the copper hit the plastic tubing. The plastic tubing spun and popped right off of the drain port just like it did when the silicone was wet! Fuuuuuudge (not what I really said)!
OK plan B. Plastic model cement. I will huff it until I come up with a plan JK. I cleaned the drain port and the plastic tubing thoroughly with acetone and removed any silicone residue. Then I liberally applied the plastic cement to the hose and slipped it on the drain port, attached the clamp, and proceeded to wait. I gave it a good two hours of cure time and removed the clamp. The tubing was firmly adhered to the port!
Next I screwed on the copper elbow and the plastic tubing held firm
I reassembled the machine just to see how the elbow lined up with the drain tube hole in the side of the base. It was within tolerances but it was a little high no you are no you are shut up! Where was I? Oh yeah put the lid back on the tube of glue. I decided to make some changes so that the copper elbow would rest on the bottom of the base. This should add extra support to the drain tube and keep the plastic tube nicely stuck to the drain port.
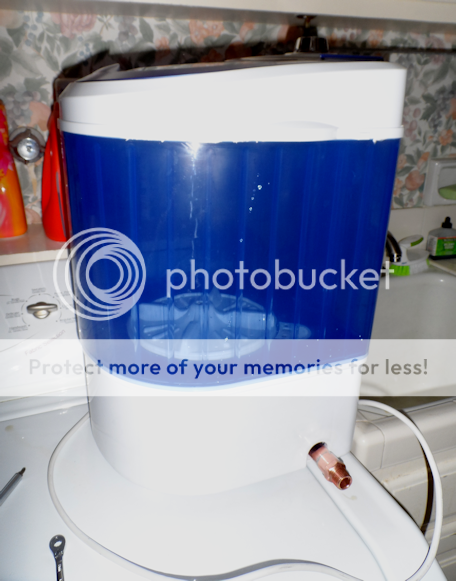
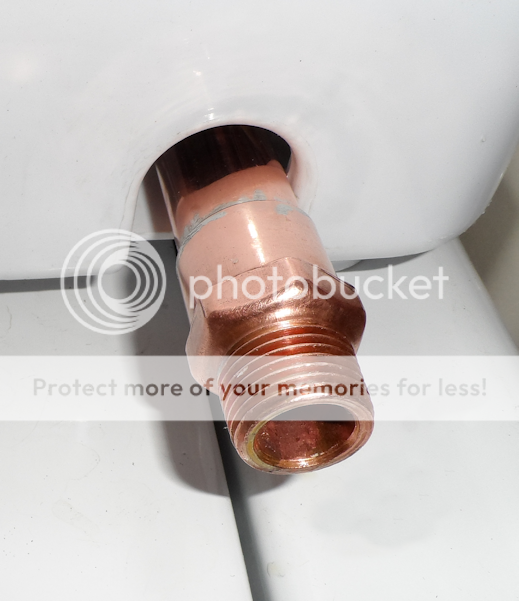
Everything fit so now I could finish assembling the copper drain assembly. After several design revisions I decided to keep it simple and give myself the most options. By having the tube come out of the side of the base with another male threaded adapter I can hook up plastic tubing and just bend it up and down like the original design, or I can go all Cadillac and add a nice ball valve, or I can go Frenchy and just add an elbow and a cap.
Now it is time for me to glue the copper drain pipe assembly to the plastic tubing. I decided to go with the plastic cement again because it just smells so good .safety break .puff, puff, pass
Got everything ready and then tried to glue the wrong end to the plastic tubing! Take two. Cleaned away the glue residue and started over with the correct end of the pipe. Went together perfectly and the plastic tube didnt budge one little bit.
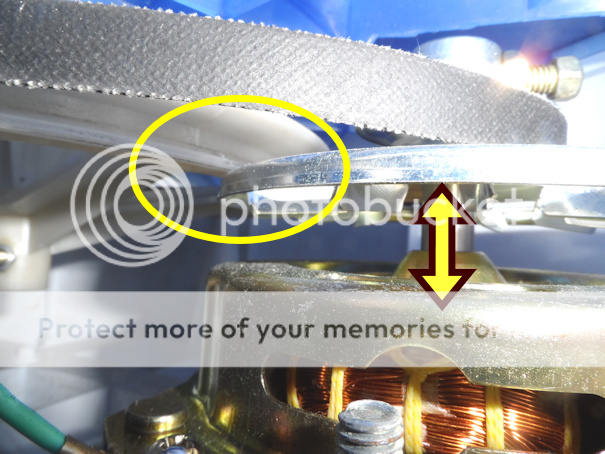
Time to reassemble the base! The belt is a little difficult to get back on the motor pulley from this angle but luckily they created a removable panel on the base that makes it easy to access the belt. So I put the base on, being careful to align the pipe with the drain pipe opening. Everything is going smoothly never a good sign. I remove the belt access panel and run the belt on to the motor pulley. This is when I notice something odd. The belt wasn't straight.
The tub pulley is higher than the motor pulley. Ugh! I need to take it apart again and adjust one of the pulleys. The tub pulley is not adjustable so that leaves the motor pulley. I loosen the set screw and adjust the pulley easily and reassemble the tub and base. I plug in the machine and turn it on to test everything. It runs but there is a terrible scraping noise. I cant tell what is causing it so I unplug the machine and take it apart again.
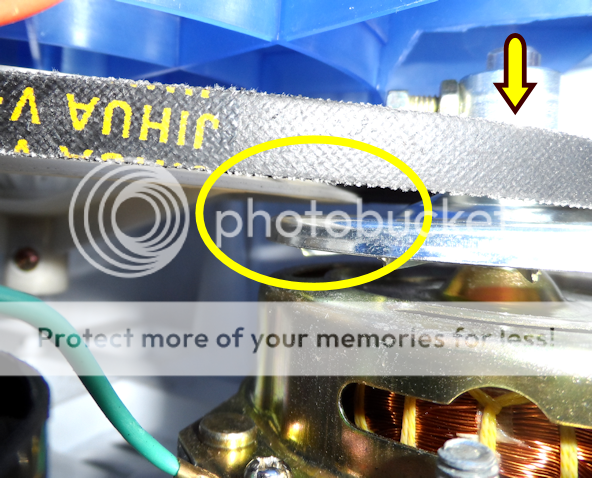
The motor pulley has a larger perforated disk on the bottom to act as a fan. This larger disk is rubbing against the tub pulley.
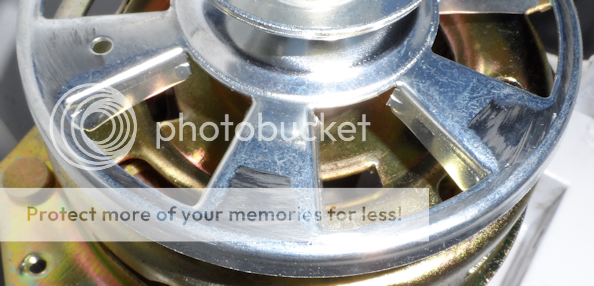
I can fix this by lowering the motor pulley enough that they dont touch. I go through the whole pulley adjustment procedure again and lower it until it barely clears. Start up the machine and it is still hitting the pulleys wobble a little and hit when they both wobble together. Adjust the pulleys again and this time it is perfect. The belt is still not straight but it is much better than it was originally.
I screwed the belt panel and base back on and the modification and tune-up is finished!
Now I just need to finish trimming the last of the Mulanje and I can make some beach sand!
Cheers,
Mo
The washing machine arrived on Monday. It was in a box wrapped in a box. The inner box had a picture and name and was very professional looking. It was a little beat up so I figured they had to open it to get the 220 workbag out of the box (I ordered it without per Frenchys advice). Packed in the outside box was also my new 70 micron all mesh Frenchy style bag ooh lala
I removed the washing machine from the box, and I noticed that the bottom of the machine looked a little dirty. Figured it was from the box and from sitting in the warehouse. I opened the machine and took out the manual and the filler hose. At this point I noticed a couple dark scratches on the agitator. Not what I expected from a new product (or is it?).


Filled up the machine half way with water and added a dash of Clorox bleach. I turned the timer to 15 minutes and away she went. A couple minutes in it started to smell like new machine getting hot. I threw the new mesh bag in the machine to wash it too.

Everything seemed to work fine and it stopped running when the timer reached the end. I drained the machine and dried the mesh bag.
Now I was ready to add a bigger better hose to the drain exit on the machine. I unplugged the power cord from the wall and turned the machine on its side. I examined the base for screws. During this examination I discovered more of the black dust/powder residue and some of the molded plastic air vents were not completely cleared of the molded plastic.


I got my trusty Stanley utility knife and cut away the errant plastic.


I now noticed that the feet on the base had scratches and embedded dirt. Hmmmm.

Removed the four screws holding the base on and easily removed the tub from the base.


The wires have plenty of slack to make this a fairly easy task. The belt running from the tub agitator pulley to the motor pulley was a surprise but easy enough to handle.


The motor was still very hot. It had been at least 15 minutes since I ran the machine. I took out my laser thermometer to take a reading. It was 106.7 degrees Fahrenheit!

This seems a bit high and is definitely something I will keep an eye on in the future. Must be where the hot smell was coming from!
I carefully sliced just through the side of the drain hose and peeled it away from the drain port. There was some glue residue, which was also easily removed. At this point I went to the local hardware store and tried to find the right materials for the modification. They didnt have any barbed plastic elbows! They had tees, and they had elbows that were barbed on one end. They just didnt have what I needed. I came up with a plan when I found out that the ½ inch copper male threads would tightly screw inside the plastic tubing. I love sweating copper pipe so I decided to fabricate the drain hose from copper plumbing pieces. Cool so now I had all of my materials and I could work on the drain pipe mod.
When I got home I stretched the plastic tubing so it could be pushed over the drain port. It was not easy but it finally slipped on and seemed to fit nicely. A threaded drain port would be so much nicer hint hint J
I decided to use some high-end silicone I had purchased for another project to glue the hose to the drain port. Boy was that a mistake! Silicone is slippery. I pushed the hose on and just as quickly it popped itself right back off! But I was smarter than the plastic tubing. I pulled out a special clamp and pushed the hose in place. Now I could just wait overnight and the silicone would dry and the tube would be secure.
The next day I took off the clamp and the hose stayed in place yay! I started working on the next part of the drain hose the copper tubing. I soldered a ½ inch male threaded adapter to a short piece of ¾ inch copper pipe and a ¾ inch copper elbow. When the copper elbow section had cooled enough to handle I washed it and prepared it for assembly with the plastic tubing.
I made several measurements and then cut away some extra plastic tubing until it was the proper length. Next I made a dry fitting test of the copper elbow and the plastic tubing.
It was going great until I reached the end of the threads and the collar of the copper hit the plastic tubing. The plastic tubing spun and popped right off of the drain port just like it did when the silicone was wet! Fuuuuuudge (not what I really said)!
OK plan B. Plastic model cement. I will huff it until I come up with a plan JK. I cleaned the drain port and the plastic tubing thoroughly with acetone and removed any silicone residue. Then I liberally applied the plastic cement to the hose and slipped it on the drain port, attached the clamp, and proceeded to wait. I gave it a good two hours of cure time and removed the clamp. The tubing was firmly adhered to the port!
Next I screwed on the copper elbow and the plastic tubing held firm

I reassembled the machine just to see how the elbow lined up with the drain tube hole in the side of the base. It was within tolerances but it was a little high no you are no you are shut up! Where was I? Oh yeah put the lid back on the tube of glue. I decided to make some changes so that the copper elbow would rest on the bottom of the base. This should add extra support to the drain tube and keep the plastic tube nicely stuck to the drain port.
Everything fit so now I could finish assembling the copper drain assembly. After several design revisions I decided to keep it simple and give myself the most options. By having the tube come out of the side of the base with another male threaded adapter I can hook up plastic tubing and just bend it up and down like the original design, or I can go all Cadillac and add a nice ball valve, or I can go Frenchy and just add an elbow and a cap.
Now it is time for me to glue the copper drain pipe assembly to the plastic tubing. I decided to go with the plastic cement again because it just smells so good .safety break .puff, puff, pass
Got everything ready and then tried to glue the wrong end to the plastic tubing! Take two. Cleaned away the glue residue and started over with the correct end of the pipe. Went together perfectly and the plastic tube didnt budge one little bit.
Time to reassemble the base! The belt is a little difficult to get back on the motor pulley from this angle but luckily they created a removable panel on the base that makes it easy to access the belt. So I put the base on, being careful to align the pipe with the drain pipe opening. Everything is going smoothly never a good sign. I remove the belt access panel and run the belt on to the motor pulley. This is when I notice something odd. The belt wasn't straight.
The tub pulley is higher than the motor pulley. Ugh! I need to take it apart again and adjust one of the pulleys. The tub pulley is not adjustable so that leaves the motor pulley. I loosen the set screw and adjust the pulley easily and reassemble the tub and base. I plug in the machine and turn it on to test everything. It runs but there is a terrible scraping noise. I cant tell what is causing it so I unplug the machine and take it apart again.
The motor pulley has a larger perforated disk on the bottom to act as a fan. This larger disk is rubbing against the tub pulley.


I can fix this by lowering the motor pulley enough that they dont touch. I go through the whole pulley adjustment procedure again and lower it until it barely clears. Start up the machine and it is still hitting the pulleys wobble a little and hit when they both wobble together. Adjust the pulleys again and this time it is perfect. The belt is still not straight but it is much better than it was originally.


I screwed the belt panel and base back on and the modification and tune-up is finished!


Now I just need to finish trimming the last of the Mulanje and I can make some beach sand!
Cheers,
Mo
hyroot
Well-Known Member
master lush, northern lights og, cheese berry kush, Hindu skunk, sfv og, bubba kush, soma rock budNice! I love the hash art! What strains were they?
Don Gin and Ton
Well-Known Member
Props Mo that's bad ass macguyvery!
Frenchy Cannoli
Well-Known Member
Hey Mo, all pretty sweet but you should have your pipe come out some more from the machine so that the flow fall in the bag, not along the side splashing and such.
Shawns
Active Member
Hey Mo mine was a bit dirty on spots too like the people building the machine didn't wear gloves also I had to lower the one wheel also and theres many other small things I would not buy another machine from them it just seems like whoever builds the machine doesn't take pride in there work imo
edit: i also was going to change the hose, I went out and bought the hose and everything I needed, got home started doing what your doing realized all the small imperfections and things I had to adjust and decide to put the original hose back on just incase I had to return it
edit: i also was going to change the hose, I went out and bought the hose and everything I needed, got home started doing what your doing realized all the small imperfections and things I had to adjust and decide to put the original hose back on just incase I had to return it
st0wandgrow
Well-Known Member
Damn Mo. You got some skillz beyond that green-thumb! I have been kicking around the idea of buying one of these for a while. The old spoon and 5 gallon bucket is a labor of love, but the juice is just not worth the squeeze for me anymore. I'll check back in to see how you like it. One thing is for certain, I would need a plug-and-play machine that works well right out of the box. No way I could modify one like you did above.
Mohican
Well-Known Member
Thanks All! It was a labor of love. I have tried all of the hand mixing, drill mixing, dry ice... I like the idea of the heavy trichomes coming out of the bottom. We will see if it improves my yield.
Frenchy - I will be attaching a ball valve and hose to the copper nipple. It should be perfect. Thanks for the lessons and I can't wait to smoke some Mulanje Cannoli
Hey Trousers - every time I see your avatar it reminds me of the golfer John Daly
Cheers,
Mo
Frenchy - I will be attaching a ball valve and hose to the copper nipple. It should be perfect. Thanks for the lessons and I can't wait to smoke some Mulanje Cannoli
Hey Trousers - every time I see your avatar it reminds me of the golfer John Daly
Cheers,
Mo
hyroot
Well-Known Member
I totally see that now. Just needs a beer in his hand and thats Daly for sureHey Trousers - every time I see your avatar it reminds me of the golfer John Daly
Cheers,
Mo
This Hidden Creature
Well-Known Member
Great mod and explanations.
I think I will end with copper elbow like yours.
So much easier to find where I am
Hat off Mo'
I think I will end with copper elbow like yours.
So much easier to find where I am
Hat off Mo'
Frenchy Cannoli
Well-Known Member
I have followed that little girl life and can't wait to see her trichomes pressed in a cannoliThanks All! It was a labor of love. I have tried all of the hand mixing, drill mixing, dry ice... I like the idea of the heavy trichomes coming out of the bottom. We will see if it improves my yield.
Frenchy - I will be attaching a ball valve and hose to the copper nipple. It should be perfect. Thanks for the lessons and I can't wait to smoke some Mulanje Cannoli
Hey Trousers - every time I see your avatar it reminds me of the golfer John Daly
Cheers,
Mo
Mohican
Well-Known Member
I am very excited about this next run also Frenchy. I just need to finish trimming. Everything has been on the rack drying. Half trimmed and half not.
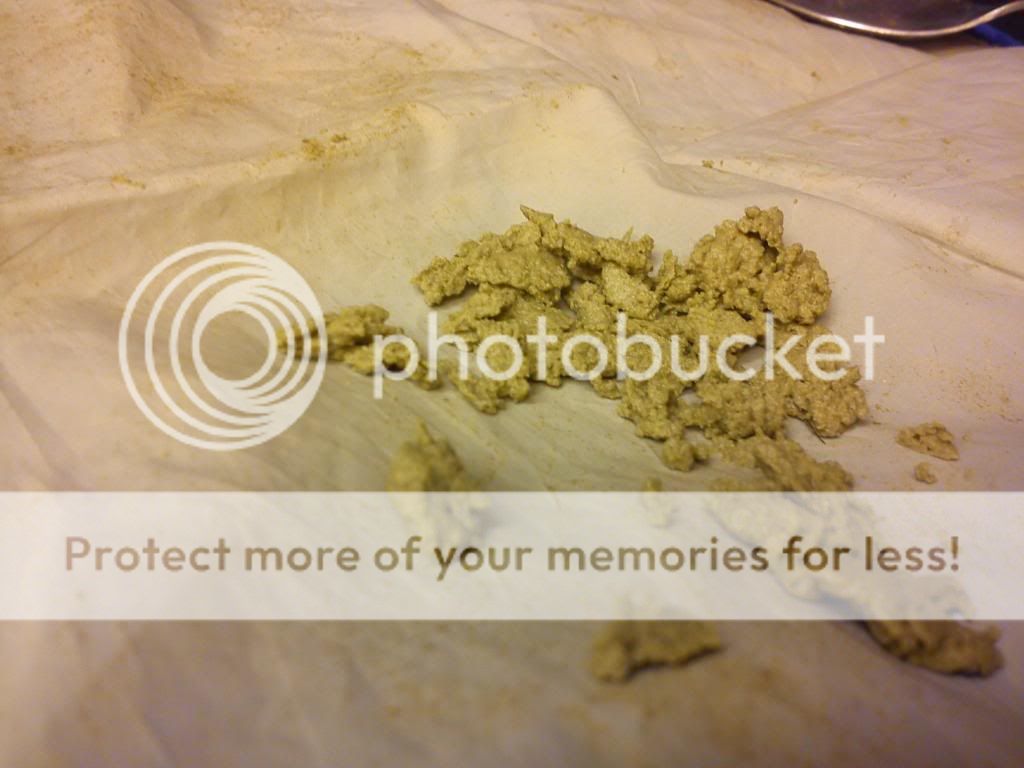
It looks like the dry sift method in the old country results in just as much leaf matter. They just dry their plants to a nice golden brown color so it does not look green in the hash. The dry ice hash I made was delicious even though it was very green. I was a noob and used a coffee grinder and a 220 bag. I did get a ton of hash though:

My question is this. Wouldn't I get more trichomes if I break the material up more? I am not worried about a little leaf matter. I just want to get the maximum trichome recovery possible.
Thanks,
Mo


