m4s73r
Well-Known Member
Somewhere I heard that its hard to see where to go if you cant remember where you've been. This may read a little different then other post due to me being long winded, percise, comical, stoned, that list can go on.
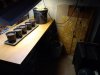
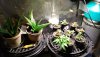
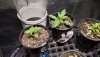
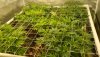
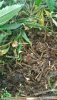
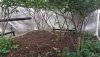
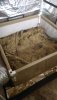
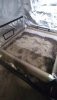
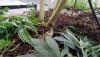
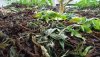
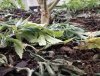
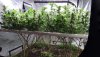
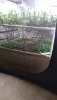
So its 2012. I join rollitup and Start my first thread. My T5 FFOF grow I inherited a couple T5s got some FFOF and 1 gallon smart pots 3 pack nutes and away we went. Talk about a first time shit show. I sprouted 8 bag seeds and got 1 damn female. (there's a thread out there with me raging and shit). I named her Bridget. She became my first bonsi Mum. So now a I got a female and I had to learn to clone. Nailed in first go. got 3 solid clones, threw then into veg and flipped them. I did several this away to get a perpetual grow going.
![20131207_162818[1].jpg](/data/attachments/3807/3807294-c4e789b3850d549e10d10963f4882cbd.jpg)
![20131207_162635[1].jpg](/data/attachments/3807/3807296-c62b3345245ad57ddad199c4f72a3c26.jpg)
![20131207_162620[1].jpg](/data/attachments/3807/3807297-b41738a0c0a16e18bb7b75777c2df981.jpg)
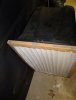
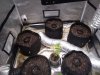
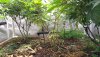
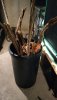
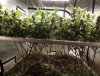
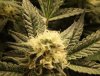
But I wasn't producing enough so I jumped to 3 gallon Pots, they were much better. Below Is a Pic of Bridget.
![20131207_162927[1].jpg](/data/attachments/3807/3807291-c0bf498baeed81329cfa8325231172c3.jpg)
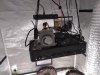
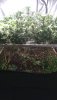
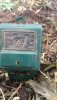
From Here I grew for a couple of years. Sadly I was still not getting the results that I wanted. Then one fateful evening one of the Ballast burnt out of the 8 Bulb T5. So I bought a 600 watt light and went VERTICAL!!! The family was running out before the next plant was ready. Honestly I was broke as shit so we had to upgrade on a budget. Hello 600w HPS and 3.5 gallon hempy buckets lucas formula soon after!
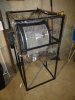
The next pic is of the 600 watt finishing off the T5HO. I moved both of the T5s to a little veg box.

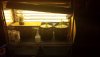
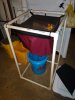
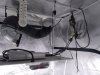
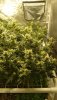
This Pic below is the 600 with a ring of Hempys growing a way. All of them spaced out in bloom. I was doing 6-8 plants. Shit that was a long time ago.I think it was set so I could pull a blooming plant out a week. But in 3.5 Thats was about 2.5 ounces. It was almost there. But i started to run into issues of getting rid of used up perlite or trying to wash it. It was a messy PITA but fucking hell it was cheap. Seriously for the kids in the back, this that hella tight budget growing shit. This was also the point where I had started ordering femized seeds and growing strains. Up till this point i have just been growing and cloning Bridget. (best bag seed i ever had. Miss that bitch)

But I was onto something. And I liked how the lighting worked. "Ummm hey RIU, I'm back and changing my shit up. We're going to leave dear sweet cheap Lucas Hempy behind for ORGANIC NO TILL 25GALLON POTS AND DUEL 1K LIGHTS!!! OOOOOOOHHHHHHHH YEAHHHHHHHHHHHH!!!!! Let me blow this bonus check.
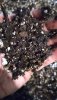
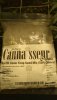
So 650 bucks of Soil from buildasoil shipped. 25 gallon fabric pots. Custom made rolling flower planters. 2 Digilux 1k Ballast with duel vert sockets. a 8 inch fan filter combo, worm bin, compost tea brewer, clover, worms and BOOM. The massive Super Silo Z. (where that dragon ball theme song shit when you NEED it!)

If you would like to see How this developed check out the other Thread In my Sig. This is my No Till Vertical Grow. Only 6 pages. I tend to make big posts then Disapear for a bit then come back with a big update. I dont want to turn this into a full recounting of the system I have used for the last 5 years. But cause I'm a tease like that here is a taste.

OK OK. Hope you check that out. MOVING ON!! (I did warn you I was long winded correct? I am pretty stoned right now.)
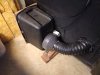
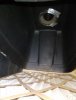
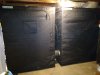
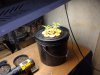
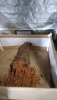
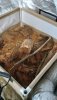
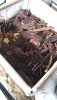
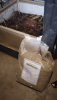
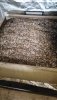
I was good guys. I was planning on riding that train like forever. Then I met her and her kid. And now the family goes from 3 smokers to 4 and FUCKS THE WHOLE SYSTEM. Im running out again. Time to split up the system. Jumping to 2 5x5s. throwing in a couple of extra fans. Make a couple of Intake dust filters. Let me show you this. cost me 4 bucks for the tote sans lid. I had the self tapping screws and duck tape. 2 bucks for a furnace filter and DONE! (oops says I can only do 10) NEXT POST!
So its 2012. I join rollitup and Start my first thread. My T5 FFOF grow I inherited a couple T5s got some FFOF and 1 gallon smart pots 3 pack nutes and away we went. Talk about a first time shit show. I sprouted 8 bag seeds and got 1 damn female. (there's a thread out there with me raging and shit). I named her Bridget. She became my first bonsi Mum. So now a I got a female and I had to learn to clone. Nailed in first go. got 3 solid clones, threw then into veg and flipped them. I did several this away to get a perpetual grow going.
But I wasn't producing enough so I jumped to 3 gallon Pots, they were much better. Below Is a Pic of Bridget.
From Here I grew for a couple of years. Sadly I was still not getting the results that I wanted. Then one fateful evening one of the Ballast burnt out of the 8 Bulb T5. So I bought a 600 watt light and went VERTICAL!!! The family was running out before the next plant was ready. Honestly I was broke as shit so we had to upgrade on a budget. Hello 600w HPS and 3.5 gallon hempy buckets lucas formula soon after!
The next pic is of the 600 watt finishing off the T5HO. I moved both of the T5s to a little veg box.
This Pic below is the 600 with a ring of Hempys growing a way. All of them spaced out in bloom. I was doing 6-8 plants. Shit that was a long time ago.I think it was set so I could pull a blooming plant out a week. But in 3.5 Thats was about 2.5 ounces. It was almost there. But i started to run into issues of getting rid of used up perlite or trying to wash it. It was a messy PITA but fucking hell it was cheap. Seriously for the kids in the back, this that hella tight budget growing shit. This was also the point where I had started ordering femized seeds and growing strains. Up till this point i have just been growing and cloning Bridget. (best bag seed i ever had. Miss that bitch)
But I was onto something. And I liked how the lighting worked. "Ummm hey RIU, I'm back and changing my shit up. We're going to leave dear sweet cheap Lucas Hempy behind for ORGANIC NO TILL 25GALLON POTS AND DUEL 1K LIGHTS!!! OOOOOOOHHHHHHHH YEAHHHHHHHHHHHH!!!!! Let me blow this bonus check.
So 650 bucks of Soil from buildasoil shipped. 25 gallon fabric pots. Custom made rolling flower planters. 2 Digilux 1k Ballast with duel vert sockets. a 8 inch fan filter combo, worm bin, compost tea brewer, clover, worms and BOOM. The massive Super Silo Z. (where that dragon ball theme song shit when you NEED it!)
If you would like to see How this developed check out the other Thread In my Sig. This is my No Till Vertical Grow. Only 6 pages. I tend to make big posts then Disapear for a bit then come back with a big update. I dont want to turn this into a full recounting of the system I have used for the last 5 years. But cause I'm a tease like that here is a taste.
OK OK. Hope you check that out. MOVING ON!! (I did warn you I was long winded correct? I am pretty stoned right now.)
I was good guys. I was planning on riding that train like forever. Then I met her and her kid. And now the family goes from 3 smokers to 4 and FUCKS THE WHOLE SYSTEM. Im running out again. Time to split up the system. Jumping to 2 5x5s. throwing in a couple of extra fans. Make a couple of Intake dust filters. Let me show you this. cost me 4 bucks for the tote sans lid. I had the self tapping screws and duck tape. 2 bucks for a furnace filter and DONE! (oops says I can only do 10) NEXT POST!