ifartsmoke
Well-Known Member
Ok so why do the MH and HPS get to have all the fun haha. I'll list all materials and prices for each and run through how to make this reflector. It takes a little bit of handy work, but I'm not handy at all and I still did it!!
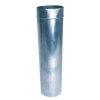
1. I got a 24x16 duct tube, get the kind that are split in the middle or you'll have to do some cutting. $3-5 at any home improvement store oh and 2-4 hanger hook screws for metal $1
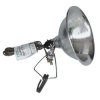
2. 2 clip work lights you don't have to get the clip lights, you can get individual components to make a socket and plug only, but they come with the socket, cord, and power switch. Plus you'll have a clip and an extra reflector for what ever $6 at walfart
3. 1 flat piece of sheet metal 26 guage 18x12 $5 at depot or lowes
4. 1 pair of tin snips $10 or just borrow some
5. drill, 1 inch hole saw, metal drill bit, 1 fully charged battery. If you don't have this stuff then it might not be such a $$ saver for you. Or if you have someone you can borrow the stuff from your set!!
6. rivet gun and rivits $5. If you have a harbor freight near you, go there to get your tools, that way you'll have em for next time haha
7. a nice open area where you can make a mess, and gloves would be good to, or at least put a sock on your hand. You don't want metal shavings in your hands!!!
So I open the duct pipe to the desired witdth and radus or curve that I want take that and set it on the sheet metal. Trace the inner radus with a sharpie so you have a template of the side reflector which is where you'll place the light socket. Be sure to leave enough room for the other side also. You don't want to cut from the middle and not have enough sheet metal left over to cut your other side. Once you've traced the template use your nibblers or tin snips and start cutting. When you have those 2 pieces cut; cut 6 additional strips from the left over metal, around 4x1. these pieces will connect and old the side pieces to the main hood.
Next drill with the hole saw on each side of the reflector for the sockets to rest.
Now put the drill bit in, I used a 5/16 or 5mm bit for the 3/16 rivets to go into. Drill 3 holes in the main hood. 1 on top and 2 on the sides now drill 2 holes in each of the little stripps you snipped from the left over metal, 1 on each end. take the stipps and line thoes holes up with the holes on the hood and put the rivets in from outside in. So you should have 3 strips on each side of the hood now. start poping the rivets in to attach the strips to the hood. When thats done take the 2 radius side reflectors and set them in where you want them to be attachecd. Bend the little strips over and mark with a sharpie through the holes. So when you take the piece away you should have 3 marks where to drill to attach the little strips with the rivets. If you skip this step you my end up haveing to drill additional holes as the strips attaced to the main hood will not line up with the hold on the side pieces. Drill the side pieces where marked and start popping in the rivets to that piece so it will look like this when complete.
The last step is to put in the hood screws in the top of the reflector. The reflector is now complete. All you have to do is screw in the socket in the side holes drilled with the hole saw
and viola... you have a CFL reflector hood!!!

 If anyone has any questions please let me know. I did alot of babbleing here and may have confused you haha. I hope this helps someone that is looking for a CLF reflector. It's really easy and fun!! Please note the hood pictured is my 1st attempt so there are gaps and such. My last hood lookes really nice with no gaps cause I put reflective tape on where the light was leeking. Well happy builing!!!

1. I got a 24x16 duct tube,
 get the kind that are split in the middle or you'll have to do some cutting. $3-5 at any home improvement store oh and 2-4 hanger hook screws for metal $1
2. 2 clip work lights
 you don't have to get the clip lights, you can get individual components to make a socket and plug only, but they come with the socket, cord, and power switch. Plus you'll have a clip and an extra reflector for what ever $6 at walfart
3. 1 flat piece of sheet metal 26 guage 18x12 $5 at depot or lowes
4. 1 pair of tin snips $10 or just borrow some
5. drill, 1 inch hole saw, metal drill bit, 1 fully charged battery. If you don't have this stuff then it might not be such a $$ saver for you. Or if you have someone you can borrow the stuff from your set!!
6. rivet gun and rivits $5. If you have a harbor freight near you, go there to get your tools, that way you'll have em for next time haha
7. a nice open area where you can make a mess, and gloves would be good to, or at least put a sock on your hand. You don't want metal shavings in your hands!!!
So I open the duct pipe to the desired witdth and radus or curve that I want take that and set it on the sheet metal. Trace the inner radus with a sharpie so you have a template of the side reflector which is where you'll place the light socket. Be sure to leave enough room for the other side also. You don't want to cut from the middle and not have enough sheet metal left over to cut your other side. Once you've traced the template use your nibblers or tin snips and start cutting. When you have those 2 pieces cut; cut 6 additional strips from the left over metal, around 4x1. these pieces
 will connect and old the side pieces to the main hood.
Next drill with the hole saw on each side of the reflector
 for the sockets to rest.
Now put the drill bit in, I used a 5/16 or 5mm bit for the 3/16 rivets to go into. Drill 3 holes in the main hood. 1 on top and 2 on the sides now drill 2 holes in each of the little stripps you snipped from the left over metal, 1 on each end. take the stipps and line thoes holes up with the holes on the hood and put the rivets in from outside in. So you should have 3 strips on each side of the hood now. start poping the rivets in to attach the strips to the hood. When thats done take the 2 radius side reflectors and set them in where you want them to be attachecd. Bend the little strips over and mark with a sharpie through the holes. So when you take the piece away you should have 3 marks where to drill to attach the little strips with the rivets. If you skip this step you my end up haveing to drill additional holes as the strips attaced to the main hood will not line up with the hold on the side pieces. Drill the side pieces where marked and start popping in the rivets to that piece
 so it will look like this when complete.
The last step is to put in the hood screws in the top of the reflector. The reflector is now complete. All you have to do is screw in the socket in the side holes drilled with the hole saw

and viola... you have a CFL reflector hood!!!

 If anyone has any questions please let me know. I did alot of babbleing here and may have confused you haha. I hope this helps someone that is looking for a CLF reflector. It's really easy and fun!! Please note the hood pictured is my 1st attempt so there are gaps and such. My last hood lookes really nice with no gaps cause I put reflective tape on where the light was leeking. Well happy builing!!!
