About a pound? Uncharted HPA Territory?

ShirkGoldbrick

Active Member
Grow Day 1

Room:
-4 Kw LEDs
-Dehumidifier
-Minisplit
-Carbon filter
-CO2 controlled by small water heater, run at 1500ppm

IMG_20150313_021512824.jpg


Table:
-Steel sprayers being run at 170psi, no timers - I'll be interested to chart growth rates..anyone running high pressure always ran timers and I'm not sure it's necessary.
-Reservoir hooked up to a chiller
-UV light in reservoir

Water:
-Run through reverse osmosis and stored in a holding tank with a UV light

pH/EC/ORP
-ORP controller is connected to maintain 600-700mV by utilizing a solution of calcium hypochlorite
-pH/EC controller are set to maintain a pH of 6 and variable EC, all solutions I've mixed myself.

IMG_20150313_015222399.jpg

Note: The calcium hypochlorite will raise the EC reading - It's going to be trial and error getting it set correct EC based on how the plants look.


And now, for what you've all been waiting for:
IMG_20150313_015206290.jpg
 

Atomizer

Well-Known Member
Great looking room.
Wishing you the very best of luck with this but i have to say, imho, a timer is an essential bit of kit for HPA ;)
 

ShirkGoldbrick

Active Member
Pretty sexy... I'm very interested in your nutrient doser setup.

The doser is just an etherdose. In the waterproof junction box on top of the rack I built pictured above is: router, etherdose controller, ORP controller, surge protecting power strip.

The router has one LAN cable coming to the etherdose and another I can connect to a computer. With this I can create a schedule and set:

pH level, pH tolerance range, pH dosing amount, time to stabilize after each dose
EC level, EC tolerance range, EC dosing amount - which in this case is equal parts from a two part solution(so equal pumping from both pumps 1 and 2), and time to stabilize.

The etherdose comes with three peristaltic pumps. I weighted down the supply line with a chrome coated nut one end into the reservoir and the other end goes to the pump inlet.

It comes with a sample pot but it's almost impossible to get it to not "overflow" unless you put a ball valve (not included) in line and close it until the water coming in matches the water coming out. Instead I used another waterproof junction box and utilized the bulkhead fittings off their pot in order to create a "pressurized" sample pot. I also used the rubber grommets from their sample pot for the probes. A hole saw drilled the holes for the bulkhead fittings and a step drill got the sizes for the grommets on top.

I cut the supply line to the sample pot and the return line the same lengths. I zip tied the return line, the three outgoing lines from the peristaltic pumps, and the outgoing line from the ORP pump together. This way I can keep all lines nice and tidy and not have all the electrical equipment right next to the table.

The ORP controller utilized some pretty robust materials and I can pump almost whatever I want through it. However the peristaltic pumps limit you to dilute acids because of the hose inside the pump itself, as well as the nylon hoses on the inlet/outlet side. They're not compatible with a lot of materials and probably will need to be changed out fairly regularly (we'll see).

As you can see, it's a fairly large table, and the table has to be able to move for me to reach the plants on the far end. As such, it's on wheels. I couldn't attached the dosing equipment to the table because of this (the table has to move more than the slack provided) and attaching it to the reservoir sounded like I was asking for electrical failure. That's why I built the moveable dosing table. The reservoir doesn't move. Even if I put it on wheels, it'd be close to 500 lbs (50 gallons of water).
 

ShirkGoldbrick

Active Member
Great looking room.
Wishing you the very best of luck with this but i have to say, imho, a timer is an essential bit of kit for HPA ;)

Haha, well since I'm the first one that's done this (to my knowledge) perhaps I should just make up another acronym. CHPA? Continuous High Pressure Aeroponics.

I do admit though, even with a 1/4HP chiller on my 50 gallon reservoir the temps 85F (30C). Without the chiller it was 90F. I'm not sure if I should get a bigger chiller, or say screw it and let it run warm like that. A lot of studies seem to indicate that a higher temperature for the root zone is desirable but I'm not sure. Bacteria growth isn't a problem since I maintain an high ORP with the chlorine injection
 

ttystikk

Well-Known Member
Roots prefer temps between 60 and 75F. Out of that range is asking for trouble; below, metabolic issues, above lack of aeration/root rot incubation.

It may be that the aeroponic nature of your system will prevent that, but I'm not a fan of tempting fate.

IMHO, the best use for a 1/4 hp chiller is as a doorstop. The bigger they are, the better they work.

Mine is is two Tons, and cools/dehueys the environment as well as water.
 

ttystikk

Well-Known Member
Thanks for the in depth discussion of your peristaltic pumps and controllers. I very much want to do as you've done.
 

ShirkGoldbrick

Active Member
Thanks for the in depth discussion of your peristaltic pumps and controllers. I very much want to do as you've done.
It's not that hard really. I think it probably took me a day to build everything, mix up all the solutions, and set up and program? The cart itself is 4' long by 39" tall (not including the wheels below) and 13" wide. There is I think 19" between bottom and top shelf. This would allow me to put on 6 5 gallon buckets comfortably. (I could probably squeeze in 8 as it is if not for the ORP pump taking up space on the bottom shelf)

I actually just built two sides of the frame with 2x3s and they're held together by the plywood.

I forgot to mention. The peristaltic pumps come with a plastic rectangle that they snap into, then on each of the four corners it has a hole for a mounting screw. I cut a rectangle out of one side end of the plywood so the motor portion of the pump could fit through and then flush mounted it on one side.

Roots prefer temps between 60 and 75F. Out of that range is asking for trouble; below, metabolic issues, above lack of aeration/root rot incubation.
The lack of aeration is because in say, DWC, the oxygen content of water decreases at higher temperatures.

This would not be an issue with aeroponics as the water droplets are so small the air actually "wraps" around them and results in much more efficient delivery of water and nutrients to the roots. Plants have been found to grow best with 1500ppm of CO2 and 21% oxygen in the root zone. That's ambient oxygen and elevated CO2. Albeit I admit by raising CO2 I do lower the relative % oxygen a bit.

The root rot is caused by bacteria, which grows faster at higher temperatures. Keeping the temperatures low serves the same purpose as your refrigerator - the bacteria can't reproduce as fast at lower temperatures.

This also isn't an issue because of the ORP controller. At 700mV almost all bacteria is killed instantly. Due to this I will need to ensure adequate amounts of nutrients as there's no "fixating" bacteria to help. This is fine since when you deliver adequate nutrients the normally "beneficial bacteria" have been shown to be parasitic.

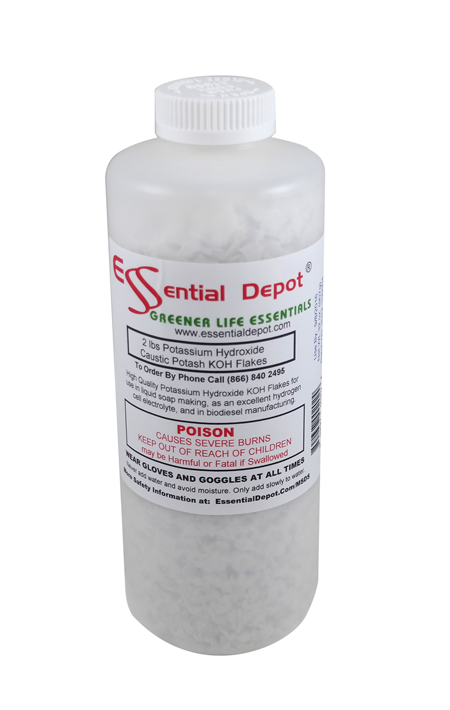
The issues I really have to keep any eye on is the total chlorine. I actually ran this res for a few days prior to hooking up the ORP controller so once I did it had to kill a bunch of bacteria, higher than 20ppm is detrimental to the plants. I've killed seedlings by using HCl in hard water as a pH down because of this. I have a total chlorine test to periodically measure the levels, once it gets too high I will change reservoir for the water I mentioned in my first post which has been RO and UV filtered.

“In our experiments an increase in the root temperature of tomatoes and lettuce has always produced an increase in growth. In tomatoes the response curve shows a broad optimum in the region 25–30°C. The greater growth is associated with a larger leaf area and total dry matter production, increased length of the root system (but not necessarily the dry weight of the roots) and the absorption of larger amounts of N, P and K. The rate of transpiration is also increased at higher root temperatures. There is a reduction in the size of the root cortex and the formation of larger xylem vessels in the warmer roots.”-ISHS Acta Horticulturae 98: Symposium on Research on Recirculating Water Culture J. Moorby, C.J. Graves

I will admit the majority of papers I've read favor the higher root zone temperatures. It seems to be a more complicated issue with dicots such as MJ than with monocots though. I guess that's part of the reason why this is "uncharted territory"

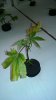
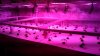
I did lose a few clones prior to placement in the table because I'm lazy and let them dry out, some of the ones in the table are actually still a little stressed because of this but hopefully will perk right back up and take off growing.
 

Atomizer

Well-Known Member
This would not be an issue with aeroponics as the water droplets are so small the air actually "wraps" around them and results in much more efficient delivery of water and nutrients to the roots.
The efficient nutrient delivery comes from the droplets being depleted of nutrient on contact with the root. Its the reason HPA runs very low EC compared to other aero methods that soak the roots for 1 minute and leave them wet for 4 minutes :)
 

Hot Diggity Sog

Well-Known Member
Grow Day 1

Room:
-4 Kw LEDs
-Dehumidifier
-Minisplit
-Carbon filter
-CO2 controlled by small water heater, run at 1500ppm

View attachment 3370879


Table:
-Steel sprayers being run at 170psi, no timers - I'll be interested to chart growth rates..anyone running high pressure always ran timers and I'm not sure it's necessary.
-Reservoir hooked up to a chiller
-UV light in reservoir

Water:
-Run through reverse osmosis and stored in a holding tank with a UV light

pH/EC/ORP
-ORP controller is connected to maintain 600-700mV by utilizing a solution of calcium hypochlorite
-pH/EC controller are set to maintain a pH of 6 and variable EC, all solutions I've mixed myself.

View attachment 3370878

Note: The calcium hypochlorite will raise the EC reading - It's going to be trial and error getting it set correct EC based on how the plants look.


And now, for what you've all been waiting for:
View attachment 3370877
SEXY!
 

ShirkGoldbrick

Active Member
Day 3

Well I gotta say, it's rather unfortunate that I had let the clones dry out prior to putting them in here because some are looking a little sad. Hopefully they bounce back. I lowered the lights down a bit and have them all turned on now. Here are a few more pics of the table for you guys.

Mist shots:

mist 1.jpg
mist 2.jpg

Table shots:
Table 1.jpg
Table 2.jpg
Table 3.jpg

Let me know what you guys think and if there's anything you feel I could improve upon. This is my first run with this setup. Hopefully they take off growing soon and I can hurry up and put up the netting and raise the lights and SCROG these babies. The excitement makes me impatient lol.
 

ShirkGoldbrick

Active Member
Day 4


Well today we learn about Calcium hypochlorite and the crappy solubility of store bought stuff. A "mud" will form on the bottom of your ORP injection bucket.

Disclaimer: Calcium hypochlorite products come with a warning that it's a violation of federal law to premix, kind of like how it's against federal law to grow MJ :finger:bongsmilie

The fix to this, I presume, is to put the intake for ORP injector several inches from the bottom of the bucket so at least you don't suck up pure mud. I have adjusted accordingly.

Old filter:
Old filter - Copy.jpg

New filter for comparison:
New filter - Copy.jpg

I'm struggling with humidity right now. It seems a dehumidifier is actually completely unnecessary. Running 4k LEDs seems to make the minisplit run in cooling mode so much that it dropped the humidity to 38%. I turned off six of the lights in order to assist them with the shock from transplanting as well as to reduce the cooling load and hopefully raise humidity a little. I also put in a small bedside humidifier. Doing these two things has raised humidity to 50%. The poor little things barely have roots coming out of their rooters. :cry:

Since I changed the filter I also decided to change the reservoir for shits and giggles to see how the numbers actually add up one by one.

Reservoir: 50 gallons
RO water treated with UV - 0.1 EC
Adding in 250mL Silica blast and the last two tablespoons of superthrive I had - 0.47 EC

I had the ORP controller turned off and set pH to 9 and EC to 1.47 (so pH adjustment wouldn't affect EC - it's stupid how they run at the same time by default since nutes lower pH anyway)

After achieving equilibrium I set pH to 6 and turned on the ORP controller. I achieved a pH of 5.98 and an ORP of 700mV at 2.6EC. For those of you who struggle with math that accounts for 1.2 EC.

So in order to maintain an EC of 1.0 for nutes with ~.47 being silica it's necessary to set target EC to 2.6.
 

churchhaze

Well-Known Member
Stop adding silica to your res.

Mix your nutes and pH before putting in the res. Use pH up from Botanicare- but only if absolutely necessary.
I don't even make a stock solution with the KOH, but if pH up is needed, I measure flakes with a mg scale.

http://www.essentialdepot.com/product/KOH-2.html

(assuming pH up is needed)

Honestly, people using potassium silicate may as well just switch to using potassium hydroxide.
 

ShirkGoldbrick

Active Member
Stop adding silica to your res.

Mix your nutes and pH before putting in the res. Use pH up from Botanicare- but only if absolutely necessary.
Y u no add silica to res? o_O

Their mothers love it, and the strain, gg #4, is known for weak branches. So I'd like to make sure they're able to withstand the bondage once I get the nets out :hump:. The girls, we'll call them Anastasia Steele. Me, I'm Christian Grey. ;)

I think you guys misunderstood the reasoning - I have to use plenty of pH down just because the calcium hypochlorite - I currently have no need for pH up. The silica is strictly to increase strength of branches. Sometimes I bend their mothers over and give it to them pretty rough when they start going a little wild and with the silica, they well, seem to..er, um..enjoy it? :shock:

Hahaha :razz: ok I guess I should stop with the innuendo.

If I ever do need to add pH up because say the pH is getting below 6 even with the calcium hypochlorite and silica I have the ingredients on hand to make some and a couple spare peristaltic pumps I could add one to the doser and just program it in. I left extra room on my cart just for this reason :mrgreen:.
 
Top