4 day bud dryer for $40.

panhead

Well-Known Member
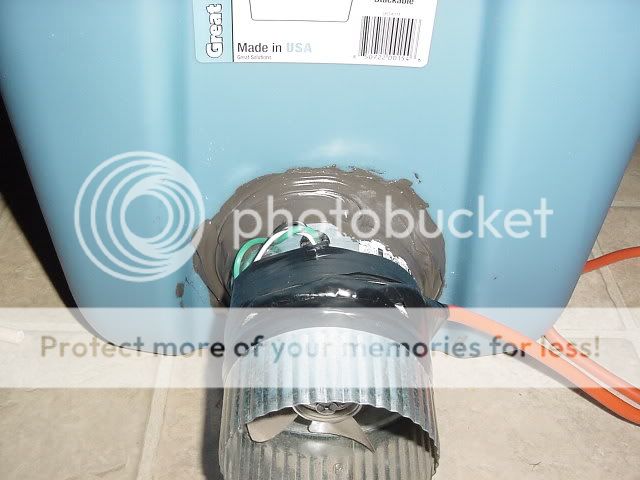
This is my home made bud dryer,depending on how full i pack it the dryer will dry my buds in 4 to 5 days,when it takes 5 days i have it packed full to the rim,it will dry around 1/4 pound at a time.

List of materials.

1 Rubbermaid Tote from Walmart...............................................$4.

1 Inline fan(4 inch) from Home Depot........................................$20.

1 Extension cord from Home Depot.............................................$5.

1 Sheet Expanded Metal from Home Depot in the drywall section.....$7.

3 Wooden Dowels from Home Depot @$1 each.............................$3.

1 Electrical tape(black tape from Home Depot..............................$1.

1 Tube Ployureathene Caulk from Home Depot..............................$5

1 Pack heavy duty Zip Tie's from Home Depot..............................$1

1 PC 1/2 PVC Plumbing pipe from Home Depot.............................$4

Total cost............................................................................$50.

NOTE,try not to use silicone caulking,silicone last forever but it does not hold very well in rough handeling situations unless a special silicone primer is used,primer is hard to come by & not cheap so use polyureathene & it'll never let loose,best caulk on earth.

Tools needed.

Magic Marker or pencil.

Tape measure.

Tin snips or strong siscors.

A 3/4 spade or auger drill bit.

Hand saw,a steak knife with a seraded edge will work in a pinch.

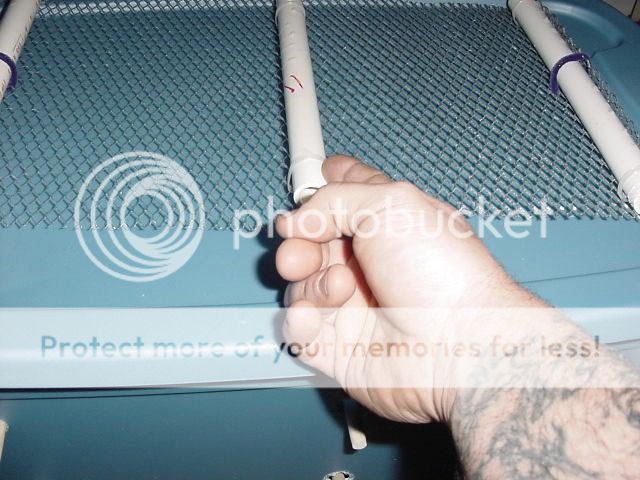
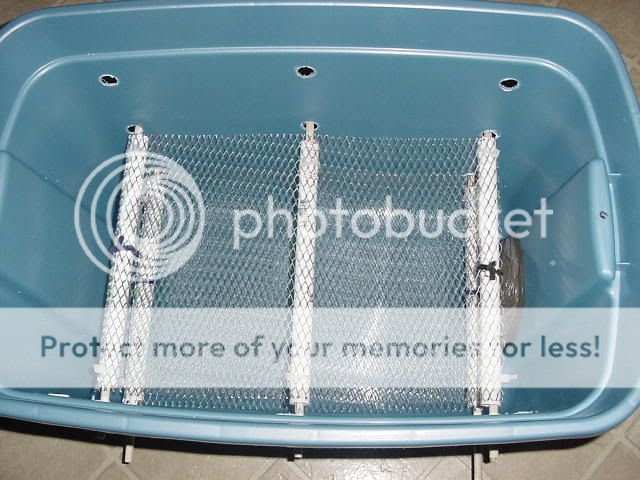
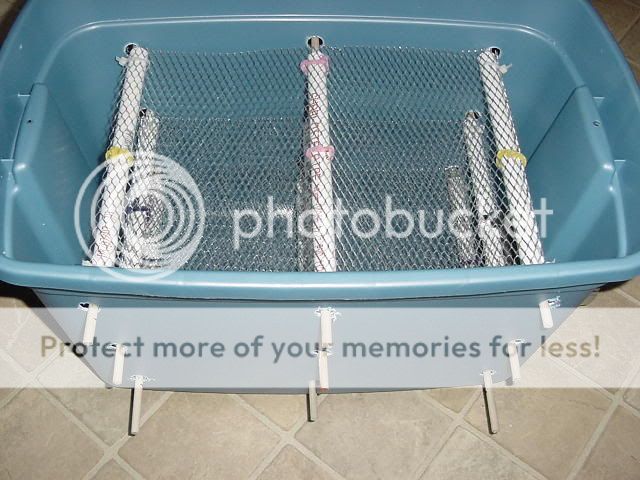
First you will need to mark the holes on the side of the Rubbermaid to allow for how many shelves you want,i used 3 shelves in this dryer & 4 shelves in my other dryer,mark the holes at even distances on both sides of the tote,now you drill the holes out with a 3/4 inch spade drill bit,the holes are oversised for a reason,this is what it will look like after all holes are drilled & dowels inserted.


More to follow in a few minutes.

This idea was stolen by me from Al fuct.
 

panhead

Well-Known Member
Now that the holes are drilled you can cut the wooden dowel rods,make sure you cut them about 3 inches longer than the tote is wide so they stick through each side of the tote,the dowels will be what suspend the drying racks up,the holes & dowels should line up like this.


Here's an inside shot so you get the idea where this is heading.


Now you need to cut the hole for the exhaust fan,make sure you trace a very tight circle with your marker or pencil,a snug fit is essential,after cutting the circle install the 4 inch exhaust fan to where its sucking outwards not blowing in then seal inside & out with caulk,here's finished pics of the fan.


Now to make the racks.More to follow in a few minutes.

This idea was stolen by me from Al fuct & modified.
 

panhead

Well-Known Member
Now its time to make the racks,take the 1/2 pvc pipe & cut the peices to be 1 inch shorter than the inside dimensions of the tote,this will allow you some needed play.

Now you take the Expanded metal sheeting & cut it in to peices to fit the dimensions of the inside of the tote,check these measurements twice.

After cutting the pvc pipe & the expanded metal now you connect the pvc to the expanded metalwith zip ties to make the racks,here is a few finished pic's of a rack.

This is the top of a finished drying rack.


This is the bottom of a finished drying rack,note the zip ties holding the expanded metal to the pvc.


More to follow in a few minutes.

This idea was stolen by me from Al fuct & modified.
 

panhead

Well-Known Member
Now you take the finished drying racks & install them by pushing the wooden dowel rods through the pvd pipes that are attached on the bottom of the racks.


Note how on the pic below you can see how the wooden dowels are holding up the drying racks & the extra length of the dowel is sticking out,the other side also has extra dowel sticking out as well.


More to follow in a few minutes.

This idea was stolen from Al fuct by me & modified by me.
 

panhead

Well-Known Member
Hooking up the exhaust fan you have several options,option number one is the most flexible,a standard inline fan from Home depot has 3 wires comming out of it,White = Hot,Black = Ground & Blue or Green = Neutral.

Option number one (used on my other bud dryer) is to buy a male plug from home depot & attach it to the wires comming out from the exhaust fan,this will leave you a very short lead to plug an extension cord into,it will be like plugging a power tool into an extension cord.

Option number two used on this dryer & included in the pics is to simply cut off the female end of the extension cord,match up the color coded wires one at a time,tape each one off seperately then continue on to the next wire,after wiring the fan you should take a few zip ties & secure the cord to the dryer so you cant trip & yank the cord.

More to come in a few minutes.

This idea was stolen by me from Al fuct & modified by me.
 

panhead

Well-Known Member
The holes on the side of the tote need to be drilled at the 3/4 inch measurement or larger to allow fresh air into the unit,the fresh air comes in from 18 different locations around the dowels, with the exhaust fan on the bottom having 60 cfm the draw is strong enough that the fresh air is pulled across all the buds on each rack then out the bottom,no buds are without fresh moving air at all times.

Finished unit with some goodies on the rack.


panhead

Well-Known Member
If smell is a concern you can hook up a carbon filter to the exhaust,the air draw is so strong that no smell escapes from the air intake holes,odor only comes out of the exhaust,tomorrow i'll show how to make a carbon filter for $5 that will fit right over the exhaust & kill any smell.

This is where the carbon filter will go over.


panhead

Well-Known Member
am i just really high or how do u get to the lower racks without taking the top 1s off
That is the reason why i used a 2 peice connecting system for the racks,you simply remove the dowels, then pull out each rack one rack at a time,all racks are easily removed or installed in about 30 seconds each rack by removing or re installing the dowels..
 

P@ssw0rd

New Member
perhaps you could put something on one end of all the dowels so that they could only be removed in one direction. That way it seems far less likely that they could ever get knocked/fall out by accident. Just my 2 cents. Looking great so far.
P@ssw0rd
 

southfloridasean

Well-Known Member
Panhead, very nice & clean set up. Will you eventually put an intake fan on the opposite side as well to bring air in or will yo just stick with the exhaust only? All the same very clean.
 

FilthyFletch

Mr I Can Do That For Half
Any ideas how to add any heat to the inside to help speed dryinga nd control humdity better?Looks good.I need 20 of these or bigger tubs lol
 

southfloridasean

Well-Known Member
Filthy I was thinking the same thing. I was thinking if someone could add one of the small water heaters for a res in a long glass tube & plug the water heater into a thermostat to keep the temps where they need to be.
 

BRSkunk

Well-Known Member
the other one on here has a heating element... look it up!

so this is just pritty much sucking air from the box... if you leave it in a heated soom it would be quicker... have you used it and made a full from harvest to dry in 4days?
 
Top