PPP KiloBitsSecondGrow

KiloBit

Well-Known Member
Good evening ladies and gentleman, I have just begun my second grow and as such starting another journal. Hope this one turns out as well if not better than my first, which will be hard to beat;-) Please feel free to visit my first grow, as there are some great pictures and final results, which quite frankly are amazing, and makes me glad I discovered this new hobby of mine. Here we go.

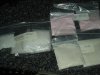
I purchased the seeds from Nirvana and they are feminized. Packet states PPP.

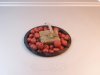
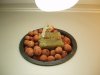
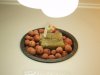
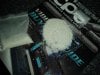
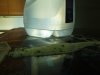
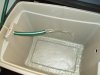
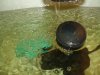
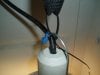
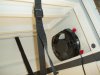
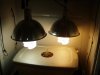
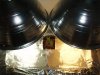
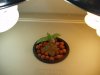
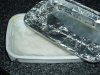
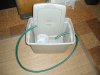
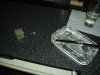
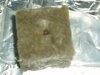
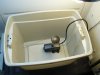
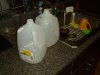
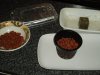
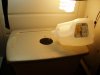
OK, basically started by putting a seed into some very damp paper towels in a washed out lo mien carryout container (yeah you can still see some of the shit). lol This is the same setup I used for my last grow. Well, then I just put it by my cable modem and router were it is dark and not cold. I will check back in a few days.
 

Attachments

  • P1010101.jpg
    P1010101.jpg
    18.7 KB · Views: 317
  • P1010097.jpg
    P1010097.jpg
    35.5 KB · Views: 475
  • P1010098.jpg
    P1010098.jpg
    81.4 KB · Views: 159
  • P1010099.jpg
    P1010099.jpg
    37 KB · Views: 169
I don't fecking believe it. Holy shit my girl is already forming, see the ittsy bittsy root?. Just fecking put her in yesterday. Holy shit. Now I have to start moving. bongsmilie 
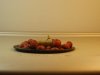
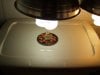
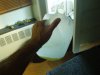
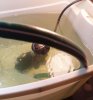
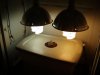
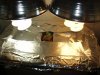
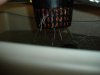
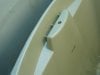
I can almost see inside her. Or is just the fecking smoke?
 

Attachments

  • P1010010.jpg
    P1010010.jpg
    36.1 KB · Views: 77
  • P1010010a.jpg
    P1010010a.jpg
    37.4 KB · Views: 188
Alright here are the hardware and nutes we be using. The only other medium will be hydro.bongsmilie

1. the guts of the shit. medium sized plastic storage cabinet, 10 gal tub of which 6 Gal is used for the grow, a couple of adjustable straps to assist with light adjustments of which majority will be done be shelf, 2 CFL one veg one bloom, some aluminum foil for reflection and privacy.
2. this is the tub that we use for the draining of the old hydro and nutes.
3. irrigation water pump, netpot with hydroton grow rocks, rockwool, irrigation dispersal and tube.
4. CFL same as for first grow very satisfied with them
5. airpump for the bubbleponics have to get new airstone
6. fan
7. nutes for the grow showing both veg and bloom with micro for both they are pre weighed and are to be mixed with 6 Gal hydro 1packet of veg and 1 packet of micro or 1 package of bloom and 1 package of micro again I used this for my last grow
 

Attachments

  • P1010004.jpg
    P1010004.jpg
    51.3 KB · Views: 424
  • P1010001.jpg
    P1010001.jpg
    70.2 KB · Views: 227
  • P1010003.jpg
    P1010003.jpg
    140.6 KB · Views: 206
  • P1010012.jpg
    P1010012.jpg
    76 KB · Views: 348
  • P1010006.jpg
    P1010006.jpg
    27.6 KB · Views: 174
  • P1010007.jpg
    P1010007.jpg
    35.3 KB · Views: 186
  • P1010002.jpg
    P1010002.jpg
    55.8 KB · Views: 204
.
¤
~~~~~~~
Thanks man. I actually had a lot of fun doing it. And to reap these kinds of rewards is fecking awesome.


amen to that brother :mrgreen:

Pure Power Plant, this will be good KiloBit
If it's Ok I'll pull up a seat and watch these babies grow with ya. :blsmoke:


203820d1222546165-myfirstgrowcomingtoanend-p12.jpg


This box is great. Nice setup. Nice yeild on the last journal, NYC bagseed.


have a good day

cya bongsmilie


~~~~~~~
¤
.
 
Moved the girl from the wet paper to the wet rockwool. Back into the container and back into the hole. bongsmilie

1. the container, rockwool, utensil to widen the hole in the rockwool, knife
2. ppp exposed
3. moving her from the towels to the wet rockwool see her on the tip of the knife?
4. ppp nested in the rockwool kind of shitty pic eh
5. back into the container
6. cover and back by the modem and router

Tomorrow after work, setup the tub and get ready for the move from darkness to light.bongsmilie This is exactly what I did with the first grow. When the move occurs, we will have a full functioning system for her. Then in roughly 7 to 14 days we'll start with some mild nutes, full strength will be given when she's about 6 to 8 inches 15 to 20 cm.

As my pops would say, "So far so good."
 

Attachments

  • P1010017.jpg
    P1010017.jpg
    89.2 KB · Views: 68
  • P1010018.jpg
    P1010018.jpg
    37.5 KB · Views: 67
  • P1010019.jpg
    P1010019.jpg
    53.1 KB · Views: 73
  • P1010020.jpg
    P1010020.jpg
    37.3 KB · Views: 125
  • P1010021.jpg
    P1010021.jpg
    30.3 KB · Views: 93
  • P1010023.jpg
    P1010023.jpg
    45.7 KB · Views: 90
Please remember, this grow is a low cost, stealth model, say for an apartment. We only move 6 Gal 22 liters, minimal smell, minimal noise, and depending on seed (got a 2 oz 58.1 gr first grow)a personal harvest.
If you want an idea of what to expect, I strongly urge you to view my first grow journal. Although not from seed, it does have some great pics. Plant, harvest, cure weight, etc. Please check it out so I get hits. lol Oh yeah one more thing, if your expecting ph levels and humidity readings, etc. I'm afraid you'll be disappointed. Anytime I feck with a plant I kill it. So as my farmer grandparents said, "Leave it alone, it'll take care of itself."

Today she's been moved to the tub and light. She's in her spot until harvest. Seeing as she's still in germination, no nutes, we don't need air pump for the bubbleponics yet, and the fan also need not be engaged at this time. Hey save as much electric as you can.

1. the water pump is put into tub
2. marking for 6 gallons lol I know I know I'm using one gallon containers so why not just count them? Because a couple of times I forgot, I was toking while doing itbongsmilie this isn't really important now, but when we start the nutes it becomes critical as the nutes are premixed and weighed for 6 Gal 22 liters
3. we use 2 containers one fills while we move the other to the tub
4. very important to thoroughly wash the hydroton grow rocks or your water will turn dark brown
5. obvious, pouring the water into the tub
6. prep for her crib
7. let her in, look how much she's grown since yesterday already popping out of the holebongsmilie
8. close the door, also important to cover as much as possible so no light gets through into your water, that causes algae
9. into the tub she goes another fecking lousy picture
10. pic of the wiring it's in a drawer, the white thing on top is my speed adj for fan
11. lower the lights
12. dropback view
13. close cabinet

OK All we can do now is hope the genetics are good and we have a successful grow. Hope you've enjoyed it so far and possibly it was of help to some of you as well. I'll keep updating as required.

Also, please post your comments or questions. I know a lot of you are wondering why I'm only doing one plant. Well, frankly seeing as this is only my second grow and I'm also giving a step by step, I really don't want to become overwhelmed. Besides, it's enough for me, for nowbongsmilie Check out my first girl, she took up the whole box.
 

Attachments

  • P1010026.jpg
    P1010026.jpg
    34.8 KB · Views: 152
  • P1010030.jpg
    P1010030.jpg
    19.8 KB · Views: 86
  • P1010028.jpg
    P1010028.jpg
    63.4 KB · Views: 88
  • P1010027.jpg
    P1010027.jpg
    55.7 KB · Views: 94
  • P1010033.jpg
    P1010033.jpg
    41.2 KB · Views: 167
  • P1010032.jpg
    P1010032.jpg
    39 KB · Views: 91
  • P1010031.jpg
    P1010031.jpg
    64.8 KB · Views: 86
  • P1010029.jpg
    P1010029.jpg
    27.3 KB · Views: 112
  • P1010037.jpg
    P1010037.jpg
    36.7 KB · Views: 164
  • P1010036.jpg
    P1010036.jpg
    24.8 KB · Views: 184
  • P1010035.jpg
    P1010035.jpg
    47.6 KB · Views: 140
  • P1010034.jpg
    P1010034.jpg
    32.6 KB · Views: 144
  • P1010038.jpg
    P1010038.jpg
    42.9 KB · Views: 89
.
¤
~~~~~~~
OK All we can do now is hope the genetics are good and we have a successful grow. Hope you've enjoyed it so far and possibly it was of help to some of you as well. I'll keep updating as required.

. . . . nice little photo journal.

This is going to be fun to watch, thanks. bongsmilie


Good growing to you bro


~~~~~~~
¤
.
 
:leaf:
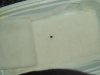
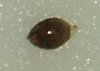
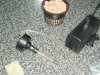
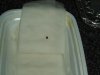
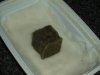
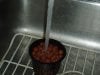
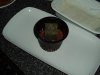
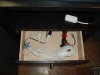
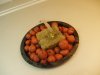
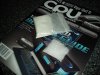
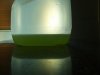
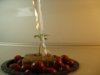
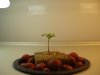
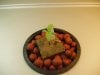
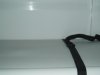
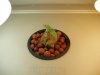
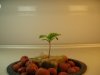
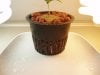
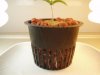
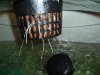
Woke this morning and found that she's already popped the shell. I don't know, my first grow didn't happen this fast. I hope this is a good omen.bongsmilie Oh yeah, the roots already past the rockwool, so I'm going to have to get that airstone by the weekend.

1. here she comes
2. side ass view lol
3. OK see the shell to the right? fecking awesome, looks like a little pacman

We are on the way. hehe
 

Attachments

  • P1010042.jpg
    P1010042.jpg
    28 KB · Views: 146
  • P1010046.jpg
    P1010046.jpg
    24.8 KB · Views: 126
  • P1010047.jpg
    P1010047.jpg
    37.3 KB · Views: 213
No big deal here. Just posting a couple of pics. She has changed since yesterday though. Taller, stronger, four leaves, she is growing as expected. I believe she is officially a seedling now. Trying to post a couple every day. lol We all know that wont happen at some point.bongsmilie Just remembered how amazed I am at what starts and what finishes from a little fecking seed. It truly is a miracle.
 

Attachments

  • P1010058.jpg
    P1010058.jpg
    29.5 KB · Views: 116
  • P1010051.jpg
    P1010051.jpg
    35.2 KB · Views: 61
  • P1010049.jpg
    P1010049.jpg
    31.3 KB · Views: 47
Waited 48 hours to post. Looking healthy so far, with no issues to speak of. It's been a week since start and because she's looking healthy and strong We'll add half strength nutes after changing the water. Also bought the the airstone, thinking root might be in water by this coming weeks end.


1. Before nutes over 24 hours ago
2. side of the same over 24 hours ago
3. the nutes veg (big bag) and micro
4. mix half the veg and half the micro (reseal the other half for next feeding)
5. a small amount of warm water and the nutes
6. shaken not stirred
7. now fill the rest of the container
8. purge the old water, insert hose and siphon into other tub
9. collection tub, it's on a stool so we don't have to bend over that far, the beauty of this is you determine how much or little to empty at time
10 she's showing root out of the netpot, another fecking lousy pic
11. after pouring 4 Gal 15 liters and the 1 Gal 4 liters of nutes, put her back into the tub and slowly pour the last 1 Gal 4 liters directly into the netpot over the rocks and rockwool
12. move the lights back
13. bye for now, this is what she looked like when we started the nutes
14. breath of CO2 lol
15. feck, forgot this one, inside after the nutes with the airstone, sorry

Well it's been a week since the start of this grow and it looks like all is well. Alrighty then, until the next update.
 

Attachments

  • P1010048.jpg
    P1010048.jpg
    34.1 KB · Views: 56
  • P1010058.jpg
    P1010058.jpg
    29.5 KB · Views: 46
  • P1010059.jpg
    P1010059.jpg
    73.5 KB · Views: 46
  • P1010065.jpg
    P1010065.jpg
    70.4 KB · Views: 39
  • P1010069.jpg
    P1010069.jpg
    29.1 KB · Views: 51
  • P1010072.jpg
    P1010072.jpg
    41.7 KB · Views: 46
  • P1010071.jpg
    P1010071.jpg
    25.1 KB · Views: 31
  • P1010079.jpg
    P1010079.jpg
    49.1 KB · Views: 55
  • P1010078.jpg
    P1010078.jpg
    42.3 KB · Views: 82
  • P1010080.jpg
    P1010080.jpg
    42.4 KB · Views: 72
  • P1010081.jpg
    P1010081.jpg
    22 KB · Views: 63
  • P1010085.jpg
    P1010085.jpg
    29.5 KB · Views: 42
  • P1010086.jpg
    P1010086.jpg
    24 KB · Views: 49
  • P1010087.jpg
    P1010087.jpg
    35.3 KB · Views: 86
  • P1010093.jpg
    P1010093.jpg
    61.5 KB · Views: 111
The lighting is Compact Fluorescent. Using what is termed dual spectrum. What this means is that both the vegetative and flowering spectrum are used simultaneously. This is the lighting technique for the first grow. The product specs are as follows:

Company Sunlite
SL85/30K Flowering Cat. No. 05581
SL85/65K Vegetative Cat. No. 05580

Each is 85 watt producing in theory 4200 lumens each
Average life is 8000 hours

Some basic reflectors, nylon straps and tie wraps.

As you can see in the photos, with this setup the lamps can be moved any which way inside the cabinet. The only restrictions are based on the reflectors. This means if we decided to do four plants we could move the light closer to a leaner and or directly over a runt. The shelf which the straps are attached, will be at the top of the cabinet by flowering. The straps themselves are adjustable, so once the shelf is moved up the lights can be lowered and raised according. In addition, the straps can slide back and forth. Finally, the loose tie wraps can be adjusted on the strap for precision if need be. Pretty good little system.
 

Attachments

  • P1010004.jpg
    P1010004.jpg
    51.3 KB · Views: 48
  • P1010088.jpg
    P1010088.jpg
    28.5 KB · Views: 28
  • P1010092.jpg
    P1010092.jpg
    48.7 KB · Views: 35
  • P1010005.jpg
    P1010005.jpg
    16.7 KB · Views: 22
  • P1010094.jpg
    P1010094.jpg
    34.5 KB · Views: 43
  • P1010095.jpg
    P1010095.jpg
    33.3 KB · Views: 23
Thanks bro.

Just a couple pics and update that foil is added around. Trial of using foil around seedling to see if growth is accelerated or plant strengthened. If not, goodbye foil.

1 thru 4. 24 hours after nutes introduced, she has grown a bit
5-6. foil is added around her
 

Attachments

  • P1010102.jpg
    P1010102.jpg
    36.4 KB · Views: 22
  • P1010100.jpg
    P1010100.jpg
    29 KB · Views: 23
  • P1010099.jpg
    P1010099.jpg
    24.6 KB · Views: 39
  • P1010101.jpg
    P1010101.jpg
    26.9 KB · Views: 44
  • P1010104.jpg
    P1010104.jpg
    65.9 KB · Views: 30
  • P1010103.jpg
    P1010103.jpg
    67.3 KB · Views: 46
Foil is never good from what i hear. Causes hot spots and makes temps get a little higher. Good luck with that but i would suggest just taking it all off. Keep us posted man

Tom :joint:
 
Foil is never good from what i hear. Causes hot spots and makes temps get a little higher. Good luck with that but i would suggest just taking it all off. Keep us posted man

Tom :joint:


Thanks for the info tom. I'll try overnight and then make a decision. Only reason I'm trying is because they are CFL, maybe won't be as hot, don't know. Your probably right though. Posting tomorrow with decision.
 
Well even though the internet research was inconclusive we are going to remove the aluminum foil.

Plus two more pics.

Roots are doing well. A little airing is in order.

Sure had more fun doing this than winterizing the windows.
 

Attachments

  • P1010105.jpg
    P1010105.jpg
    31.4 KB · Views: 52
  • P1010106.jpg
    P1010106.jpg
    27.9 KB · Views: 83
24 hour update. OK OK 22.5 hour update. lol

Just wanted to show the difference a day makes as far as the roots and leaves are concerned. Like stated in one of the previous posts, the roots should hit the water by weeks end, shit maybe by Wednesday. Incredible! Oh yeah, once the roots hit the water, she really takes off. I fecking love this. Smoking my last grow while doing another. Doesn't get any better.
 

Attachments

  • P1010110.jpg
    P1010110.jpg
    28.1 KB · Views: 47
  • 2.jpg
    2.jpg
    33.1 KB · Views: 43
  • 1.jpg
    1.jpg
    63.2 KB · Views: 119
  • P1010111.jpg
    P1010111.jpg
    23.7 KB · Views: 64
Back
Top