Continued:
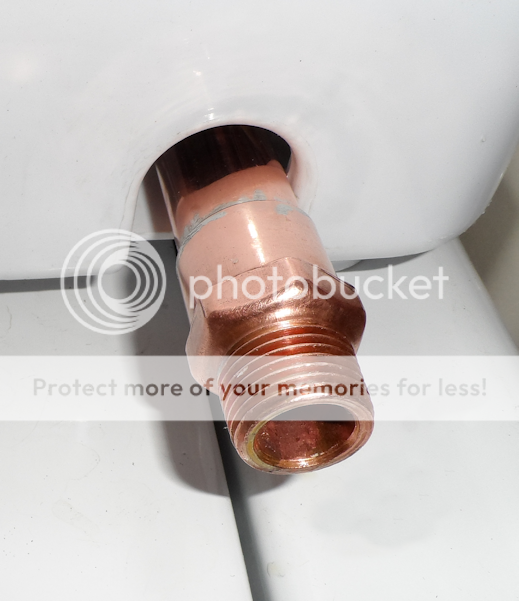
The next day I took off the clamp and the hose stayed in place yay! I started working on the next part of the drain hose the copper tubing. I soldered a ½ inch male threaded adapter to a short piece of ¾ inch copper pipe and a ¾ inch copper elbow. When the copper elbow section had cooled enough to handle I washed it and prepared it for assembly with the plastic tubing.
I made several measurements and then cut away some extra plastic tubing until it was the proper length. Next I made a dry fitting test of the copper elbow and the plastic tubing.
It was going great until I reached the end of the threads and the collar of the copper hit the plastic tubing. The plastic tubing spun and popped right off of the drain port just like it did when the silicone was wet! Fuuuuuudge (not what I really said)!
OK plan B. Plastic model cement. I will huff it until I come up with a plan JK. I cleaned the drain port and the plastic tubing thoroughly with acetone and removed any silicone residue. Then I liberally applied the plastic cement to the hose and slipped it on the drain port, attached the clamp, and proceeded to wait. I gave it a good two hours of cure time and removed the clamp. The tubing was firmly adhered to the port!
Next I screwed on the copper elbow and the plastic tubing held firm
")
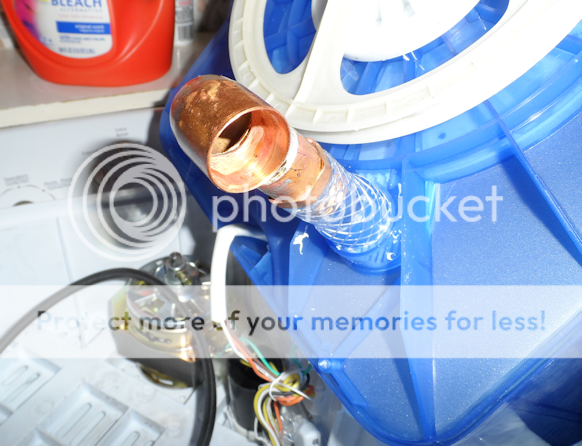
I reassembled the machine just to see how the elbow lined up with the drain tube hole in the side of the base. It was within tolerances but it was a little high no you are no you are shut up! Where was I? Oh yeah put the lid back on the tube of glue. I decided to make some changes so that the copper elbow would rest on the bottom of the base. This should add extra support to the drain tube and keep the plastic tube nicely stuck to the drain port.
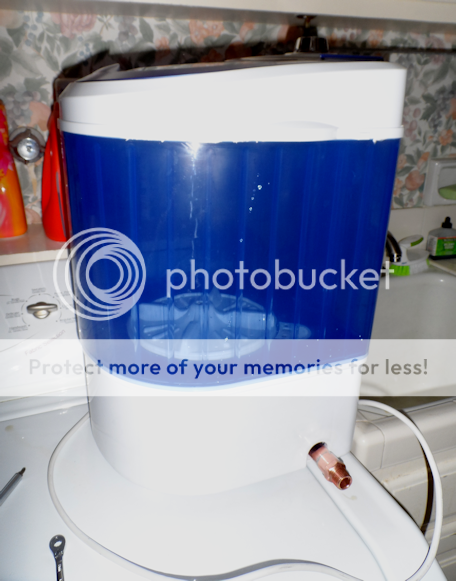
Everything fit so now I could finish assembling the copper drain assembly. After several design revisions I decided to keep it simple and give myself the most options. By having the tube come out of the side of the base with another male threaded adapter I can hook up plastic tubing and just bend it up and down like the original design, or I can go all Cadillac and add a nice ball valve, or I can go Frenchy and just add an elbow and a cap.
Now it is time for me to glue the copper drain pipe assembly to the plastic tubing. I decided to go with the plastic cement again because it just smells so good
.safety break
.puff, puff, pass
Got everything ready and then tried to glue the wrong end to the plastic tubing! Take two. Cleaned away the glue residue and started over with the correct end of the pipe. Went together perfectly and the plastic tube didnt budge one little bit.
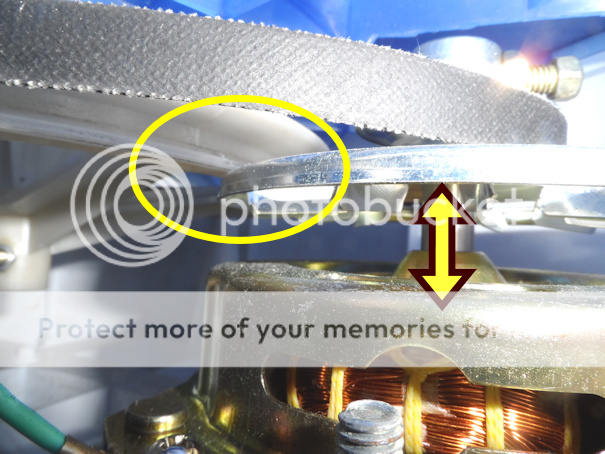
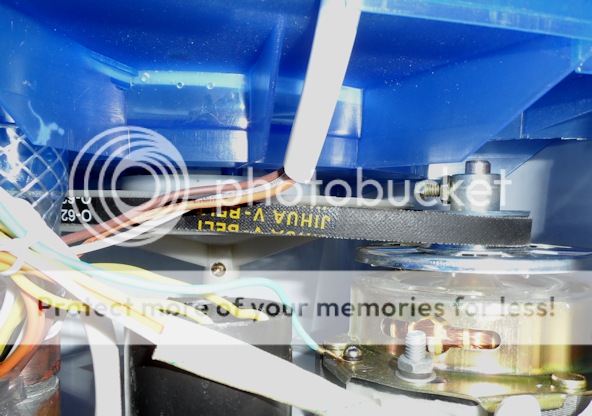
Time to reassemble the base! The belt is a little difficult to get back on the motor pulley from this angle but luckily they created a removable panel on the base that makes it easy to access the belt. So I put the base on, being careful to align the pipe with the drain pipe opening. Everything is going smoothly never a good sign. I remove the belt access panel and run the belt on to the motor pulley. This is when I notice something odd. The belt wasn't straight.
The tub pulley is higher than the motor pulley. Ugh! I need to take it apart again and adjust one of the pulleys. The tub pulley is not adjustable so that leaves the motor pulley. I loosen the set screw and adjust the pulley easily and reassemble the tub and base. I plug in the machine and turn it on to test everything. It runs but there is a terrible scraping noise. I cant tell what is causing it so I unplug the machine and take it apart again.
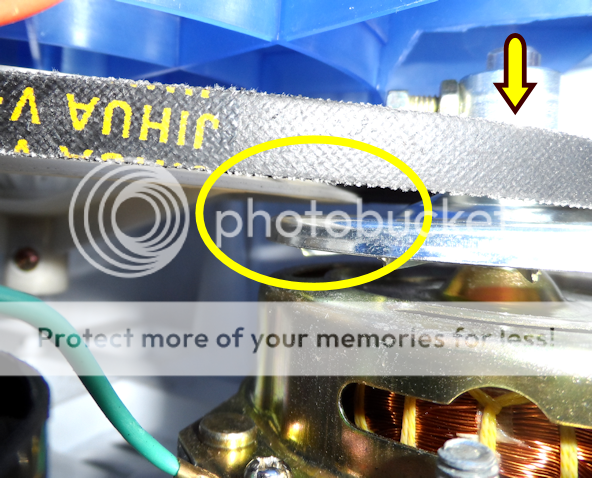
The motor pulley has a larger perforated disk on the bottom to act as a fan. This larger disk is rubbing against the tub pulley.
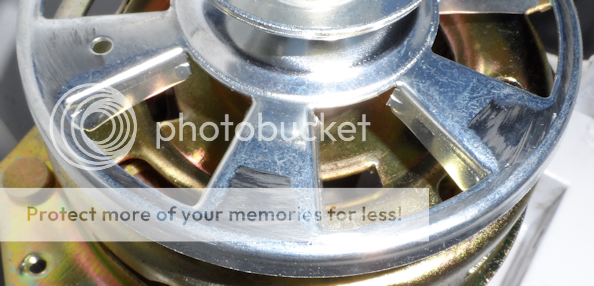
I can fix this by lowering the motor pulley enough that they dont touch. I go through the whole pulley adjustment procedure again and lower it until it barely clears. Start up the machine and it is still hitting the pulleys wobble a little and hit when they both wobble together. Adjust the pulleys again and this time it is perfect. The belt is still not straight but it is much better than it was originally.
I screwed the belt panel and base back on and the modification and tune-up is finished!
Now I just need to finish trimming the last of the Mulanje and I can make some beach sand!
Cheers,
Mo