Beer Belly
Well-Known Member
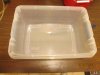
Ok so I learned a lesson in flow tectonics a few days ago that I'd like to share. Our world is full of filters. Oil and gas filters for your car. HEPA filters for everything these days. RO/DI filters for your groom. Sediment filters for your tea.Your lungs filter out all kinds of crap..... Think my liver may not work as a beer filter like it used to.
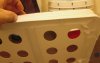
But whatever you do, beware of using inline filters for your recirculating hydro systems when using bene tea's.

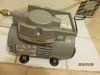
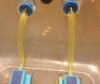
Thought it would be cool to add a couple of inline water filters. To catch any sediment every few weeks or so.
WRONG!
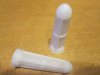
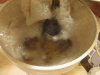
Those tampon sized filters are a grow room for bacteria and the like.
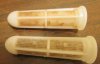
I had no Idea how fast they'd clog up until one day after work I came home to find a room full of listless drooping plants suffering from water starvation.
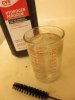
I cleaned them out with brush and H2O2 and they appeared as new.
However a couple days later same dirty shit!
Don't use these MoFo's in your system!
But whatever you do, beware of using inline filters for your recirculating hydro systems when using bene tea's.
Thought it would be cool to add a couple of inline water filters. To catch any sediment every few weeks or so.
WRONG!
Those tampon sized filters are a grow room for bacteria and the like.
I had no Idea how fast they'd clog up until one day after work I came home to find a room full of listless drooping plants suffering from water starvation.
I cleaned them out with brush and H2O2 and they appeared as new.
However a couple days later same dirty shit!
Don't use these MoFo's in your system!


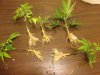


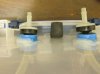

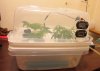


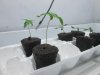
 for roots?? Clone subjects came from a bag of bottom trimmings I literally pulled out of the trash. Limp biscuits