Six lights for six plants. Organic No-Till 4400 watt indoor grow

714steadyeddie

Well-Known Member
I've used Attitude up until now, but I'm thinking the next time I grab seeds I'm gonna give Herbies a try. A lot of the seeds I got from Attitude looked pretty weak and my success rate with them was pretty mediocre. I feel like unless you're buying a 10 pack of seeds that it's pretty much a crap-shoot as to whether or not the seed you get from them is any good. Whenever I get seeds from flowers the first thing I do is try my hardest to squish them, if they don't break they're good to go. However, I was afraid to try that with the seeds I got from Attitude because a lot of them looked weak. Pretty disappointed with them. And you can't really tell them about it because of their disclaimers about them being souvenirs, so I'm SOL pretty much. I'm gonna see how Herbies does for me, I feel like I spend too much money on seeds to start off with a 50% chance of death.

I'm bummed because I was way stoked on the BB Headband, grew it outdoors my last grow a few years back. Didn't have too much flavor because it didn't seem to like the outdoor SoCal heat much, but oh man was the effect incredible. I'm ashamed to say that none of my Green Crack or BB Headbands ended up sprouting though :( The Purple Trainwreck remains to this day some of the best stuff I've ever grown. Had amazing bag appeal, amazing smell and taste, and yielded rather well. Can't wait to see what it's like indoors! Wasn't planning on even running the Amnesia until I lost all of those seeds, so I had to end up popping it with the Critical + 2.0 and they're doing amazing. Thought the Amnesia took 9-11 weeks but the instant I found out it was an 8-9 week I dropped it in a pot asap!


For sure give it a try, especially while they're in veg because that's where it really shines! Can't wait to have an organic set up similar to yours though. Bunch of no-till raised beds for veggies and a grip of self-sustaining products that most view as trash after all is said and done. That's one of the more humbling aspects about organics, you take stuff that most people consider trash and turn it into black gold! I was cracking up at myself about how excited I was about all the weeds popping up in our yard, now I actually look forward to picking them! :P


Can't wait to hear back with the results my man! Your girls will love it though. Coconut water and aloe are amazing and are an absolute must for organic. When I was first reading about it, someone had a great explanation about aloe/coconut water that pretty much compared those two to a supercharger. Your car can and will have great performance all on it's own, but when you supercharge it the performance gets a huge increase! As I was saying to white though, next time around make sure you give them aloe and coconut water in veg because that's where a lot of the benefits of the stuff really shine. Aloe is super helpful for developing roots in a plant, as well as coconut water to a lesser extent. What makes the coconut water kick so much ass is that it not only adds a shitload of nodes to your plants, but it makes the spacing on them tighter as well.
Dude the girls were praying so hard after I fed them the coconut water. I hit the veg tent as well earlier today and they are perked up Nicely too.

I'm glad you gave me a break down on what exactly they do. Now I can really examine them and study the positive effects they have. I'm going to source an aloe plant and try it for cloning as well.

Good stuff!
 

Yodaweed

Well-Known Member
I've used Attitude up until now, but I'm thinking the next time I grab seeds I'm gonna give Herbies a try. A lot of the seeds I got from Attitude looked pretty weak and my success rate with them was pretty mediocre. I feel like unless you're buying a 10 pack of seeds that it's pretty much a crap-shoot as to whether or not the seed you get from them is any good. Whenever I get seeds from flowers the first thing I do is try my hardest to squish them, if they don't break they're good to go. However, I was afraid to try that with the seeds I got from Attitude because a lot of them looked weak. Pretty disappointed with them. And you can't really tell them about it because of their disclaimers about them being souvenirs, so I'm SOL pretty much. I'm gonna see how Herbies does for me, I feel like I spend too much money on seeds to start off with a 50% chance of death.

I'm bummed because I was way stoked on the BB Headband, grew it outdoors my last grow a few years back. Didn't have too much flavor because it didn't seem to like the outdoor SoCal heat much, but oh man was the effect incredible. I'm ashamed to say that none of my Green Crack or BB Headbands ended up sprouting though :( The Purple Trainwreck remains to this day some of the best stuff I've ever grown. Had amazing bag appeal, amazing smell and taste, and yielded rather well. Can't wait to see what it's like indoors! Wasn't planning on even running the Amnesia until I lost all of those seeds, so I had to end up popping it with the Critical + 2.0 and they're doing amazing. Thought the Amnesia took 9-11 weeks but the instant I found out it was an 8-9 week I dropped it in a pot asap!


For sure give it a try, especially while they're in veg because that's where it really shines! Can't wait to have an organic set up similar to yours though. Bunch of no-till raised beds for veggies and a grip of self-sustaining products that most view as trash after all is said and done. That's one of the more humbling aspects about organics, you take stuff that most people consider trash and turn it into black gold! I was cracking up at myself about how excited I was about all the weeds popping up in our yard, now I actually look forward to picking them! :P


Can't wait to hear back with the results my man! Your girls will love it though. Coconut water and aloe are amazing and are an absolute must for organic. When I was first reading about it, someone had a great explanation about aloe/coconut water that pretty much compared those two to a supercharger. Your car can and will have great performance all on it's own, but when you supercharge it the performance gets a huge increase! As I was saying to white though, next time around make sure you give them aloe and coconut water in veg because that's where a lot of the benefits of the stuff really shine. Aloe is super helpful for developing roots in a plant, as well as coconut water to a lesser extent. What makes the coconut water kick so much ass is that it not only adds a shitload of nodes to your plants, but it makes the spacing on them tighter as well.
Heard that bro, that sucks about the germ rate, yeah i love that amnesia it's a great strain i hope you get some good phenos:joint::joint:bongsmilie:bigjoint:
 

kratos015

Well-Known Member
Dude the girls were praying so hard after I fed them the coconut water. I hit the veg tent as well earlier today and they are perked up Nicely too.

I'm glad you gave me a break down on what exactly they do. Now I can really examine them and study the positive effects they have. I'm going to source an aloe plant and try it for cloning as well.

Good stuff!
Yeah for sure, the stuff is absolutely amazing to say the least! I'm having the same results with the coconut water, I'll post an update shortly! To be honest, this is actually my first time using coconut water and I can't believe it took up until now for me to find out about it. This is my first grow in almost 4 years now, my last grow I was using Sub's Supersoil when it was all the rage and organic growers on these forums were just starting to get into No-Till. Now there is an absolute abundance of valuable information! I'm nothing special, all I did was spend months doing research and asking/answering questions. I've always believed that with enough dedication, hard work, and studying that anyone can do just about anything. You should be able to come across Aloe quite easily at your local Lowes or Home Depot. I'd recommend buying two, that way you can use one to use/apply immediately and the other can just grow. It's a succulent and can get quite invasive so after a while you're going to have more than you know what to do with! :P


Heard that bro, that sucks about the germ rate, yeah i love that amnesia it's a great strain i hope you get some good phenos:joint::joint:bongsmilie:bigjoint:
I only got one Amnesia seedling and it was a freebie, so I'm hoping that it's a good pheno. However, based on what I'm seeing from it the little lady sure looks promising! The Amnesia Lemon I have going is an absolute monster though, with haze and skunk in her lineage I'm hoping for a good harvest. :D

Update coming soon by the way :D
 

kratos015

Well-Known Member
So as you guys can see, the babies are finally getting established and I'm finally getting some growth worth updating. Was just a matter of waiting on them to fully adjust to the 2 gallon pots, they've not only done that but the coconut water kicked them up a notch.

18072702_10210739676241310_1656959695_n.jpg

They're looking absolutely gorgeous :D

The soil has been up and running in these pots for 6 weeks with the plants 4 days shy of a month old. I made the mix light in nutes since I was starting them as seeds. I probably didn't need to do that because the amendments in CC's mix don't really burn, but with seedlings I'd much rather be safe than sorry. Besides, all I have to do is top dress them to fix that which is exactly what I did last night.

18042708_10210739675881301_1669007945_o.jpg

18110541_10210739676161308_705400939_n.jpg

Pretty much just mixed up all of the above and made a little top dress mix that I sprinkled over the tops of the pots before watering. That, in conjunction with the aloe/coconut water have done wonders for them. They're all doing so well now!

18109421_10210739678481366_2029582955_n.jpg

Jack Herer #1 (almost 3 weeks)

18035507_10210739678321362_1193550231_n.jpg

Critical + 2.0 (almost 3 weeks)

18073236_10210739678241360_544406117_n.jpg

Amnesia Lemon (almost 4 weeks)

Got high hopes for this one, haze already has an awesome flavor but with lemon in addition? This should make some excellent full melt for sure.

18073468_10210739677681346_1067360715_n.jpg

Cluster Bomb (almost 4 weeks)

18110741_10210739677401339_508745723_n.jpg

Berry Bomb (Almost 4 weeks)

18109813_10210739677041330_1490418014_n.jpg

Purple Trainwreck

18110711_10210739676521317_1646427182_n.jpg

Amnesia Haze

Things are coming along quite nicely. Its looking like they'll be ready to top once they hit 4 weeks. I hate to top them without a way to clone the cuts but it's looking like I won't have a choice as buying more of that bubble insulation is gonna set me back quite a bit. But I'm thinking they'll be in my veg tent for another 2 weeks at the absolute minimum, possibly even up to 4 weeks. They need to be topped and trained quite a bit before they're ready to go in the shed. I'll be experimenting with something called "flex training" that my wife showed me from an Instagram account. When she gets back in, I'm gonna ask her to find his Instragram so I can give the guy credit.

Kind of hard to explain without pictures anyway but I'll give it a shot. It's similar to mainlining in the sense that after you top the plant, you LST the tops to form a T shape. You continue to LST the plant to maintain that T shape and wait for the side branches to start growing out a little more, then LST those. Eventually you've got a nice little web that covers the entire pot that looks like it will fill out a SCROG quite nicely.

So I have to top, LST, let it grow, LST some more, then let it grow out a little more until I've got myself a nice little canopy around the pot. By my estimate, that entire process should take anywhere between 3-4 weeks. The 2 gallon pots will then be transplanted into 25-30 gallon pots containing 25 gallons of soil each, the roots being sprinkled with VAM mycorrhizae. They will then proceed to veg for another 2-4 weeks, being LST'd as needed to keep the canopy even across the pot before I let them stretch into the first screen. Once the bottom screen gets full then it's flower time. Normally you're supposed to only do 75% of the screen to account for stretch. However space is not even a concern in my shed, so I'm gonna fill the entire bottom screen up and flower it into the second screen. The second screen will mainly be a support system for the branches so that I don't need to buy a bunch of yo-yos :P

With this set up, I'm hoping to get a pound per 600w and 1.5lb per 1000w. I'm hoping to pull of 1gpw but I'm assuming .5gpw just to be on the safe side. However, with the set up I've got going on I feel like I'll get closer to 1gpw than I ever have before! I spent my entire tax refund on this shed, making absolutely sure the room is dialed in before it was even built. The entire room is completely insulated, I have 30,000 BTU of cooling if I need it, tons of space, CO2 generator+controller, 25 gallons of living soil, the room itself should be completely optimized. However, I've never been one to assume things, especially when it comes to yields. I'll just be pleasantly surprised if I get more than .5gpw ;)

As always, thanks for reading :D
 

714steadyeddie

Well-Known Member
So as you guys can see, the babies are finally getting established and I'm finally getting some growth worth updating. Was just a matter of waiting on them to fully adjust to the 2 gallon pots, they've not only done that but the coconut water kicked them up a notch.

View attachment 3928807

They're looking absolutely gorgeous :D

The soil has been up and running in these pots for 6 weeks with the plants 4 days shy of a month old. I made the mix light in nutes since I was starting them as seeds. I probably didn't need to do that because the amendments in CC's mix don't really burn, but with seedlings I'd much rather be safe than sorry. Besides, all I have to do is top dress them to fix that which is exactly what I did last night.

View attachment 3928809

View attachment 3928808

Pretty much just mixed up all of the above and made a little top dress mix that I sprinkled over the tops of the pots before watering. That, in conjunction with the aloe/coconut water have done wonders for them. They're all doing so well now!

View attachment 3928800

Jack Herer #1 (almost 3 weeks)

View attachment 3928801

Critical + 2.0 (almost 3 weeks)

View attachment 3928802

Amnesia Lemon (almost 4 weeks)

Got high hopes for this one, haze already has an awesome flavor but with lemon in addition? This should make some excellent full melt for sure.

View attachment 3928803

Cluster Bomb (almost 4 weeks)

View attachment 3928804

Berry Bomb (Almost 4 weeks)

View attachment 3928805

Purple Trainwreck

View attachment 3928806

Amnesia Haze

Things are coming along quite nicely. Its looking like they'll be ready to top once they hit 4 weeks. I hate to top them without a way to clone the cuts but it's looking like I won't have a choice as buying more of that bubble insulation is gonna set me back quite a bit. But I'm thinking they'll be in my veg tent for another 2 weeks at the absolute minimum, possibly even up to 4 weeks. They need to be topped and trained quite a bit before they're ready to go in the shed. I'll be experimenting with something called "flex training" that my wife showed me from an Instagram account. When she gets back in, I'm gonna ask her to find his Instragram so I can give the guy credit.

Kind of hard to explain without pictures anyway but I'll give it a shot. It's similar to mainlining in the sense that after you top the plant, you LST the tops to form a T shape. You continue to LST the plant to maintain that T shape and wait for the side branches to start growing out a little more, then LST those. Eventually you've got a nice little web that covers the entire pot that looks like it will fill out a SCROG quite nicely.

So I have to top, LST, let it grow, LST some more, then let it grow out a little more until I've got myself a nice little canopy around the pot. By my estimate, that entire process should take anywhere between 3-4 weeks. The 2 gallon pots will then be transplanted into 25-30 gallon pots containing 25 gallons of soil each, the roots being sprinkled with VAM mycorrhizae. They will then proceed to veg for another 2-4 weeks, being LST'd as needed to keep the canopy even across the pot before I let them stretch into the first screen. Once the bottom screen gets full then it's flower time. Normally you're supposed to only do 75% of the screen to account for stretch. However space is not even a concern in my shed, so I'm gonna fill the entire bottom screen up and flower it into the second screen. The second screen will mainly be a support system for the branches so that I don't need to buy a bunch of yo-yos :P

With this set up, I'm hoping to get a pound per 600w and 1.5lb per 1000w. I'm hoping to pull of 1gpw but I'm assuming .5gpw just to be on the safe side. However, with the set up I've got going on I feel like I'll get closer to 1gpw than I ever have before! I spent my entire tax refund on this shed, making absolutely sure the room is dialed in before it was even built. The entire room is completely insulated, I have 30,000 BTU of cooling if I need it, tons of space, CO2 generator+controller, 25 gallons of living soil, the room itself should be completely optimized. However, I've never been one to assume things, especially when it comes to yields. I'll just be pleasantly surprised if I get more than .5gpw ;)

As always, thanks for reading :D
Shit man you're doing it right! Hard work pays off. That living soil is going to kick ass.

Ya that coconut water is routine now. Once a week. I like that I can use it on veg and flower. Seedlings love it too. In coco and FFof. Amazing
 

kratos015

Well-Known Member
Shit man you're doing it right! Hard work pays off. That living soil is going to kick ass.

Ya that coconut water is routine now. Once a week. I like that I can use it on veg and flower. Seedlings love it too. In coco and FFof. Amazing
Thanks for the kind words my man! All I did was read up on what others are doing and tried to keep an open mind about things. All I really did was follow instructions, but it did take me damn near 5-6 months of studying the Organic thread I posted about on the last page and lots of note taking. I had to wait that long though because I was waiting on my tax refund to fund the entire grow, which ended up being a blessing because it gave me that much time to learn and fine tune things. I have like half a notebook filled with scrapped ideas :P

This is my first time getting these kind of results and coincidentally it's my first time going no-till organic with CC's Mix instead of Sub's Supersoil. At this point I feel the results are speaking for themselves and if I can do it then anyone can as I'm certainly nothing special!

The coconut water is definitely something I'll never go without again either though! I mean, the stuff is literally available everywhere so there's absolutely no excuse! The node growth that I'm getting is just ridiculous and all I have to do is go down to whatever store carries coconut water and it'll last for about a month to boot!


Great thread man!:clap:

I wish I could articulate like you do. This is the kind of thread people who want to can really learn from.
Wow thank you for the kind words sir! If anything, I was worried I was babbling too much :P I'm glad that it's posted in a way that could help people learn about the process, I was really hoping for that. It's threads like these that I even got all of this information in the first place! I had pretty much only one shot with my method of choice here and spent months and months researching the best way to go about this. I considered Sub's soil again, then the Rev's, then after that the Moonshine Mix, but Coots mix kept coming up over and over again. It was pretty time consuming digging through all that information, but damn is it paying off right now! I just want this journal to be a place where people can come and learn about organic growing, myself included. There is just so much information out there and on top of that, you have to dig through a bunch of junk just to find it! I try my best not to post any junk and to only post when I'm able to contribute something :P

It's just fascinating to think that you can create a soil that will take care of whatever plant you put into it. As long as you keep feeding it (top dressing, grower's recharge, EWC teas, etc), aerate it (smart pots and good aeration mix), and keep it moist then your soil will continue to give you incredible results until you get to a point where you have to make new soil. Eventually, the worms and the microbes turn your entire pot of soil into rich humus. So when that happens you just mix up a new batch of soil, using the old no-tills as the humus component. I'm waiting until I can afford to get this soil going for outdoor veggie no-tills because I'm convinced that this soil is cheating. From what I've read up on and the results I'm seeing, it seems like all you have to do is pick a plant you want to grow and throw it in this soil. If you take care of the soil, it will take care of your plant for you which is a huge relief for someone that sucks at taking care of plants. Unless you have things dialed down to an absolute T, it simply is not possible for you to provide the optimum amount of nutrients and minerals on the same level that a batch of this soil can.
 

kratos015

Well-Known Member
Got another update on the girls, they're growing so much it's getting to the point where I can actually post daily and see results! When I went in and checked them about 5 hours ago this is how they looked.

18119914_10210751043565486_94752358_o.jpg

The 3 in the middle and the one in the back right are all a week older than the other 4, but they were getting big with no end in sight! I didn't think I'd have to top them for another couple of days but they for sure looked ready to me.

18053112_10210751045525535_207260481_o.jpg

18111172_10210751046965571_420872565_o.jpg

And the two above this text are the photos I took after topping them about an hour ago. I can't even wait to see how they react to it because they have more nodes on them than any other plants I've had this size. Check it out!

18136095_10210751045165526_372703779_n.jpg

Berry Bomb

18073603_10210751045005522_389937325_n.jpg

Cluster Bomb

18110779_10210751044765516_843091473_n.jpg

Purple Trainwreck

18072454_10210751044525510_26249134_n.jpg

Lemon Amnesia

I'm thinking that within just the next handful of days those nodes will be all grown and ready for some training. Once I finally get them all trained how I want them is when the fun will really begin :D
 

714steadyeddie

Well-Known Member
Got another update on the girls, they're growing so much it's getting to the point where I can actually post daily and see results! When I went in and checked them about 5 hours ago this is how they looked.

View attachment 3929665

The 3 in the middle and the one in the back right are all a week older than the other 4, but they were getting big with no end in sight! I didn't think I'd have to top them for another couple of days but they for sure looked ready to me.

View attachment 3929660

View attachment 3929659

And the two above this text are the photos I took after topping them about an hour ago. I can't even wait to see how they react to it because they have more nodes on them than any other plants I've had this size. Check it out!

View attachment 3929661

Berry Bomb

View attachment 3929662

Cluster Bomb

View attachment 3929663

Purple Trainwreck

View attachment 3929664

Lemon Amnesia

I'm thinking that within just the next handful of days those nodes will be all grown and ready for some training. Once I finally get them all trained how I want them is when the fun will really begin :D
Hey bud, just wondering how do you apply the fresh aloe to your waterings? You said something about double boiling is that necessary?

Could you just crush up a half tbs and just mix in 4 gallons of water?
 

kratos015

Well-Known Member
Hey bud, just wondering how do you apply the fresh aloe to your waterings? You said something about double boiling is that necessary?

Could you just crush up a half tbs and just mix in 4 gallons of water?
Totally not necessary, just what I had to do because I didn't have a blender.

You could totally do it that way though, just crush some of the gel from the aloe into the water and then you foliar feed or water with it. However, if you'll be foliar feeding with it I recommend straining it through a coffee filter or the aloe gel will clog up your sprayer. HTH!
 

kratos015

Well-Known Member
What's up guys? Sorry it's been so long since I've updated my journal, it's been a combination of work being hectic and just simply not having all too much to report at the moment.

The Cluster Bomb, Berry Bomb, Purple Trainwreck and Amnesia Lemon are 6 weeks as of today. I put the seeds in my pots on 3/27 and those were the only ones that survived for those of you that are just joining the thread. So come 4/3 when I realized the other ones were dead I planted 2 Jack Herer seeds, a Critical + 2.0, and an Original Amnesia that all successfully popped a few days after that. So those 4 are 5 weeks old as of today.

Been running into some minor problems that I'm currently in the process of fixing, rather stupid mistakes on my part but in my defense this is my first time growing since I moved out to Arizona so there are a handful of things that are different from when I was in Southern California. I'm not too proud to admit when I make mistakes fortunately, and I'm quite confident that some people more experienced than myself may be able to give me a second opinion on what I'm thinking my issues are at the moment.

18361350_10210883113707157_1700629933_n.jpg

18361655_10210883113187144_1180321118_n.jpg

Don't get me wrong, they don't look awful but I'm sure some of you can catch the little issues they're having.

1) Some of the leaves appear to have bug damage, you'll notice the one to the left of the bell pepper has a pretty decent chunk bit off. Arizona has WAY more bugs than where I was at in Southern California, I get a shitload of moths sneaking in every time I open my damn door :/ Another dumbass mistake I made was leaving my compost container next to my trash can, so naturally I had a bit of a fruit fly problem for a bit until I moved it outside. Don't be a dummy like me and have your compost container in the same building as your grow!

Not too much of an issue fortunately, I've just been spraying with neem more often than normal to compensate for my mistakes and Arizona's enormous bug population. So I've been steeping neem meal in a gallon of water and using that as a foliar feed every week or two as well as spraying the top layer of soil. Fortunately I'm still in veg so I anticipate this problem being dealt with quite shortly as things start to die off. Normally adding a little bit of H2O2 into your water is a good solution for dealing with pests in your soil, but when you're running a living soil you'll end up killing the good guys along with the bad guys, so not worth it!

2) I didn't have my pots propped up until the last few days. So as a result, the roots/soil have been sitting in water WAY more than they should have been. Again, I'm still in veg so this too is an easy enough fix. I've got them propped up and things are draining much better. Not proud of myself for making such a silly mistake, but it is what it is!

3) My water. I used to use tap water without any problems even when I was living in Southern California, had very little if any problems out there with the water as far as my girls were concerned. Now that I'm living in Arizona, I finally have tap water that is actually good to drink! So my thinking was "If I can drink it, my plants should love it too". Wrong. I'm on well water out here, and although it's good for drinking it absolutely destroys pretty much any appliances that use water because of the calcium build up. You can see it all over every faucet in my house and the pads on my swamp cooler need to be changed quite a bit because of how bad it is.

My soil has Oyster Shell Flour and Crab Meal in it, both of which have a decent amount of calcium in it. However for the last few weeks I've been seeing signs of Magnesium deficiencies, which made no sense because I did everything right with my soil. But then I finally realized my well water has a ton of calcium and other minerals in it. So what appears to be a Magnesium deficiency is actually a Magnesium lockout caused by having too much calcium. Problem number 2 compounded this problem, since my pots weren't draining as they should that means that all that calcium/salt/mineral build up is in my soil because I wasn't getting the run off I should have been! But again, I'm in veg so this is something that I can fix quite easily with a little time. I'll be foliar feeding the girls with a little epsom salt to give them the magnesium they've been missing out on for the last few weeks while I fix my problem with my water. I'll be filling up 5 gallon jugs up with water from the water dispensers in town and using that to dilute my well water that has over 400ppms!


Now that I know what needs to be done, it's simply a matter of time waiting for the girls to recover. I mean, overall they really do look great. However these issues still need to be addressed if I want things to be optimal, growth has been slowing down a tad but once I get all the above issues addressed I should be back on the right track. This is my first grow since 2013/14 so I knew I'd be bound to run into some mishaps. These are all easy fixes though fortunately, just gonna set me back a bit in veg time which is no big deal because I'm not ready to put anything into the shed just yet anyway.

I'm finally done wrapping the walls with the bubble insulation so I'm getting there! All that needs to be done now is install all the equipment, set up the screens, and get my soil/pots ready to go. I'll also be installing a swamp cooler in the shed so I can avoid using the air conditioners unless I absolutely have to. Gonna save me a ton of money for sure. The reason I went with air conditioning in the first place is because putting a swamp cooler in would cause light leaks, however I just realized that I can remedy that problem by putting setting the swamp cooler up like a central A/C. I'll just set the swamp cooler to the side of my shed and line some ducting from it to the shed, giving me all the benefits of the swamp cooler without the light leak! I'm beyond stoked about that because it's going to save me hundreds on my electric bill.

Anyway, sorry about the book and thanks for your time as always guys! :)
 

kratos015

Well-Known Member
Had myself a fairly busy day today, with work and family it's hard for me to find time but that's why I started so far in advance after all :D

18516241_10210916023129872_1736957037_n.jpg

18449900_10210916023009869_506564577_n.jpg

Starting to look more and more like a grow room with each passing day :D As you can see I managed to get the two 1000 watt hoods hooked up today, I got the ducting all cut up but have yet to install most of it because I need to get some more clamps or zip ties to hold everything in place. I've also lined a basic hose into the room so that watering isn't a total hassle.

I still have to hang the 4 600 watters, all of the fans and my controllers as well. I've also got to mix soil and throw them in the 25 gallon pots. I'm hoping to be able to get all of that done tomorrow after work.

I also managed to find a way to connect an evaporating cooler to the room without the risk of a light leak.

18450077_10210916023289876_105028513_n.jpg

I've still got some tweaking to do to make it completely light proof and to connect the ducting to the swamp cooler, but the main purpose for today was to just get it over here and make sure that everything was in working order and that my theory held true. With a little tweaking it's looking like I'll be able to use this bad boy for all of my cooling needs!

I've never heard of an evaporating cooler (swamp cooler) until I moved out here but let me tell you, they kick ass. It's pretty much just a water pump that supplies water to pads on the inside of the cooler. A motorized fan then draws hot air through the watered down pads and proceeds to cool the room that it's attached to. They work best in hot and dry climates because as we growers know, the hotter the temps of the air the more moisture/humidity the air is capable of holding. I'm doing something similar to this in my veg tent at the moment and it's absolutely incredible, I've retired both my humidifier and air conditioner in favor of this baby! Even with 600 watt wing reflector, this thing can keep my tent and my entire room at 60 degrees if I really wanted it to. Granted that's just with 600 watts and not 4400 like it will eventually be. But when the girls are under 4400 watts they'll also be given 1000-1200ppm of CO2 so I can keep my temps at 80-85 (will need to be dialed in of course). I use CO2 more to save money on electricity for cooling than I do for the extra photosynthesis/growth, kills two birds with one stone :D

The reason that I need to attach the ducting to it like this though is because it isn't lightproof or airproof, attaching ducting to the register on the front allows me to circumvent both of these issues though. It can get up to 110 to even 115+ out here in the summer and a swamp cooler will do so much better than an air conditioner at those temps in terms of efficiency. Each of my 15000 BTU air conditioners take up 12 amps, around 1500 watts. The swamp cooler only uses a single amp for the water pump and 2 amps for the fan for 3 amps total, or around 400 watts.

Also managed to get my girls to recover, snapped a photo of them for you guys!

18493605_10210916023449880_219243938_o.jpg

Only topped them once and have been low stress training them ever since to build the canopy I want for when I throw them into the shed.

Aside from things taking longer than planned, everything is going right on schedule. I plan on moving them into the shed within the next week or two and that's when the fun really begins. Stay tuned and thanks for dropping by :D
 

kratos015

Well-Known Member
All the pieces are finally starting to come together; months of planning, research and hard work are finally starting to show results and the idea I've head in my head for so long is finally starting to become a reality. I only managed to get my equipment installed in the room, not including the 4th 600 watt light or the CO2 generator. I just need to line the hose and regulator into the room and then find a place to hang the generator. Now that I finally have an idea of where all the lights are located it will be easier to determine a good place for the generator. I've got the hooks for the other light ready, but I won't be able to install it until I shut off the veg tent.

18492986_10210923863485876_198983224_o.jpg
18470723_10210923864005889_928714484_n.jpg
18492354_10210923865205919_1846675061_n.jpg
18518595_10210923865525927_1204038074_n.jpg
18492933_10210923866245945_1982963946_n.jpg


Finally seeing the size of those damn pots underneath the lights really puts things into perspective. Each light will have a single plant underneath it and the SCROG will be used, 3x3 for the 600s and 4x4 for the 1000 watters. Each plant will be in 25 gallons worth of living organic soil. The plants will then veg for however long they need (I'm thinking 4 weeks, give or take) to completely fill the screens. Most SCROG tutorials will recommend filling the screen 75% of the way, but in my experience this is only to account for the stretch in the first weeks of flower which is only an issue if you have space requirements. I made sure to plan it so I had plenty of room for the sake or working, and for the sake of allowing the screens to fill up completely. I should be able to increase my overall yield by allowing all of the screens to fill up 100%, however some of the girls are going to need a second screen for support for sure.

18492217_10210923864645905_1952441786_n.jpg

This is the light controller I decided to go with. I'm no electrician, but I know enough about the basics to avoid burning my house down or kill myself. I calculated it so that not a single one of my breakers exceeds 75% maximum capacity, and all of my extension cords are all 12 gauge which is pretty much overkill for anything I could possibly plug into it from the grow. Safety first! Can't grow meds if you're homeless or dead! If you plan on growing with more than one light you should really look into researching the basics of electricity or how it works. I'm no genius, so if I can understand it then anyone should be able to also :P

The light controller is rated for 30 amps and can be wired for 120v or 240v. I've got it connected to an RV hook up that came with the property, I just bought a weatherproof RV hookup cable and cut the female end off of it, stripped the wire, and installed the wire into the controller. Tested it out and everything works as it should. For those of you wanting to run multiple lights but are limited to 15-20 amp breakers then this is your solution. You could do the exact same thing with a dryer cord for a dryer outlet instead of an RV connection, it's basic enough that someone like myself could do it. Just make sure to show electricity respect, like everyone else echoes on these forums, you don't often get a second chance with electricity!

The swamp cooler situation has been figured out also, and today I actually accidentally discovered that it's going to work in tandem with the exhaust from my hooded 1000 watt lights. Swamp coolers work best when hot air is being pulled through the dampened pads, I happened to place my exhaust for my lights directly above the swamp cooler. So pretty much my light exhaust will exhaust 2000 watts worth of light (7000 BTU heat) right above my swamp cooler for it to suck through the pads and work as it should. I'll be running my lights during the night, so if things get too cold for my swamp cooler to work the hot air will help it out.

I made a manifold for the front register of the swamp cooler out of cardboard, it's pretty much just a box that fits over the front of the swamp cooler and has my line of ducting installed in it as well. The cool air blows from the swamp cooler into the cardboard box, and then is forced into the ducting that leads into the shed. However the airflow was weak no matter what I tried, until ventilation 101 finally hit me like a ton of bricks. The fan inside of the swamp cooler normally pulls air through the pads and out of the front, but in my case the front is connected to a cardboard manifold and ducting. So instead of the fan in the swamp cooler pulling air like it should, it's actually pushing it instead as a result of my ducting which lead to the weak airflow. The way to install that? Install an inline fan onto the ducting inside the shed so that the swamp cooler can then proceed to work as intended. The best part about doing it that way? The inline fan uses 1.7A at 2500 rpms where as the swamp cooler motor on high uses 5.5A at 1400 rpms, so I'm using less electricity while doubling the amount of air I can move. Both the inline fan and the water pump in the swamp cooler will be plugged into a temperature controller that will shut them off once my temps hit the desired 75-85 degrees, that number will depend entirely on the amount of CO2 my girls will take. Even when it gets to 115 degrees out my swamp cooler will have absolutely no trouble keeping the temps where I want them to be.

ach-evap-cooler-temp-chart.jpg

So in 110 degree weather, if the RH is 2% I can cool my room to 75 degrees. If the RH is 20 and it's 110 I can still get my room to 85 degrees. As the chart above shows, these things will keep your temps exactly where you want them and they work as a dehumidifier as well. If you live in a state where you can use a swamp cooler, I can't recommend it enough. In the right climate, a simple swamp cooler is capable of performing the same as 2 15k BTU air conditioners, which is what I originally thought it would take to properly maintain temps in the shed. They're cheaper to buy, cheaper to run, and easier to maintain. However, you have to account for the fact that on those rainy and humid days your swamp cooler will essentially just be a fan. Fortunately I still have the air conditioners to pick up the slack on those days, but depending on how things go I may be able to get away with a single 15k BTU A/C on those days if the girls will take enough CO2 to allow me to raise the temps to 85 degrees. Not having to cool your room that extra 10 degrees really goes a long way, it's WAY cheaper to buy propane than it is electricity and if running CO2 allows you to keep your temps at 85 degrees then it's way worth the initial investment when you consider the money you say long term.

Forgive my rambling, I just like to include my thought process in my posts because I'm trying to make this grow journal into something that I wish I could have had when I spent all of those months doing research. This thread/grow is a culmination of 5-6 months worth of planning and research, as well as years worth of mistakes and failures; I have a lot of things I hope to accomplish with this journal: 1) Save people that were in my shoes 5-6 months of researching by providing all of that information in a single thread, 2) To show people that anyone can do it if they put the work in, 3) To keep track of my progress/steps, and 4) To teach as well as to learn more.

If you have the knowledge and the money to buy yourself a tent, a light, and everything else you need then you can grow your own meds. I'm going to do my best to make sure that the knowledge part of the equation isn't an issue with this thread, I want to show that with just a small start up investment you can provide all of the meds you could possibly need. You don't have to pay $300/oz for meds, you don't have to worry about what's in your meds, and you don't have to leave your house to get your meds! If everything is done properly, a 4x4 tent with a 1000w light is capable of producing 1.5-2 lbs every harvest for the cost of 3 ounces of meds at retail donation.

If everyone started growing their own organic medicine then all of the crap in the dispensaries would cease to exist due to a lack of demand. Everyone would know what MMJ is supposed to be like, something that doesn't make you cough your brains out, something that doesn't make you feel like you have a lump between your ribcage and lungs, something that tastes and smells unlike anything else. I'm not faulting anyone's particular method of growing, that's not my place and there are a thousand ways to skin a cat. I've seen some incredible work from hydro growers in fact, and that takes a lot more skill to pull off for sure! But in my experience, organic is always easier and better.

If everyone that was capable of growing knew how to grow top quality meds, then only top quality meds would be available in dispensaries. I know for a fact that dispensaries buy outdoor and sell it as "top shelf indoor" and have the experience to back that claim up. I would vend my meds at a donation that was affordable to everyone, I made it so that the prices would be for 10/g and 200/oz so that the vendor, dispensary, and patient are all happy. So what did they do? They labeled it as top shelf indoor and had it at a 350/oz donation! I was livid and the donations were adjusted immediately after I had a talk with the owner. A dispensary is an awful lot like a mechanic, 9/10 times they only give a fuck about your money and not fixing your problem. If you happen to find the 1/10 then hold on to them for dear life. Why would a dispensary pay 2k+/lb when they can sell 1-1.5k/lb outdoor for the same price? Greedy people like that are why it took so long for people to respect cannabis as a medicine, and a lot still don't because of all of these drug dealers selling their crap for top dollar.

I've practically written a book so I'll stfu now. As always, for those of you that chose to stop by and read I thank you for your time :)
 

kratos015

Well-Known Member
Been trying to get around to this for ages, but today I finally got my soil put together and ready to go. Just equal parts peat, aeration, and humus with some light amendments.

Soil consists of the following:

Base (7 cu ft)

6 cu ft. Peat Moss

18554938_10210942379508765_1010708553_n.jpg

1 cu ft. Bio-char

18492450_10210942379948776_1524911336_n.jpg

Humus (7 cu ft)

- 4 cuft Wiggle Worm Earthworm Castings
- 1 cuft Michigan Peat compost
- 2 cuft Homemade Vermicompost from the bins

18552758_10210942380788797_459158998_o.jpg

18552836_10210942381148806_882504016_o.jpg

Aeration (7 cu ft)

18554626_10210942379788772_1495976290_n.jpg

- 6 cu ft Perlite
- 1 cu ft Lava Rock

18554721_10210942381588817_1077437597_n.jpg

Mixed it up somewhat before adding the amendments, doesn't look like much but all together it's a little over 22 cu ft of living organic soil, no-till.

Onto the amendments:

18516165_10210942380508790_88260190_n.jpg

Equal parts Neem Meal, Crab Meal, and Kelp Meal. 1/2 cup of each for every cubic foot of base soil.

18493851_10210942381428813_178823415_o.jpg

Then we add the minerals (forgot to take a photo of the minerals themselves :()

18493877_10210942381708820_1897492237_o.jpg

18553933_10210942381948826_1569458609_o.jpg
4 cups of minerals/rock dust per cubic foot of base soil. The 4 cups of minerals consists of: 1.5 cups basalt, .5 cups Glacial Rock Dust, 1 cup Oyster Shell Flower, and 1 cup Gypsum. You could just replace the .5 cups GRD with Basalt if you'd like, the GRD isn't necessary but I just included it for the diversity. The key players here are the basalt, OSF, and Gypsum. The OSF is your buffer for the peat as well as your source of calcium, the Basalt provides silica and a host of other trace elements and minerals to the plant the second the roots make contact with it, the gypsum and GRD are also responsible for providing other trace elements and minerals with the GRD even providing very very small doses of NPK.

One thing that may stand out to some of the more seasoned soil growers is the seemingly low amount of phosphorus in the mix. Apparently, if your soil is too high in phosphorus you actually inhibit the growth of certain microbes and lose out on a wide variety of microbes if you go too high in phosphorus in a living soil. Keep in mind this only applies to a true living soil where you are nurturing the soil and not the plant.

You do have to top dress every month or so in order to keep the soil microbes fed and happy.

And just a bit about the Wiggle Worm castings. A lot of people turn up their nose to the stuff, and while I can see their reasons for it, it makes a lot of people believe that it is a bad product and I certainly wouldn't go that far. At the end of the day, Wiggle Worm castings are still castings. However they are a very large scale operation and don't take the time to feed their worms like you or I would, as a result the castings aren't nearly as amazing as homemade castings. I had 2 bins with a total of 3000 worms and was only able to produce 2 cu ft total the last time I harvested, however it was vermicompost and not pure castings. You could tell from the smell that it was good stuff, the Wiggle Worm had little to no smell at all. Before I had a worm farm and when I ran Sub's Supersoil, I had good results using the Wiggle Worm castings.

So, if your worm bins aren't producing the amount you need then there is no shame in substituting for Wiggle Worm if you can't find a local supplier. Back in Southern California I lived 5 minutes away from a worm farm so not having a bin was no big deal. Now, I live out in the middle of nowhere. The closest hydro store is over 100 miles away, so ordering online was much more practical. It depends on your situation, use WW as a last result but if that's all you got you'll still get good results. It's just that your best results will come from homemade castings. I'm not too concerned about using WW because within another month I'll be harvesting my bins again, providing me with 2-3 cu ft of more vermicompost/castings. I'll simply top dress the girls with those before I switch the lights to 12/12. No biggie :)

So after you've added everything, you know the rest! Mix it up real good, get it a little moist, then mix it up some more. Put them in pots and get the soil nice and moist, then keep it that way for a week or two until your soil starts building life. I'm thinking that within another 7-10 days I'll be transplanting the girls into the shed. The electric bill for the shed in veg is gonna hurt, so I'm trying to split the damage up between two billing cycles. Flower won't be too big of a deal though, 6 hours may not seem like much but it sure as hell is when you're running 4400 watts!
 

kratos015

Well-Known Member
With the exception of the inline fans, ducting, and CO2 generator the shed is good to go. I'm currently using one of the inline fans for the veg tent, so I can't hook up the ducting until I move the girls into the shed. The line for the propane is all set and good to go, just needs a full tank of propane and that's all set as well. Other than that (and of course some cleaning) I'm ready for business.

18553986_10210942382028828_1145461713_o.jpg

18516893_10210942382108830_155384892_o.jpg

18516427_10210942382428838_537954749_o.jpg

18516649_10210942382508840_1568223164_o.jpg

As you can certainly notice, the second roll of the bubble insulation was way different than the first roll I got. I just decided to take a joke and use it up anyway, I plan on getting drywall on the walls anyway so this will work for now. Then when I get drywall this can act as my vapor barrier ;P

The pots are enormous though, I can't even wait to see the growth I get in these bad boys. They're all 2 feet wide in diameter and 16 inches tall!

30 gallon

18553869_10210942382908850_1825606436_o.jpg

25 gallon

18553751_10210942382988852_401070575_o.jpg

18518541_10210942383228858_1385909704_n.jpg

I had to get a 30 gallon pot because the site I ordered from only had 5 25 gallon geo pots and I needed 6, so I just got a 30 gallon instead :P This actually works out quite nice for me, because I can have an extra 5 gallons of living soil for the cream of my crop. So far it's a tie between the Purple Trainwreck and the Berry Bomb. The Purple Trainwreck has slightly more nodes and tops than the Berry Bomb does, however the nodes and tops on the Berry are not only looking like they're preparing to form golf balls, but the stems on them do as well! I'll get some photos of all of the girls individually so that I can get some second opinions :)

That's it for the updates, but I wanted to touch down on the reason for the size of the pots and address a few misconceptions concerning them. Please don't take this as my bashing of anyone's technique because that is certainly not the case, this is just what I've come across in my research. I found that most of the people running living organic soils indoors were using 5-7 gallon pots and some of them were recycling the soil instead of running no-till. These were journals from other grow forums, including this one and might I add and they were some amazing grows. Some of the guys on Instagram are also doing amazing things, some of them had full blown beds for their indoor grow and the yields and quality were humbling to say the absolute least. I recommend checking out some of the Living Organic Scrog guys on Instagram for sure!

For sake of example, let's say we have a 4x4 sqft area with a 1000 watt light. Having a single large pot in favor of multiple smaller pots in the same square foot area will product as much, if not more than the multiple plants in the same space and conditions for a variety of reasons.

In living organic soil, you want as big of a pot as your space and other limitations will allow for. In the 4x4 example, we could have a various amount of plants. 25 1 gallon pots, 9 3 gallon pots, 4 7 gallon pots, or 1 30 gallon pot. The main reason people go with more plants is to reduce the amount of time spent in veg. The 25 1 gallon pots would save a lot of time, because you could just flower clones and call it a day. But with living organic soil, you have to keep the soil into consideration. A 30 gallon pot is going to have a much larger population of microbes than a 7 gallon pot. Having a 30 gallon root mass in constant contact with a 30 gallon population of microbes will produce a tree. This tree is capable of uptaking way more than a large amount of smaller plants. Another reason to have large pots is because certain microbes will only grow 12 inches below the surface of your soil, so having pots smaller than 12 inches will prevent you from having certain microbes in your soil.

You could still grow the 25 clones in a similar fashion though if that's what your preference is. Just build yourself a 3x3x2 raised bed and throw all of the clones in there in rows! The point isn't so much the amount of plants that you grow but the amount of plants that you grow in them. As long as you're working with a large mass of living soil, plant however many plants you'd like to form a nice even canopy.

Anyway, as always guys, thanks for stopping in :)
 

kratos015

Well-Known Member
Got the screens all finished now, the CO2 generator has been hung, and pretty much everything is good to go as far as the shed is concerned.

18600832_10210973739092735_760245225_n.jpg

One of the 4 screens I built today, this is one of the two 4x4 screens for the 1000 watt bulbs. I also built two 3.5x7 screens for the 600 watt bulbs, two lights per screen. I plan on having gaps in between the plants to avoid any potential mildew issues, so that will remove a couple of square feet from the total coverage. After I account for that though the room is going to be 75 square feet of screen to fill and I plan on filling every square inch of that 75 sq ft! I'll be vegging for however long it takes to completely fill the screens since space isn't an issue with height or length/width.

I cannot even wait until all of the screens are full! This is the first time I've taken on a project of this size so I'm quite curious to see what my final outcome will be.

The plants will be going in the shed within the next 3-5 days, depends on when my next day off is pretty much :P I was going to wait until they hit two months, but as you can see there's no way I can let them go another 10 days! Quite frankly, they should have been in the shed a week ago because they're clearly rootbound by this point. I had to top dress them with some neem oil because I'm getting signs of N deficiency. I watered with coconut water a couple of days ago and all of the sudden I have tons of new growth and an N deficiency, kind of caught me off guard because I wasn't expecting to have to top dress for another week. Guess I know which ones are the heavy feeders now ;)

The 29th of this month marks 8 weeks for the Purple Trainwreck, Berry Bomb, Cluster Bomb, and Amnesia Lemon, the 7 week mark for the and Critical + 2.0 and Amnesia Haze. The plants were trained before I took these photos, been spending the last 4 weeks establishing even canopies on these babies to prepare them for the screens.

Purple Trainwreck

18579415_10210973737452694_1488164447_n.jpg

Amnesia Lemon

18579243_10210973737612698_476203962_n.jpg

Cluster Bomb

18601470_10210973737892705_1444611167_n.jpg

Critical + 2.0

18579017_10210973738372717_779461832_n.jpg

Amnesia Haze

18624685_10210973738492720_2077290410_n.jpg

Berry Bomb (before training)

18601475_10210973738572722_1798532535_n.jpg

Berry Bomb (after training)

18578968_10210973738892730_801413562_n.jpg

The Berry Bomb is clearly going to be an incredible yielder, this girl has way more nodes than the others and on top of that it's looking like she's going to give off some golf balls. This is definitely worth of one of the 1000 watters, the question is which one will I put under the other one? The Cluster is supposed to yield well, and the Critical is supposed to have almost as good of a yield, but I'm most excited about the Purple Trainwreck so I'm kind of conflicted here.

The next time I update this journal the girls will finally be in the shed and things will really start to get interesting.

Thanks for stopping in!
 

kratos015

Well-Known Member
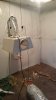
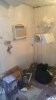
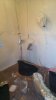
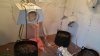
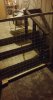
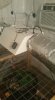
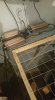
Shed is 100% done and I'll be doing the transplants within the next hour or two, so expect an update on that once I'm finished transplanting :D

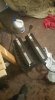
I did happen to run into a few snags though. One of my 600 watt ballasts crapped out on me and is just not working for some reason. I took it apart and the capacitors and connections look totally solid. I even swapped out the fuse with the backup fuse and even that didn't fix it.. so I have to buy a new 600 watt ballast :/ LAME! I'm still going to transplant a plant underneath the unlit fixture though because there is enough light in the rest of the room when the lights are on, I would get the most amazing growth but it will be about the same as having it under a florescent until the ballast gets here. Of course since it's Memorial Day weekend, I'm gonna have to wait until at least Tuesday or Wednesday for it to get here :/

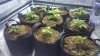
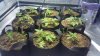
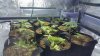
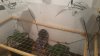
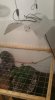
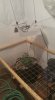
And on top of that, one of my 1000 watt hoods isn't the standard plug in, it's a hydrosun and I guess they have a unique connection as opposed to the others. So I have to order an adapter in order to get that hooked up lol. So as of now, I'm down a single 1000 watt and a single 600 watt but both should be up and running by Wednesday. As you can tell from the photos below, I simply can't wait any longer and they should have been in the shed a week or two ago! It is what it is, gotta improvise. Always hope for the best and plan for the worst, in life and in this business.

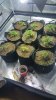
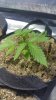
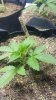
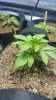
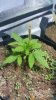
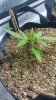
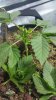
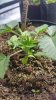
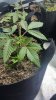
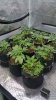
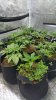
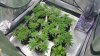
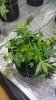
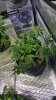
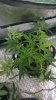
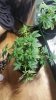
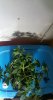
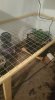
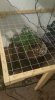
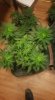
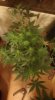
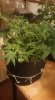
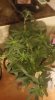
While I wait on getting my transplants taken care of, I figured I'd take a photo of the ladies for you guys so you can see how they look before going into the shed.

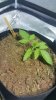
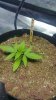
Cluster Bomb (Bomb Seeds)

18763067_10211035654360578_2085146644_n.jpg

18741946_10211035652280526_255641724_n.jpg

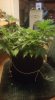
Berry Bomb (Bomb Seeds)

18767145_10211035649360453_848654761_o.jpg

18742055_10211035648680436_1490406396_n.jpg

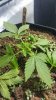
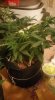
Jack Herer (bag seed)

18788465_10211035648520432_321772659_n.jpg

18644383_10211035648120422_1164677894_n.jpg

Purple Trainwreck (Humboldt Seeds Organization)

18762498_10211035647920417_1852823145_n.jpg

18762968_10211035647800414_930535987_n.jpg

Amnesia Lemon (Barney's Farms)

18741378_10211035646520382_209464819_n.jpg

18741617_10211035646400379_1988826569_n.jpg


Those of you that have been following the journal from the beginning may notice the absence of the Critical + 2.0 in favor of one of the Jack Herer plants, as well as the absence of the Original Amnesia.

Concerning the Critical + 2.0 I'm just not quite all that happy with how it's turned out compared to the Jack Herer pictured above. The Jack Herer has a nice little "halo" of nodes growing upward and is getting so big that it's dwarfing the Critical, on top of that I'm quite disappointed with the node spacing on the Critical and how skinny the main stems on it are compared to the Jack. The Jack is clearly preparing itself for a heavy yield where as the Critical just looks mediocre and when the Critical touts itself as a heavy yielding strain that produces golf balls, yet doesn't look the part I'm simply not inclined to put it into a 25 gallon pot. The description says up to 700g per square foot but I'm just simply not seeing it based on the size and structure of it.

The Jack Herer definitely deserves a full pot, where as I'll likely just flower the Critical + 2.0 in the 2 gallon pot it is still currently in. I only got one seed, so perhaps the phenotype I got was just mediocre. The only snag is that the Jack Herer seeds were not feminized, and although the one pictured above certainly looks like a girl I can't say that it is with 100% certainty just yet.

So the plan for now is to transplant the Jack into a 25 gallon and wait for it to sex, should it end up being a male I can simply just rip it out and replace it with the Critical + 2.0 without any problems. If the Jack is in fact a female, it'll stay in the 25 gallon pot until harvest. If it's a male, I'll cull it and swap it with the Critical because I know for sure it's a girl. I have two Jack Herer plants, the one pictured above and another one I don't have pictured. The one not shown is looking like a male in structure, plus the stems on it are significantly smaller than the one pictured above. This leads me to believe that the one with smaller stems is a male and the one with the thicker stems is a female, as the thicker stems are preparation for buds whereas a male doesn't need to prepare itself for buds. I'm pretty sure it's a girl, but until you see pistils you simply can't be 100% sure.

As for the Original Amnesia, the size of that plant as well as the node spacing is just obscene on it. It is WAY bigger than the other plants and will be taking one of the 1000 watt lights to itself (The Cluster Bomb gets the other 1000 watter) because of how large this thing is. However, until the adapter gets here I can't transplant the Amnesia. Since it's already so much larger than the other plants, I'm just going to keep it under a florescent light until the adapter gets here, then it will be transplanted into the 30 gallon pot. It's funny, the Amnesia says it's "manageable in height" in the description, yet it's become my largest plant! The Critical says it's good to "control it's height" but it's not even growing enough to warrant a transplant!

This is exactly why people on these forums will tell you that the descriptions are useless for the most part. Only use the descriptions to get a general idea of how the plant will produce and the characteristics of the phenotypes of the plant, but never assume the descriptions are 100% accurate because in my experience they most certainly are not. It all comes down to the phenotype you get. In most cases, if you want a seed to match the description on the website then you're gonna need to do some phenotype hunting.


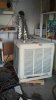
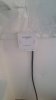
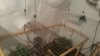
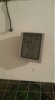
The swamp cooler is kicking ass too! Even with the lights on at full power my temps never got over 83 degrees, when the lights are dialed down to 50% the temps hover between 79-81 degrees. As you all know, normally those temps are on the high side but this is exactly why I plan on supplementing with CO2. The main reason for me going with CO2 is so I can get my temps to 85, even 90 degrees without any sort of negative consequences. For where I'm living now, this is an absolute must because it's starting to get to be over 100 degrees here pretty much every day. That's the best part about swamp coolers though, the hotter it gets outside the cooler the swamp cooler gets.


I have no experience with running CO2 so I plan on taking things slow and seeing how the girls react to it, I'll be gradually pumping the ppms up to 1200-1500, it's entirely dependent on what the plants tell me they want. Growing is a lot like cooking, it's much easier to add things in small amounts as opposed to attempting to remove anything if it's too much.

For those of you that are as new to CO2 as I am, there are a handful of things that you need to consider about it. There is a lot of consensus that anything over 1200ppm is actually a waste and that only certain strains like more than 1200ppms, however I've seen some journals where people let it get as high as 2000ppms.

Another thing about CO2 is you want to make sure that you shut it off around 2-3 hours before lights off. The reason for this is because when the lights go off, there is still CO2 in the stomata. However, without light the plant is unable to process the CO2 so it actually gets released back into the air. On top of this, your living organic soil will also produce some CO2. After watering the pots to keep the soil moist, it's not uncommon for me to see 450-550ppms on my CO2 meter and this is without having any plants in the soil or my CO2 generator running. You absolutely do NOT want your CO2 to be past 500-600 ppms during lights off and you should vent the room of the CO2 at least once every day or two before lights off.

From a thread on ICMag

"A concern with high Co2, especially over ~1,000 ppm, is ethylene buildup. Even low ppm concentration of ethylene gas can affect flower (inflorescence) size, plant growth rate, seed set (for breeders), senescence, etc. If grow rooms or greenhouses are not vented at least once, ex., at the end of the day, and Co2 is used at 1,000 to 1,500 ppm (esp the latter), ethylene can buildup to levels that will lower yield."

source (https://www.icmag.com/ic/showthread.php?t=221893)

Another thing about CO2, after week 6 you absolutely do not want it past 600 ppms for any reason. This is because CO2 is actually capable of hindering the ripening process as well as terpene production. You will actually run the risk of lowering your yield AND potency if you run CO2 past 6 weeks of flower. We absolutely do not want this to happen.

And as I'm sure most of you already know, CO2 is an absolute waste if your nutrients, lighting, temps, and watering aren't up to par with it. The more CO2, the hotter your temps need to be to promote transpiration in the leaves and the opening of the stomata. With extra CO2 comes the need for extra light (the extra photosynthesis you receive from the CO2 is directly proportional to the light the plants have available), extra water and nutrients (more photosynthesis/transpiration = more water and nutes).

Anyway, that's pretty much it for the time being. Within the next few hours I'll be finished transplanting and I'll post an update with photos of the girls in their final pots as well as the shed. As always, thanks for stopping by :)
 

kratos015

Well-Known Member
Ok, just as promised I finally got some photos of the girls inside the shed. They're a bit crappy though because I was in a bit of a rush to finally relax for a bit, spent around 5 hours fine tuning everything and doing the transplants.

Hit all the holes with VAM endo mycorrhizae, put the girls in the pots, then sprinkled some of the Xtreme Gardening mycorrhizae around the root mass and buried them all up. The girls were then fed their doses of Liquid Seaweed, Ful-Power, Coconut Water, TM-7, and Recharge, and watered until there was runoff. The lights are currently off at the moment, so I'll snap some better photos when everything is up and running in a few hours.

The photos were taken with the florescent light on but none of the MH bulbs were on at the time, gave them enough light to finish the transplants and the odds and ends and shut the lights off.

Cluster Bomb

18741895_10211037700211723_375874974_n.jpg

Amnesia Lemon


18762543_10211037699651709_1167400532_n.jpg

Jack Herer

18741605_10211037699531706_1814673304_n.jpg

Jack Herer (Left) and Amnesia Lemon (Right)

18745021_10211037698651684_1727270165_o.jpg

Purple Trainwreck (Left) and Berry Bomb (Right)


18767241_10211037698051669_1059134439_o.jpg

Berry Bomb

18788760_10211037697291650_475653875_n.jpg

Purple Trainwreck

18788214_10211037697131646_978731235_n.jpg

Original Amnesia

18788570_10211037697011643_244432784_n.jpg

I ended up putting the Original Amnesia in the final pot today after all because I figured since the Jack Herer was going to be under a non-working light then why not the Amnesia too? They're the largest of the bunch at the moment, and it won't be too harmful to my schedule if they're a few days behind in vegging since they've already got a bit of a head start. They won't be getting any direct light, but there's more than enough light in the room itself for them to at least benefit from the pots in some way. They were going to be stored under a floro anyway so I figured indirect light from 2800 watts dialed down to 1250 watts would be much better than direct light from a floro. Come Wednesday that should be fixed up and the Jack and Amnesia can start catching up.
 

kratos015

Well-Known Member
Figured I'd include photos of my equipment and monitor readings too.

18788110_10211037700571732_1694856510_n.jpg

Swamp cooler is working a little too well it seems! Had to turn on my AC for a bit to get rid of some of that humidity haha. Temps are great though, and the room hasn't ever got hotter than 85 yet. But once I get CO2 going the 85 degree temps will actually be perfect for lights on. May have to use the A/C to keep things in check.

18763407_10211037700851739_2127055057_n.jpg

CO2 meter all set up and ready to go, I guess those exposed wires don't have any current and the unit comes standard like that so you can plug the controller into another device or something. Didn't mess with it because the manual said it'd void the warranty and that there is no current going through it.

Near 400ppms already though, was at 350 or so around the time I got in the room. I'm gonna let the plants settle for a bit before pumping CO2 in the room.

18763089_10211037701691760_788850130_n.jpg

18763338_10211037701651759_1996314278_n.jpg

Got the ballasts as high as I could get them to avoid any accidental exposure to water, I've also rearranged the cluser of cords :P I would have hung the ballasts on the studs, but was afraid it would get too hot and be a fire hazard. The 1000 watters have little stumps on the bottom so that the ballast themselves aren't sitting on the plastic crate, but rather the stumps. The shelf holding the 600 watters is made of metal. Can't harvest if you burn your grow down! :P
 
Top