Abiqua
Well-Known Member
It is Arctic Mx-5 paste, I believe, that comes on the sinks. it can be used...I usually scrape it off, since I have only ever used holders and had to scrape it off, to drill holes....Then I apply my own..which lately has been Prolimatech Pk2....everyone recommends PK3 and its probably worth it, but I got the Pk2 for about $4 from Newegg and it is about half the thermal impedance of the Arctic line, even their really expensive stuff.....so all the PK's are good in my opinion, Pk1,2, and 3....I wondered the same thing, and I ordered the exact same heat sinks as you, in the description of the item it lists the thermal paste, and I wondered if maybe it came with some on there, thanks for the heads up , now it makes me wonder as well about the polishing because my lazy butt is already dreading the drilling and tapping let alone lapping and polishing, hopefully nothern lights or Apique will have the answer on that one. those cob holders were only like 1.80 each, and I am considering just using the thermal glue paste and stick them on there and call it good,??
Here is the Thread on Tapping, the LED section put together....
https://www.rollitup.org/t/a-thread-on-tapping.856745/
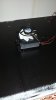
I drill and tap by hand with a 13v cordless drill with a adjustable stop-chuck....a tapping block or a hand tapper with a guide are good alternatives for a drill, IF doing by hand.....[you can find those in the tapping thread!...]
I find that putting a small magnetic level on my drill does all the work......and drilling the pilot hole is the critical part, tapping is direct result of how well you drill....
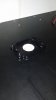
Since the Holders require M3 6mm screws, what is suggested is to use a 4/40 tap and #43 drill bit [.0890" or 2.26mm]
I suggest and own this one... [especially for beginners]
[Spiral flute bottoming tap - this is meant to tap a blind hole [aka a hole with a bottom]
http://www.ebay.com/itm/4-40-H2-Spiral-Flute-Bottoming-ANSI-CNC-Tap-HSS-V-TiN-Coated-YG-1-Part-F8162-/310549937294?pt=LH_DefaultDomain_0&hash=item484e37fc8e
Roll form thread taps are also an option for the beginner!
[These work a little different, they actually extrude the shape of the thread, INSTEAD of cutting a ribbon of metal away, like the spiral flute] [holes can be drilled faster and with less accuracy...generally]
http://www.ebay.com/itm/BALAX-4-40-H5-ROLL-FORM-BOTTOM-TAP-10725-010-NEW-/121437774401?pt=LH_DefaultDomain_0&hash=item1c46416241
As for sanding and polishing heatsinks.....in the beginning this practice was started with single Red diodes like the Far Red 730nm's or Deep Red 660's....These were the most finicky in the LED world, so sanding and polishing was a little trick to help just that little Nth more in squeezing out performance.....well with White LED's, SupraSPL ran all of these tests and showed everyone how to sand....150, 600, 1000, 2000 grit in sequence...I started there.....
But then he started doing tests with no sanding, stock paste and high power [100w's +] and comparing them against his very lovingly polished beauties....sometimes results came out in favor of the heatsinks, where NOTHING had been done to them at all!.....
I clean everything with isopropyl real well, and then apply paste and my mounting method...only if I have a nick or something, might I hit it with 1000 grit sandpaper...

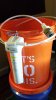

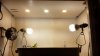
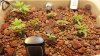

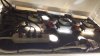
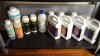
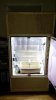
 Anyway, there it all is on one adjustable board, everything is completely secure, can tilt it, flip it whatever. and just one plug to remove if i need to take it out. Anyway here is a pic of up top, and thrown in a pic of my my nutrient array.