I'm a believer

TechnoMage

Well-Known Member
I've been a soil grower for about a decade now. Fox Farm soil and nutrients and I pretty much had the soil grown dialed in.

Then a few months ago I decided to try Hydro. I'd thought about hydro before but it seemed more complicated than soil. My biggest problem with soil was that I had to water every other day, if I missed a day the plants would definitely suffer. My job is causing me to travel more and I wanted something that I could leave for a few days without harm.

After looking over the options I decided to try DWC. This is actually my second DWC grow. I tried one back in July and while I got a decent harvest I knew I could do better. Most of my problems were around not knowing what to expect and switching nutes several times.

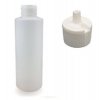
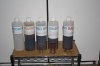
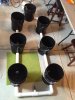
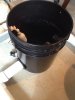
For this grow I knew exactly how I wanted things laid out and did some tweaking to my setup like wrapping the buckets in Reflectix to keep the water temp down. I also settled on using Botanicare KIND nutrients.

Here's a photo 21 days into the grow.
I'm a believer 10-25-2014 7-44-52 PM.JPG

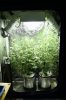
I've never had growth like this in soil. The one plant is 4' tall from the top of the bucket.
 

butsack

Well-Known Member
flowering with MH? how many watts? I really would like to hear your thoughts on Botanicare KIND.
 

TechnoMage

Well-Known Member
I'm flowering with a 600w HPS. My photos don't have a yellow cast because I've set a manual white balance on my camera to adjust.

So far I've been very happy with Botanicare Kind. My first hydro grow I started with Fox Farms but I didn't like the sediment that was building up in the buckets.

The only problem I had at first was measuring stuff out. I only need to mix up 5 gallons of water to split between the two buckets. That works out to only 10ml-70ml of the different nutrients and pouring those small amounts out into the measuring glass was difficult. I bought some 32 ounce plastic bottles with a flip top cap similar to what you'd find on a shampoo bottle.
$_12.JPG
They're about a dollar each and make dealing with these small amounts of nutrients much easier. I printed out some labels for each bottle because I'm anal retentive. :)

Here's a shot of the different nutes I'm using each in their new bottles. The measuring glasses I use are in front.
IMG_4520.JPG
 

ttystikk

Well-Known Member
I'm flowering with a 600w HPS. My photos don't have a yellow cast because I've set a manual white balance on my camera to adjust.

So far I've been very happy with Botanicare Kind. My first hydro grow I started with Fox Farms but I didn't like the sediment that was building up in the buckets.

The only problem I had at first was measuring stuff out. I only need to mix up 5 gallons of water to split between the two buckets. That works out to only 10ml-70ml of the different nutrients and pouring those small amounts out into the measuring glass was difficult. I bought some 32 ounce plastic bottles with a flip top cap similar to what you'd find on a shampoo bottle.
View attachment 3281232
They're about a dollar each and make dealing with these small amounts of nutrients much easier. I printed out some labels for each bottle because I'm anal retentive. :)

Here's a shot of the different nutes I'm using each in their new bottles. The measuring glasses I use are in front.
View attachment 3281235
This is the kind of idea from a 'noob' that has me scratching my head, wondering why everyone doesn't do it this way. GREAT IDEA for working with small amounts of nutrients!
 

SeedHo

Well-Known Member
I'm flowering with a 600w HPS. My photos don't have a yellow cast because I've set a manual white balance on my camera to adjust.

So far I've been very happy with Botanicare Kind. My first hydro grow I started with Fox Farms but I didn't like the sediment that was building up in the buckets.

The only problem I had at first was measuring stuff out. I only need to mix up 5 gallons of water to split between the two buckets. That works out to only 10ml-70ml of the different nutrients and pouring those small amounts out into the measuring glass was difficult. I bought some 32 ounce plastic bottles with a flip top cap similar to what you'd find on a shampoo bottle.
View attachment 3281232
They're about a dollar each and make dealing with these small amounts of nutrients much easier. I printed out some labels for each bottle because I'm anal retentive. :)

Here's a shot of the different nutes I'm using each in their new bottles. The measuring glasses I use are in front.
View attachment 3281235
i like using syringes for small batches.......but making your own bottles is cool tho.
 

blackforest

Well-Known Member
I'm becoming a believer as well. Saw a friend's undercurrent system and decided to build my own. I got ahead of myself a little. Still 3 weeks left in the flower tent so this is just hanging out in the basement for now. I tried to do this as cheaply and efficiently as possible. Last thing to order are disc style air diffuses and a mag drive pump. Since this picture, I added some rubber couplers to 4 sections so I can take it apart and move it easier. It was fun to build!

IMG_2471.JPG

IMG_2472.JPG

IMG_2469.JPG


I bought a cheap $4 float valve on eBay and used a couple 3/4 bulkheads for the drain and for the pump line to the top of the epicenter. For the drain I used the 3/4 threaded bulkhead and a pvc>hose thread adapter then a small shut off valve so I can connect a hose to it to drain. Works like a champ. I have a small inline 1000l/hr pump but am going to upgrade to a 700gph mag drive I believe. CANT FRIGGIN WAIT!! to get this going
 

Myles117

Well-Known Member
nice looking room! I was also a soil grower for years and then switched to flood tables and haven't touched soil since. Hope you continue to have great results :D
 

nawaz

New Member
The only problem I had at first was measuring stuff out. I only need to mix up 5 gallons of water to split between the two buckets. That works out to only 10ml-70ml of the different nutrients and pouring those small amounts out into the measuring glass was difficult. I bought some 32 ounce plastic bottles with a flip top cap similar to what you'd find on a shampoo bottle.


__________________
Nawaz
 

Myles117

Well-Known Member
good idea :) i always used to use syringes for measuring very small amounts of nutrients. more than one way to skin a cat. :)
 

TechnoMage

Well-Known Member
I'm becoming a believer as well. Saw a friend's undercurrent system and decided to build my own. I got ahead of myself a little. Still 3 weeks left in the flower tent so this is just hanging out in the basement for now. I tried to do this as cheaply and efficiently as possible. Last thing to order are disc style air diffuses and a mag drive pump. Since this picture, I added some rubber couplers to 4 sections so I can take it apart and move it easier. It was fun to build!
Nice setup BF. I'm looking at building something sorta similar but it's going to be a two bucket system with a big reservoir that sits outside of the tent. Thing I still need to work out is how I get the two water lines (output, input) from the reservoir to inside the tent while still being light proof.
 
Now the next thing that will make you a believer it's when you go from hydroponics to aeroponics.

The reason these systems work so well is that it develops the root system . Bigger roots bigger plants and bigger buds.

But the problem with deep water culture is the higher the temperature of the water the less oxygen your roots get. I tried a flood and drain system myself and I did better than a deep water culture hands down had no root rot problems.

Then I went to aeroponics where nozzle spray fine mist on the roots which mixes in air and gives more oxygen to the roots. and also the sprayers are not always on and turn off therefore even also giving more oxygen to the roots.

And from there I'll never go back . The roots are really nice and white they have a whole bunch of fine little hairs and the growth is explosive.

Is a video I did when I built my first aeroponics system. :)


P.S. I was high when I made this video LOL
 

blackforest

Well-Known Member
Nice setup BF. I'm looking at building something sorta similar but it's going to be a two bucket system with a big reservoir that sits outside of the tent. Thing I still need to work out is how I get the two water lines (output, input) from the reservoir to inside the tent while still being light proof.
I've been contemplating this too. I'm just going to find a rubber grommet that is just the right size for my water line. I feel confident I could install one with no tear problems. It would be pretty small for a 1/4" water line too. Any other ideas, let me know!
 

blackforest

Well-Known Member
Now the next thing that will make you a believer it's when you go from hydroponics to aeroponics.

The reason these systems work so well is that it develops the root system . Bigger roots bigger plants and bigger buds.

But the problem with deep water culture is the higher the temperature of the water the less oxygen your roots get. I tried a flood and drain system myself and I did better than a deep water culture hands down had no root rot problems.

Then I went to aeroponics where nozzle spray fine mist on the roots which mixes in air and gives more oxygen to the roots. and also the sprayers are not always on and turn off therefore even also giving more oxygen to the roots.

And from there I'll never go back . The roots are really nice and white they have a whole bunch of fine little hairs and the growth is explosive.

Is a video I did when I built my first aeroponics system. :)


P.S. I was high when I made this video LOL
Sweet system man. I'm sure my evolution will lead me towards aeroponics as well. Heck, i'm cloning in an Ez cloner anyway! Pretty much the same thing. I'm just bored w/ soil and coco, hopefully I don't F it up!
 

waterdawg

Well-Known Member
I just started using low pressure sprayers as well, works great!!!! I was going to do a true aero system which uses high pressure to mist the roots but it can get a bit complicated when pluming it all. To OP are those auto's that your doing?
 
Sweet system man. I'm sure my evolution will lead me towards aeroponics as well. Heck, i'm cloning in an Ez cloner anyway! Pretty much the same thing. I'm just bored w/ soil and coco, hopefully I don't F it up!
Well least in my opinion I believe aeroponics is very forgiving. Just one thing you need to keep in mind, if there's a problem dump your water and flush for 24 hours and then start your solution again.

As when I was first starting an aeroponics or even hydroponics I tend to try to fix the plants with different additives . Then I just decided to dump the water flush and start again that seems to work pretty well.
 
I just started using low pressure sprayers as well, works great!!!! I was going to do a true aero system which uses high pressure to mist the roots but it can get a bit complicated when pluming it all. To OP are those auto's that your doing?
I came up with an idea to do a high pressure system . I was thinking about purchasing a replacement motor for a cheap espresso machine . Those pumps are designed to be used at high pressures. And it also has a good water flow.
Not quite sure on how well it works for long durations but in any case the sprayers are only on for a short period time and then off. So maybe it will work
 

waterdawg

Well-Known Member
You would probably want adiaphragm tank as well so pump doesn't cycle all the time. True aero on off cycles are pretty close and short.
 

ttystikk

Well-Known Member
I'm becoming a believer as well. Saw a friend's undercurrent system and decided to build my own. I got ahead of myself a little. Still 3 weeks left in the flower tent so this is just hanging out in the basement for now. I tried to do this as cheaply and efficiently as possible. Last thing to order are disc style air diffuses and a mag drive pump. Since this picture, I added some rubber couplers to 4 sections so I can take it apart and move it easier. It was fun to build!

View attachment 3281784

View attachment 3281785

View attachment 3281791


I bought a cheap $4 float valve on eBay and used a couple 3/4 bulkheads for the drain and for the pump line to the top of the epicenter. For the drain I used the 3/4 threaded bulkhead and a pvc>hose thread adapter then a small shut off valve so I can connect a hose to it to drain. Works like a champ. I have a small inline 1000l/hr pump but am going to upgrade to a 700gph mag drive I believe. CANT FRIGGIN WAIT!! to get this going
Check out my thread. I rebuilt the UC design and thew out the air pump, stones and lines, replacing them with a simple water manifold to deliver a waterfall to each tubsite.

The 'epicenter' goes away, replaced by a control bucket where the pump and water cooling coil reside. Cooling your RDWC water to below 66f is critical to the success of the approach, IME.

Instead of merely pumping water to another bucket- where UC don't want you to put plants?!- it feeds a manifold which delivers RDWC water to half inch elbow fittings in the lids of every tubsite. For my manifold I went to home depot and bought 1" irrigation fittings called funnypipe tees.
 
Top