Grow Project : Sun_burns Every Summer !

stardustsailor

Well-Known Member
Guod ,I think I'll try to wait for the hot-air solder gun ...
Perfect for SMD re-working ...
(Tiring & boring for massive SMD soldering ,though ...)
 

stardustsailor

Well-Known Member
the psu stored a lot of energie without a load in the output stage. (Capacitor and Coil). it´s the same as a car Ignition system works.
now if you reconnect the load this energie will flow and it does as you know now.
was also stupid enough to do this on my modul, and i know it. see here... https://www.rollitup.org/led-other-lighting/547085-diy-modular-led-light.html#post7754589
so, for switching drivers always disconnect the primariy side first, then connect your load.

Guod ,a resistance and a Tantalum cap in the drivers pcb power input ,would not help to avoid that ?

(Could they both be SMD ? )

I mean ,if an excess load is applied on the input ,then the resistance will "slow it " down until ti fills up the cap ...
(Values of both ,have to be calculated for ~500msec delay ... )
When cap fills up completely ,the current flows to drivers /fans ....
Correct ?
Or there's something I'm missing ?

res & cap.jpg
 

guod

Well-Known Member
Guod ,I think I'll try to wait for the hot-air solder gun ...
Perfect for SMD re-working ...
(Tiring & boring for massive SMD soldering ,though ...)

your massive Heatsink will suck up all the Heat from your hot-air solder gun or what ever you will use.

and the next Question is: how to get a new Led on the Pcb
 

stardustsailor

Well-Known Member
Well ,I think not ....
It sucks up the heat from solder gun tip yes ....

But hot air guns work differently ...(I hope ... )
I've seen hot air-working (live ) at a star pcb ...( cree led ) ..
Solder got liquid really fast ...
Guy doing the "operation" said ,"with normal solder gun ,that ain't gonna happen ... "

Hot air really heats up superficially & locally the area ...

If this won't work ...

Oh shit ...
 

guod

Well-Known Member
an other idea
get the heatsink on 100 to 120°C and try to solve the board from the heatsink.
cleaning the Heatsink is possible, but i think you need a new PCB.
 

stardustsailor

Well-Known Member
PCBs are not a problem ....
By now I can make any shape,design , with any pad ,anything ....

I 've to make better job with the protective spraying ..
( That teslanol spray is good ...But I'm searching for the orange/red lacquer used on transformers /coils copper wiring ..)

Maybe later get an good cutter ,also ...


I've to pay extra attention on solder paste applying and hot plate soldering ...
I get often tiny bridges or short-circuits between led contacts ..
(too much solder -not much solder time )..
Leds are flickering at low currents when they are soldered badly (cold solder ) or there are bridges ..

I am still a newbie to all this ....

Never made FR4 / MC pcbs in my life before ,never used stove as a hot-plate soldering station ,never worked with such tiny parts ...
Even the smallest of laser diode, seem huge to me , by now .....
 

guod

Well-Known Member
I've seen hot air-working (live ) at a star pcb ...( cree led ) ..glued on a 2Kg Heatsink?

Hot air really heats up superficially & locally the area ...

heating up alu locally.... come on
 

stardustsailor

Well-Known Member
Hey ....
Yeah ....
That's what I will do ....

Bring the whole thing (heatsink ) to "late preheating " / "early soaking stage " ,into the oven ..
( 100-120°C for 5 min will do ,i guess -oven preheated .)


And then re-work the led really quick with the hot air gun ....

I think that will work ....

(Another thing trying to rework on a 2kg ally ,from 25° C to ~240 °C
and another from 100-120° to 240°C ....
Maybe even,set hot air temp ,a bit higher than 240 °C ..)
 

SnotBoogie

Well-Known Member
could a heat gun not be aimed directly at the solder point? i.e transferring heat straight to the solder. (the heat may go to the alu, but THROUGH the solder or component)

Hate the idea of reflowing LED more than necessary, probably irrational.....


edit: I just realised you already got the broke LED off...derp.
 

guod

Well-Known Member
Leds are flickering at low currents when they are soldered badly (cold solder ) or there are bridges ..

same effect on higher current?
if not then there is a mismatch with the switching frequency of the driver at low currents.
only solution here is go for more current. set the SMD resistor to a higher value.
 

stardustsailor

Well-Known Member
same effect on higher current?
if not then there is a mismatch with the switching frequency of the driver at low currents.
only solution here is go for more current. set the SMD resistor to a higher value.


Not ...As current increases leds work properly ...
Thing is that only one or two leds might act like that ...
Not all the pcb ...Still min current is 200 mA ..
Should not been a prob for the Oslons ...
( SMD res is 1.2 K , pot is ~11 K ..)...
 

stardustsailor

Well-Known Member
Old good way for melting /destroying metal parts ....

-Car battery charger ...
&
- Ordinary AAA 1.5 volt (not alkaline ) battery opened up ,and central carbon electrode taken out ....

P3016204.JPGP3016205.JPG..........

P3016214.JPGP3016208.JPGP3016215.jpgP3016216.jpgP3016217.JPG...

Now ......Can this method somehow be used ,I wonder .....

(Learned about it ,during serving in Army .
As a Leopard tank driver ,that was an "on the field " way to fix, melted away /destroyed battery lead contacts .
Or melt/weld aluminium parts ...)
 

agios

Member
Some bad news ,guys ....

At one pcb ,one led (white ) ws flickering(just a bit ) at 200 mA ..
-" Ok .not soldered good enough or there's a tiny short-circuit somewhere ",I thought ...

So without switcing off the PSU ,I unpluged the box ,reworked the led a bit with the solder gun ...
Went back and plugged back the box (PSU switched on .... ) ...
Bam ! ..None of the leds of the pcb now ,lighted up ...
"Shit ! Something bad happened " ....
Went back ....
Check all the leds with multimeter ...
Couple pof them didn't light ....

First in the series (a red one ) has burned (close at it's cathode ,chip is totally black ...) ...
Oh ....

Now I've to fix that ....

Wonder what exactly caused that /..

Agios ,in what way provocative ,the title might be ?
Don't get it ...
I just thought that you were using a sarcastic title comparing : the Sun [that burns every summer[only!?]] and the LED SUPER PANEL that you just created which burns all year around ;-)...
 

guod

Well-Known Member
Not ...As current increases leds work properly ...
Thing is that only one or two leds might act like that ...
Not all the pcb ...Still min current is 200 mA ..
Should not been a prob for the Oslons ...
( SMD res is 1.2 K , pot is ~11 K ..)...
only one or two leds in a string goes off, rest works normal?
anything must bridged these leds and only at low current...

does this flickering change with time or is it constant?
 

stardustsailor

Well-Known Member
Yes ..
At low currents (200-250 mA ) ,and happened couple times by now ,with 3-4 leds only in the string ..
Rest works fine ....
Now ...First time that happened ,I unsoldered the leds ,wiped out excess solder and resoldered them ,without adding new solder paste ...
Problem disappeared ...
Flickering does not have any repetitive pattern or "rythm " ,neither is periodical ....
It just flickers like an EQ led ....Kinda like crazy morse signaling ...

I'm sure it's tiny bridges ...
Leds that do that ,when I test them with polymeter ,reading reads Resistance(or Voltage drop ,I'm not sure ) and does not light the led ...
Normal placed leds ,light up (at really low current ,given by the polymeter in "continuity test " settting ...)..

You know what ?

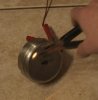
The whole secret of success,regarding kitchen hot-plating leds , is the applied solder paste thickness/quantity ..

Following a reflow soldering profile of a led ,with kitchen stove plate and playing back-forth with it's temperature knob ,might seem the tricky part ....
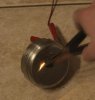
Well ..Ain't ...In fact ,it becomes ridiculously easy ,if you do it 2-3 times ....Seriously ....

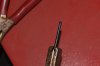
If too much solder paste applied ,at these tiny pad distances /measures ,then bridges form ....
I've to train more at applying solder paste ....
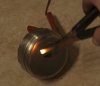
An ordinary toothpick ,can do wonders ,"cleaning off " excess paste between the traces ..
It is way boring ,though ....
As for a solder paste S.Steel sheet stencil ...
Dunno ..Sounds Way complicated (needs laser cutter,for sure ) for that sizes ...

Why I haven't ordered some "spare " Oslons ? Why ?
How stupid one man can be ?

Edit : Until I'll find some money ( I'm totally broke by now .... ) to order some spare Oslons ...
(Guod ,it is your fault !!!! Now ,I'm totally addicted to Osram .Games Over .Osram Forever ! Osram Rules !
Best leds ever ! (at least ,for our "beloved purposes" ...)
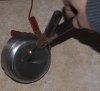
I'm thinking of making a "dummy load "from two "humble" 1N4007 diodes (Vf =1.something ,if I remember correctly ? Or it is .5 V ? ...
OOps ..Will the diodes handle the 700mA current ? >...??? ..I think not ...Just a jumper then ...Or a 1206 res ,maybe ? )...
At least make rest of the string work back again .....
I need it for the grow to continue ....
( Although two leds on the string might be short-circuited by bridges ....Do not light up & are not burned/fried ..Weird ...
Both of them I tried to rework them with Weller solder tip ...Might I short -circuited them ? ..Might be ....
.............
......Learning the hard way ...The right way ......)
 

guod

Well-Known Member
think also now of to much solder, one pic show it clearly.
a stencil will be the best but it´s also very expensive for good ones.

a cheap one can be made from mylar and a sharp knife for one led.
or found a foil that´s stiff and has the right thickness.

http://www.pololu.com/catalog/product/446
 
Top