DIY Passive cooling with PIN Heatsinks SST120 and SST140
- Thread starter robincnn
- Start date
CoB_nUt
Well-Known Member
@Airwalker16, thank you for posting those pix. That was what I was picturing in my mind. That radio shack flux spool is what I bought. "Rod" was a bad choice of word. As far as the pot and resistor goes, I just used the a piece of solid core wire to loop thru the holes in the pot, connected the other end to the new clear wago. The resistor, I just stuck one end of the resistor in the wago and wrapped the other end thru the pot hole and around it. Sealed them both with ele tape. I will solder them once i get that resin paste.
I take it, sand paper is the best wasy to polish up the aluminum? No alloy polish needed? Or Mother's? I'm diggin that shine growmau5 has on that cutter kit vid.
@robincnn thank you.
I take it, sand paper is the best wasy to polish up the aluminum? No alloy polish needed? Or Mother's? I'm diggin that shine growmau5 has on that cutter kit vid.
@robincnn thank you.
Growmau5
Well-Known Member
Acetone & steel wool make dat bling.@Airwalker16, thank you for posting those pix. That was what I was picturing in my mind. That radio shack flux spool is what I bought. "Rod" was a bad choice of word. As far as the pot and resistor goes, I just used the a piece of solid core wire to loop thru the holes in the pot, connected the other end to the new clear wago. The resistor, I just stuck one end of the resistor in the wago and wrapped the other end thru the pot hole and around it. Sealed them both with ele tape. I will solder them once i get that resin paste.
I take it, sand paper is the best wasy to polish up the aluminum? No alloy polish needed? Or Mother's? I'm diggin that shine growmau5 has on that cutter kit vid.
@robincnn thank you.
The Dawg
Well-Known Member
Modifying The Early Version Of The SST140 To Accept The Katoud Lens Holder. As You Will See The Lens Holder Has 2 Dimple's which I Used To Aline My Lens With The Cob. The SST 140 Has 2 Pre Drilled Mounting Holes. After Further Inspection I Found That No Matter How You Turned The Lens Holder It Covered Up The Mounting Holes. I Measured And Found That By Enlarging The M-4 Holes With A 5/32 Drill Bit That The Lens Holder Snapped In Perfect Aliment With The Cob 

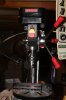
Now If Your Considering A Harbor Freight Drill Press Don't Waste Your Time. I Payed Under 200.00 For A Sears 12 Drill Press. Let Me Tell Ya Its Night And Day
Now If Your Considering A Harbor Freight Drill Press Don't Waste Your Time. I Payed Under 200.00 For A Sears 12 Drill Press. Let Me Tell Ya Its Night And Day
Last edited:
robincnn
Well-Known Member
@The Dawg it took you 3 months to put one cob and silicone optics on SST140. Ok let's blame it on that cheep harbor freight press.

I see the holder and Lens arrows match up. Looking great.
I assume you will have another hole drilled for wires.i think the small channels under lens are to route wire.
Please share pics of how you route the wire under lens.
I see the holder and Lens arrows match up. Looking great.
I assume you will have another hole drilled for wires.i think the small channels under lens are to route wire.
Please share pics of how you route the wire under lens.
The Dawg
Well-Known Member
Lmao Yes Proper Equipment Will keep You From Being Proper Fucked@The Dawg it took you 3 months to put one cob and silicone optics on SST140. Ok let's blame it on that cheep harbor freight press.
I see the holder and Lens arrows match up. Looking great.
I assume you will have another hole drilled for wires.i think the small channels under lens are to route wire.
Please share pics of how you route the wire under lens.
The Dawg
Well-Known Member
Ha Ha Ha This Little Build Is My 5000k 320 Watt Passive Light Bar. I Couldn't Find My Center Punch And Bits For my 4-40 Mounting Screws. Lowes Visit Later Today. I Plan On Drilling A Hole Just To The Side of My Cob To Run My Wires Through. Of Course I Will Document This Build@The Dawg it took you 3 months to put one cob and silicone optics on SST140. Ok let's blame it on that cheep harbor freight press.
I see the holder and Lens arrows match up. Looking great.
I assume you will have another hole drilled for wires.i think the small channels under lens are to route wire.
Please share pics of how you route the wire under lens.

JorgeGonzales
Well-Known Member
I bought a HF drill press when I saw the same one at Lowe's, for a much higher price, branded as Porter-Cable.Modifying The Early Version Of The SST140 To Accept The Katoud Lens Holder. As You Will See The Lens Holder Has 2 Dimple's which I Used To Aline My Lens With The Cob. The SST 140 Has 2 Pre Drilled Mounting Holes. After Further Inspection I Found That No Matter How You Turned The Lens Holder It Covered Up The Mounting Holes. I Measured And Found That By Enlarging The M-4 Holes With A 5/32 Drill Bit That The Lens Holder Snapped In Perfect Aliment With The Cob
Now If Your Considering A Harbor Freight Drill Press Don't Waste Your Time. I Payed Under 200.00 For A Sears 12 Drill Press. Let Me Tell Ya Its Night And Day
Unlike your Craftsman, made in...oh, China.
It's all the same shit.
salmonetin
Well-Known Member
..bro guod.. from my large real experince...talking about bosch drillers...i prefer the blue line... green line its for hobby... ...green its ok... but blue are better.... trust in me...
...blue line its more for profesional use... ...
...from my real experience with bosch.. much better her blue line...
...off course more expensive too...
...tenia varios taladros bosch azules (mis preferidos tras los caros HILTI)... pero en mi critica situacion actual he tenido que vender todas mis buenas y caras herramientas... ciclos de vida... ...yo no logro salir del ciclo malo este año....
...for me HILTI hand drill and her drills are the best... lighter ...lijeros... and powerfull...y potentes en cemento (paredes duras o piedra)...
...cambio de tema....hoy he perdido otros dos familares... este año llevo 15... no estoy preparado para tanta muerte...
...you know me a bit... today "night train" again... solo para descargar....
paz
pd...hermano guod ultimamente solo estoy posteando en el foro del bro positivity (mas en la parte privada que publica...) ... ....para mi es como una casa del arbol... o una cabaña de montaña... ....paz sin malos rollos... ...una ultima bendicion para mi... pues casi no tengo conexion a internet... por lo que no me vereis por aqui participando tanto como antes... de hecho casi ni me vereis... aqui decimos a mi situacion... a la vejez viruela.... o eramos pocos y pario la abuela....
...lo siento hoy no voy de hierba... hoy solo acohol....
...love to all bros here... ap included... ...peace for all...
pd1... to bro robincnn... all ok with me?... no comunication ultimately... then ...are you ok?...
Saludos
Last edited:
guod
Well-Known Member
me too, but this drill press never come out in the blue line....i prefer the blue line... green line its for hobby.
The Dawg
Well-Known Member
Lmao A Spaniard Using A Mexican Made Drill Press.a tool for a fool like me

guod
Well-Known Member
Lmao A Spaniard Using A Mexican Made Drill Press.

that´s spanish for you
salmonetin
Well-Known Member
....bro dawg... ...i dont use mexican made drill press...actually for my its ok the mexican made but ...actually im too poor for this mexican made...
...the actual mine its similar to this...

peace
Pd ,...guod ..cuando los americanos votan a un cabronazo blanco... agarrarte bien los machos.... va a ver fiesta... y no de la fiesta que nos gusta a nosotros...
Saludos
...the actual mine its similar to this...
peace
Pd ,...guod ..cuando los americanos votan a un cabronazo blanco... agarrarte bien los machos.... va a ver fiesta... y no de la fiesta que nos gusta a nosotros...
Saludos
Last edited:
Bill Lidgate
Active Member
I used to use something similar then I found scotchbrite metal finishing pads from Homedepot (2$) will stick right to a hook and loop (velcro) random orbit sander (with vacuum for dust!) and produces a good finish on aluminum*, nicely removing the embedded grit left by water jet cutting. For clean up I use Goo Gone Pro spray, which is d-Limonene based like most electronics wash solutions, followed by a water rinse. I'll never use steel wool again.Acetone & steel wool make dat bling.
*3M actually sells various grades of Scotchbrite mounted on wooly velcro for $$ but these finer grades will get you closer to "mirror bright" if you need it. Cheaper is the (nonabrasive) white scotchbrite with Mothers aluminum polish again on a sander (no vacuum needed!). While messy it cleans up well with dish soap/water or Goo Gone.
Last edited:
at what point does one use wet/dry sandpaper versus a scotchbrite pad ?I used to use something similar then I found scotchbrite metal finishing pads from Homedepot (2$) will stick right to a hook and loop (velcro) random orbit sander and produces a good finish on aluminum*, nicely removing the embedded grit left by water jet cutting. For clean up I use Goo Gone Pro spray, which is d-Limonene based like most electronics wash solutions, followed by a water rinse. I'll never use steel wool again.
*3M actually sells various grades of Scotchbrite mounted on wooly velcro for $$ but these finer grades will get you closer to "mirror bright" if you need it. Cheaper is the (nonabrasive) white scotchbrite with Mothers aluminum polish. While messy it cleans up well with dish soap/water or Goo Gone.
I have been stepping from 400, 800\600 and up to 1000 wet\dry for when I want a really well done aluminum or copper heatsink finish.
Bill Lidgate
Active Member
With heatsink mounting surfaces you are very interested in absolute flatness as well as surface finish, so its very useful to use a granite flat* with silicon carbide (SiC) paper stuck down to it with spray mount (best) or double stick tape for final lapping. In a pinch a thick piece of glass will be a good flat surface too. Scotchbrite deforms too much to give true flatness, but SiC loads badly with aluminum. so I might clean up the mill finish with scotchbrite, then flatten it with good fresh SiC paper on a flat surface then polish with the white scotchbrite/lapping slurry or Mothers.at what point does one use wet/dry sandpaper versus a scotchbrite pad ?
I have been stepping from 400, 800\600 and up to 1000 wet\dry for when I want a really well done aluminum or copper heatsink finish.
* Grizzly G9647 - 6" x 8" x 2" Granite Surface Plate, $21.50 plus ship (12lbs)
Bill Lidgate
Active Member
Sounds good to me, ideally both surfaces but usually people use overly large heat sinks that compensate for imperfect interface, we're not working on the ragged edge of performance so extreme measures aren't required. Hardcore stuff uses fancy surface grinders with diamond lap and maybe diamond thermal paste, which has amazing heat transfer. We should probably aspire to "computer overclocker with OCD" level of surface prep and call it a dayso scotchbrite first, then step though SIC, then polish ?
(surface area solves this problem too, the Samsung inFlux 09 with 35.2 sq in of surface area to dissipate its 67W needs nothing but a little thermal paste and a couple screws, the Vero 29 needs to move 14 times more watts per its dinky surface area, so polish it UP)
Last edited: