There are many ways to design a DIY LED but here are the details of the wiring for constant current drivers. If you have no experience working with 120V wiring you should understand that it can be dangerous under certain conditions and you should study and gain a thorough understanding of the dangers before attempting your project or ask for help from an electrician. The most obvious thing is never work on live wires. Once your build is complete, a GFCI can help protect you from electrical shock in our wet growing environments and are available for $7 on eBay. Check your AC circuit for hot spots which is a sign of an overloaded circuit or a poor connection. This can occur in timers and in the connections of extension cords.
==================================
Recommended tools:
Multimeter with 10A current measuring capability
Power meter - KillAWatt or EnSupra (no affiliation)
Wire stripper
Wire crimper
Slide Connectors
Heat Shrink Tubing
=========
The AC side
The AC power input has a hot and a neutral. This is important when wiring an LED driver. If you mix them up, the LEDs can glow a bit during lights out because the timer will cut the neutral instead of the hot and the LEDs may respond to ghost voltages and emf. In most homes the smaller side of the outlet is the hot wire (black) and the larger side is the neutral (white) so it is helpful to use a power cord that forces the plug into the correct polarity. If you install a switch make sure you switch the hot wire or use a double pole single throw switch. The driver should have labeling so you know which is the hot (Line) and which is the neutral. You can make the AC connections using molex connectors although that can get prohibitively expensive if you are making dozens or even hundreds of connections.
=========
The DC side
-Do not apply AC power to a driver that is not connected to an LED string
-Do not switch an LED driver on its DC side, but rather on the hot wire of the AC side.
-Constant current circuits operate with the LEDs connected in series.
-On the DC side of the driver there is a positive and a negative wire. Red is the positive and black or white is the negative.
-The negative wire of the driver goes to the negative side of the LED. (I find this unintuitive in a series connection)
-The positive of an led connects to the negative of the next LED in the series until the whole circuit makes a loop.
-If wired backward the circuit will not function and there is a possibility of damaging the LEDs.
-The driver will have a certain voltage range that it can operate within and this range may not be printed on the driver.
-The efficiency of the driver will vary depending the voltage of the LED string.
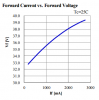
-To estimate the total voltage of the string, add the total vF or each LED in the string. If the voltage is of the LED string is too low the driver may flash. If it is too high the driver may flash or it may drastically reduce its current output.
-Each LED will operate it its own voltage but they will all operate at the exact same current.
-As each LED warms up its voltage will drop slightly.
-If you decrease the voltage load on the driver, its current output will rise and vice versa.
-As the driver warms up its current will drop (unless regulated). LED drivers are typically 75-90% efficient so they will heat up as they operate.
-As the current drops the LED voltage will drop slightly.
-Each driver may operate at a slightly different current +/-5% even if they are the same model.
-Adding a fuse that is lower than the maximum current of the LEDs may help protect the LED string in the event of a driver malfunction.
-It is critical that all connections and soldering points are secure. Flickering or arcing in the circuit can damage the driver or worse can destroy the entire LED string.
View attachment 3003741
For the DC connections you can use molex, wire nuts (not recommended), splices, closed end crimp ons or you can solder the connections and heat shrink them. In my case I use .25" bare (non insulated) crimp on slide connectors (quick disconnects) and once I have verified that the connection is very solid, I cover with heat shrink tubing leaving no metal exposed. They are cheap, secure, force the correct polarity, can be color coded and it makes your drivers and LED strings easily swappable.
View attachment 3003738
==========================
Choosing a Driver - Drive Current
LEDs suffer from current droop which means that the harder you run them (higher current), they dissipate more power but become significantly less efficient. They also suffer from temperature droop. As the temperature rises they become less efficient and if run hot they will suffer significant lumen depreciation over time. Because we use our lights for long hours each day, efficiency becomes an even more important factor. Therefore it is recommended to run LEDs relatively soft and use more of them. This increases the up front cost for the LEDs but decreases the cost of drivers, heatsinks and electricity. The value point will vary depending on electrical costs and keep in mind that we expect LEDs to continue to improve in the coming years.
=========================
Testing the String - Do this when the driver and heatsink are already warmed up and stabilized.
Once your driver and LED string is wired it is recommended that you verify the current (amperage) of the string. Very occasionally drivers malfunction and drive at a much lower or much higher current than specified. To check current your multimeter must be in series with the LED string (anywhere in the string on the DC side). Make sure your multimeter probes are plugged into the correct slot for testing current (amps). Make sure you do not apply power to the driver until the multimeter connections are secure in the LED string (slide connectors are helpful here). Record this number (example 700mA = .7A)
If you are curious about the efficiency of the driver, connect your multimeter in parallel in the LED string to measure voltage. The voltage measurement has to be taken from before the first LED and after the last LED in the string. The easiest place to do this is at the DC side driver connections.
Make sure to move your test leads to the correct slots on your multimeter for measuring voltage or else you will short circuit the string. (Yes I have done this).
Once you have your volts and amps you can calculate dissipation wattage of the string. It is very simple volts X amps = watts. Next check your input wattage from the KillAWatt or EnSupra. Now divide your dissipation wattage by your input wattage and you get the driver efficiency percentage. Keep in mind that if you measure input wattage while your multimeter is in series with the string you will get a slightly incorrect figure. My multimeter adds .2-.3W.