DiY LED - Cree CXA3070

SomeGuy

Well-Known Member
Just right..big, fat, and fast....:joint:

The trigger is the thing methinks. :-) its what just white led is missing in comparison to hps IMO. I think I am gonna use mo's red kessils as a test to that end. turn it on like 5 min before lights out and off 5 min afterwards. They will only get two weeks of that so we will see. I think it is probably more critical from the get go so they start setting earlier. The earlier they set the bigger they get IME. HOwever.... oddly, my grow is seeming to pick up speed this week.
 

Bueno Time

Well-Known Member
THNX BT, if I read your post right, you got over 1.25gr/W on your last round? How was the smoke?
Somewhere around that it was over 1GPW of unseeded buds with some seeded buds having a few hundred seeds total maybe 300 if that.

Only been curing for a couple weeks so far but the OXs are good smoke I really like the stone on it, very relaxing and nice stoneyness with good body effects, real nice indica medicine.

The LVPK x Pre 98 Bubba fem I ended up with doesnt smoke as tasty as the OX but grew nearly identical, the PK Bubba has maybe a little higher potency but I still like the effects of the OX better (probably my new favorite for effects).

Sugar Jones turned out a little more potent this run and tastes a little different more Chemmy/OG flavor and smell than the Sugar Kush mother, really good flavor on the green hit. A good portion of the SJ buds were shaded out though and are airy but still light green and coated with frost, just doesnt have the bag appeal and tightness the top halves of the plants have/had. Both the OXs and PK Bubba had real tight frosty indica nuggets.
 

PurpleBuz

Well-Known Member
Very true. But I think a better comparison would be xgs 190 vs rw. They both seem to yield similarly. The cxas even more so.

Cool white cxas mixed with red? Maybe but I think I'd still avoid the complication given similar end quality. Just wait for a different cob..
yeah not a perfect comparison. Butt On the other hand keep in mind that the onyx uses warm white xml2s which has almost the same spectrum as the warm white cxa's, and we at least know from the comparison that at least one led light system out grew the onyx plain warm whites.
 

bushrider

Member
"Instead of 6 LPC drivers you could run 3 3070 in series on the HLG-120H-C1050* (high voltage)
* = A or B"

I have 2 lights that I've built using the HLG-120H-C1050 driver on recovered copper industrial heatsinks (like a cpu cooler but 4x the size and weight). This driver ideally works with 4x cxa3070 (3K AB bin), I measured the voltage of my string of 4 COBs and it was 143V (drivers max is 148V). The driver runs most efficient at close to full load, below 70% load efficency drops off. Since I plan on sometimes dimming my light I wanted to run as close to full load as possible, that way when the light is dimmed the efficiency of the power supply will still be pretty high.

Its a little expensive but the meanwell LCM60 is 92% efficient and will run 2x cxa3070 at up too 700ma and 1x CXA3070 at 1.4a (adjustable current via dip switches). The LCM60 is a nice driver to own for testing also as it runs 350/500/600/700/1050/1400ma current and handles voltages as low as 2V. So you could use 1x HLG120H and 1x LCM60.

I was initially hesitant about running cobs in series due to the potentially lethal voltages.
I found a way to minimise the risk of electrocution by using liquid heat shrink to insulate the solder joins. I cover the solder pads in a few coats of liquid heat shrink after soldering and testing the COBs.
This does not help with the risk when building the light but thats a non issue IMO as you are going to be dealing with mains power building a light which is far more dangerous than 148V @ 1amp.

Supra, Mr Flux and the other regular cobbers on this forum, you rock.
Thanks for sharing all your info.
 

SupraSPL

Well-Known Member
Nice work Cap looks like it will be a damn fine yield!

EF, sorry to hear that I steered you in the wrong direction for your build (I use the method of, sanding heatsink to 1000 grit US, using high performance thermal grease, pressing hard for 30 sec to create vacuum and thin even layer, add kapton tape to stop lateral movement.) I have installed and retired many hundreds of 20mm stars and COBs. If I had drilled them all to mount them, I'd still be working on it or I would have never got the projects done. Also, my heatsink surface would be drilled with thousands of holes but they currently have none which I appreciate. I have changed my 20mm setup 2 or 3 times and have already changed my COB setup 2 or 3 times and added 20mm to them. So in my case drilling and mounting them all would have been a nightmare. Flattening the heatsink surfaces however, was a job that only had to be done one time and continues to serve its purpose, so I believe it is a more worthwhile investment of time although not completely necessary to grow good bud.

The SOLERIQ test has nothing to do with comparing vacuum method vs COB holders, it has to do with screwing the COB directly VS screwing the COB holder. (That said, I am very skeptical that COB holders provide superior cooling over the vacuum method.) I am not defending the "screw down the COB directly" method and the article itself states: "screwing with too high torque can cause the CoB to bend which can have an adverse effect on the thermal interface." However there are problems with this demonstration I would like to point out.

The thermography scan cited did not contain enough information to determine anything conclusive. They failed to show the thermal scale and we have no idea how much power they are pumping through the COB. The more heat you run through it, the more the thermal interface comes into play. We have no idea how long they let the test run, did they allow enough time for thermal stabilization? Did the thermograph automatically adjust its thermal scale in each experiment or were they done side by side or with a fixed scale? Also, I would never advocate the use of a thermal pad regardless of mounting method and the test showed poor performance no matter which way it was screwed down with a thermal pad so I ignore A and C. And finally, we have no idea how they prepared the heatsink surface or what the surface is made of (could be plastic). It seems they used a relatively poor performing thermal grease (~6K/W, only half of the PK3 we use).

In summary, I would put my recommended mounting method up against any of these with full confidence that it would be the best thermal performer and would hold up with time. The only downside, it is not pretty, but it was not meant to be. Also, my method should not be used with stars smaller than 16mm because the vacuum pressure is not high enough to be reliable. I have sold lamps using the vacuum method to folks that trusted me and I want to reassure them. Again, this test has nothing to do with my argument, but I call BS that D would outperform B to any significant extent in practice. I accuse the experiment of being poorly designed or intentionally skewed but I am open to being proven wrong :leaf:
thermal scans.png
 

predd

Well-Known Member
Nice work Cap looks like it will be a damn fine yield!

EF, sorry to hear that I steered you in the wrong direction for your build (I use the method of, sanding heatsink to 1000 grit US, using high performance thermal grease, pressing hard for 30 sec to create vacuum and thin even layer, add kapton tape to stop lateral movement.) I have installed and retired many hundreds of 20mm stars and COBs. If I had drilled them all to mount them, I'd still be working on it or I would have never got the projects done. Also, my heatsink surface would be drilled with thousands of holes but they currently have none which I appreciate. I have changed my 20mm setup 2 or 3 times and have already changed my COB setup 2 or 3 times and added 20mm to them. So in my case drilling and mounting them all would have been a nightmare. Flattening the heatsink surfaces however, was a job that only had to be done one time and continues to serve its purpose, so I believe it is a more worthwhile investment of time although not completely necessary to grow good bud.

The SOLERIQ test has nothing to do with comparing vacuum method vs COB holders, it has to do with screwing the COB directly VS screwing the COB holder. (That said, I am very skeptical that COB holders provide superior cooling over the vacuum method.) I am not defending the "screw down the COB directly" method and the article itself states: "screwing with too high torque can cause the CoB to bend which can have an adverse effect on the thermal interface." However there are problems with this demonstration I would like to point out.

The thermography scan cited did not contain enough information to determine anything conclusive. They failed to show the thermal scale and we have no idea how much power they are pumping through the COB. The more heat you run through it, the more the thermal interface comes into play. We have no idea how long they let the test run, did they allow enough time for thermal stabilization? Did the thermograph automatically adjust its thermal scale in each experiment or were they done side by side or with a fixed scale? Also, I would never advocate the use of a thermal pad regardless of mounting method and the test showed poor performance no matter which way it was screwed down with a thermal pad so I ignore A and C. And finally, we have no idea how they prepared the heatsink surface or what the surface is made of (could be plastic). It seems they used a relatively poor performing thermal grease (~6K/W, only half of the PK3 we use).

In summary, I would put my recommended mounting method up against any of these with full confidence that it would be the best thermal performer and would hold up with time. The only downside, it is not pretty, but it was not meant to be. Also, my method should not be used with stars smaller than 16mm because the vacuum pressure is not high enough to be reliable. I have sold lamps using the vacuum method to folks that trusted me and I want to reassure them. Again, this test has nothing to do with my argument, but I call BS that D would outperform B to any significant extent in practice. I accuse the experiment of being poorly designed or intentionally skewed but I am open to being proven wrong :leaf:
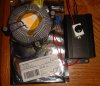
View attachment 3282851
Hi supra :).....I was wondering if you are still building diy cob's for the diy challenged?
 

SupraSPL

Well-Known Member
yeah not a perfect comparison. Butt On the other hand keep in mind that the onyx uses warm white xml2s which has almost the same spectrum as the warm white cxa's, and we at least know from the comparison that at least one led light system out grew the onyx plain warm whites.
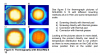
This is true but the Onyx runs the XML2s at about 2.1A and the A51 runs high efficiency reds at ~700mA if I recall. You can imagine the effect that must have on overall efficiency.
 

SupraSPL

Well-Known Member
Hi Predd, unfortunately the supply of (cheap) top bin CXAs has dried up currently so that has put a damper on things lately. But where there is a will there is a way. There is a big batch of CXA3590 3000K BD top bin for a fair price that could be used with the big Mean Well drivers for an extra large build. Another option is the CXA3070 Z2 bin which are still available and very affordable and could be used for a medium sized build. Although the top bins are awesome, I performed one quick experiment to measured the qualitative output of the Z2 vs Z4 vs AB and I did not see as large of a difference as I would have expected so that is some encouragement for Z2 or Vero29 builds.
 

predd

Well-Known Member
Hi Predd, unfortunately the supply of (cheap) top bin CXAs has dried up currently so that has put a damper on things lately. But where there is a will there is a way. There is a big batch of CXA3590 3000K BD top bin for a fair price that could be used with the big Mean Well drivers for an extra large build. Another option is the CXA3070 Z2 bin which are still available and very affordable and could be used for a medium sized build. Although the top bins are awesome, I performed one quick experiment to measured the qualitative output of the Z2 vs Z4 vs AB and I did not see as large of a difference as I would have expected so that is some encouragement for Z2 or Vero29 builds.
Thank you for your response, I really only need about 250-300W of cobb I think, as I am only using a 36"x20" tent right now but plan to upgrade to a 3'x3' soon, would it be possible you could send me a pm on what it would cost to put a unit together that size (for some reason I cant find the pm button lol) whenever is convienent for you...tks
 

epicfail

Well-Known Member
@SupraSPL , I am very happy with my build and I apologize if I came off upset in anyway. I was kinda just saying that for other people who might be thinking of doing the same thing but for permanent installations. As you know I sanded my heatsinks to a 1000 grit also and even went a step further and got them anodized, I really do not want be drilling holes in them. As you can see from that same post I plan on modifying the setup already I just haven't settled on what to add yet (adding involves moving). The XM-L2s I linked are only around 36% efficient and I can't imagine the cxa1512 18v version having better numbers, maybe there is another option like three of the 6v MK-R's but I could be reaching here. @stardustsailor I would love to see what you would add to max out the driver efficiency I have about 19 volts per heat sink which is about 38v per driver.

t4-7b.jpg

Also as I chose the HLG-185H which can handle five 3070's and I only have 4 on each driver (2 per heatsink) I was thinking about adding two 18v CXA1512 to the sting (1 per sink) to better max out the drivers. Either that or 12 XM-L2's (6 per sink) and was wondering if SupraSPL had the 1512 numbers so I can compare the two. I think the XM-L2 are probably the better choice but wanted to see what people though.
Thanks guys
 

SupraSPL

Well-Known Member
All good EF. I would imagine your build is performing very excellently thermally based on what you did (nice work!) As far as what to add, you have about 45V left to fill at 1050mA? I spose you could add a 5th CXA3070 if you can get an AB that would be the best option for flowering. But if you want to modify the spectrum at all you could use the new Luxeon ES royal blue N4R bin and the Cree XPE photo reds (claims 700mA max but I think it would do better at 1A than the Osram). Or if you are into adding cool white/neutral white, the XML2 4500K U2 bin or the XPL 5700K V2 bin are both awesome performers.
 
Last edited:

kkman

Member
Have been away playing with a few things so I thought I give an update. I went to my contact on Saturday to pick up the agreed 8 CXA3590 36V chips for a share of my first harvest.

The problem was the guy thought I would be running all 8 COBS and had a very high expectation of how much I could produce. To cut a long story short, the deal fell through.

However I bought 1 CXA3590 36V 2700K BD bin. I also managed to score 2 CXA3070 Z4 3000K and 5000K.

So I have been playing around with the chips. I have connected the CXA3070 cobs to my passive heatsink and they run without getting hot.

Now I have a few questions to be able to complete my build.

First is there an easy way to connect the TC terminal on the cob to the cob driver so the driver shuts down if the TC gets too high. If so is there an idiots guide to it, as I am finding the smallest steps hard.

I managed to connect the two cxa3070's with just a thermal pad and grease and soldered the power wires. It seems to work, but, any reason I should get a holder or screw it into the heatsink. I will not be running higher than 1.05amps ( more likly 700ma ).

The cxa3590 looks a light bigger and that is causing me a problem, my passive heatsink the NOFAN 85 contact area is too small so I am trying to buy an Artic Alpin 11 rev 2 fan/heatsink. Can anyone confirm if that can hold the 37cm x 37cm cob. I have managed to run it on 550ma and tested it against the cxa3070 3000K chip and even at 2700K the light seems to be more intense. Having said that I may be reading the par meter I have borrowed incorrectly.

Lastly should I run the cxa3590 at the same current as the cxa3070 and if not what would be your advice.
 

SupraSPL

Well-Known Member
Yes the 3590 will fit on an Arctic 11 unless you use a COB holder in which case I am not sure it would fit. You said you use a thermal pad and grease? I would advide just the grease and squeeze it good to make a solid vacuum. Here is how I mounted the 3590s on Arctic 11. The tape is not to hold the COB onto the heatsink it is just to keep it from sliding sideways.
DSC07361a.jpg

Do you have a link to your passive heatsink? How hot do the heatsink get once it stabilizes? Yes the 3590 should be a lot brighter at 550mA than the 3070 would be. Choosing the driver current depends very much on your design goals. Are you gearing toward output or efficiency/heat management?
 
Last edited:

Abiqua

Well-Known Member
Yes the 3590 will fit on an Arctic 11 unless you use a COB holder in which case I am not sure it would fit. You said you use a thermal pad and grease? I would advide just the grease and squeeze it good to make a solid vacuum. Here is how I mounted the 3590s on Arctic 11. The tape is not to hold the COB onto the heatsink it is just to keep it from sliding sideways.
View attachment 3282933

Do you have a link to your passive heatsink? How hot do the heatsink get once it stabilizes? Yes the 3590 should be a lot brighter at 550mA than the 3070 would be.
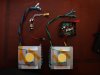
I didn't realize this but I can mount Vero's this way? I am using the Ezmate harnesses. This would make life a little less worrisome. The drilling and tapping is actually easier than I thought, but still a pain in ass. :peace:
 

kkman

Member
Hi Super,

First here is the link to the passive heatsink for CR-80EH
http://www.quietpc.com/nof-icepipe?gclid=CMe84Kvc0cECFRMatAodRkQALQ

When I tested it with the 3590 running at 550ma in a closed box 60cm x 30cm with two pc fans running at 6V each and 20cm below the light, I ran it for 1 hour. When I opened the box and touched the heatsink close to the cob, it felt warm and I could hold my hand on it. PS. The fans are used to circulate the air for the plants and not to cool the heatsink.

Also did another test of running the cob without the pc fans, and after 1 hour it was still not hot enough for me not to be able to keep my hand on the heatsink. I think the secret was I was running my extractor fan 1 min. on and 5 min. off cycles.

As to the running of the unit and power consumption, I want to have a setup which is good enough to give me a good result, so for the 3070 I was going for 700ma. So I guess I am asking what would be a good current to run the 3590 for a similar result. Looking on the web I can pick up a cheap 1.05amps 42V driver so that is where I am heading at the moment.

By the way do you have any suggestions as how to connect the cob tc terminal to the driver so it can auto shutdown if the cob temps get too high. I know it can be done but not sure what I need and how hard it would be.

Building the cobs this way would give me a better feeling of doing the job right and not have to worry about blowing the cob up.
 

Dloomis514

Well-Known Member
Hi Super,

First here is the link to the passive heatsink for CR-80EH
http://www.quietpc.com/nof-icepipe?gclid=CMe84Kvc0cECFRMatAodRkQALQ

When I tested it with the 3590 running at 550ma in a closed box 60cm x 30cm with two pc fans running at 6V each and 20cm below the light, I ran it for 1 hour. When I opened the box and touched the heatsink close to the cob, it felt warm and I could hold my hand on it. PS. The fans are used to circulate the air for the plants and not to cool the heatsink.

Also did another test of running the cob without the pc fans, and after 1 hour it was still not hot enough for me not to be able to keep my hand on the heatsink. I think the secret was I was running my extractor fan 1 min. on and 5 min. off cycles.

As to the running of the unit and power consumption, I want to have a setup which is good enough to give me a good result, so for the 3070 I was going for 700ma. So I guess I am asking what would be a good current to run the 3590 for a similar result. Looking on the web I can pick up a cheap 1.05amps 42V driver so that is where I am heading at the moment.

By the way do you have any suggestions as how to connect the cob tc terminal to the driver so it can auto shutdown if the cob temps get too high. I know it can be done but not sure what I need and how hard it would be.

Building the cobs this way would give me a better feeling of doing the job right and not have to worry about blowing the cob up.
http://www.rakuten.com/prod/nofan-cr-95c-copper-icepipe-fanless-cpu-cooler/246361829.html?
Has them with a fifty dollar off new account coupon
 

kkman

Member
Thanks Dloomis514.

I dont like registering for credit cards.

The reason I went for the CR80 was, its half the price of the 95c and handles 80W. I should also say I got a few for free which just made it better.

I would recommend the CR80, its half the weight of the 95 and it seems to need no direct cooling when I run the cob at 550ma. I am waiting for my 700ma and 1.05amp drivers, so I will get back if I find any problem with the heatsink.
 
Top