Building COB array and frame.

KhronicKills

Well-Known Member
see your ac unit looks ghetto and cool

wish we saw more ghetto looking led lights, tape and cable ties holding them together, I did use a clear "chinese take away container" as a casing for a 70/100w cob light, still got that up running it looks ghetto, I`m not sure if plants grow towards it or away from it

See that work bench type area you make that really nice frame in......... I`d have weed and lights set up there already so I`d be there with cobs and duct tape, lol
Haha i have to run it like that outiside because im using as dehuey and ac because indecided (to be dumb) and run C02 in tent. Thats only way to keep temps and RH in check and recirculate some C02 and not be a total loss. Even when i was growing w/o it cost more to cool than run. COBs upfront cost will pay once electric bill goes down from wattage of lights and cooling. Also snagged a dehuey that fits inside so that ghetto ducting and all can disappear after this haul...but the ladies do look good.
 

THE KONASSURE

Well-Known Member
Nice. What are pulling under them. Comparable to HID, 600watt?!

side lights, winters coming need 10c more in the room at least this light gives 5 to 10c temp raise a hps would give more maybe less using a cool tube but I didn't want to do that, think I spent around £100 making it can`t remember as I got the leds and heatsinks ages ago so they musta been cheap at the time or I would not of paid out for them.

yeah light levels look good say they could match a 600hps as I`d have to vent a 600 hps outside so no way I could run one till later in winter, up top lights see the pics, pretty much same bloom lights I`ve run all summer
 

Attachments

KhronicKills

Well-Known Member
Nice. Yeah I can supplement with side if need be, but will be doing SCRoG barring this harvest works (even though I messed up a bit w horizontal growth and training) so im hoping 900watts will keep me fine lightwise and the heat it does toss off wont be anywhere close to my current HID setup.
 

Evil-Mobo

Well-Known Member
If you scroll back a few pages youll see setup. This is the 2 out of 3 kits. Ones already mounted on a 36" square frame
I will go back and look thanks and my bad going through a bunch of threads today my parts get here for the next 2 lights I need to build so.....I will need to do my own frame for these, last time was just the mod420 frame made life easier but this time on my own.
 

KhronicKills

Well-Known Member
The beginning of this thread has some material and tool list (also me eff up of buying 1/16 alum first, the 1/8th is deff wayyy better)
 

KhronicKills

Well-Known Member
Heres a little break down with pics. (Sorry if stuffs not with right pic im on phone and trying to keep this as detailed and near as I can...plus im baked soooooo:weed:)

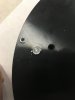
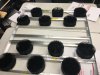
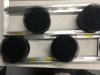
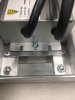
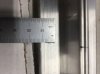
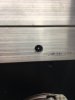
First I take the COB/Sink (referred to as unit from here on out) and lay it in my track where id like it to go, roughly marking center of unit on the frame(this is only for screw holes to hold it so screws arent as important as much as where on the frame you put it, thatll be up to each persons build)

IMG_7321.JPG

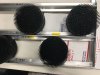
Next I take a small ruler and align dots as best as possible and draw a line on the frame which will than get center punched on that line and than drilled out.

IMG_7323.JPG
IMG_7324.JPG

IMG_7325.JPG

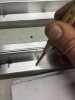
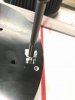
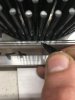
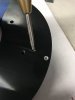
Once both holes are drilled, prop fixture up and hold unit in place. Take drill and put in holes of frame and just mark unit with drill, (enough for next step, sorry couldnt do above and take pic but you should see what i mean)
IMG_7326.JPG

IMG_7327.JPG

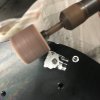
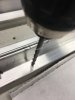
Take unit out from frame to finish next steps. Center punch that mark you just made on the unit. Followed by switching to your tapping bit and drilling a hole deep enough for desired screw.

IMG_7329.JPG

IMG_7328.JPG

IMG_7330.JPG

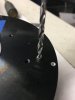
Followed by tapping out the hole...(will add more pics in bit)
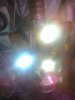
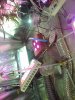
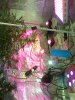
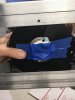
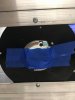
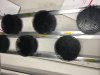
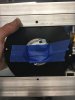
 

KhronicKills

Well-Known Member
Heres hole drilled to desire depth. After that and before tapping i hit area with dremel to remove burrs, so it sits better on frame (not needed but im anal) Align holes on unit with frame than attach with screws. Congrats you just attached a cob/sink to your frame. Drill screw and repeat.

IMG_7337.JPG

IMG_7338.JPG

IMG_7340.JPG

IMG_7341.JPG

IMG_7342.JPG

IMG_7343.JPG
 

KhronicKills

Well-Known Member
Mounting drivers. Some sheet metal rivited to frame and 10/32 holding em down. They could have just sat in but I'll feel better knkwing theyre tight.IMG_7366.JPGIMG_7367.JPG
 

CobKits

Well-Known Member
some other tips ive learned (or re-learned) over the last few months:

-if building more than one or two make a template for your holes then you can blaze. i use the spring loaded punch from harbor freight to mark them all then drill bananas

-you can be a lot more accurate piloting holes with an 1/8" bit first then stack em up and hog em out with the right size which takes no time at all

-have extra bits and taps on hand! nothing more frustrating than a 75% project you get stuck on til tomorrow

-please wear eye protection when drilling! esp with a press as they can launch scraps at you
 
Last edited:
Top